
Last updated - September 8, 2020
WooCommerce updates are common phenomena. Updates bring about the required changes to WooCommerce. When you update WooCommerce, it is expected to be better than the previous version and should add more features to it. If you own a WooCommerce store you should be responsive to all the latest updates. It may happen that the recent WooCommerce update has left a particular plugin or theme unresponsive. That would mean that you need to update them as well. You can update WooCommerce to the latest version both manually and automatically. If you have it at automation, you can expect smooth automatic updates.
But in some cases, an update can break your website. All of a sudden you may face customers with complaints on order completion, denial during payment processing and so on. To save yourself from any such unwanted situation, you require an emergency alternate solution, that will act as a backup while you fix the problem caused due to the recent update. So in this article, you’ll find ways to an effectively update WooCommerce and stop the potential breaking of your WooCommerce site.
WooCommerce is Special
You must keep in mind that WooCommerce is not a typical plugin or WordPress Extension that you install and activate to start using it. Technically a plugin, WooCommerce is a sophisticated tool which has a separate API and shows and high level of compatibility with a wide range of other WooCommerce and third-party extensions.
Consider one of shipping plugin not working properly after its update, this may not impact your business to a great extent. Or take payment gateway is not functional after its update, your customer can still complete the order by choosing a different payment option. Now consider your entire store is not functioning well after a recent WooCommerce update. This situation can shake your foundations and you can end up losing a lot of customers. So as you can see, plugins with specific function can’t be compared to an unresponsive updated WooCommerce. You can refer to the recent WooCommerce 3.0.0 update, which left store around the world with some issues or the other.
When you wish update WooCommerce, you should follow a planned strategy of doing so. First look for warnings from the WooCommerce team. Adhering to any warning will save you from any severe condition. Second, be sure if the latest feature is impacting your business or not. You should also ensure the installed plugins and extension will work properly with the latest update of WooCommerce. So wait till most of your plugin is tested on the latest WooCommerce update.
Disabling WooCommerce Auto-Update

So the first point you need to keep in mind is looking for the development log of WooCommerce. You can find minor changes in the latest version, which you can ignore.
For instance, WooCommerce 3.3 released a minor update. And a lot of store owners responded to the update due to auto-update feature and ended up being in distress. So it is recommended that you don’t update your WooCommerce until the next major update.
The present-day trend is that you’ll witness few additional minor updates in the following days of the major update. Since WooCommerce now follows a Semantic Versioning, an update from 3.1 to 3.2 has to considered a minor one.
Environment of Update
This surely refers to the environment in which you decide to update WooCommerce store first. Updating the live site shouldn’t be your first choice. So if you come to know about a recent WooCommerce update, ensure you don’t update WooCommerce on the live site straightaway. Installing the update on a testing environment may take some of your time but, it will save you a huge loss in business.
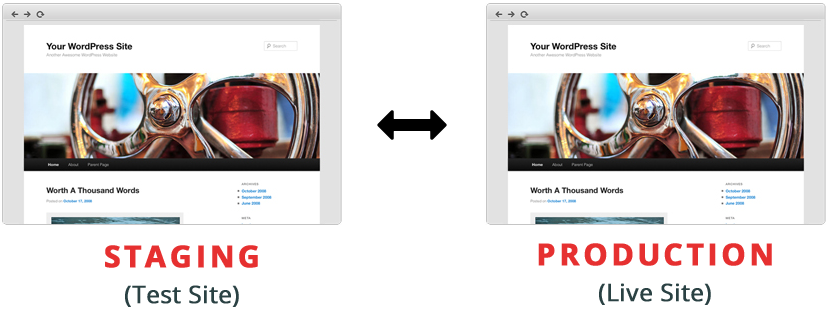
Using Test Environment
If you are really curious about even the minor updates of WooCommerce, you can choose and test the update WooCommerce on a test environment. Make sure the test environment resembles your live store in all aspects.
So since the test site will have all information and contents similar to the live one, it can be deemed to be a right choice for testing. You should be really careful about the already tested versions of the theme, plugins and other extensions in the test environment. More the similar data better will be the performance.
In other words, if the test environment is not similar to your live website in all aspects, it will essentially mean that you cant expect a similar result when you install the latest update on the live website.
Staging the Test Environment
Sample staging subdomain
You can create/stage a test environment easily. For instance, if your website domain is learnwoo.com, then take your staging site like staging.learnwoo.com. You might think learnwoo.com/staging as a good choice. But this is how you create a sub-directory. If you use the second one as the address, this will eventually create a sub-directory and it will save a copy of your site in the live store. And if by mistake you created learnwoo.com/staging as the test environment address, the following problems can be expected very commonly.
- Any problem in the test site will break the live website.
- A huge unnecessary memory occupancy due to the copied/duplicate contents on the same website.
So create the staging site in the form of staging.learnwoo.com to avoid unnecessary inconvenience.
Using Hosting cPanel
Creating a subbdomain becomes a lot easier with your hosting services. You can login to your hosting control panel and create a subdomain by clicking on Subdomains(screenshot below).
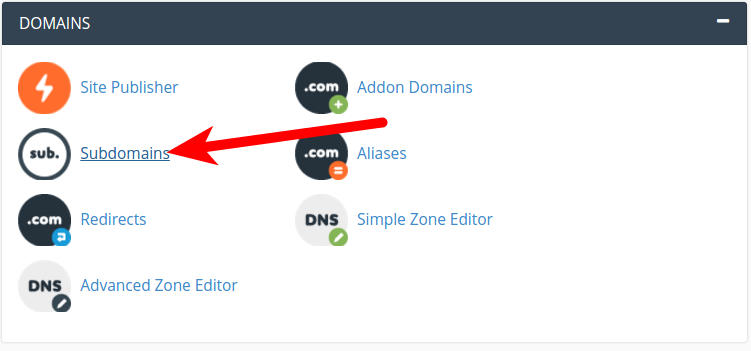
Once you click on subdomain, you get to name it by entering “staging” in the subdomain section and click on create. Now you need to copy your live website to the subdomian.
Cloning live website on Test Environment
We’ll see the various ways you can copy the entire live website to the test environment. You can do this by using any of the mentioned methods.
- Using Plugin for the purpose
- Manually
- Choosing a service provider
Using a Staging Plugin
You can find the best Staging Plugins for free. Few popular and powerful plugins are Duplicator, WP staging and WP Migrate DB. These plugins give you the ability to move copy or clone from one site to another. With any of these plugins, you can pull down the live website and create a copy in your localhost without delays. So you can use any of these plugins and duplicate the live website to a staging area and the other way around.

Manually
Manual copying will still require a backup of your website, as this will keep you on the safe side. If you are good at basic site administration and think that you understand backing up or copying your site data, you can do the staging manually. This, of course, is going to take time and pose a challenge to your abilities. You can execute the most functions from the hosting cPanel itself. So let’s proceed with copying the website.
- Go to cPanel > File Manager
- Find the root directory of the website
- Select the entire contents of the root directory and copy them
- Assign the target staging subdomain in the prompt to save the copied files(screenshot below)
In case of any confusion don’t hesitate and contact your hosting provider.

- Now, move to the Hosting cPanel > MySQL Database Wizard for setting up the databases
- Assign the staging database name, create users and password
- Once again surf to the control panel in the hosting back-end and click on phpMyAdmin
This will take you to the live website database. Now select the live WordPress database with Copy table selected. Once again you’ll be prompted to select the target folder. Here select the staging site’s database to copy the live database there.

- This calls for changing the database details in the wp-config.php of your staging website
- Finally, replace your Site URL in the database from www.learnwoo.com to staging.learnwoo.com.
Points to Remember
- Contact the hosting service support in case of any confusion.
- Be careful with replacing database in the .sql file.
- Ensure you enter correct website URL. If you don’t have SSL certificate then don’t include ‘s’ in https. If you have the certificate don’t miss the ‘s’ in https while replacing the URL.
- Create an SSL certificate for the staging site if you have it on the live site.
With all these steps and cautions, your staging site is ready to be used. You can log in the staging site with your existing WordPress credentials.
Approaching Service Providers for Staging Website
As you saw the first method is not the most reliable and lack the necessary support and the second method is a tough choice for new users. In that case, you have an option to approach a service provider which can create a staging website for your live website and launch it back to life. These service providers create stating sites on your behalf on cloud hosting spaces.With all these, you get a continuous support.
Siteground is one of our recommendations. WP Engine, Kinsta etc are some other excellent hosts who provide full support for the rapid creation of staging sites.
WooCommerce Change Log

You can be sure if you should go for the latest update if you are a keen follower of WooCommece Development Blog. The blogs contain all necessary details and suggestions that you should keep in mind before accepting the change. You’ll find the pros and cons of the change, the areas affected by the update and the pre-requisites to update WooCommerce to its latest releases. You can also find useful links for further reading in these blogs. Apart from these, you can also read the existing issues raised by users to know more about the problems arising.
Major WooCommerce Updates
As soon as you get notified of any major WooCommerce release, make sure that all of your installed plugins are tested on the latest WooCommerce. If not, the plugin might not function properly.

You wait till the plugins and the theme is made compatible with the latest WooCommerce Release. Extension developers keep themselves up to date with such major release and start working on their products for better performances and compatibility.
In short, you should wait till all your plugins and the theme is fine to work with the latest update. Once you are sure of the compatibility, you can move forward and update WooCommerce. But to start with, test the compatibility on the Staging Website with the theme and plugins.
Test Functions In Staging Website
While still being in the staging website, you must ensure that you test various functions under the latest WooCommerce. This is one of the important steps in the process and acts as the deciding factor.
To test the extensions, enable the WP_DEBUG_LOG. By doing this you can capture all the programming and basic errors and their causes. The debug mode will also direct to the places where you can fix those issues. One more thing that you need to keep in mind is that you check the responses in both the backend and the frontend.
You can look for the pages, products pages, login and profile updates, purchase, transactions etc in the frontend. And in the backend check for order, products and different settings in WooCommerce.
If you get test results as per expectations you can move forward to installing the latest WooCommerce to your live website. Or else go for fixing issues during the test.
Fixing Issues During Test
If you encountered issues while testing, you can check the debug messages and contact the developers and WooCommerce support so that issue can be resolved. Usually, when you contact for support in these cases you are asked for the debug messages. As these debug message provide a great deal of information. Again you need for the issue resolved before you can go for the live update.
Moving to Production Website
Once you fix all the issues in your staging store, it’s time to deploy from staging store to live. Do a quick reminder before you decide to go for it. Recheck the functionality during the testing on the staging website. And get rid of any issues.
Now we’ll see the options available for deployment to the live website.
Deployment
Manual
This option is quite simple. You need to follow the same steps you followed for making the staging website. In short, start with the manual process of update, followed by making the staging website and testing the functions of the website. And follow the same process on your live website i.e go for a manual update and test the functions on the live website after a successful test on staging website.
Pushing
This process is used when you have complexities in the staging website. When you have a large code and database change occurring due to the update, you will require a technical pushing process, which will transfer the changes to the live website. Now as we know database changes are still manual in WooCommerce, an automatic pushing of codes to a website gets a bit risky. To relieve yourself you can use plugins for the purpose.
Partial push
And the last but not the least is partial pushing of codes from a third-party WooCommerce management platform. One of the most popular such platforms is Github. Using Git with Bitbucket helps you to manage WooCommerce deployments through a central git repo. In this process, changes are first pushed from local development environments to a central staging area. Once all the deployments are done, you are required to execute an automated end to end test. Once all tests are cleared you can initiate an auto deploy to your live website by tagging and pushing branches to it
Concluding comments
Managing changes or to Update WooCommerce is one of the highlighted shortcomings of WooCommerce as a platform. But if you are owning a store where you’re generating millions of dollars in revenue per year, then managing your WooCommerce updates is of high priority to you. And to help you in that, I hope this article will act as a useful aid. If you enjoyed reading the article and were able to implement it on your website, you are not going to need to hire someone and update WooCommerce all by yourself.
You can visit our Tutorial Section for more of such troubleshooting article.


")
")
")