Last updated - October 7, 2022
If you own an eCommerce store, you must have tried different ways to pursue customers to complete the order transaction. A large number of such customers back out or do not complete the transaction due to a very tedious Checkout process. In such a case, you lose a chunk of users who could have been your potential customers if you would have optimized your Checkout page for better customer satisfaction. Only a handful of interested customers make a purchase.
When it comes to your WooCommerce store, you sure have wanted to make the Checkout process quicker for effective conversion. The most usual strategy is to skip the cart to take your customers directly to the Checkout page to place the order. This could help you push your customers for the purchase and also save your customers’ time in completing the order transaction.
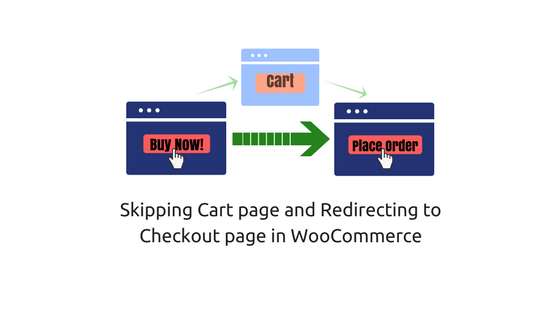
In this article, I’ll show you three effective ways of skipping the Cart page and redirecting to the Checkout page in WooCommerce.
How to skip the WooCommerce Cart page and redirect to the Checkout page?
Following are the three ways to achieve this:
- WooCommerce default settings
- Code snippet
- WordPress Plugin
Let us understand each method in detail.
1. WooCommerce default settings
Surprised? Yes, you can easily skip the Cart page using WooCommerce default settings. This method involves some settings to be configured and a little tweaking of code in the end.
Here’s how you can do this:
a) Redirect the Cart page after successful addition
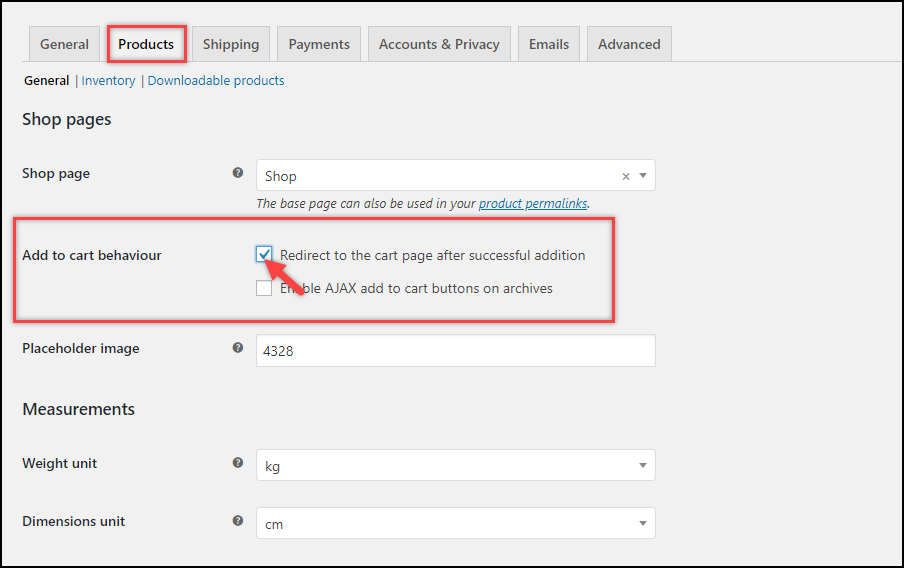
Go to WooCommerce > Products settings. Under the General section, you need to configure Add to cart behavior settings.
Tick the first checkbox to redirect to the cart page after the successful addition of product(s) as shown in the screenshot below.

Save the settings.
b) Redirecting the Cart page link to the Checkout page
Click on the Advanced tab and move to the Page Setup section. Next, for the Cart Page setting, select the Checkout page option from the drop-down list, as shown in the below screenshot.
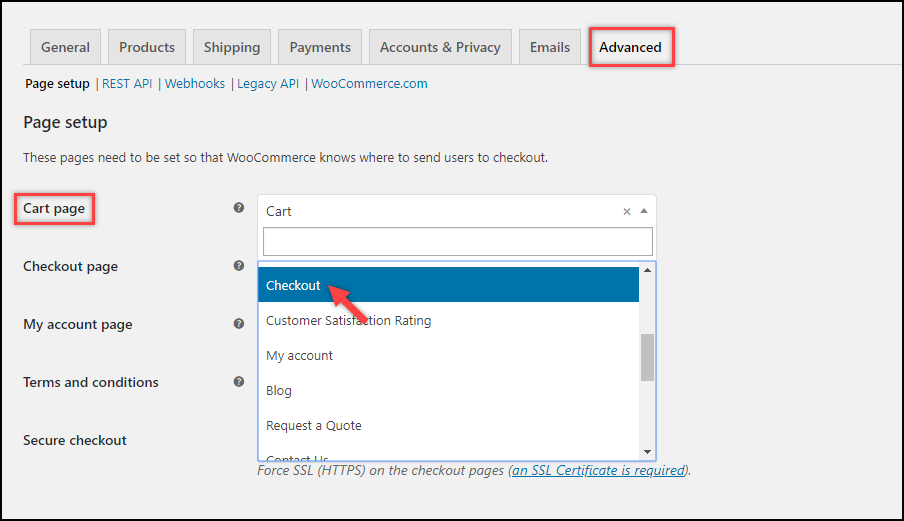

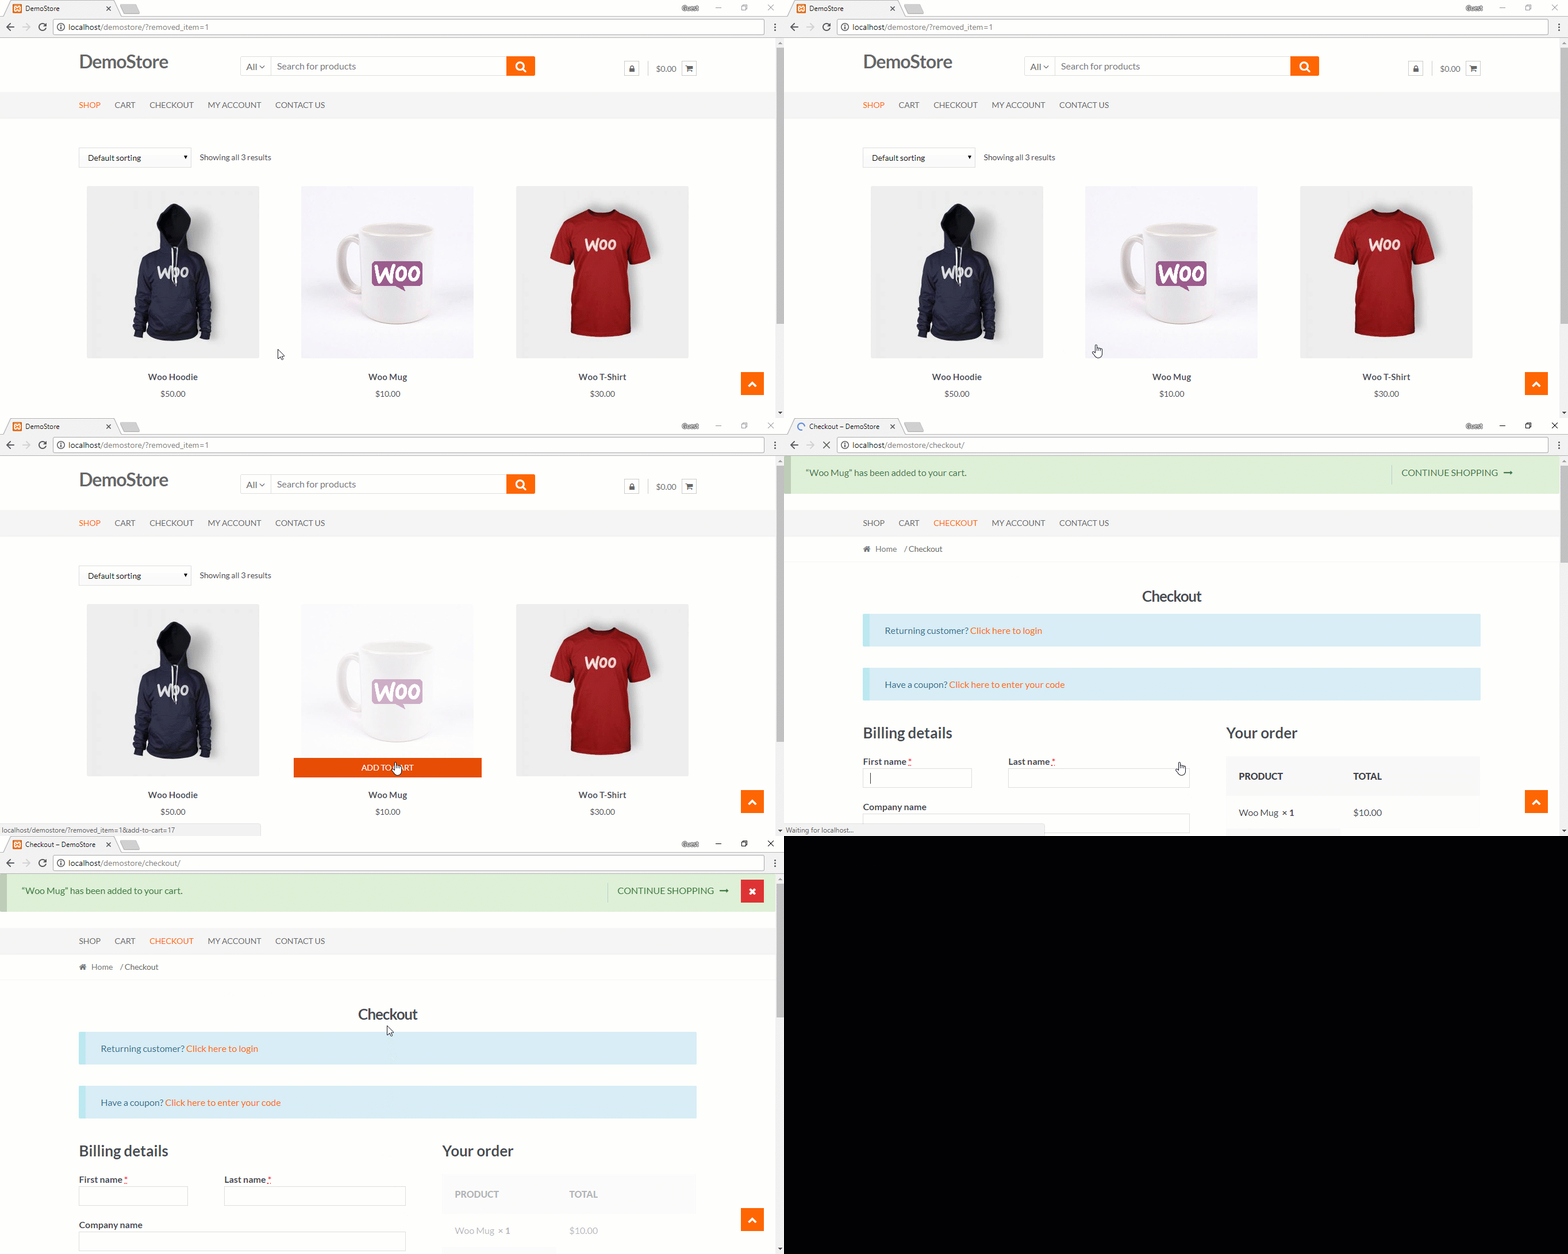
This will now make the Add-to-Cart button to redirect to the Checkout page, instead of the Cart page. A simple demonstration is shown below.

c) Hiding the Cart page from the Menu
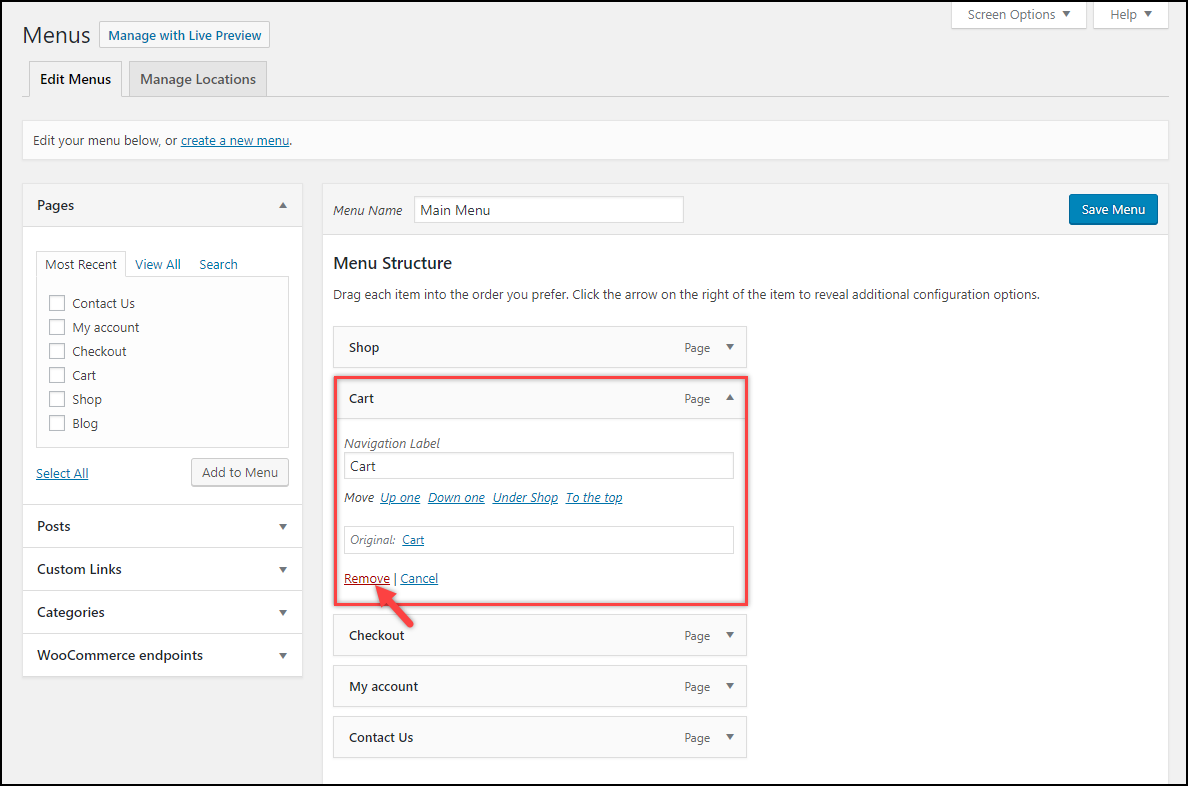
If you have listed the Cart page link on the main menu of your website, it will still lead to your cart page. Hence, you can either choose to retain it or remove it from the menu.
If you want to remove the cart page link from the menu, go to Appearance > Menu settings. Under the Menu Structure section, click on Cart option and click Remove as shown in the screenshot below.

d) Change the Add-to-Cart button text
As you have noticed from our demonstrations, even though the Add-to-Cart click action is leading to the checkout page, the text still displays Add to Cart. Hence, this needs to be changed.
To do this, you need to add the following code snippet in the Themes function (functions.php) file of your activated website theme. You can find this file in Appearance > Editor > click on the functions.php file listed on the right.
add_filter( 'woocommerce_product_single_add_to_cart_text', 'lw_cart_btn_text' );
add_filter( 'woocommerce_product_add_to_cart_text', 'lw_cart_btn_text' );
//Changing Add to Cart text to Buy Now!
function lw_cart_btn_text() {
 return __( 'Buy Now!', 'woocommerce' );
}
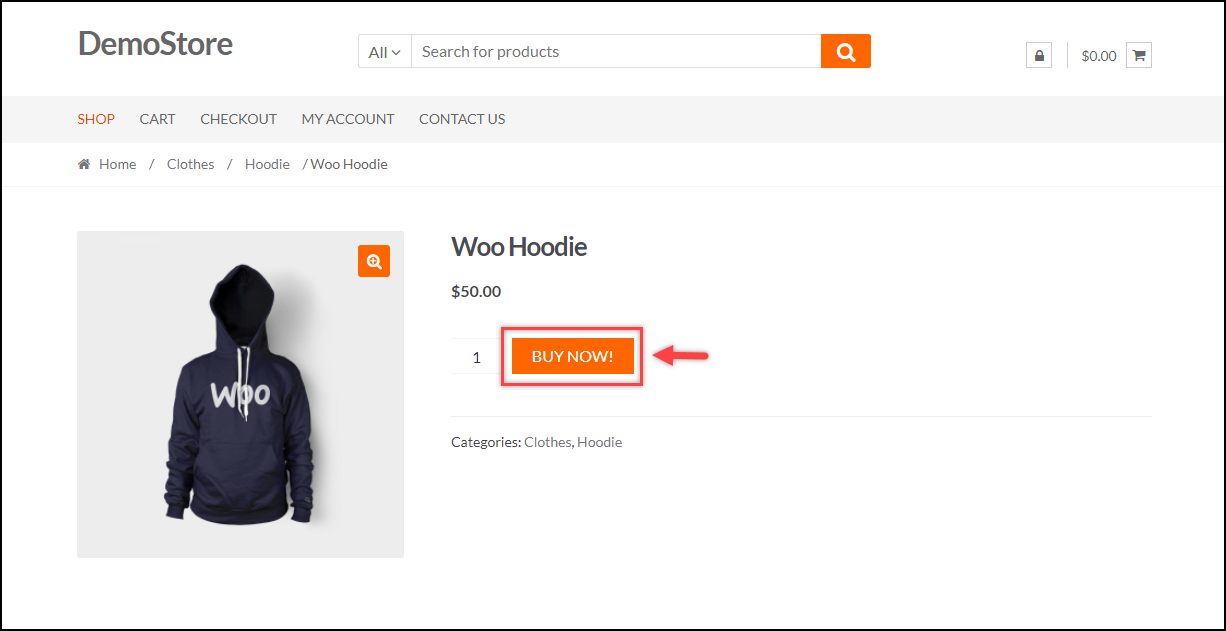
The above code snippet replaces the default Add to cart text with Buy Now! on the shop page as well as on the individual product page.
The following screenshot shows the updated text for the action button.

Use a plugin to customize the Add-to-Cart button text: If you are not comfortable adding a code snippet or want more customization to the action button, there are some free plugins that you can make use of.
- WC Custom Add-to-Cart labels: This plugin allows you to customize the Add-to-Cart button text based on product types. You can set custom text for simple, grouped, external, variable, and bookable products for single product pages as well as archive/shop pages.
Download the free plugin.
- Woo Button Text: With this plugin, you can set a custom Add-to-Cart button text for a single product page and shop page, and also provides a customization option for the Place Order button on the Checkout page. Not just this, the plugin also allows you to change the color and style of the button(s).
Download the free plugin.
That’s it! you will now be able to skip the cart page and redirect to the checkout page in your WooCommerce store.
Although, this method is useful enough, let us see the alternate ways described below.
If you prefer watching a video tutorial on this topic, check out this video.
2. Code snippet
The last method involves using a code snippet for skipping the WooCommerce cart page. This method is also simple like the other two which I have explained earlier in this article.
Add the following code snippet in the functions.php file of your activated website theme.
add_filter('add_to_cart_redirect', 'lw_add_to_cart_redirect');
function lw_add_to_cart_redirect() {
 global $woocommerce;
 $lw_redirect_checkout = $woocommerce->cart->get_checkout_url();
 return $lw_redirect_checkout;
}
The above code snippet will redirect the Add-to-Cart action from the shop page and individual product page to the Checkout page.
You also need to change the Add to Cart button text. To do this, refer to the same methods that I discussed in the earlier section of this article(refer here)
3. Using WordPress Plugin
When we are able to achieve our WooCommerce checkout goal with just simple settings, why would we opt for plugins?
Well, the answer to that question is more customization and convenience.
The most popular plugin for skipping cart pages is WooCommerce Direct Checkout.

Download the free plugin.
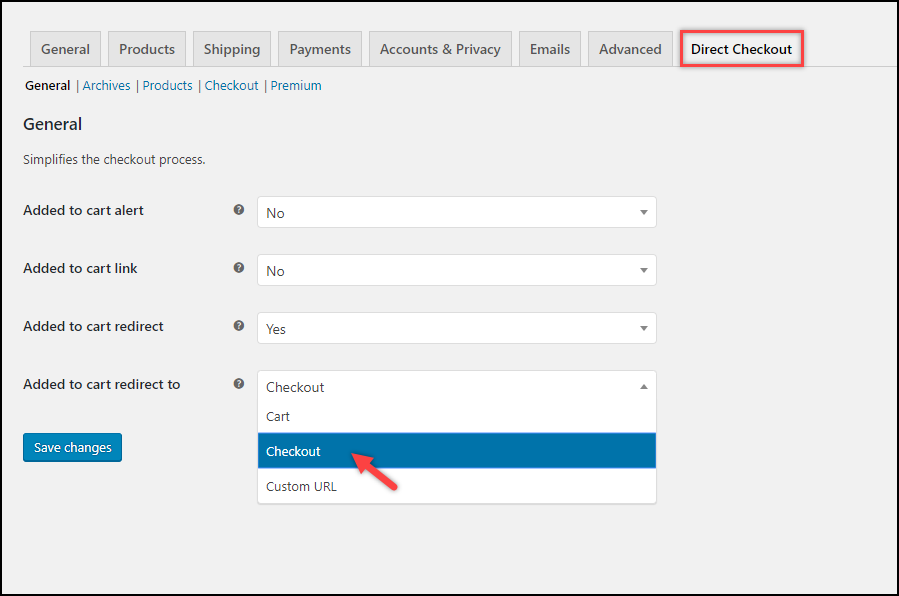
In addition to skipping the cart page and redirecting to a custom page, this free plugin allows you to set a custom Add-to-Cart button text.
The plugin settings are as shown in the below screenshot.

Concluding comments
The above-discussed methods will help you skip the cart page and redirect to the checkout page on your WooCommerce store, reducing the steps in your transaction funnel and hence making your checkout flow smoother.
Having said that, you might also need to carefully devise strategies to pursue your customers for making more purchases. For such cases, you can use some effective WooCommerce Checkout plugins for making your customer experience easygoing.
There are a lot of store owners who wish to customize their checkout page by adding desired custom fields to their checkout. This has helped them in many ways. If you are one of them, I suggest you read our article on WooCommerce Checkout Field Editor for better conversions.
Do let me know in the comments section which method worked for you. Would love to hear from you!
For now, continue exploring LearnWoo.



First option is not working foe me, I can’t select the checkout page from the list
Hi Rubb, we cannot able to see the checkout option in the article. Can you let us know in which part you have doubts exactly.
Woocommerce Slide Out Cart allow you to make add to cart on open popup on side bar it make much attractive part of woocommerce to setup
Hi Hitaxi, thank you for the heads up!
I have used the Woocommerce Product table. If add product to cart that can’t redirect to the checkout page.
Thank You Azhar. Your post has helped me in customizing my woocommerce site. Thanks for Awesome Tips.
Thanks, Simraan! 🙂
Keep reading our blog articles for more tips.
You are amazing. This was so simple! Exactly what I spent hours looking for. Gracias!!!!
Thanks, Courtney! 🙂
I appreciate the compliment.
Excellent explanation.
Thank you!
Glad it was helpful!
Thank you for this help. I also want to display a checkout slider when user click cart page. How can i do this? You can see the feature here https://codecanyon.net/item/woocommerce-direct-checkout-skip-cart-or-checkout-on-same-page/21456470 .
Hello Mike,
It is better to use plugins for such customization. I haven’t found another solution (yet). If you do, share with us.