
Stripe is one of the biggest reliable, scalable, and secure developer-friendly payment gateways available today. It’s used by many well-known eCommerce companies, B2B platforms, SaaS companies, B2C Marketplaces, and even nonprofits and fund-raising institutions.

The payment gateway is available in 40 countries and is rapidly expanding to more. And it comes with a host of tools that can do anything and everything your business may need.
If you’re looking to integrate your WooCommerce store with Stripe, just follow along.
Creating and Activating Your Stripe Account
We need a Stripe account to integrate it with our WooCommerce store. So let’s head over to Stripe’s sign up page. Here, fill the email, name, and password fields. Click “Create account” when you’re done.
To connect the account to our WooCommerce store using live API keys, we need to confirm our email address and activate our Stripe account. So head to your email inbox and look for the recent email from Stripe. Open the email and click “Verify email address”.

With our email verified, we need to activate our account. Expand the “Activate your Stripe account” option in your dashboard. Then, click “Start now” to initiate the process.
- Step 1: Stripe requests information about your business address and its type. Supply the details and click Next.
- Step 2: On the next page, you’ll have to provide some personal details like your legal name, date of birth, and home address.
- Step 3: You need to supply some more business details like the industry in which you operate, your website’s URL, and a description of the products you sell.
- Step 4: On the next page, you need to set a statement descriptor for your Stripe account. A statement descriptor is the business name your customer will see on their credit card statements. Make sure to choose an easily recognizable name to avoid potential chargebacks due to confusion. Also, add a customer support phone number in the field.
- Step 5: This step is very important as you need to connect your Stripe account to your bank account. Carefully enter your account holder name, and other bank account details required by Stripe.
- Step 6: Stripe requires a two-step authentication to add an extra layer of security. You can either use SMS or an authenticator app like Google Authenticator on your smartphone. After setting up 2-step authentication, verify the details and click Done.
We have successfully created and activated our Stripe account. Thus, we can now access our live API keys.
Connecting Stripe with WooCommerce
You need to install and activate the WooCommerce Stripe Payment Gateway plugin on your WordPress website to connect it with your Stripe account.
After activating the plugin, click “Settings” under it to head to its setup page.

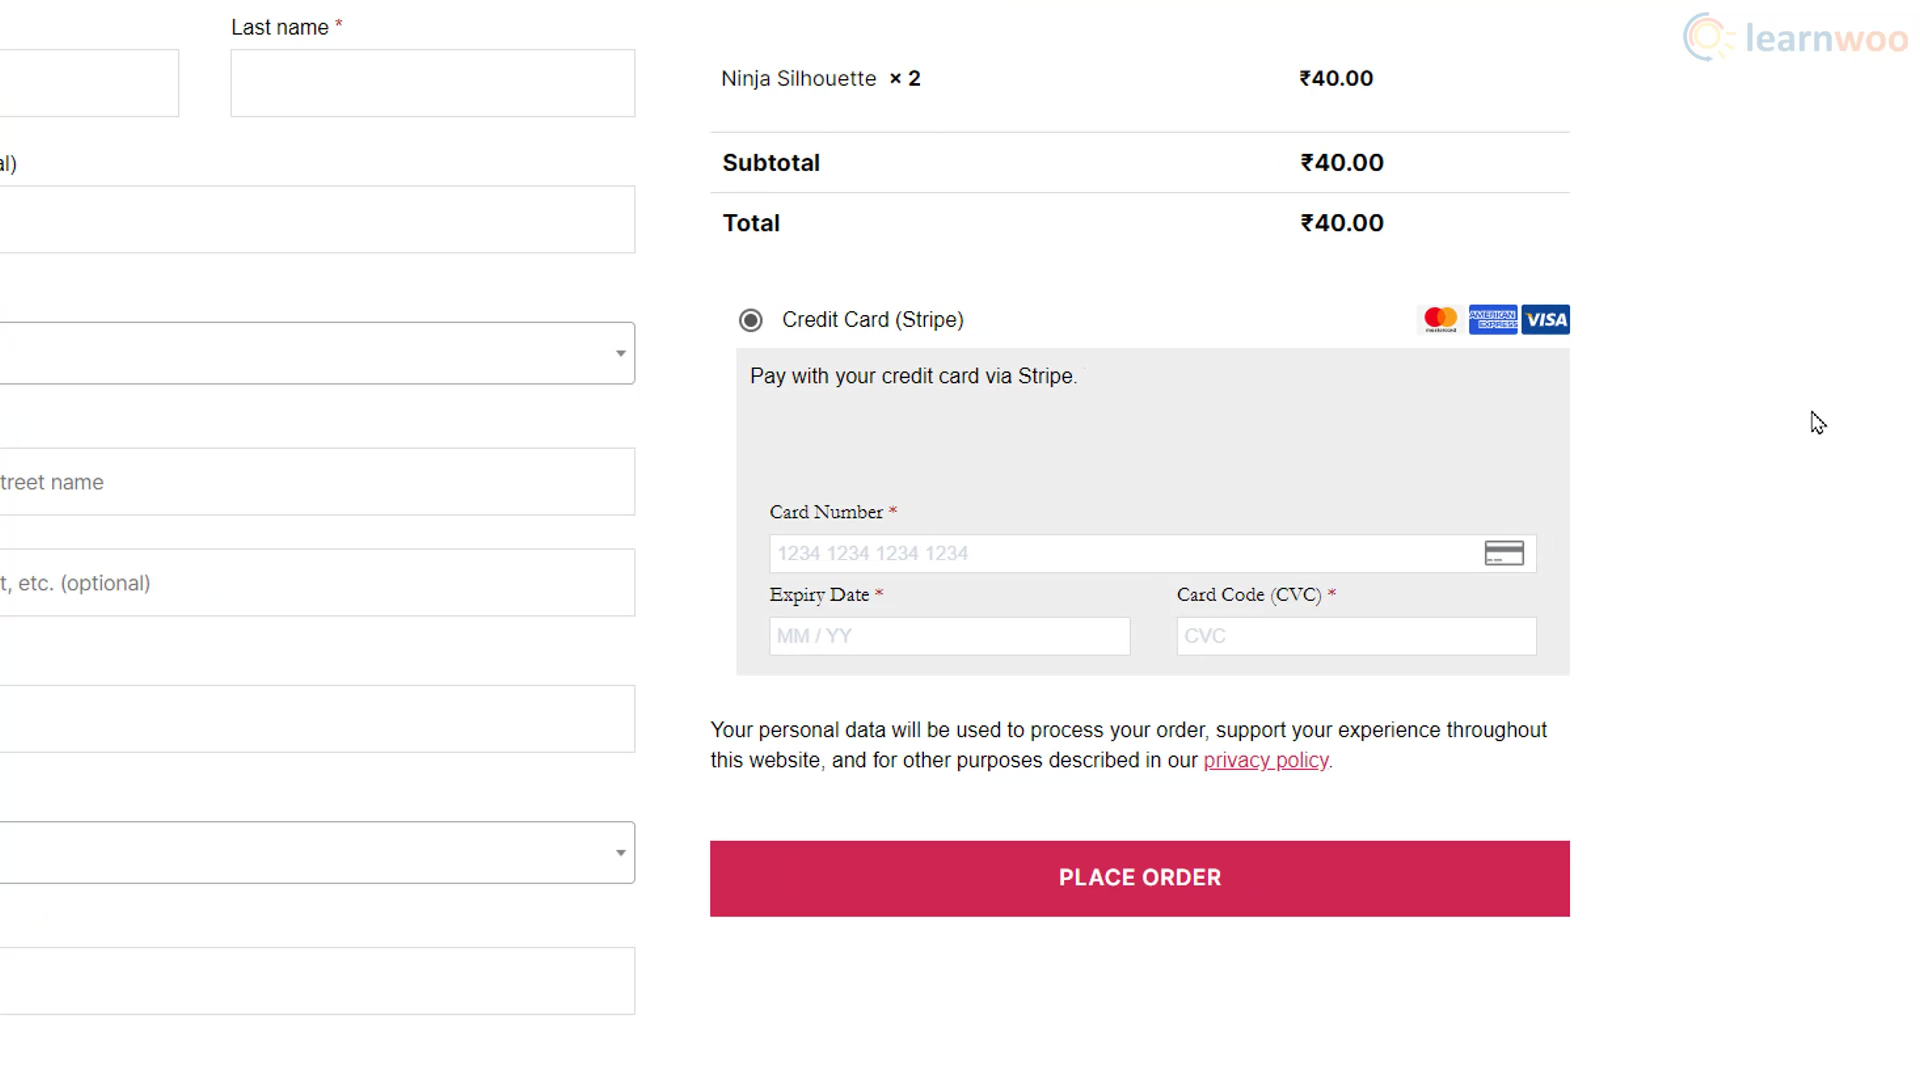
Start by enabling the Stripe payment gateway on your WooCommerce store. In the Title and Description fields below, type the text that will be shown for the Stripe payment gateway on your checkout page.
In the Webhook Endpoints section, you can disable the test mode to make the Stripe payment method live on your website. However, it’s best to keep it in test mode while setting it up and testing it. Head to the API keys section in your Stripe account dashboard. Copy and paste the publishable key and the secret key.
Also, copy the webhook endpoint URL shown in bold text just below the Webhook Endpoints section on the setup page. Then head to the Webhooks settings in your Stripe dashboard and click “Add endpoint”. Paste the copied URL in the available field.
From the dropdown below, you can select the events for which you’ll receive notifications from Stripe. For example, by choosing the “Charge” event, you’ll be updated when a charge is captured, expired, and failed. When you’re done selecting the events, click “Add endpoint”.
A signing secret is available below the webhook details. Copy it and paste it in the Webhook secret field in the plugin setup page.
Below, you can tweak some other settings for charge capturing, button customization, and card saving according to your preferences.
Click Save Changes when you’re done. The Stripe payment gateway is now active on our WooCommerce store. When shoppers head to the checkout page, they can pay via Stripe.
Enabling Subscriptions with the Stripe Payment Gateway
If your store works on a subscription based model, you can enable subscription payments with Stripe. However, you’ll need the WooCommerce Subscriptions plugin from the WooCommerce extensions store. With the Stripe and WooCommerce Subscriptions integration, you can enable both manual renewal payments and automatic recurring payments, and even let customers upgrade or downgrade between plans.
After installing the plugin, you’ll need to add a subscription product. Head to Products > Add new. Add the Product title and description. Then, select Simple subscription from the Product data dropdown. Also, add a subscription price and select the payment period.
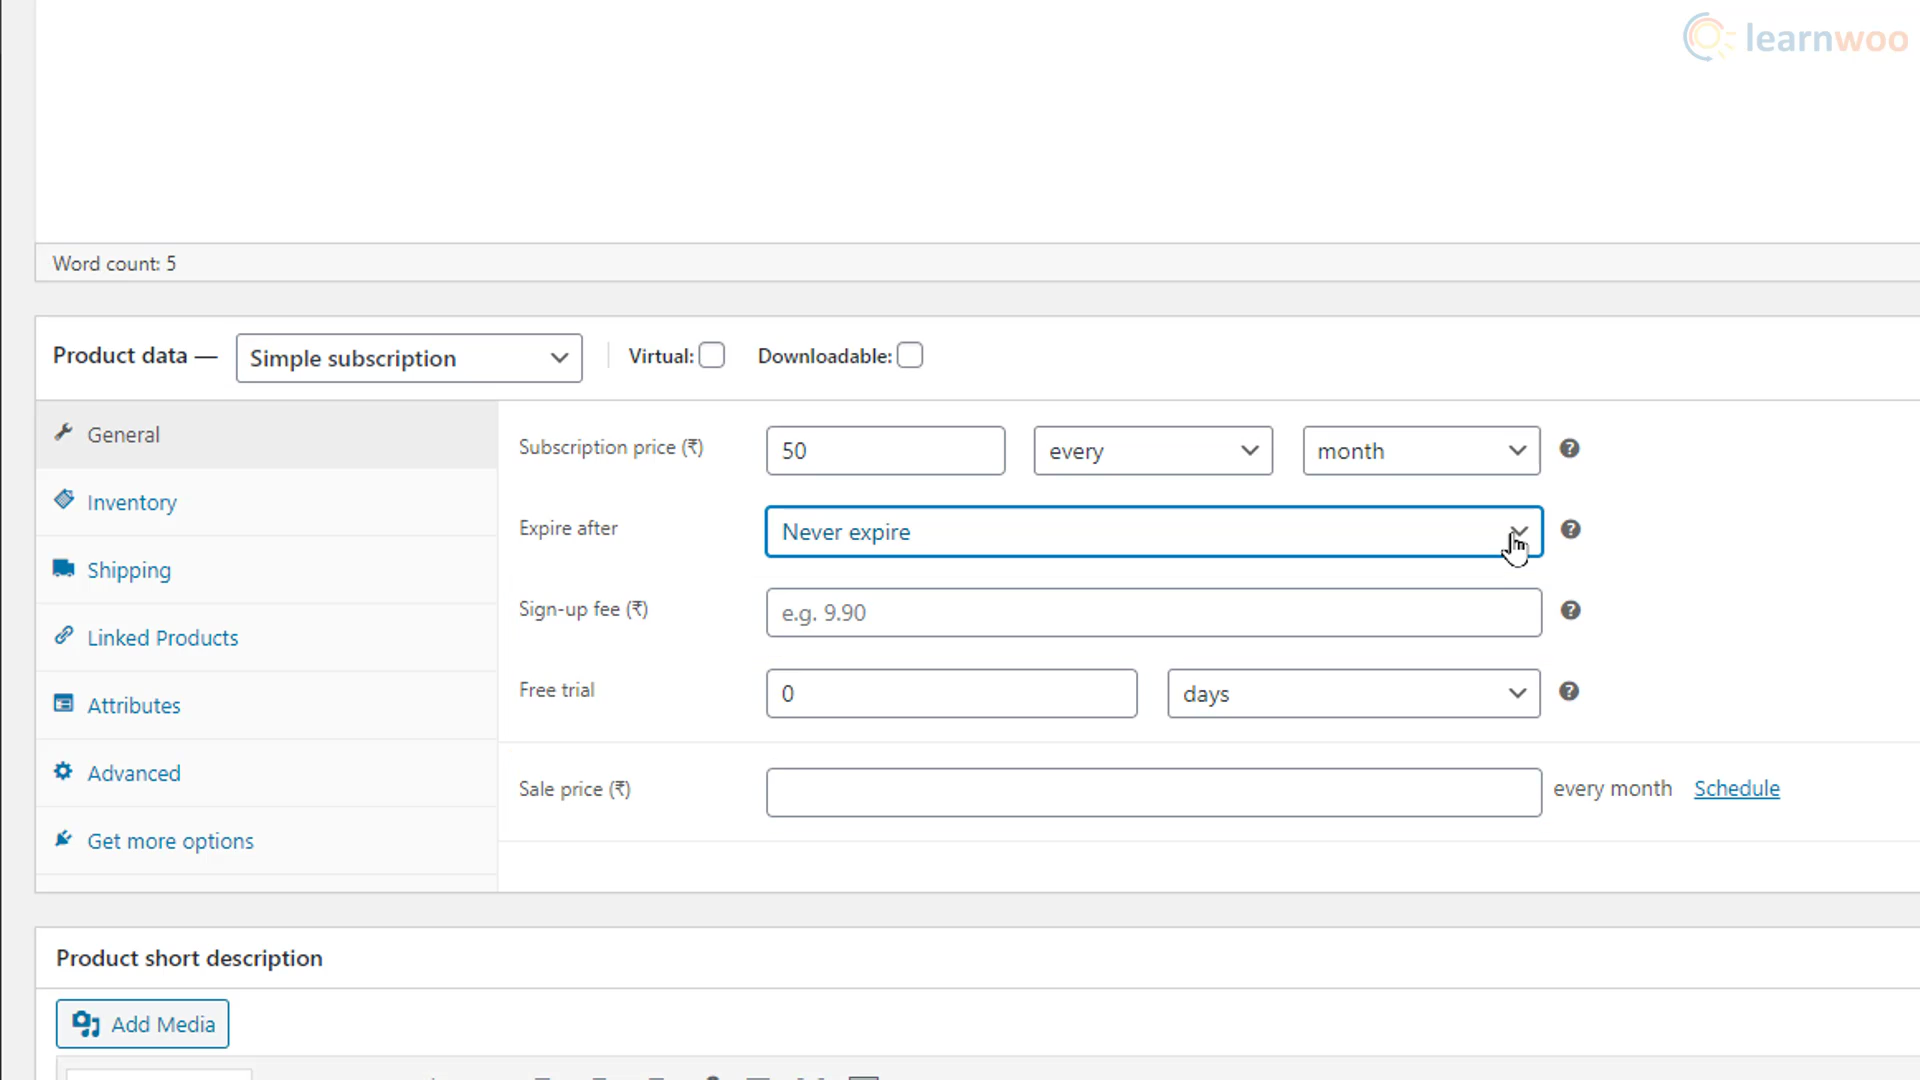
Below, determine when the subscription will expire. You can also determine a sign-up fee, free trial period, and a sale price. Finally, add a product image to go with the product.
After publishing the product, shoppers browsing the store can view the subscription product just like other products. They can click the “Sign up” button to start their subscriptions with Stripe.

After a successful payment, you can view and manage the details in the Subscriptions tab under WooCommerce.
With convenient payment methods available, your shoppers can now enjoy fast and reliable checkouts.
If you prefer a video version, please check out the video below:


")
")
")