
Last updated - July 8, 2021
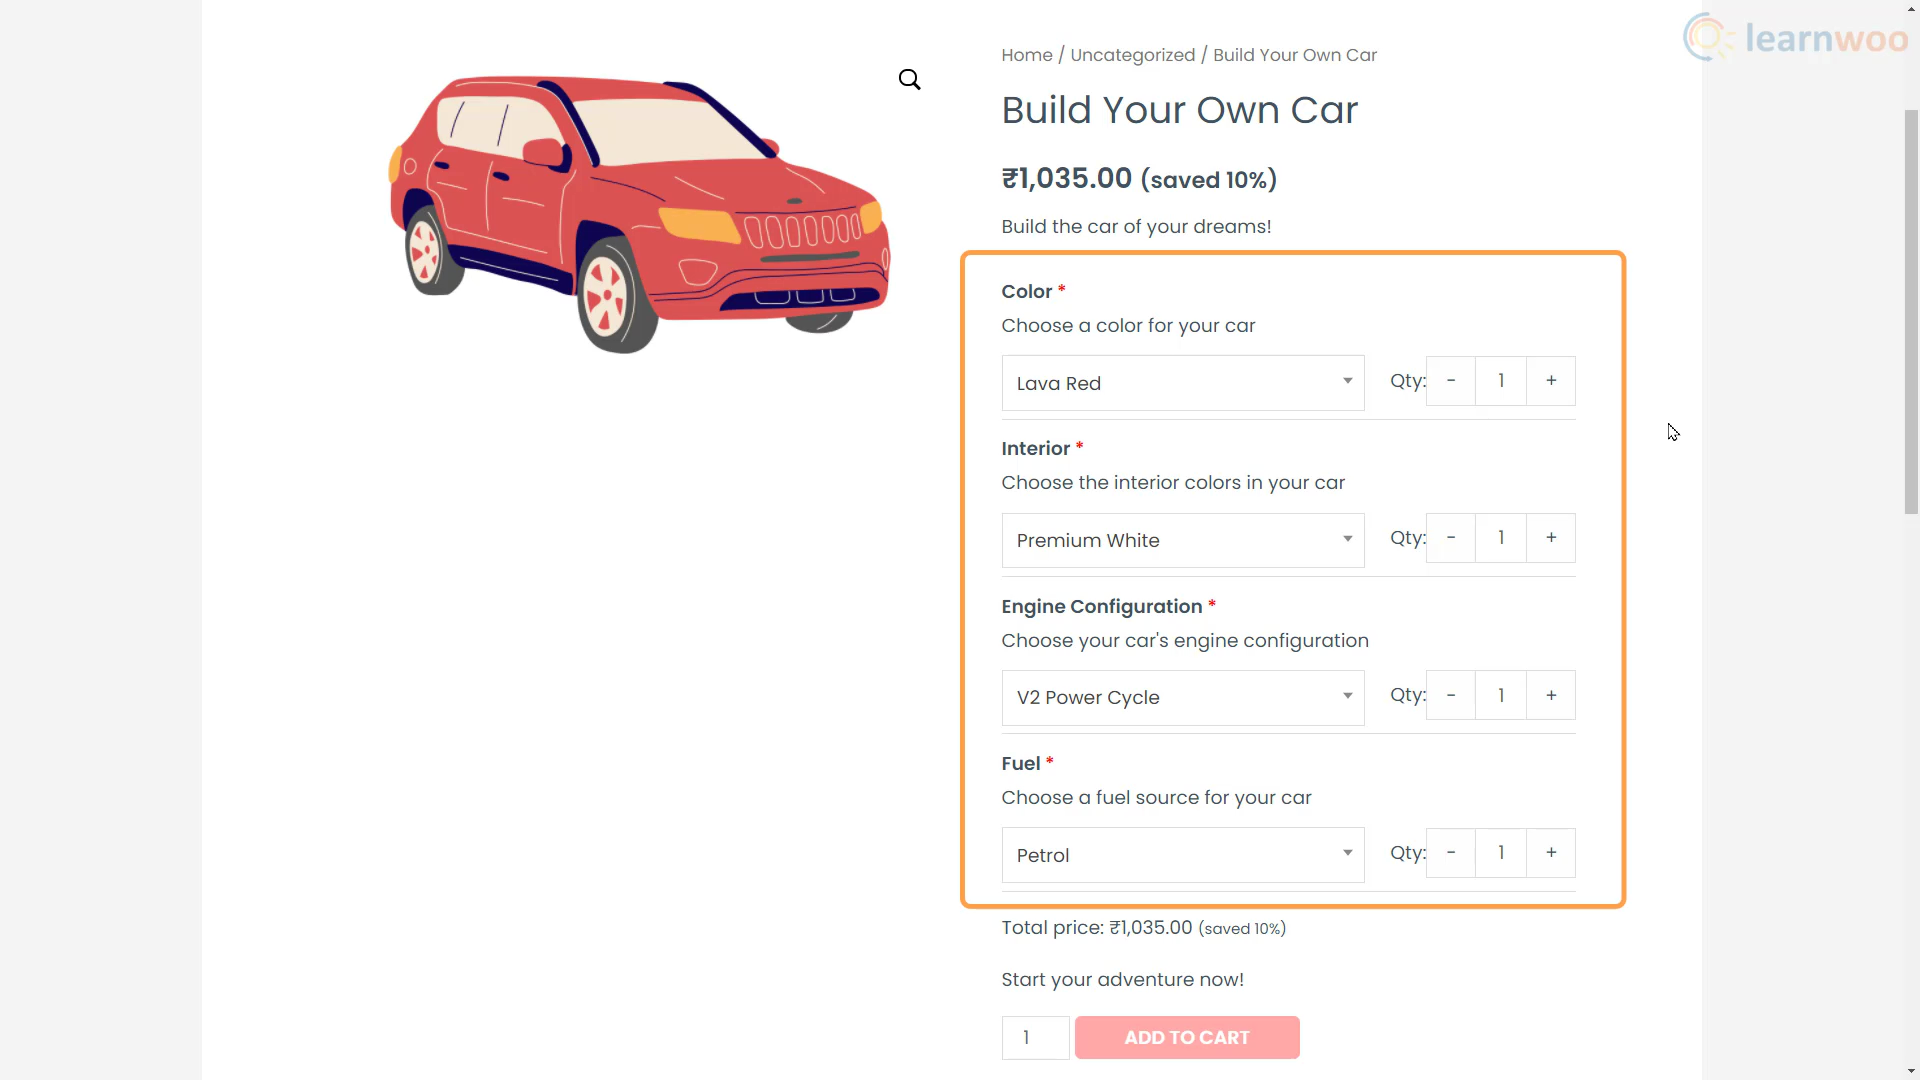
With composite products, you can let your customers build their own products from selected inventory. For example, you can let shoppers build a custom car by choosing their own components and features. They can choose the color of the car, the interiors, the engine, and finally the fuel type. The final price of the car depends on the components chosen by the customer.
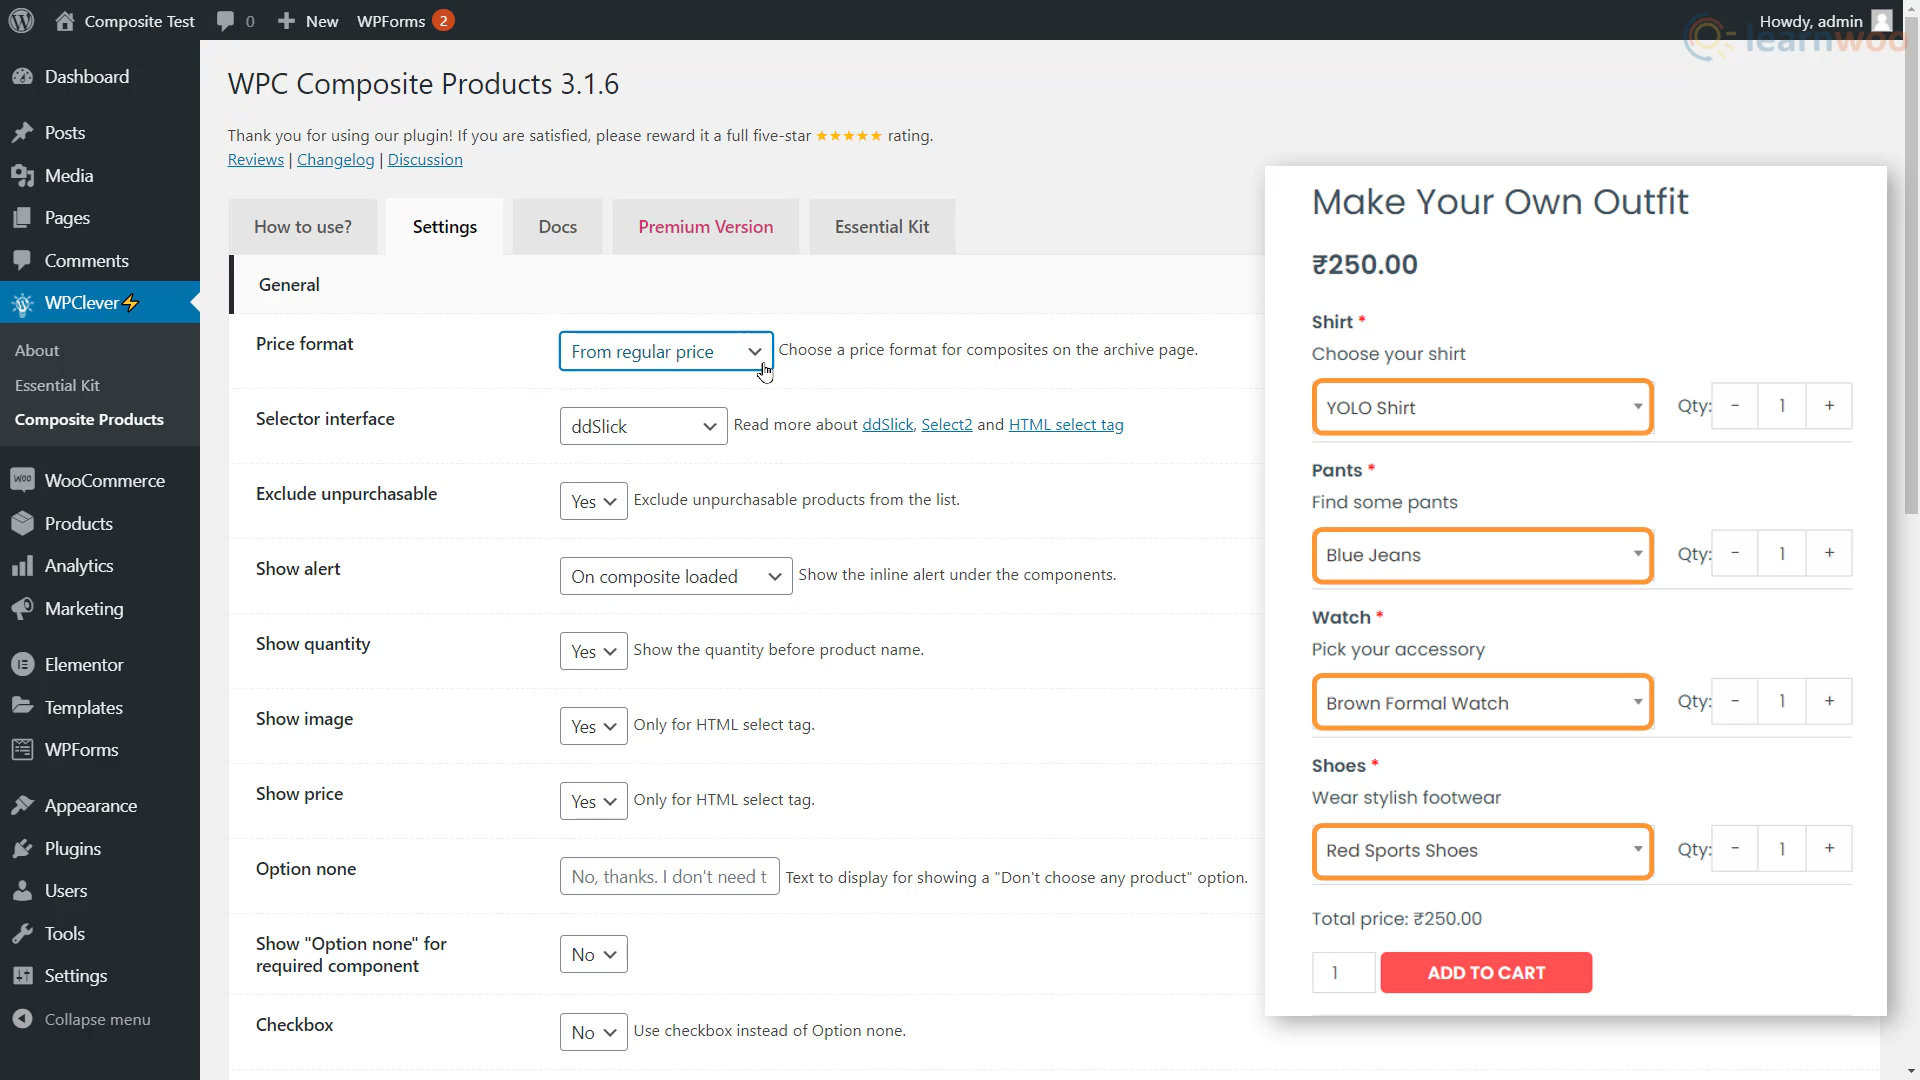
Another good example is letting your customers create their own outfit by selecting the shirt, pants, watches, and shoes. This way, shoppers can choose products according to their preferences and pay for only what they’ve bought.
If you’re looking to offer WooCommerce composite products to your customers, here’s our guide.
Installing the WPC Composite Products Plugin
Plugins like WooCommerce Composite Products and WPC Composite Products for WooCommerce are great for setting up composite products on your store. We’ll be using the latter for this tutorial.
From your WordPress dashboard, head to Plugins > Add New. Here, search and install the WPC Composite Products plugin. After activating it, click “Settings” under the plugin name to set it up.
Here are some useful settings worth customizing:
- Price format: You can choose a price format for the composite product. The product page can show the regular price, the sale price, or both.
- Selector interface: We can also choose the type of selector interface for the dropdowns. We have 3 options: DD Slick, Select 2, and HTML, each with its own distinct look. We’ll use Select 2.
- Exclude unpurchasable: With this setting, you can choose to exclude unpurchasable products from the list.
- Show quantity: Below, you can choose to show or hide the quantity before the component name.
- Show image/price: You can also change the visibility of the image and price of components for the HTML selector interface.
- Option none: Here, you can type the text that will show for components that shoppers want to avoid. Decide whether the option to skip a component is available for required components. With this option, you can also let shoppers skip a component with a check mark.
- Total text: Next, you can choose the text that appears before the price of the composite product.
- Link to individual product: With the next option, you can add links to individual product pages of the components. However, if you don’t want the products to be sold separately, it’s advised to disable this option.
Click “Update Options” when you’re done setting up the plugin according to your preferences.
Creating WooCommerce Composite Products
Having set up the plugin, our WooCommerce store is now capable of adding and displaying composite products. To create one, head to Products > Add New.
Here, give the composite product a name and add the product details and description in the space below.
Then, from the “Product Data” dropdown, select “Composite product”. You’ll notice that a new tab called Components has been added.
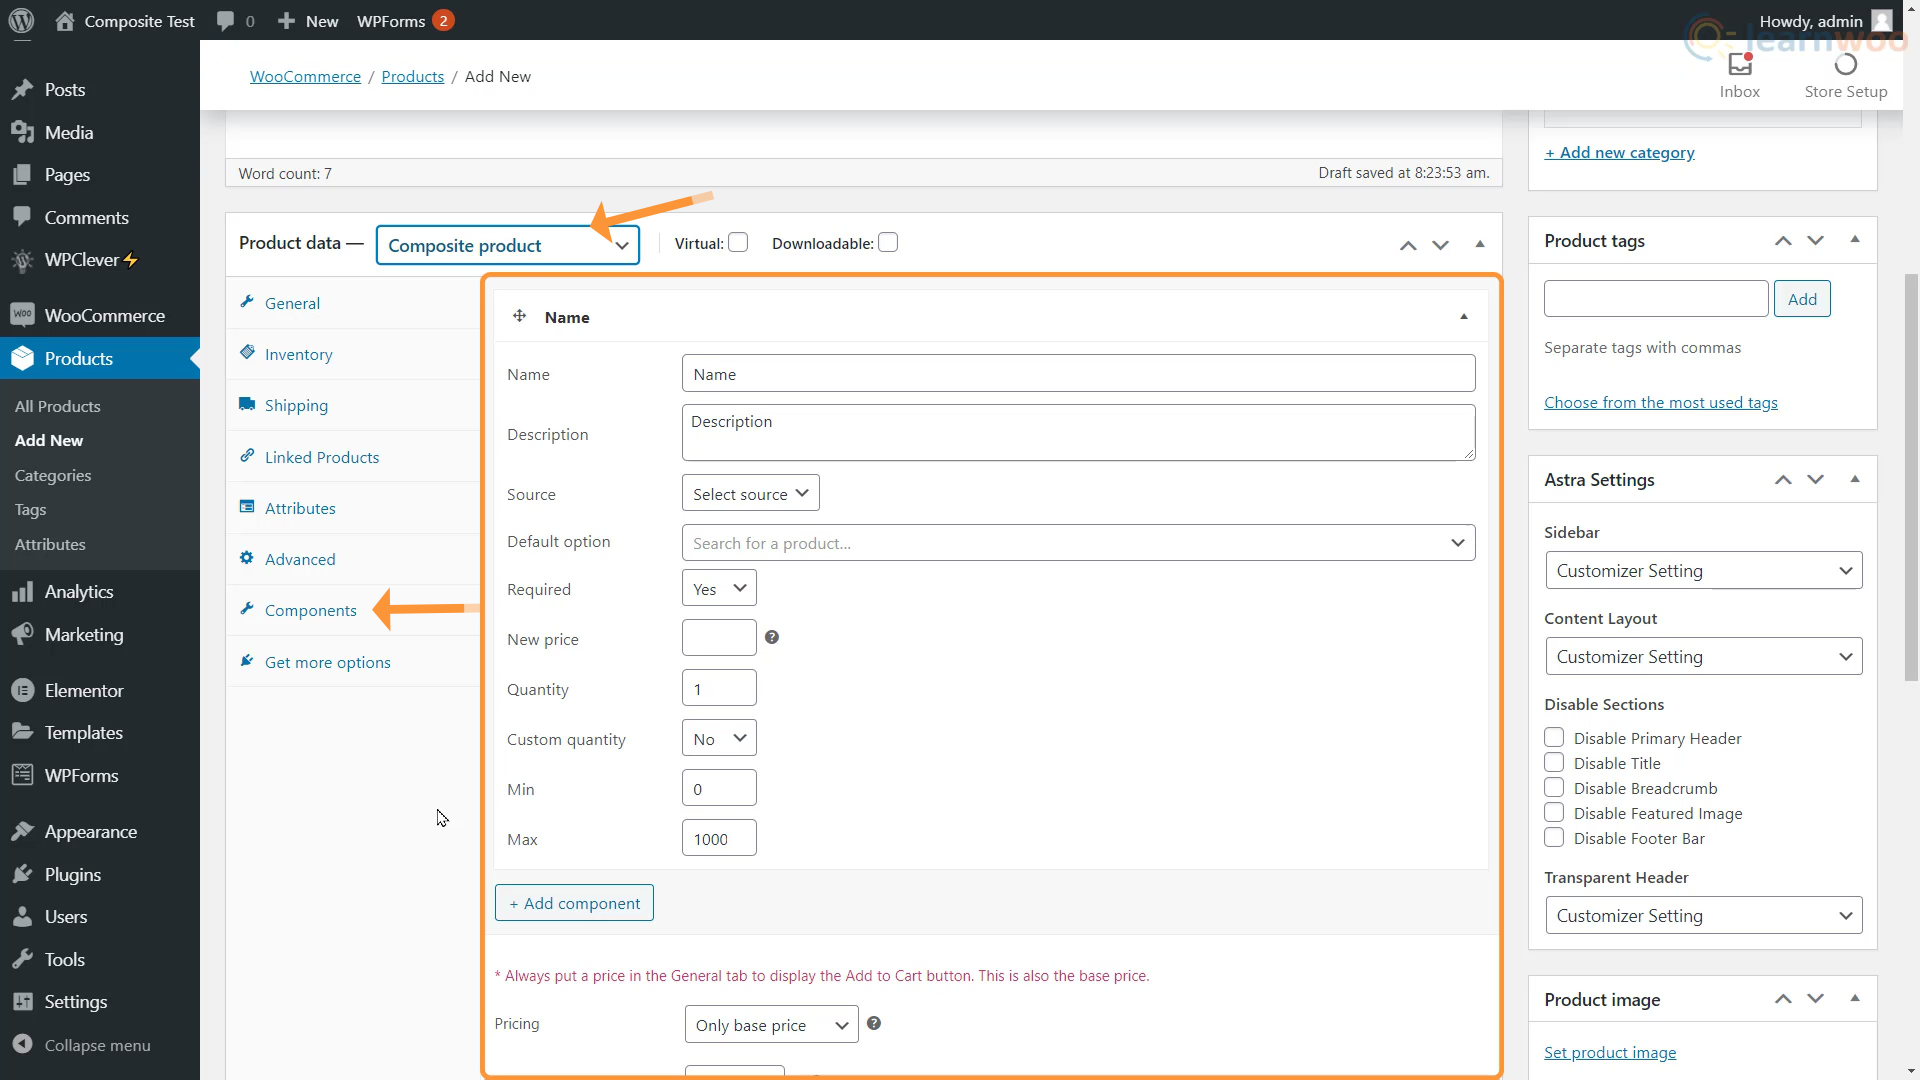
This is where we will add the components one by one by providing details like name, description, quantity, and price. Before you proceed, make sure all products that will be a part of the composite product have been published individually on your site. You can check out this article to learn more about adding and importing products to your WooCommerce store.
Adding Components
Now, we’ll add components to our WooCommerce composite products. For example, in our Build-your-own-car composite product, the components would be something like color, interior options, engine variants, and fuel type. Here are the steps for adding a component:
- Name and Description: Add a name and description for the first component just like you would for a regular product. We’ll name the component as “Color”.
- Source: Select the source of the component, i.e, if you want to filter component options from the list of products, categories, or tags. We will use products. But if you want to add a lot of component products, you can import them using categories and tags with the premium version of the plugin.
- Source: A new field will appear that will let you add the components individually. Here, type the product keywords and select from the dropdown. We’ll add Lava Red, Ocean Blue, Grassy Green, and Royal Purple. These are our Build-your-own-car’s color options.
- Required: Here, you can mark the component as required. A red asterisk will appear for required components on the shop page and shoppers will have to choose an option from that component.
- New price: This option lets you assign a single price for all the items in the component. The individual product prices of the items will be struck out.
- Quantity: Below, we can set a default quantity for the component and allow or disallow customers from changing the quantity.
- Min/Max: Also, set a minimum and maximum value for the quantity. When enabled, a quantity option appears on the shop page.
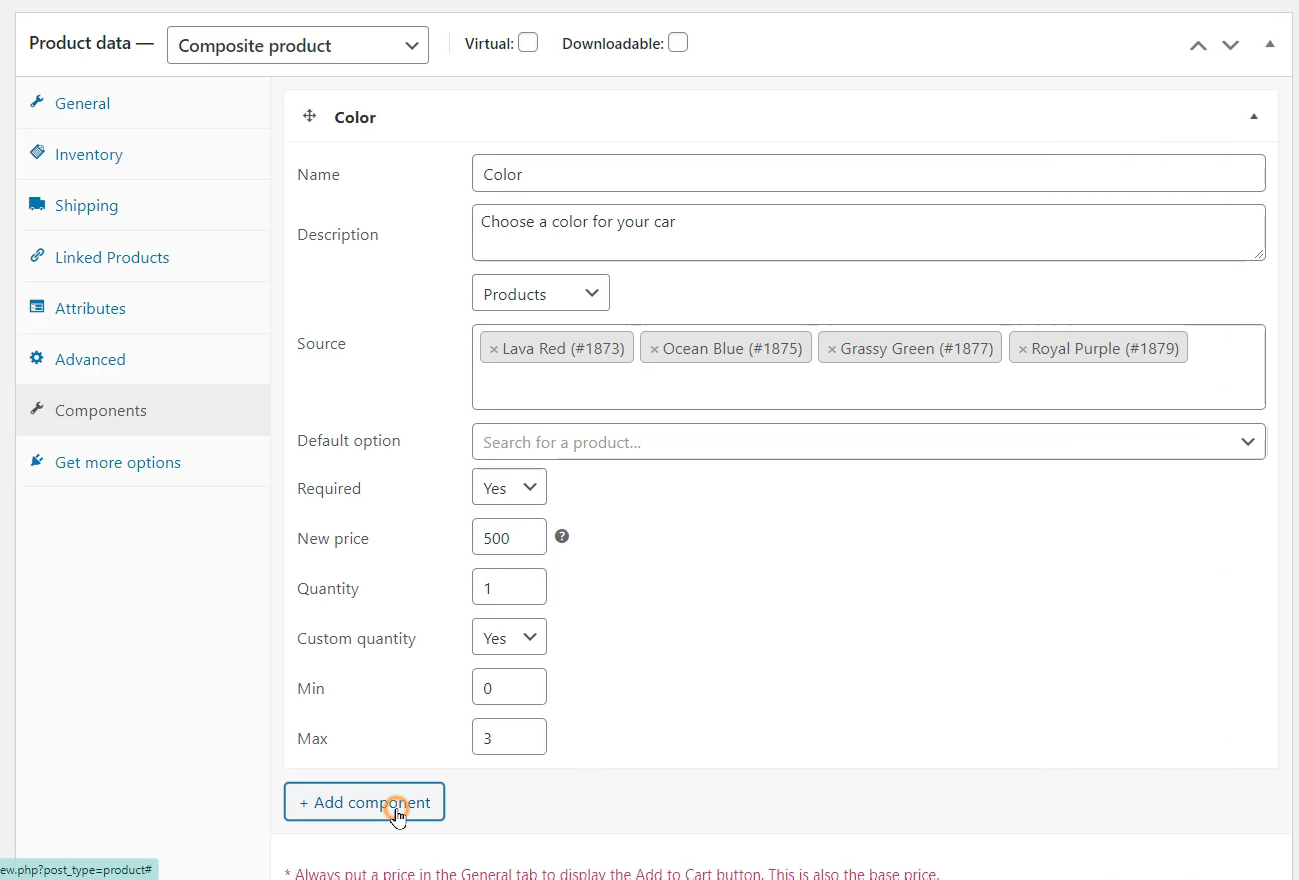
When you’re done, click “Add component” to set the parameters for the new component. Similarly, add any other components that make up your composite product.
After adding the components, you can head to the General tab to choose how you want to price your composite product. You can choose between a fixed base price, the total of component prices and base price, or simply the sum of the component prices without any base price.
No matter which option you choose, make sure you’ve set an amount in the price section in the general tab. If you leave this field empty, the add to cart button will not appear for the customer.
Back in the Components section, you can add a discount percentage on the total price to incentivize the customer to buy the composite product.
You can also set quantity limitations for the WooCommerce composite products. Additionally, decide if similar products can be chosen in different components. Also, decide how you want to apply the shipping fee for the composite product: as a whole, or to each individual component.
You can even add a custom display price and some text above and below the components. Finally, add a product image for your composite product, though selecting a component option will still show its respective product image to the customer.
When you’re done, publish the product.
The composite product is now ready. And customers can easily customize their product the way they want on your store.
If you prefer a video version, please check the video below:


")
")
")