
Last updated - January 7, 2022
An option to let customers request a quote on your eCommerce store could prove to be a conversion booster for wholesale and B2B stores, as well as stores that offer tailor-made services. Such stores will be focused on either bulk purchases or customizing a service, and will have an option to improvise the pricing patterns based on customers’ quantity requirements. If your store is based on the WooCommerce platform, you won’t have this option by default, and will have to install a plugin. In this article, we will explain how you can integrate and customize request a quote form for your WordPress eCommerce store using a plugin.
The advantages of offering a request a quote form on your online store
Instead of simply offering the add to cart option on the store, you will be able to provide an option for customers to specify their quantity requirements, and request for a more informed pricing quote. The obvious advantages are:
- Provides a better option for customers to contact you and keep records of customer requirements.
- Customers will get a chance to negotiate pricing on your store based on their requirements.
- Provides store owners to review their pricing strategies particularly for bulk purchases.
- Can boost conversions and prevent cart abandonments.
- Easily get qualified leads that can be leveraged by the marketing team.
- Through a custom quote request form, can collect required information from customers to quote a fair price.
- Avoid the hassles of missing information while preparing a quote.
How to integrate a Request-a-Quote Form?
As you know, WooCommerce does not provide this feature out of the box. Hence we will demonstrate how you can integrate a Request a Quote form on your store with the help of ELEX WooCommerce Request a Quote Plugin. Basically, the plugin provides an option to provide an Add to Quote button on your WooCommerce store. This can be in addition to the regular Add to Cart button, or as a replacement option by hiding the Add to Cart button.
We will demonstrate this in more detail in this article. If you want to understand the step-by-step process of setting up the plugin, check our article – How to Add Request a Quote Button to WooCommerce Store in 5 Simple Steps
Now when customers click the Add to Quote button of a product, that product will be added to a Quote list, which will have product details, along with other fields for the customer to enter information. You can customize this Quote list page by adding custom fields to the form.
Here is how you can do this.
When the plugin is installed and activated, it will create an Add to Quote button to all your products. The default text on the button is “Add to Quote”, which you can customize according to your requirements. Along with that the plugin offers options to change the color of the button. You can also modify the action when you click this button – whether to open the Quote List page, or display it on a lightbox.
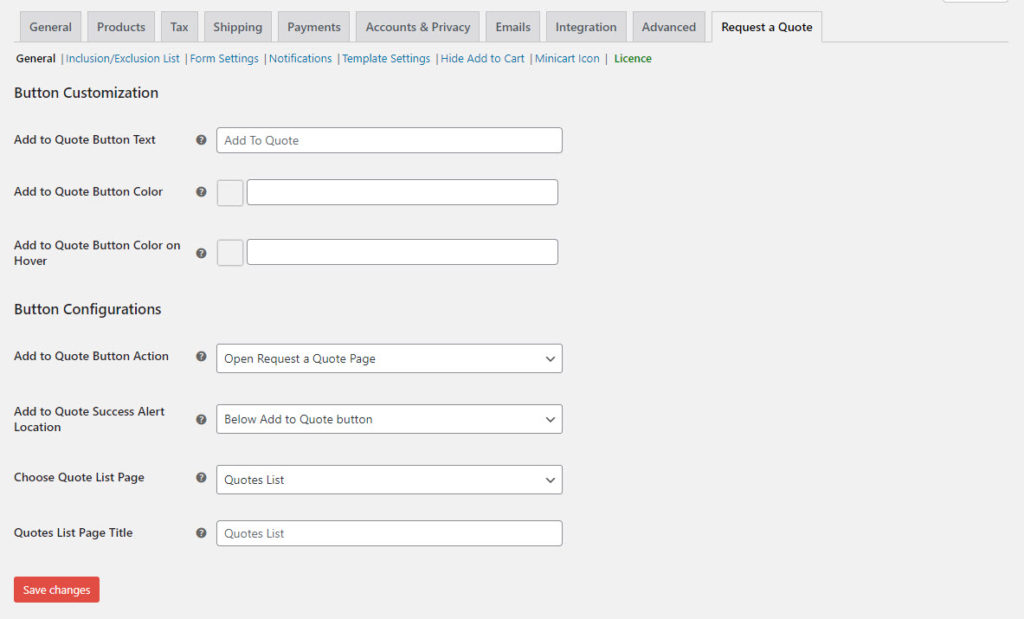
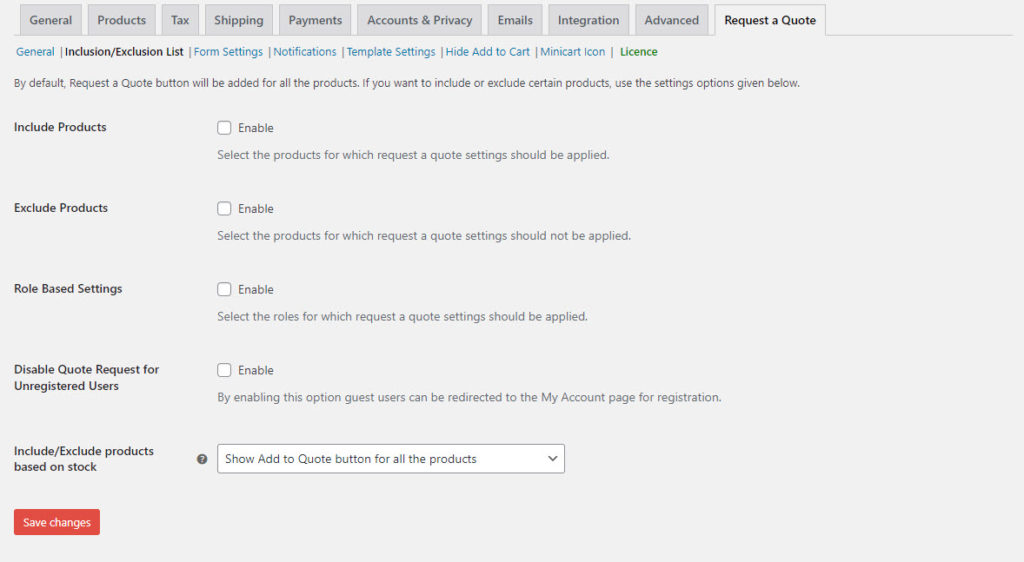
Though by default the plugin applies this feature to all your products, you can restrict it to suit your store’s requirements. For example, you can specifically include or exclude products from having this feature. Similarly, you can enable or disable it for specific user roles, or disable it completely for unregistered users.
You can also include or exclude products to have the Add to Quote button based on their stock status. You can either display the button only for in-stock products or only for out-of-stock ones.
How to Customize the Request a Quote Form?
Once the customers add the products to the quote list, they can submit the quote request to the store with the required details. Now, depending on your store’s specific requirements, you can customize this form. The plugin helps you provide core fields and custom fields to the form as per your needs.
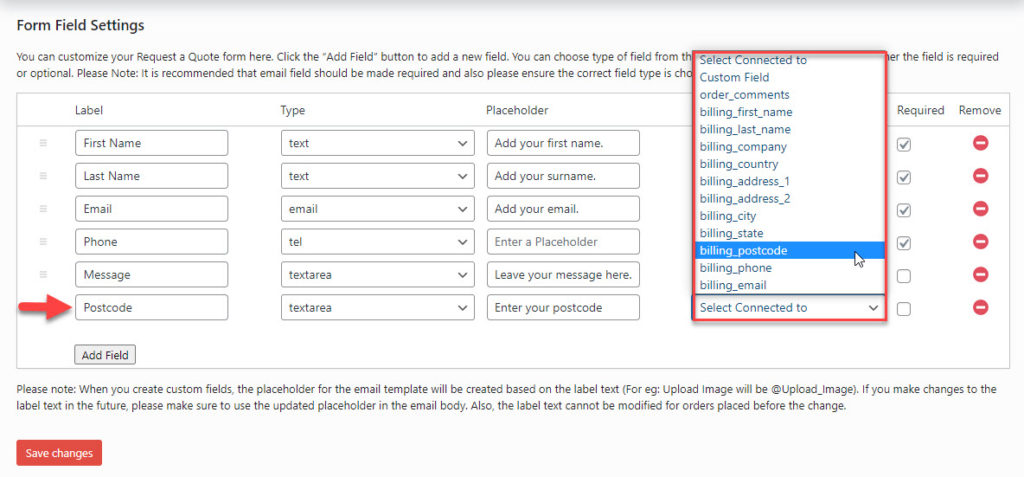
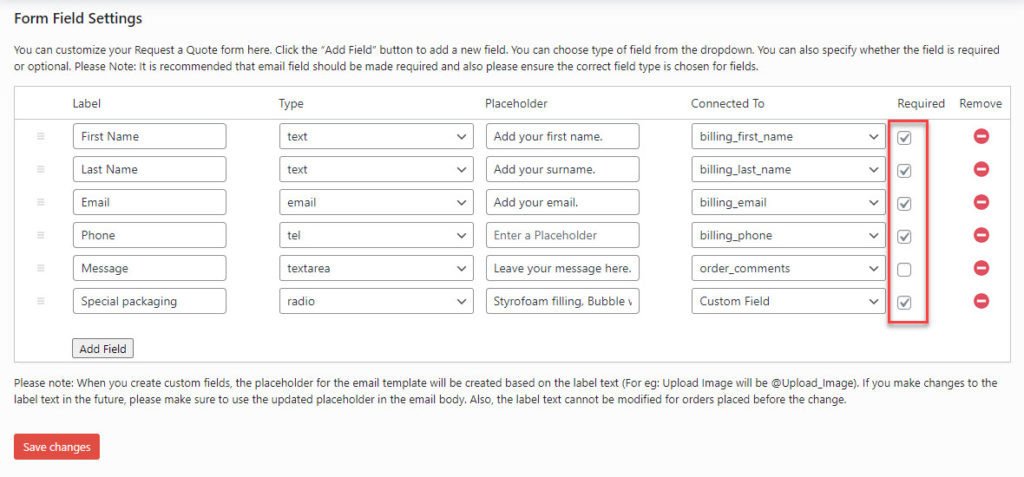
By default, the form will have a range of fields like First Name, Last Name, Phone number, email, etc. You can add more fields from the plugin settings page.

To add a new field, you need to enter a text as the field label, then choose the field type, a placeholder text, and then connect it to a field. In the ‘Connected to’ dropdown, you will find all the core fields of WooCommerce listed. For example, if you are adding a ‘textarea’ for postcode, you can choose ‘billing_postcode‘ as the connected core field.
On the other hand if you are creating a custom field, for example a radio button asking for special packaging, you can choose the Custom field option from the dropdown.
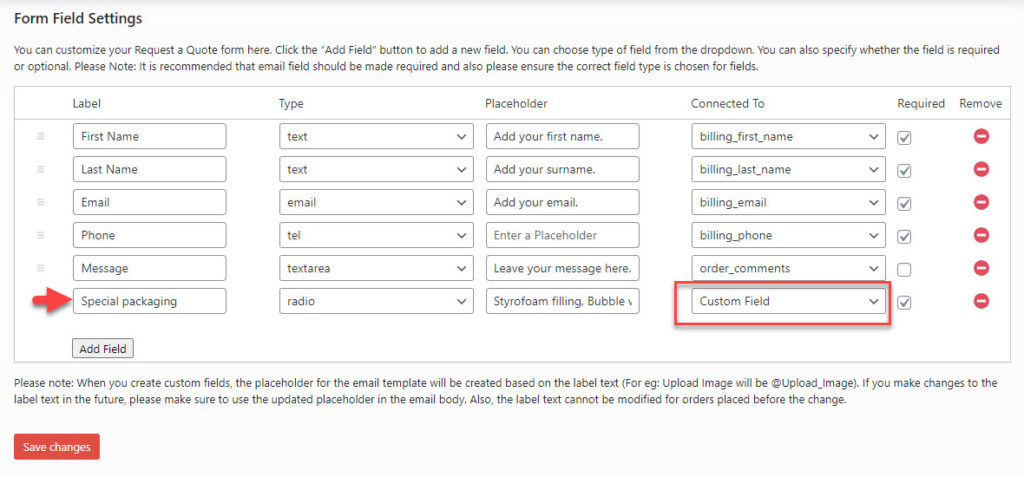
You can also choose to make each of the fields you add to the form ‘required’ or ‘optional’ by ticking the checkbox.
On the form settings page, you can also do the following:
- Redirect customers after submitting a quote to a specific url, which you can add on this page.
- Add a custom message to be displayed after the quote is submitted successfully.

Additional customization options
With this plugin, you can also add other features to make the customer experience seamless. Here is a quick look at those fetures:
- Configure automated notifications for customers and store owners based on different quote request statuses. There is an option for setting up Email notifications for customers and store admin when a quote is requested, approved or rejected.
- For store admin, SMS and Google Chat options are available in addition to email notifications.
- Notification templates can be customized using dynamic placeholders unique to the fields in the quote request form.
- Hide Add to Cart button on the Shop page and/or individual Product pages.
- Hide product price.
- Apply the settings to hide Add to Cart button and product price only to specific user roles.
- Display customizable mini cart icon on your store’s frontend.
We hope this article helped you easily integrate and customize request a quote form on your WooCommerce store. Please leave us a comment if you have any queries on the matter.


")
")
")