
Last updated - July 8, 2021
Just a few years ago, the process of building a website looked vastly different. You would have had to make changes to the code, update the website, and view it on the live website to see if the changes had taken place.
But today, you have the option to build your website visually. The process looks exactly like the result, so what you see is what you get. This is made possible by page builders that simplify the process and make it accessible to everyone.
Elementor is easily one of the best page builders out there. With more 5 million active installations and a near-perfect 5-star rating, you know you can rely on it to make good-looking web pages easily.
So today, we’ll explore the basics of Elementor and even use it to build some pages for our website. Stick around.
Installing and Setting Up Elementor
We’ll start by installing the free Elementor plugin from the WordPress repository. After activating it, click “Settings” to set it up. Under the General section, you can select the post types that can be edited with Elementor. You can also disable Elementor’s default colours and fonts to force it to inherit colours from your existing theme.
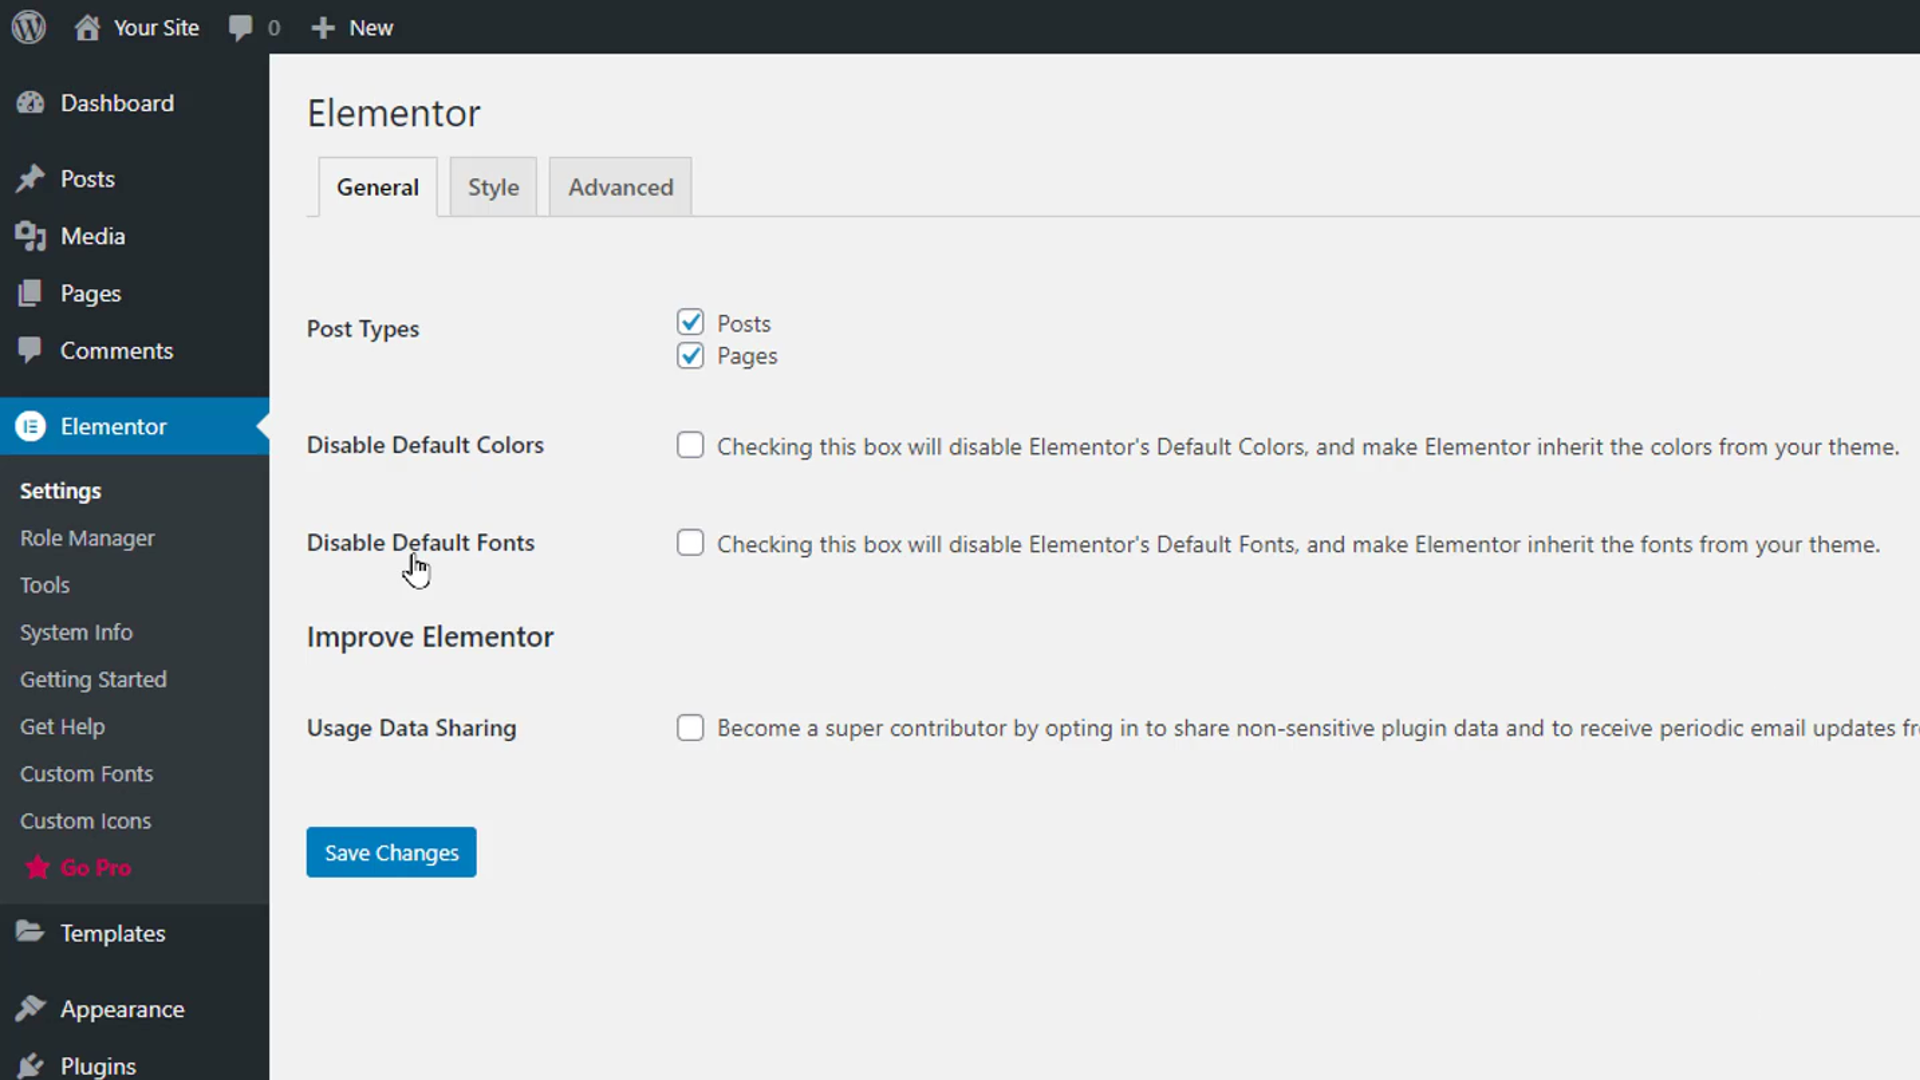
Below, you can enable data sharing with Elementor. In the Advanced section, you can manage CSS Print Method, Switch Editor Loader Method, and other settings that are focused on Developers.
In the Role Manager section, you can choose which roles on your websites can edit using Elementor. For example, if we enable the No access to editor option for the Contributor role, anybody contributing to your website won’t be able to use the Elementor editor. The Tools section has options like Library Syncing, Safe Mode, Update Site Address, Rollback version, Beta Testing, and Maintenance Mode.
The System Info section displays information about your website’s system and WordPress environments. While the Getting Started and Get Help sections can be used for accessing guides and assistance.
Getting Familiar with the Elementor Page Builder Layout
Let’s start building a page with Elementor. Hover over the Pages section in the WordPress admin area and click Add New. Give the page a title and click the “Edit with Elementor” button at the top.
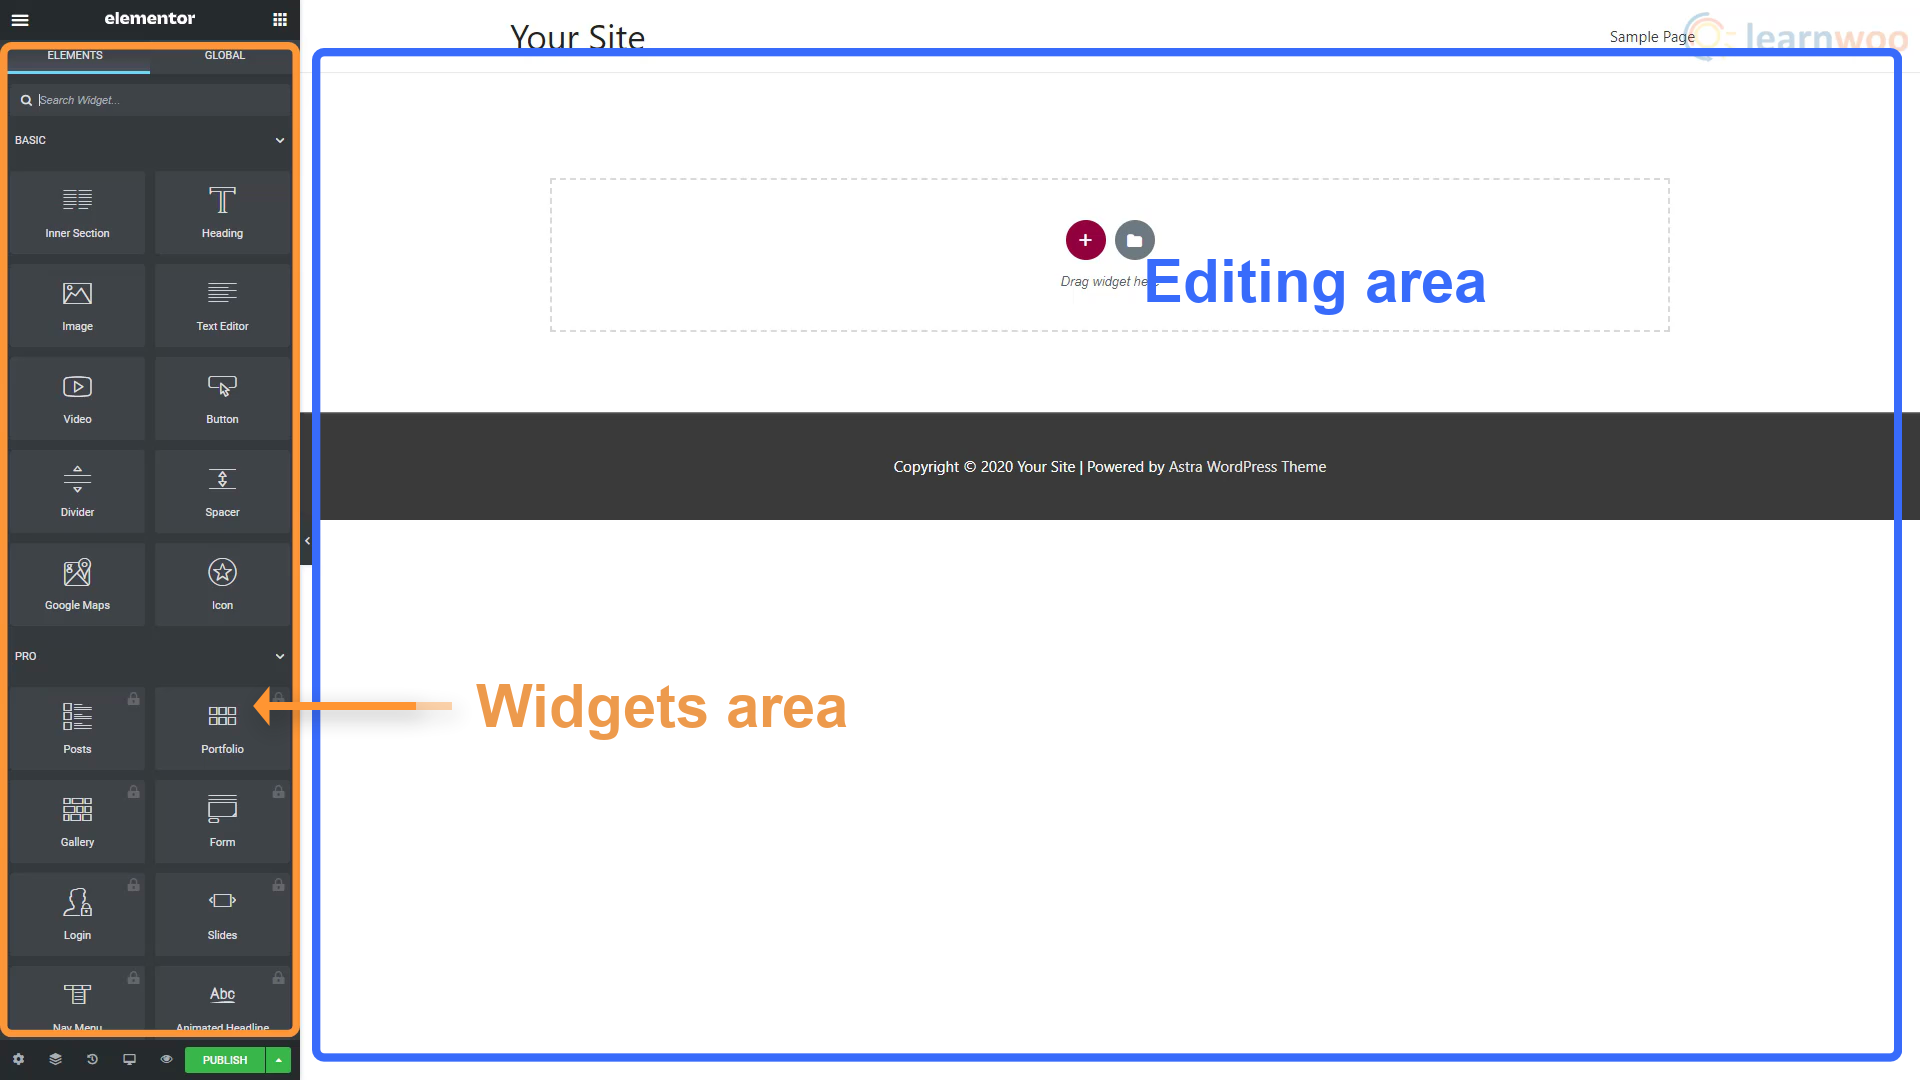
The Elementor Page Builder screen will open up with the editing area and the widgets area. In the editing area, you can add and edit the widgets visually. The Widgets area is where you can drag from and use different types of widgets like text sections, headings, images, videos, and buttons. Below the widgets area, you’ll see 4 options. The first option is the Settings button to access the overall page settings.
In the page settings, we can change the title and status of the page, set a featured image, hide the title, and select a page layout. In the Style tab, you can set a Background for your overall page. We can choose from a single-colour background, a static image background, or a gradient background. The Advanced section has a Custom CSS feature to let you add CSS code to any widget.
The option next to page settings in the bottom left is the Navigator. It shows the different types of elements we’ve used on the page and helps you find and edit them easily. Besides that, the History option shows us the past actions and revisions made on this page so we easily fix our mistakes.
The Responsive mode option gives us three choices. Desktop, Tablet, and Mobile. You can use them to make sure your website looks and works just as well on all screens. The Preview option lets you see how the live page would look without having to publish the page.
Above the Widgets area are two buttons. The Hamburger menu takes us to some more settings and navigation options. Click “Site Settings”. In the first two settings, you can set global colours and fonts to use for all new elements. You should set your brand’s colours and fonts here so that they’re easy to use.
In the theme style section, you can set the default settings for headings, buttons, images, and form fields. Finally, the Settings section gives you some more options for site identity, background, layout, and other settings.
When you’re done, head back to the widgets area.
Building a Page with Elementor
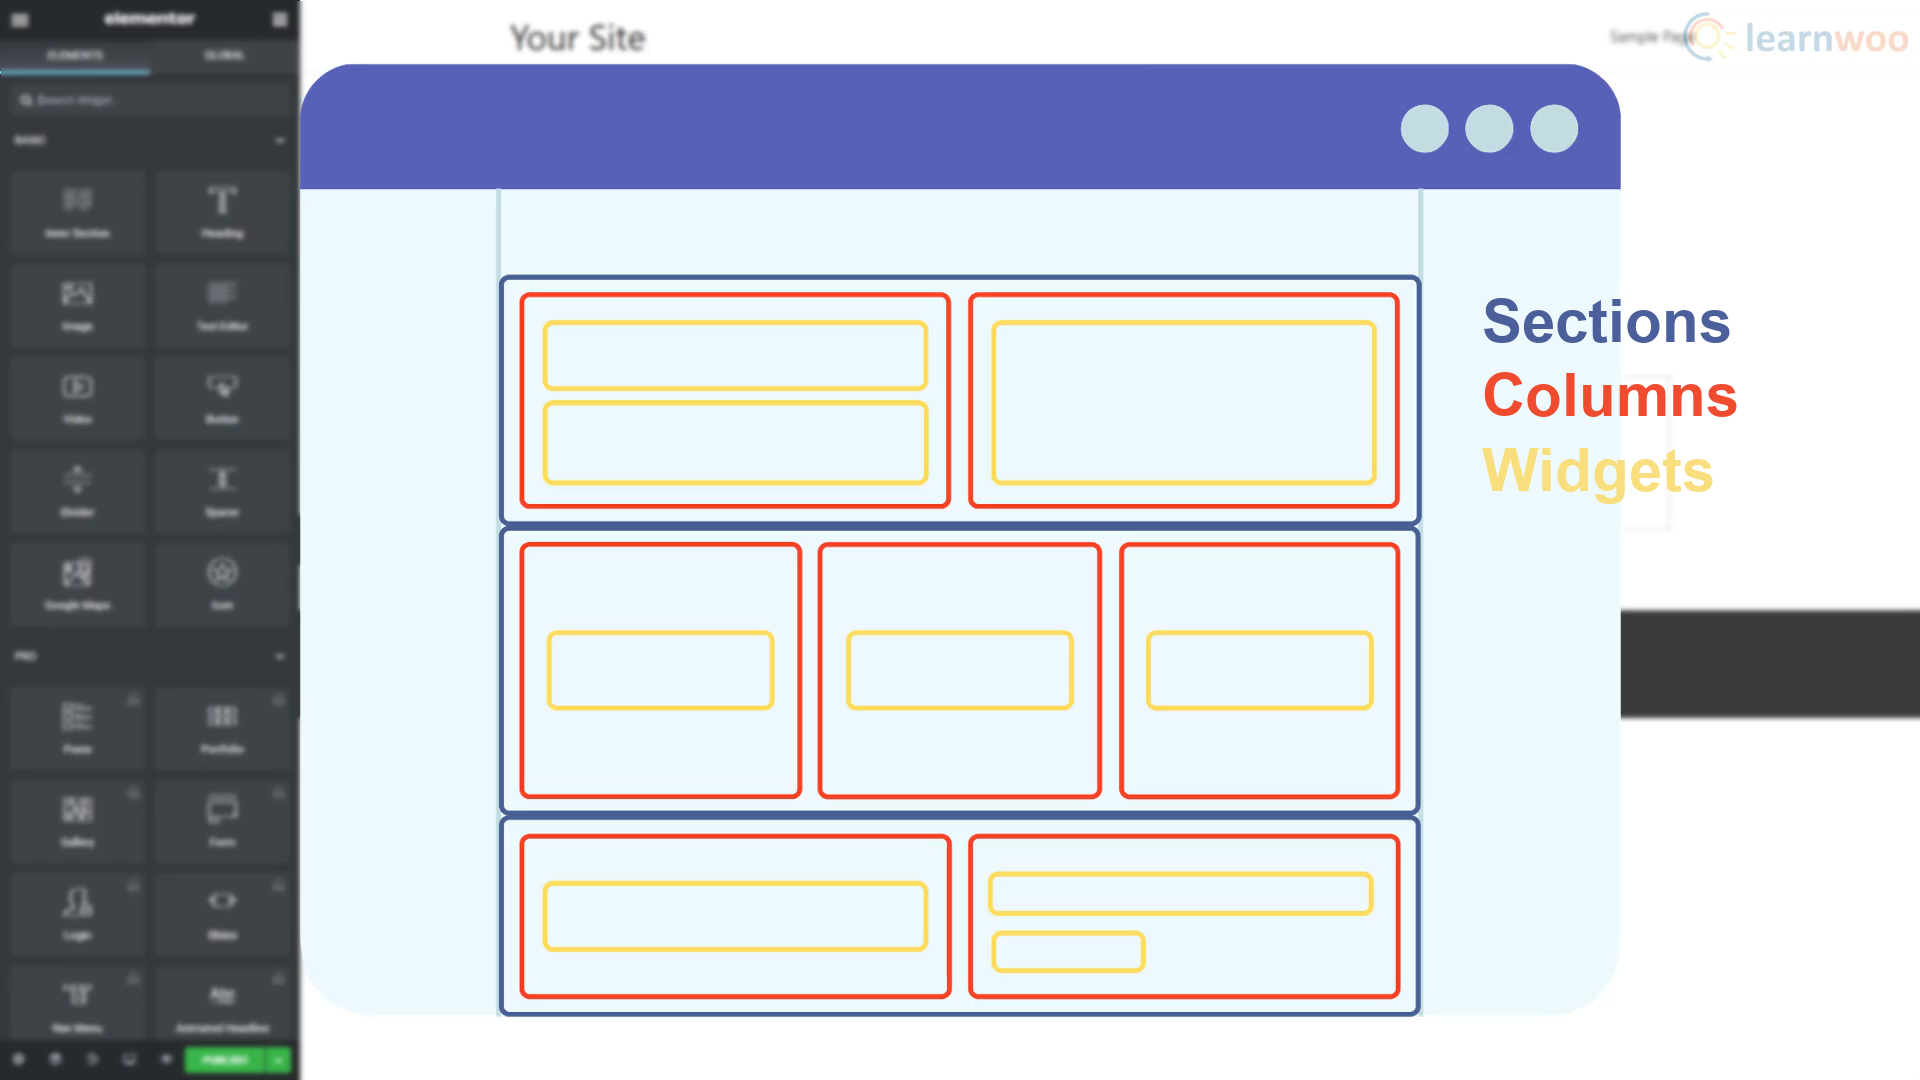
A typical Elementor page is made up of several sections arranged vertically. These sections are made up of columns, and these columns can have multiple widgets inside them.
To start building your page, click the plus icon and select the structure of the section you want. With the entire section selected, you can now customize it. In the layout part of the edit section, we can determine the layout parameters like width, gap, height, and vertical align. In the Style tab, we can add different types of backgrounds like classic, gradient, video, and slideshow.
You can also add a background overlay, border, shape divider, and typography settings. The Advanced section gives you margin and padding settings, motion effects, responsive options, Attributes, and Custom CSS features.

When you’ve set up your columns, you can add widgets to them by dragging and dropping from the widgets area. Each widget will further have its own layout, style, and advanced tabs to edit it accordingly.
For example, if you want to add an image in a column, drag and drop the image widget. We can customize the image using its three tabs. Click the Choose image option and upload the image from your computer. Next, go to the Style tab and change the width and height settings for the image.
Similarly, you can add and edit a text block in Elementor. You can then play around in the Typography options under the Style section until we find something you like.
Apart from adding sections, columns, and widgets to build our blog, you can also use templates to speed up the process.
To build a new page using block templates, click the folder icon. Then, at the top, switch over to the Blocks section. Use the search bar to look for the block you need. Browse the results to see which one you like. Then, click the Insert button below it to bring it over to your page.
You’ll get a prompt to connect your website to the Elementor Template Library. If you don’t have an account already, you can create one with your email and a new password. When you click Connect, the selected template will be imported to the page.
After importing, you can easily edit the elements to make it your own. Similarly, you can add and edit other blocks to complete your page.
Instead of individual blocks, you can also import entire page templates. Click the folder icon and go to the Pages section at the top. Use the search bar to find the type of page you want. Then browse the results and import one.

After importing the page, you can edit the content to make it your own.

With these features, you can build a good-looking website easily. If you want to make the process even easier, you can check out Elementor Pro. With a premium plan, you’ll get access to many more widgets, templates, and integrations. And you can even add custom fonts and global widgets.
If you prefer a video version, here is a video:


")
")
")