")
A quality online store requires having a well-organized way of categorizing products. Product filters and sorting options are great tools to make the search more efficient and user-friendly. In this post, you’ll find a short explanation of what sorting and filtering are, the ways you can choose to add store filters, as well as detailed instructions and tips on how to add a product filter in Shopify.
Online Store Filters: What and Why
The primary goal of store filters is to facilitate a product search for customers. The more products and variations a store has, the better the organization should be. Creating and adding product filters lets online store visitors limit their search and find necessary items faster which translates to increased chances of making sales.
Shopify is a powerful eCommerce platform that lets you add various filtering and sorting options to your products. Let’s explore how they work.
Sorting vs Filtering
Sorting is a built-in function that allows customers to display goods in a certain order according to the chosen criterion, for instance, from the lowest to the highest price. Another common sorting option is displaying the products alphabetically, from A to Z or from Z to A. Sorting doesn’t limit the number of goods that people see as it only changes their order.
Filtering, as opposed to sorting, lets people see items that meet specific criteria. Any remaining products that don’t correspond to the selected options are not displayed.
Sorting and filtering complement each other and improve the user experience which simply means that setting up sorting and filtering options the right way is a smart investment in a successful sales strategy.
You can trust Shopify professionals to build out an intuitive store layout, implement product filters, and customize solutions according to your store’s needs. Alternatively, you can create and apply Shopify filters yourself.
Shopify Product Filter Implementation: Professional Services
The main advantage of professional Shopify development services is that they provide you with the necessary store functionality alongside layout customizations. The main advantages of professional services are the following.
- They are time-efficient. You don’t need to spend time choosing the necessary Shopify Apps that will suit your store the best. Professional developers who have worked on numerous projects will be more than happy to advise you. Similarly, you can save time on creating and applying filters.
- You can get custom solutions. If the way you envision your product organization and filtering differs from the standard approach, professional services will be beneficial. This allows you to break away from the theme’s limited settings. Additionally, your unique store’s layout will represent your vision and meet clients’ needs.
Let’s have a look at some examples of Shopify custom solutions. In the case of ABV’s website, which was implemented by PSD2HTML.com, you see an animated product selection menu. This wine store’s custom menu allows people to narrow down their search and get to the desired collections much faster. Without making extra clicks and using the hovering function over the necessary category, you are quickly presented with multiple options in order to make your choice.
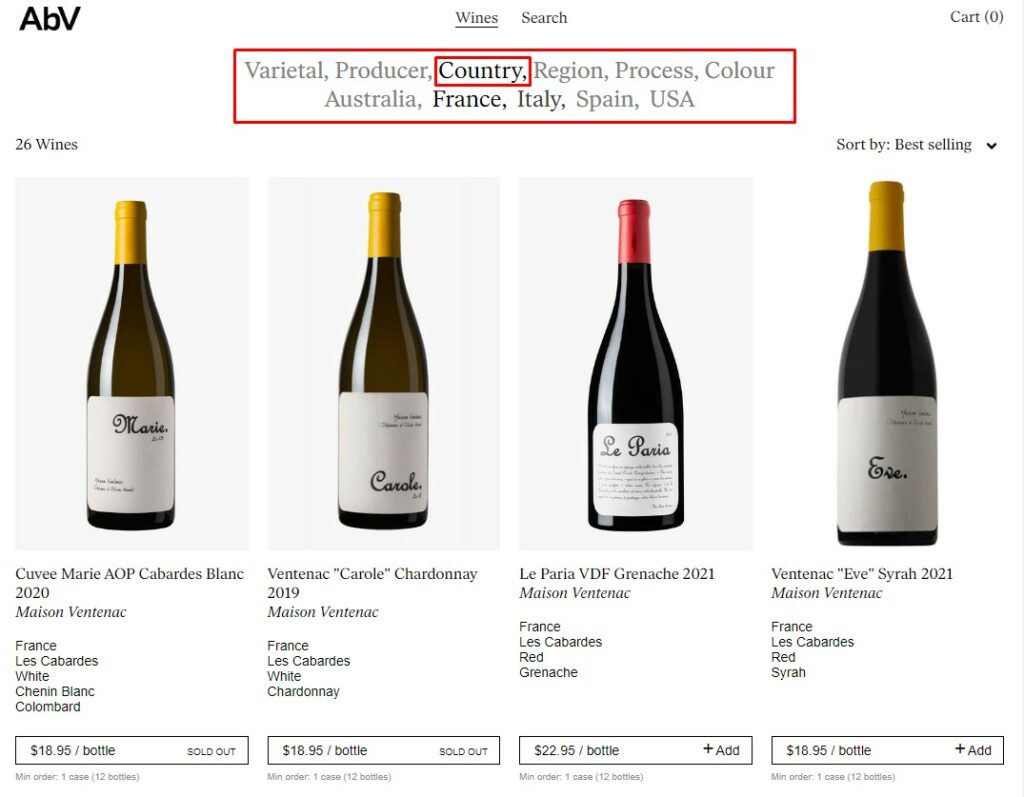
The screenshot above shows that the animated menu lets you choose wines by producer, country, region, process, or color. There’s also a list of other options to select from. The built-in animation saves time so the process is much faster than clicking on the filters.
Another nice example of filtering and sorting is the case of a jewelry brand website Young In The Mountains. With a professional product filter Shopify customization setup, the brand got a unique Product Customizer solution to create personalized jewelry. This solution is complemented by expert customization of the Product Filter & Search app’s display. As a result, website visitors can clearly see all the sorting options.
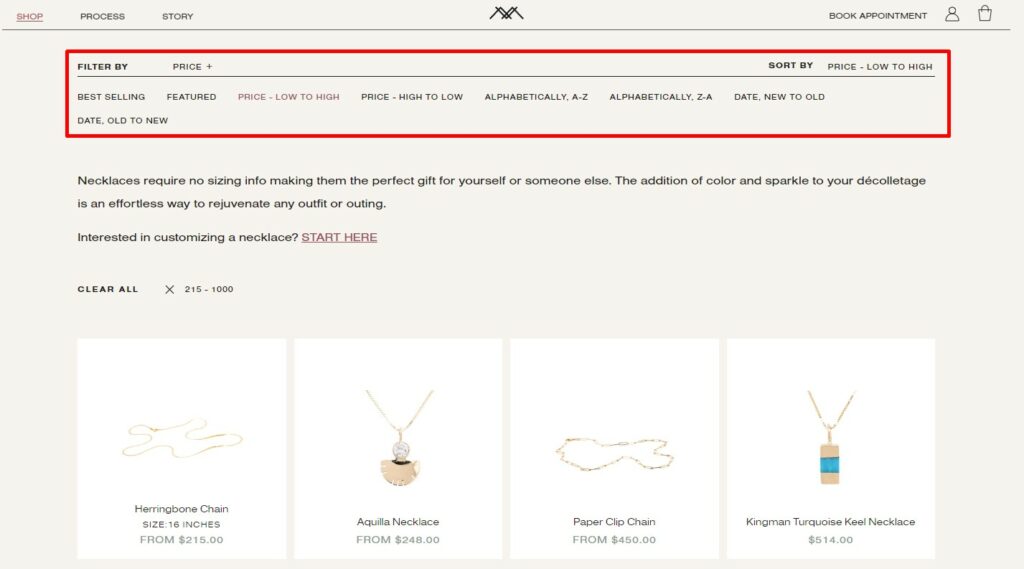
They can also filter products by setting the desired price range of their jewelry.

This minimalistic design implemented by professionals lets customers navigate through the website easily and find relevant jewelry.
How to Add a Product Filter in Shopify Yourself: Step by Step Instructions
If you don’t need professional assistance or custom solutions, you can add filtering options to the store on your own. Here’s how it is done.
1. Check Your Theme’s Filter Availability
Before organizing products and adding filters, it’s vital to ensure that your Shopify theme supports product filters. To do this, go to your Online Store admin panel section and choose Navigation.
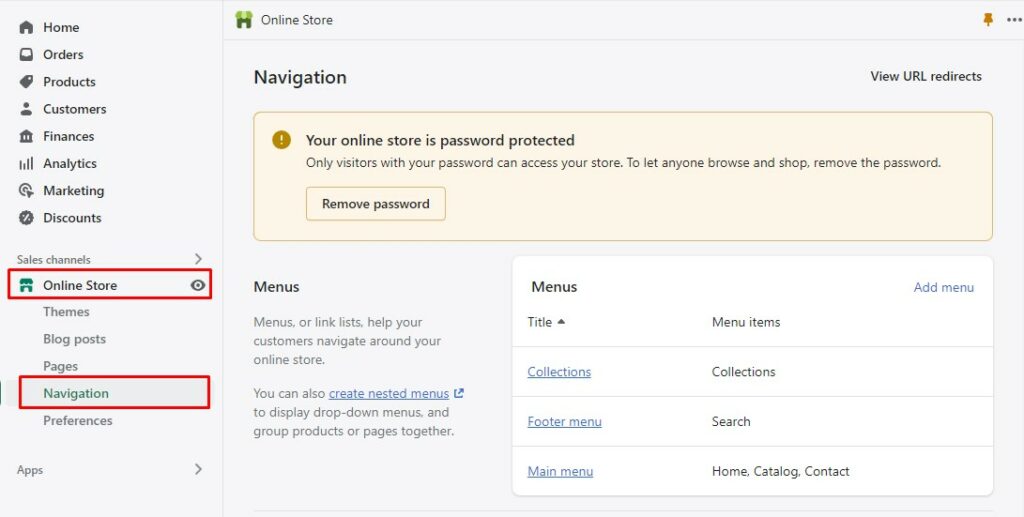
Here, you’ll find two sections: Menus and Collections and search filters (you may need to scroll the page down to see the Collections and search filters section). If your theme doesn’t support filters, you’ll see a notification about this in the Collections and search filters (as shown on the screenshot below).
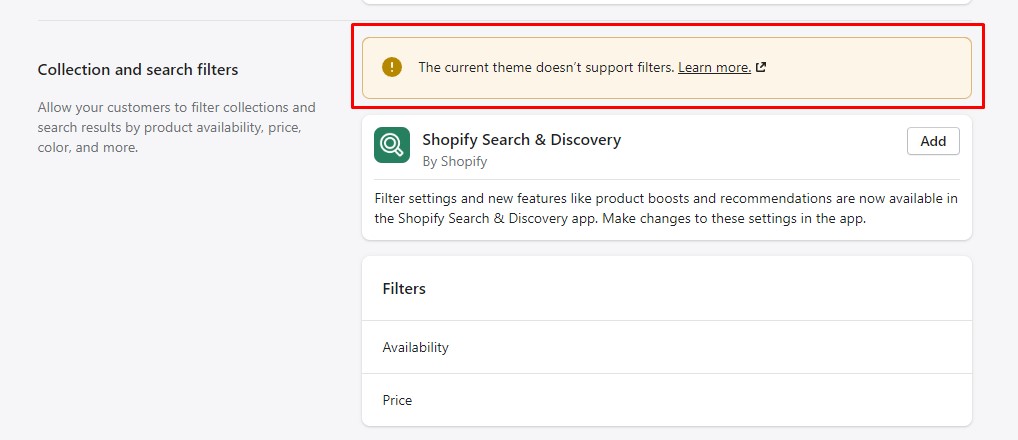
If you see the notification, then you won’t see the filters on your storefront. That means it’s better to select a theme that supports filters.
2. Enable Filters in Navigation
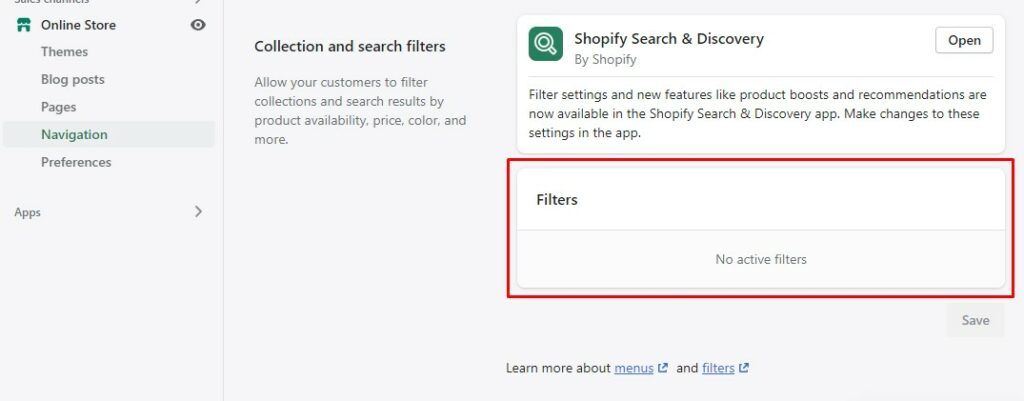
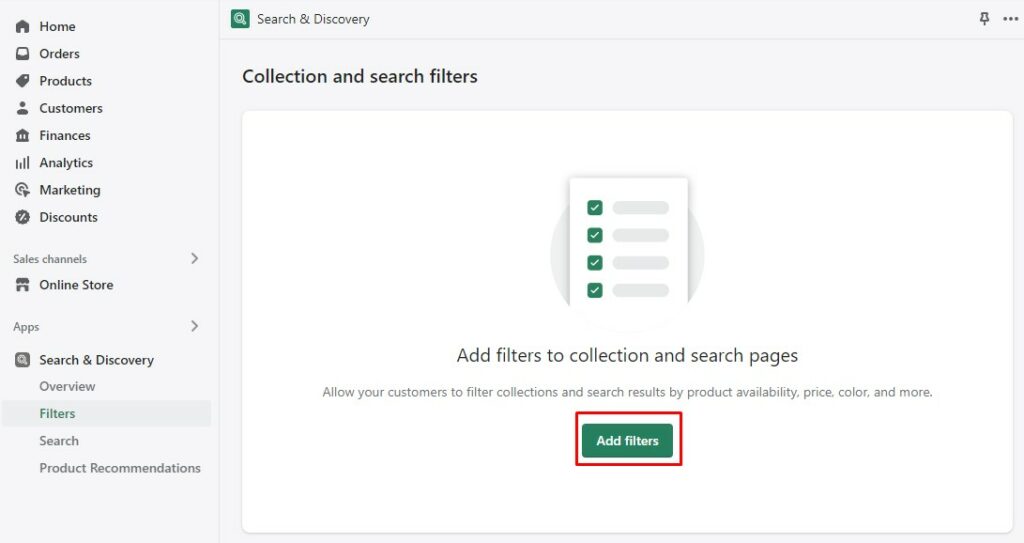
Shopify Search & Discovery is a free Shopify filter app that lets you add and manage various filters for products, product variants, and collections. After you add this app, you can enable or disable the necessary filters. If there are no active filters, i.e. no filters are enabled (as shown in the screenshot below), you won’t see them on your storefront.
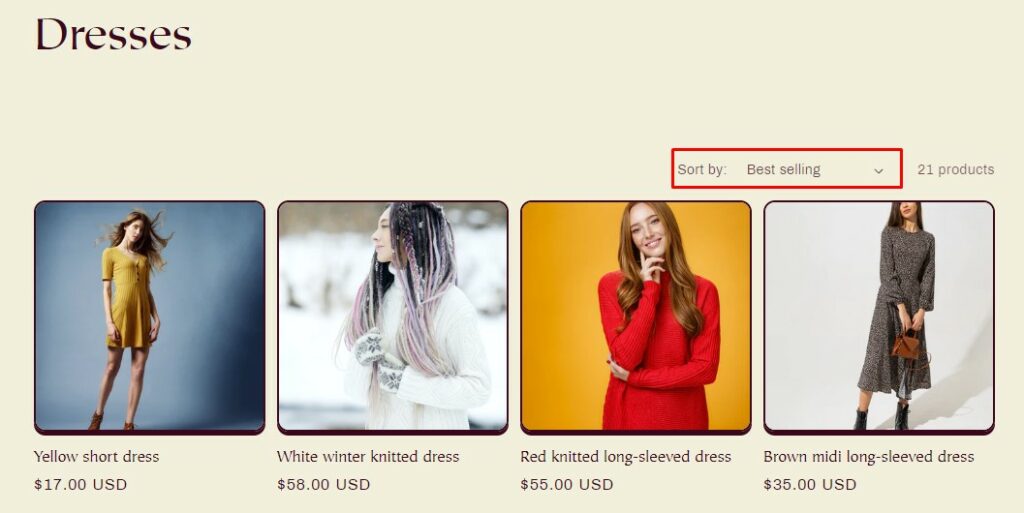
Your storefront will likely have sorting options but no filtering (as shown below).
When you open the Shopify Search and Discovery app, you should go to ‘View filters’.
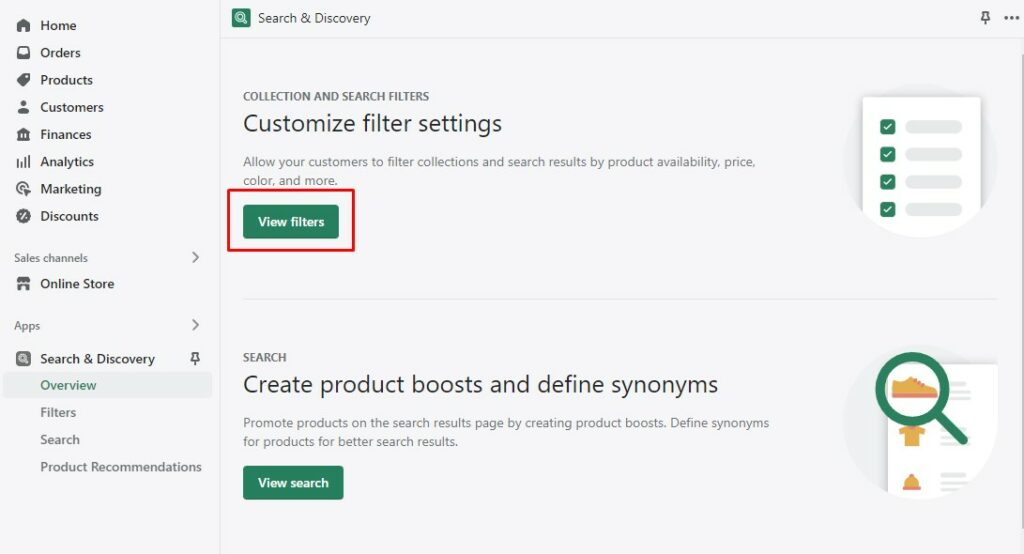
From here you can add up to 24 filters to your store.
The default product Shopify filters are: Availability, Price, Product Type, and Vendor (Brand).
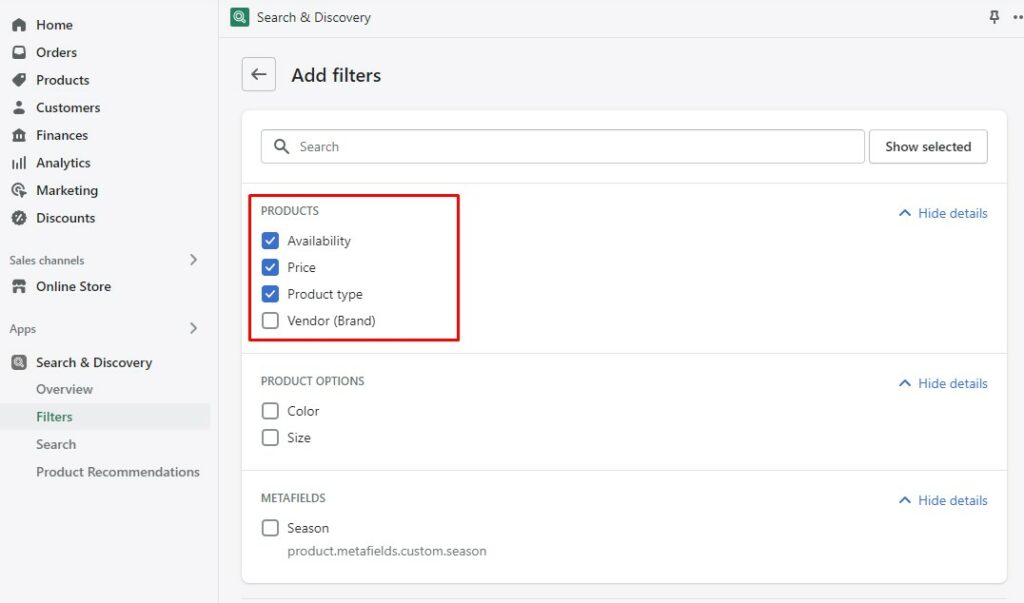
If you have already modified your products and created product variants (such as size variations, for instance), you’ll see these filters in the Product Options section. You can enable the necessary filters too. After saving your preferences, your Search and Discovery filters page will display them.

Your storefront will also display the filters now.
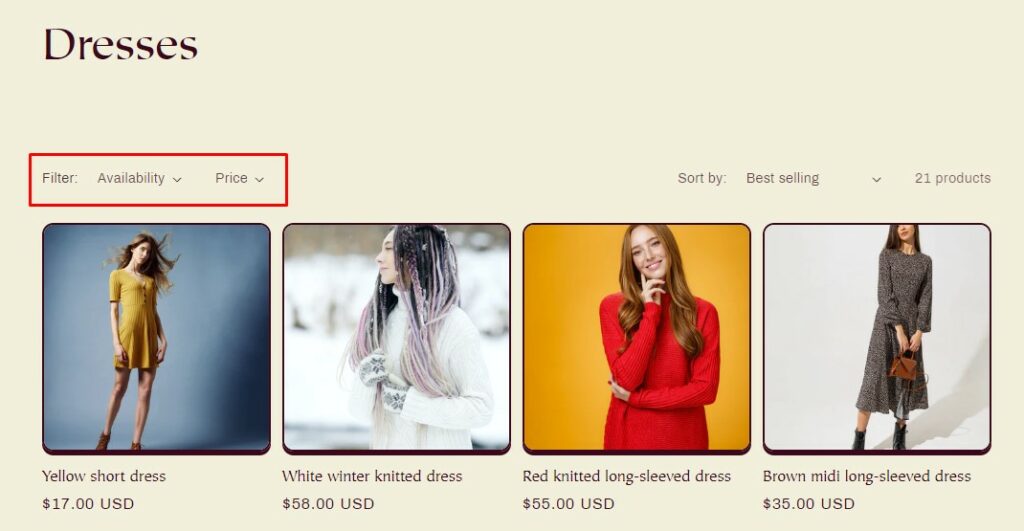
You have probably noticed that we have enabled three filters (Availability, Price, and Product Type). Yet, only two of them are visible on the storefront (Availability and Price).
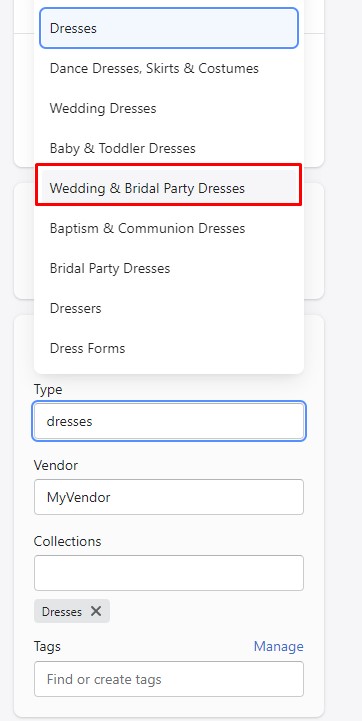
To make sure that the Product Type filter is also visible on the storefront, you should go to product options and assign the necessary product type to each one.
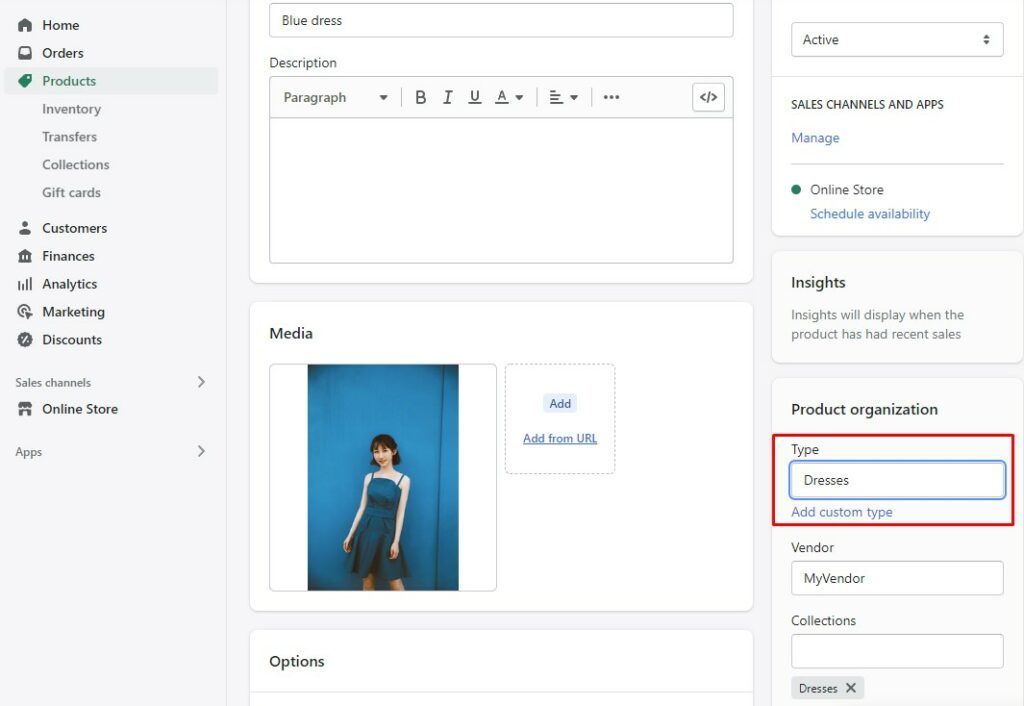
You can choose from a list of standard options or create your custom type. As an example, we have assigned the type “Dresses” to one product and the type “Wedding & Bridal Party Dresses” to another one; both types are found in the standard list.
As a result, the storefront will display this filter and available options, too.

3. Add Custom Filters
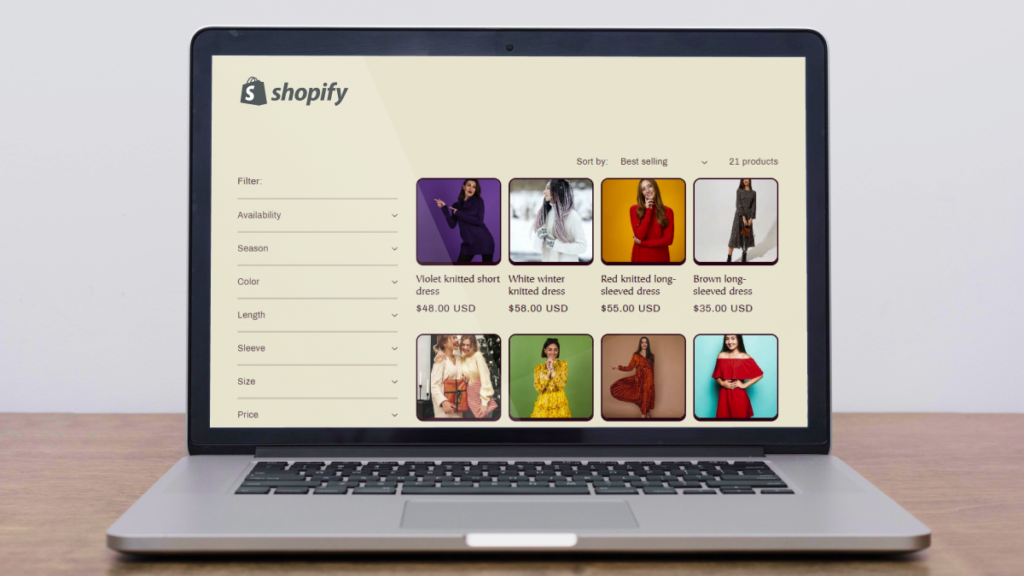
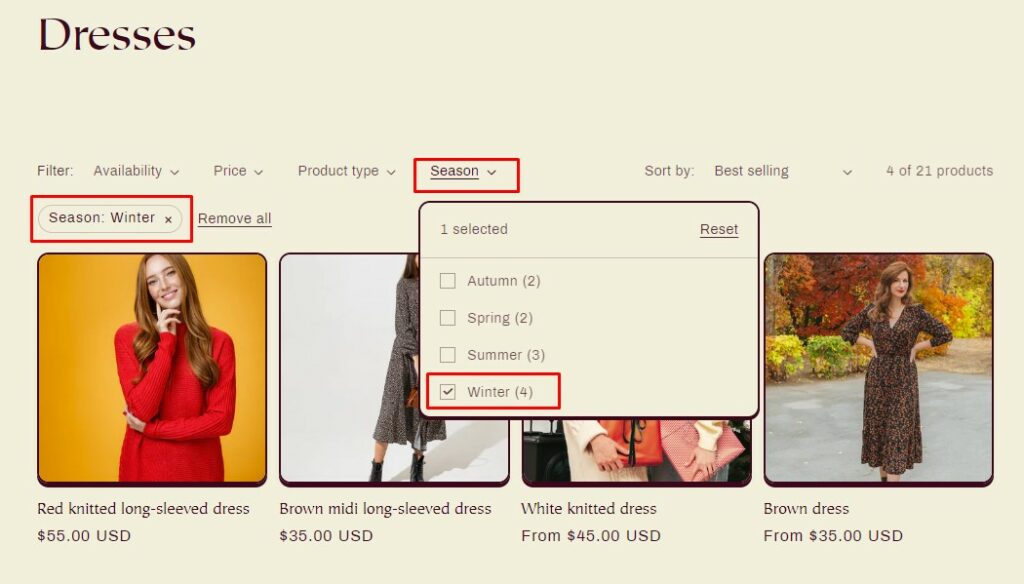
Most likely, you have already figured out that filtering products only by availability, price, and product type are not efficient. If customers are browsing the Dresses collection, they may wish to see dresses according to the season (summer/spring or autumn/winter, for instance). In summer dresses, for example, there can be a dozen other options, such as color, length, sleeve type, fit, pattern, material, etc. In this case, custom filters are a perfect solution.
If you need to create custom filters, you’ll have to work with meta fields. To make this easier to understand, we’ll start with adding one custom filter/meta field – season.
Create Metafields to Use in Filters
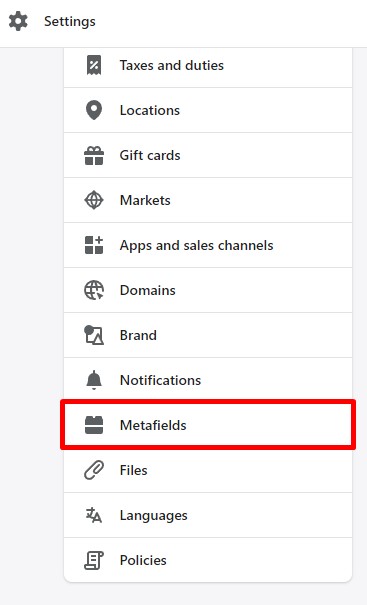
To create metafields and use them as custom filters, you need to go to the store settings (which you can find at the bottom of your admin panel).

Then scroll down to find metafields.
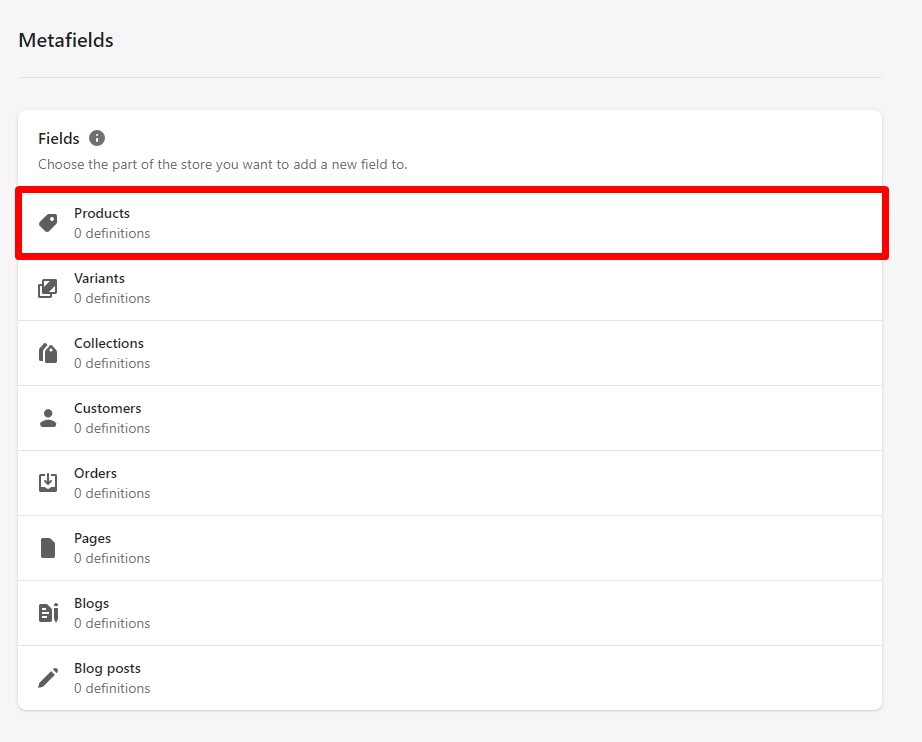
The next step is to choose which part of the store you want to modify with metafields. In our case, we’ll apply metafields to products.
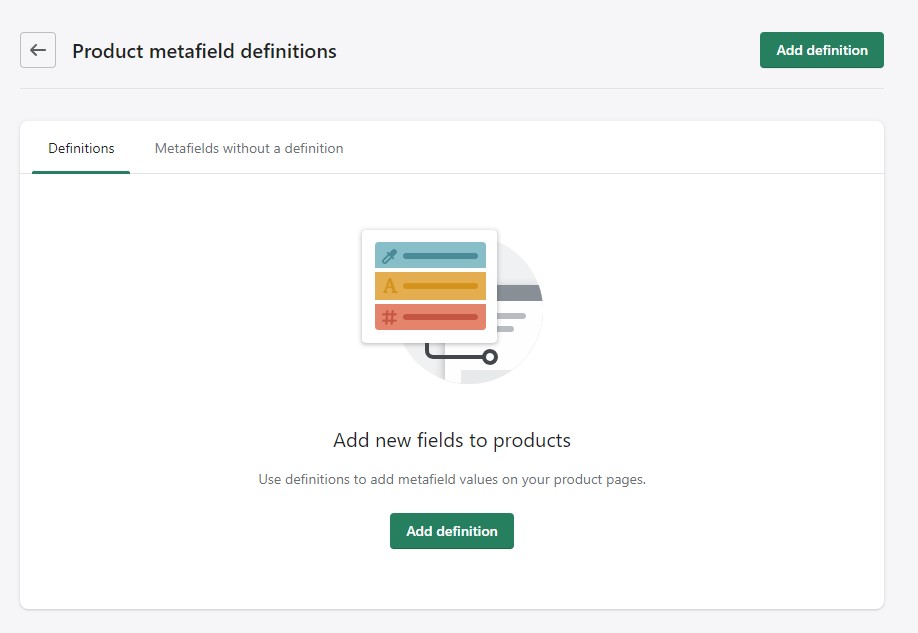
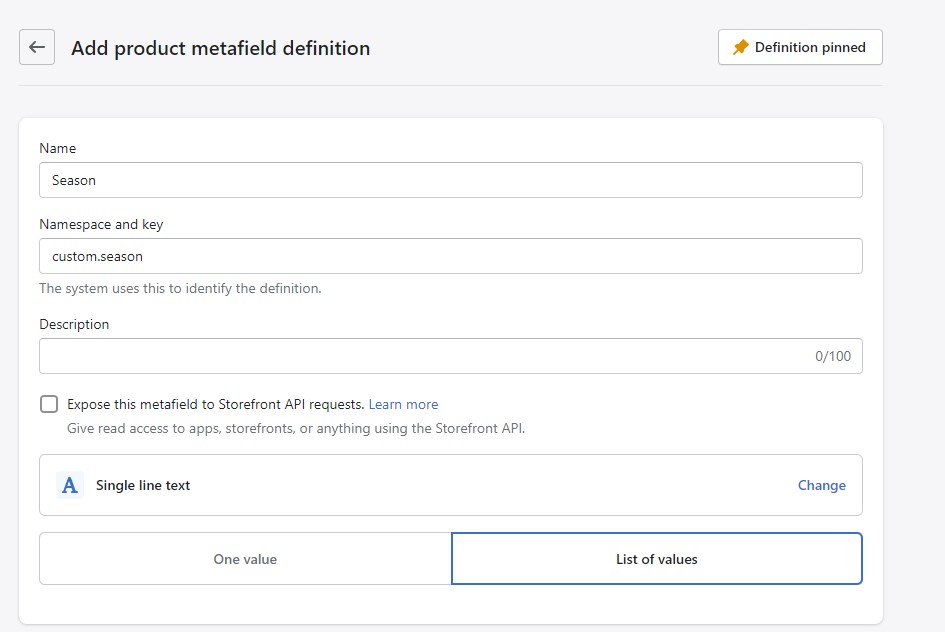
Click “Add definition” to start editing your metafield.
Here you can write a suitable name for the filter, add a description (optional) and choose the metafield’s content type. Regarding the fact that the same dress can be worn in spring and summer, or autumn and winter, we’ll choose the content type “Single line text” with the option “list of values”. Metafield lists allow you to add multiple values/parameters to a single product if you want it to be displayed for several criteria (such as a dress that fits both spring and summer).
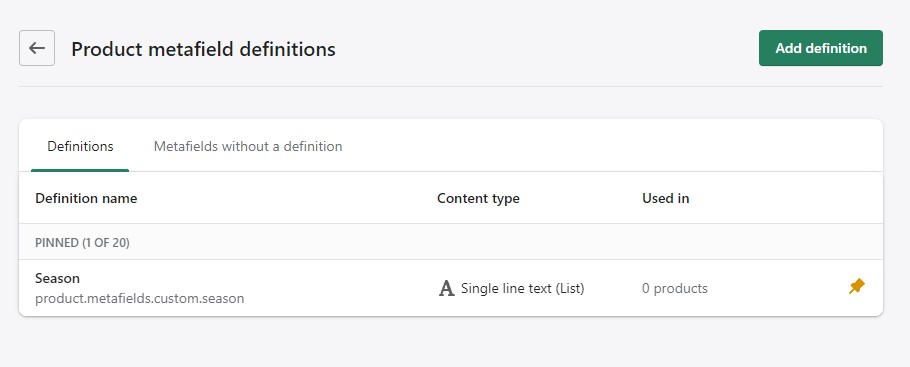
After saving the metafield, you’ll see it in the list of your product metafields.
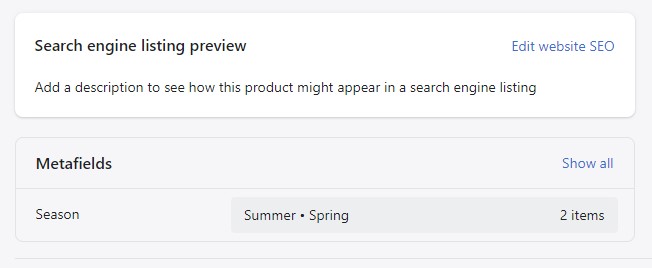
Edit Product Metafields
You can then start modifying your products. You’ll see the metafield in product settings and enter the necessary parameters.
Update Your Filters
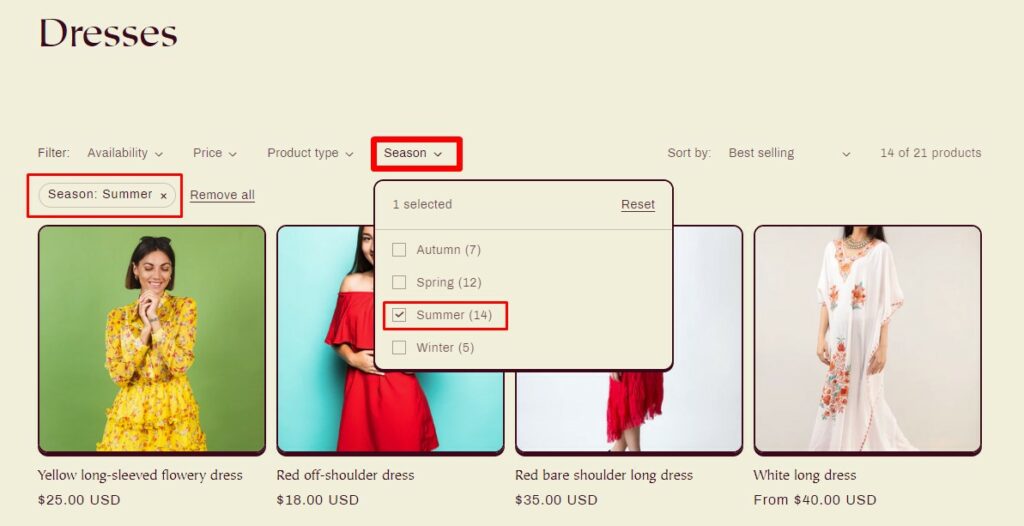
When you have finished, remember to activate the metafield in the list of filters and save the settings.

As a result, you’ll see the filter on your storefront where you can check it, applying the options.
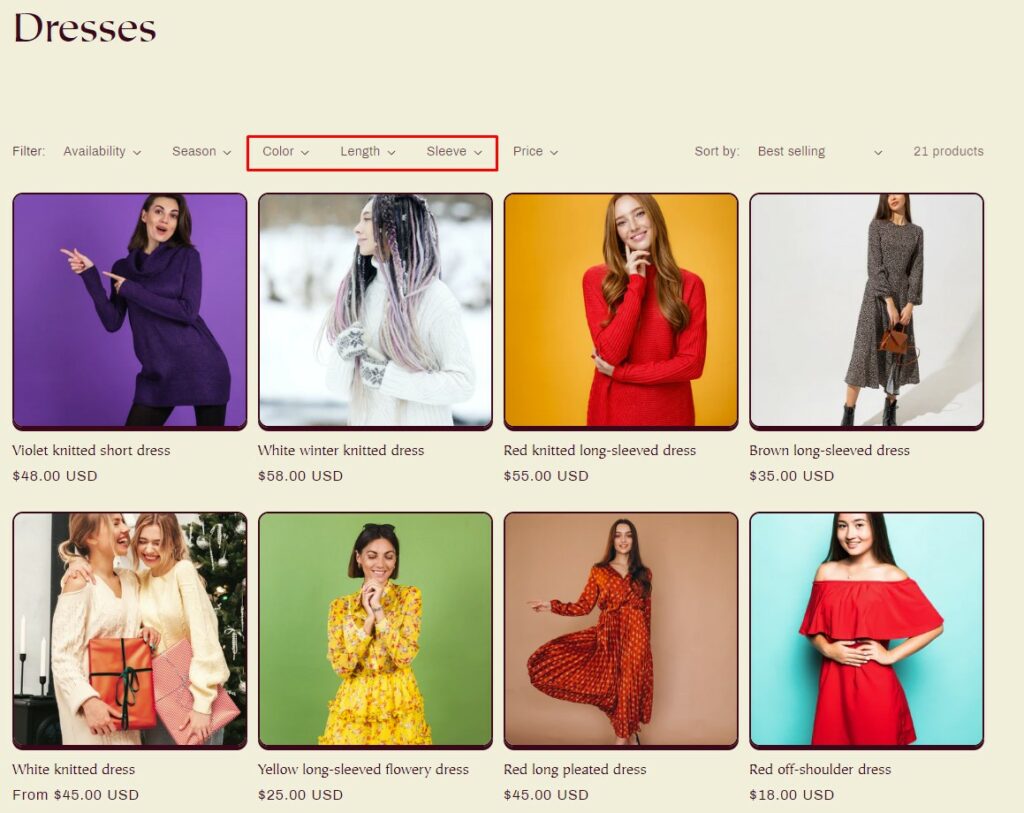
If necessary, you can add other metafields to cover available product variability. In the screenshot below, you can see that we have included such filters as Color, Length, and Sleeve to the right of the Season filter.
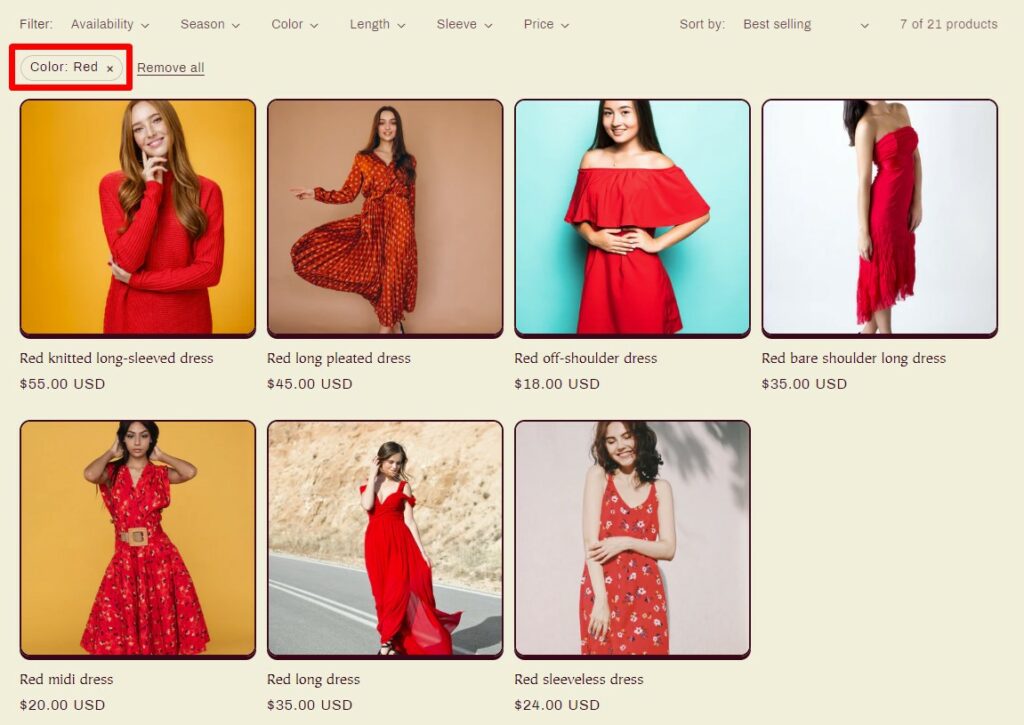
This way customers can apply only one filter and select just red dresses for instance.
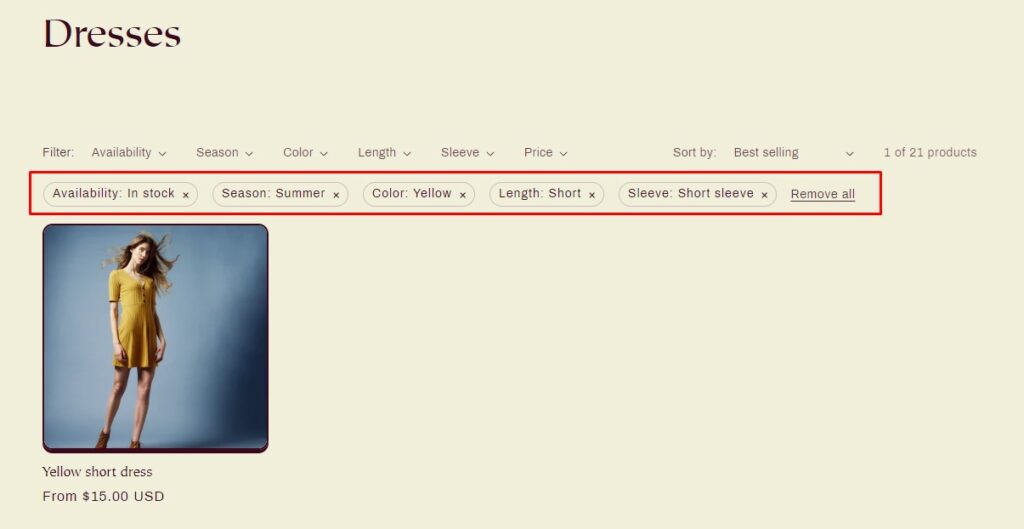
They may also have a very specific request, such as “a short yellow summer short-sleeved dress that is in stock”, and use all filters, both standard and custom ones.
It’s also possible to extend the sorting criteria and add such filters as Fit, Pattern, Material, Style, etc. Furthermore, different product categories can require different filters. You won’t need a Sleeve filter for jeans for instance.
Modify Storefront Look of Filters
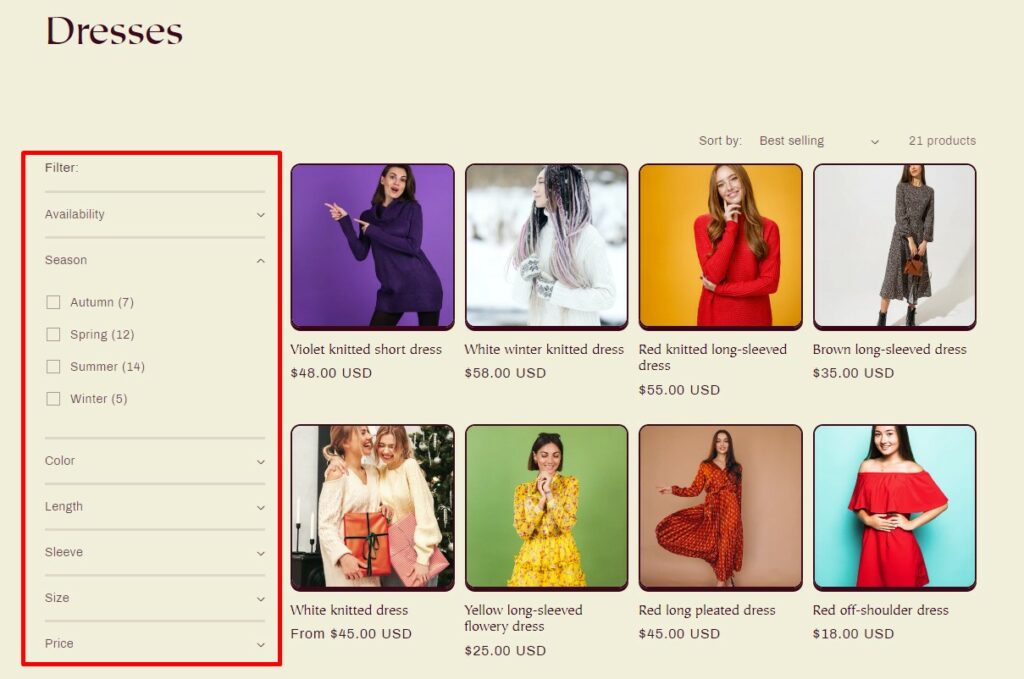
Depending on your theme options, you can change the storefront filter look. In previous examples, we had a horizontal filter alignment. If you edit your collection page, there’s the possibility to apply a vertical alignment.
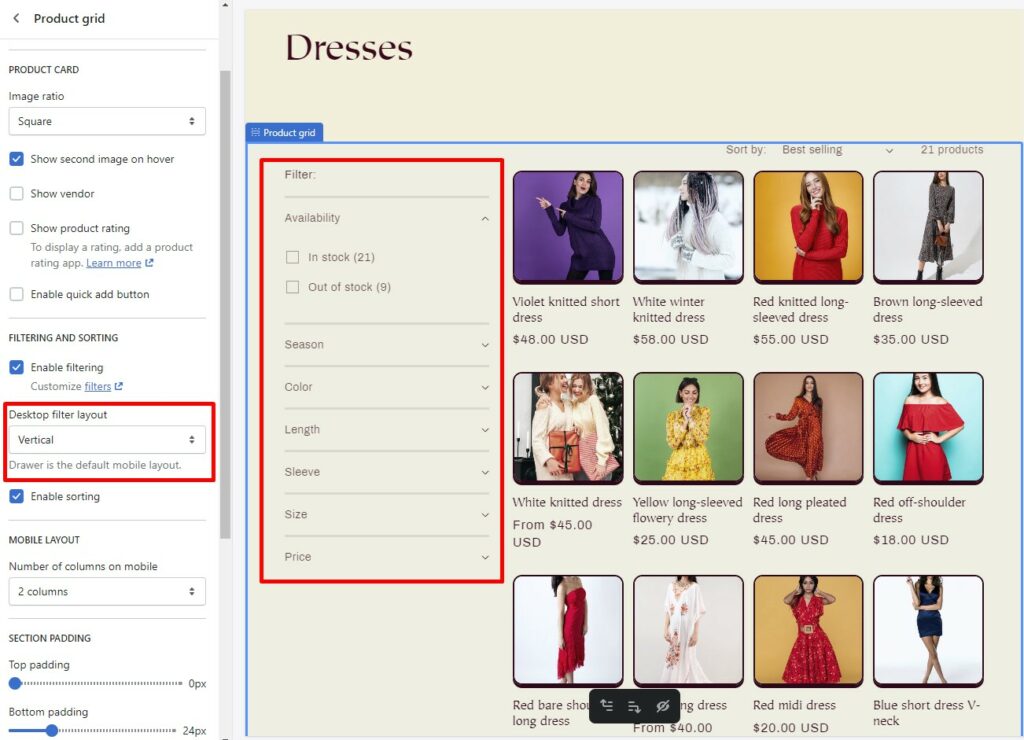
The filters will look like this on the storefront:
Shopify Filter Implementation Tips
Here is some useful advice that you should bear in mind when creating your filters.
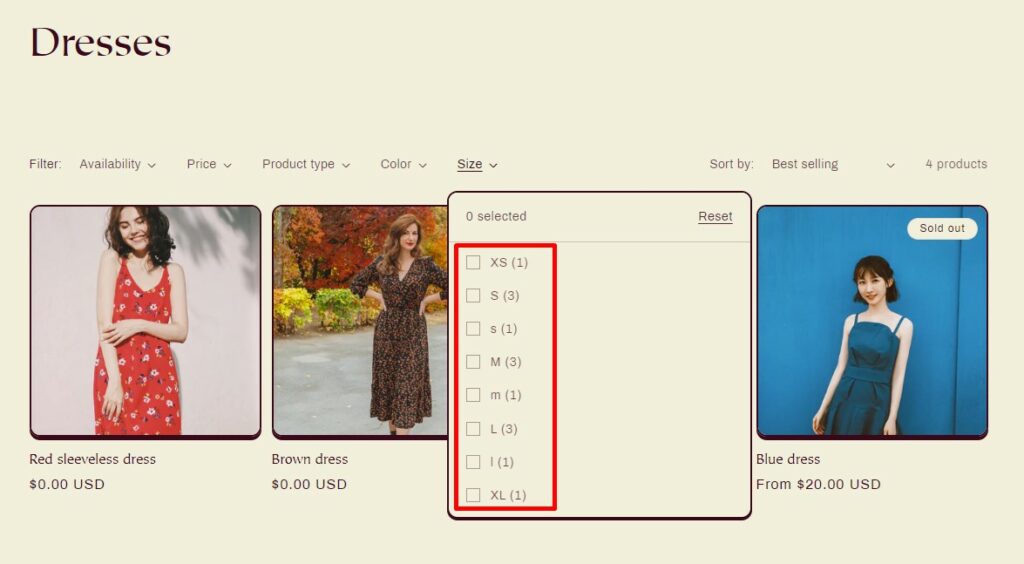
1. Double-Check Your Names
You should remember that filters are case-sensitive, so when you write “s” and “S” in the Size filter, Shopify will display them as multiple options (as shown in the screenshot below).
Similarly, “Short”, “Short sleeve”, “Short Sleeve”, and “Short-sleeved” can all turn out to be different options in the Sleeve filter, although they should refer to the same dress type.
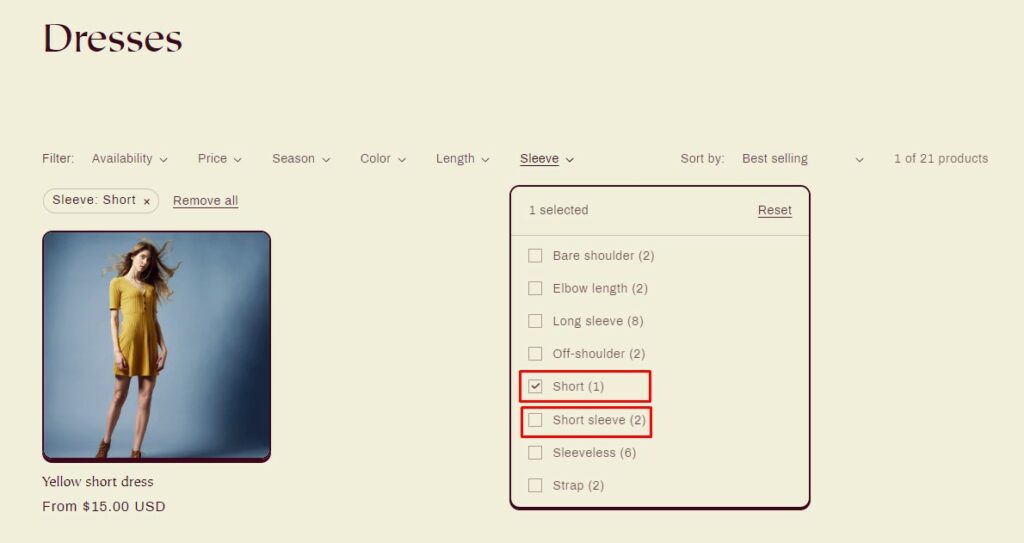
Remember to follow the chosen filter names everywhere and check your collections carefully.
2. Brainstorm Variations
“Bare shoulder”, “off-shoulder” and “cold shoulder” can all be various names for the same dress type but don’t forget to be consistent. Choose one name that you prefer and use it in your store. If you use the Search & Discovery App that we mentioned, you can define product synonyms and help customers find necessary products. This will also help search engines display relevant products matching shoppers’ queries.
3. Don’t Overdo It
The desire to implement a thorough search for your customers may lead to the creation of a multitude of filters. However, an enormous amount of filters is not always the best choice for the user experience. It can be frustrating spending several minutes trying to sort through multiple filters and any options attached to them.
Conclusion
To sum it up, product filters are essential for online stores with a large number of items. You should think about your product organization well in advance to know which filters are necessary to limit the search. Shopify allows you to apply default filters and create custom ones. At the same time, you should remember not to include too many filters as they may confuse users.


")
")
")