
Last updated - February 24, 2020
Adding a product slider on your eCommerce store can be one of the best strategies to improve conversion rate. It lets you highlight the cool images of your Woo products in a beautiful slideshow. This will increase the visibility of the products on the website to gain more impression and click through rate. High click-through rate means there are more chances of converting your audience into potential leads.
By default, many WooCommerce specialized templates come with in-built settings to include product sliders on the online shop. However, if the theme you are using on your store does not have an inbuilt product slider or have the one with limited options then, we recommend you to use a Woo product slider extension to add stunning product slides.
Here, we have come up with a short tutorial on how to add product slider on the WooCommerce store using a Woo product slider extension. The add-on we will use is Product Slider for WooCommerce.
It is one of the feature-rich add-ons for a WooCommerce website to showcase your eCommerce products in a beautiful slider/carousel view.
Here are some of the great features available on Product Slider for WooCommerce:
- 30+ Ready to Use Slider and Carousel Templates
- Option to Filter Woo Products from All Possible Taxonomies, Categories and Custom Field
- 8 Beautiful Ribbon Templates to Highlight Products
- 6 Different Position to Showcase Ribbons
- Product Sorting Options
- Option to Auto Assign Ribbons for Out of Stock Items
- Add Call to Action Button on Make Products More Engaging
- Enable Social Share Button to Share your Products on Various Social Media
Live Preview | Details | Purchase | Support
Adding Product Slider Using Product Slider for WooCommerce
Now let’s get started with the tutorial and create a beautiful product slider for the eCommerce shop:
Step 1: Installation and Activation

Purchase Product Slider for WooCommerce extension from CodeCanyon marketplace at a reasonable price of $18. Then, install it on your WordPress powered eCommerce website.
If you feel any difficulties while installing the plugin, refer to its documentation for help.
After completing the installation, activate it on your WordPress website.
Step 2: Adding New Product Slider
Upon activating the extension, you can see “Product Slider for WooCommerce” on the left menu of your WordPress dashboard. Click on it to continue.
You will land to the listing page where all the created product slider will be stored.
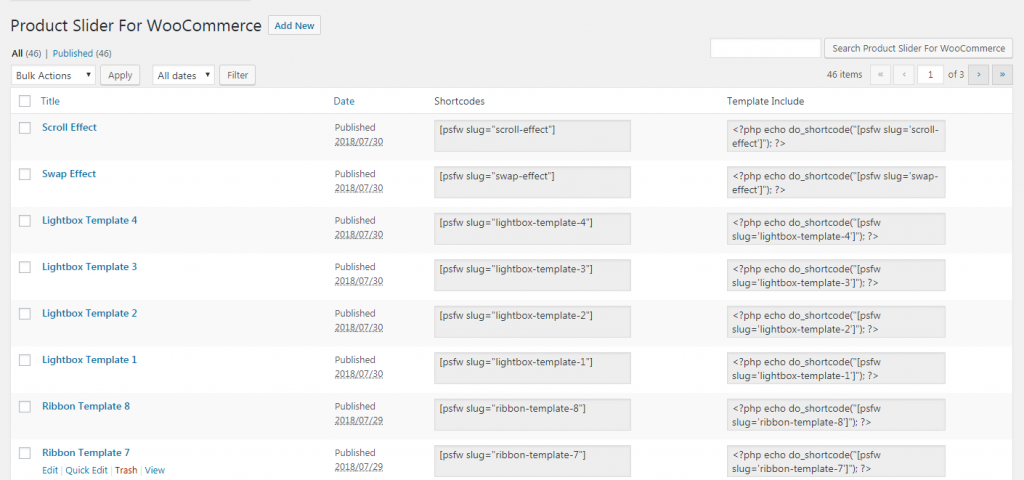
To add the existing product slider, copy the shortcode and paste it any page or post of your website.
In order to add new product slider, click on the “Add New” button.
Step 3: Configuration and Customization
You will land to the settings page where all the options are available to create an attractive product slider.
The settings are divided by 8 different sections, but before going through the settings section, give the title for your new product slider.
The settings sections include:
General Settings:
This section includes the general options for the product slider. You can enable/disable product title, product excerpt, categories/taxonomy, product link on title, and product link on image.

Also, you can choose the size and type of image that you want to display on the product slider.
Layout Settings:
This settings section allows you to select the layout and templates for your product slider. You can either choose the carousel layout or slider layout.
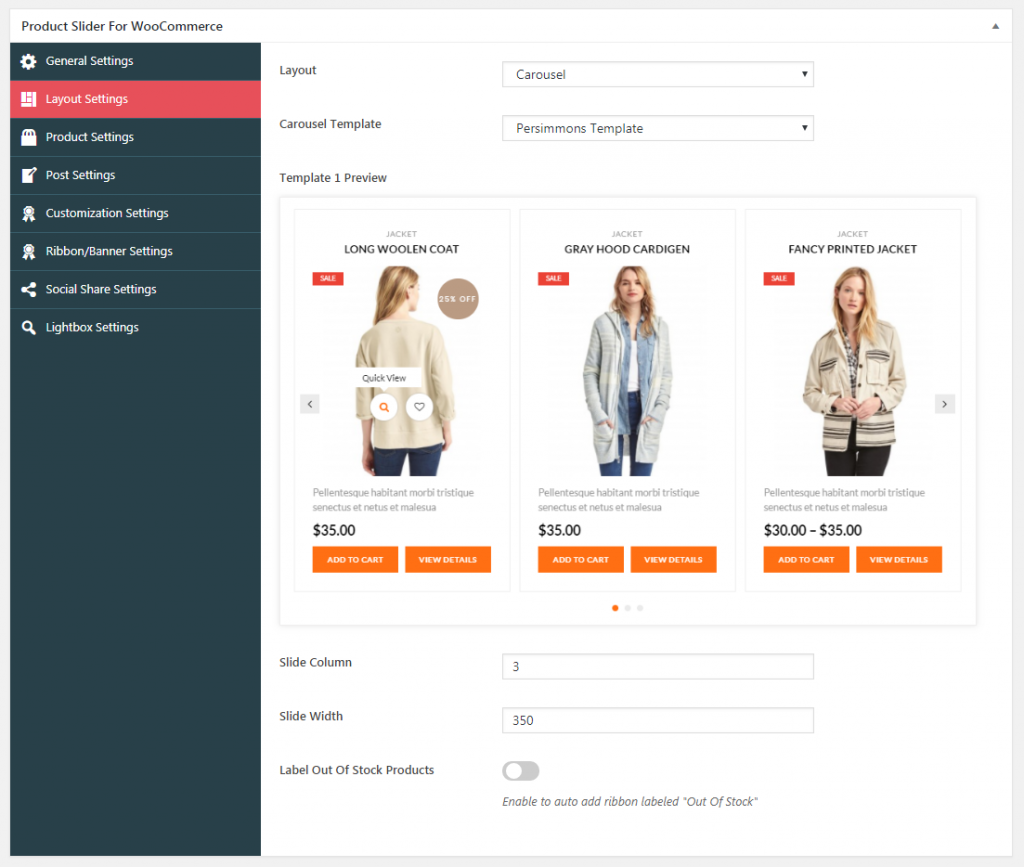
If you choose carousel layout, select any of 15+ templates available for it. Then, set the column and width for the slide. Also, you can enable the option to automatically add the ribbons for out of stock items.
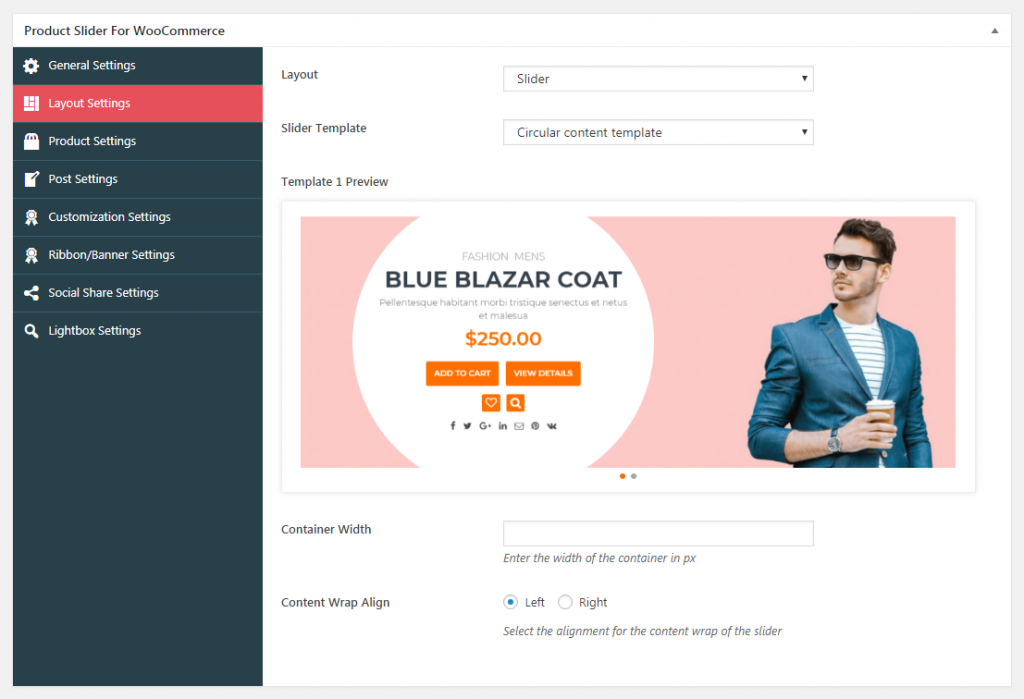
If you choose the slider layout, select any of the 10+ available templates. Then, add the container width and set the content wrap align.
Product Settings:
Here, you can configure the options available for the products. You can enable/disable the display of price, wishlist button and reviews.
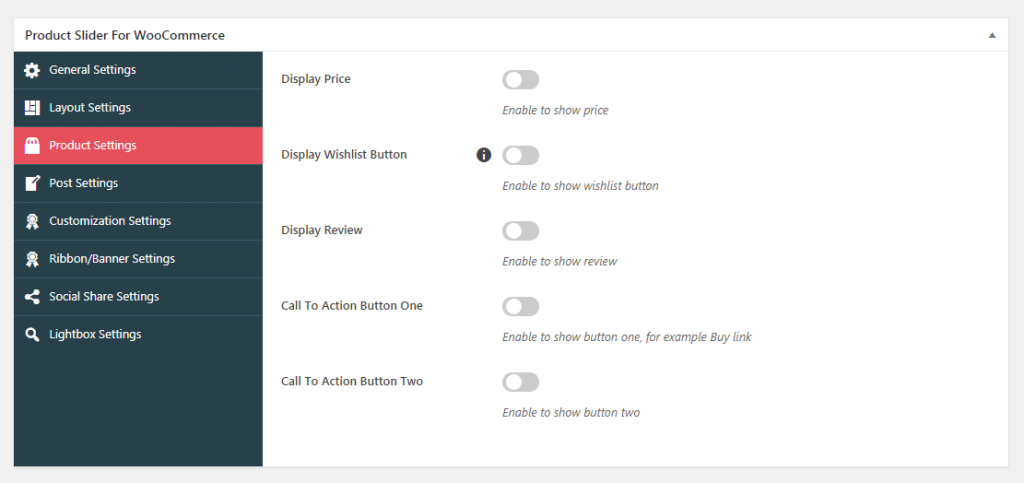
Besides, you can add up to 2 Call to Action button to make your Woo products more engaging.
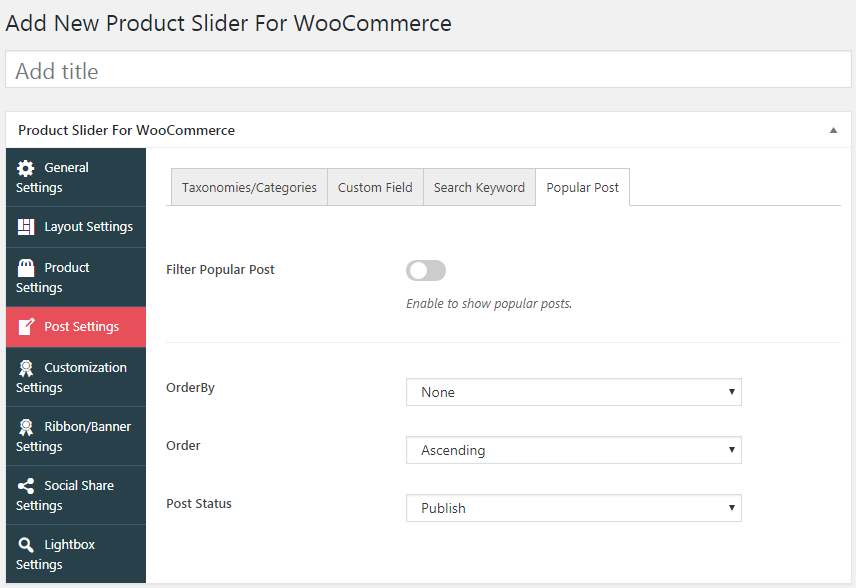
Post Settings:
This settings section lets you configure the taxonomies/categories, custom field, search keyword and popular post.
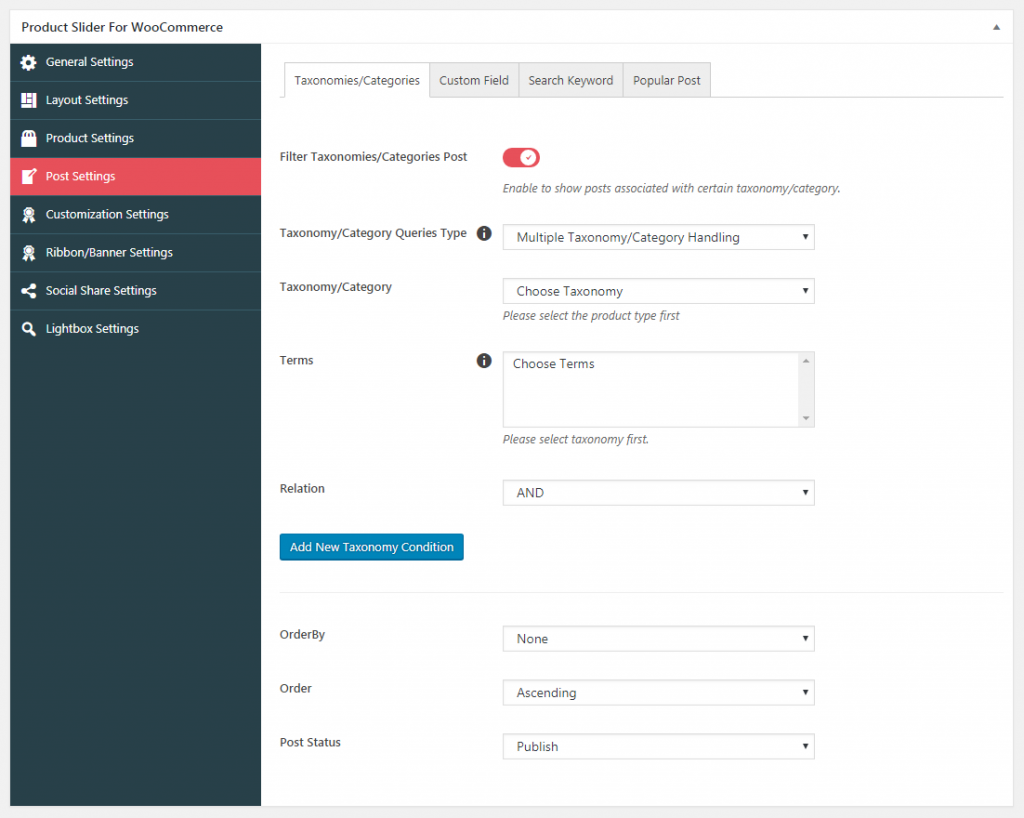
You can enable them on your posts and set their order as per your preference.
Customization Settings:
From here, you can customize various settings for the product slides. You can choose the slide orientation, slide control, autoplay, pager, pause over on hover and link options.
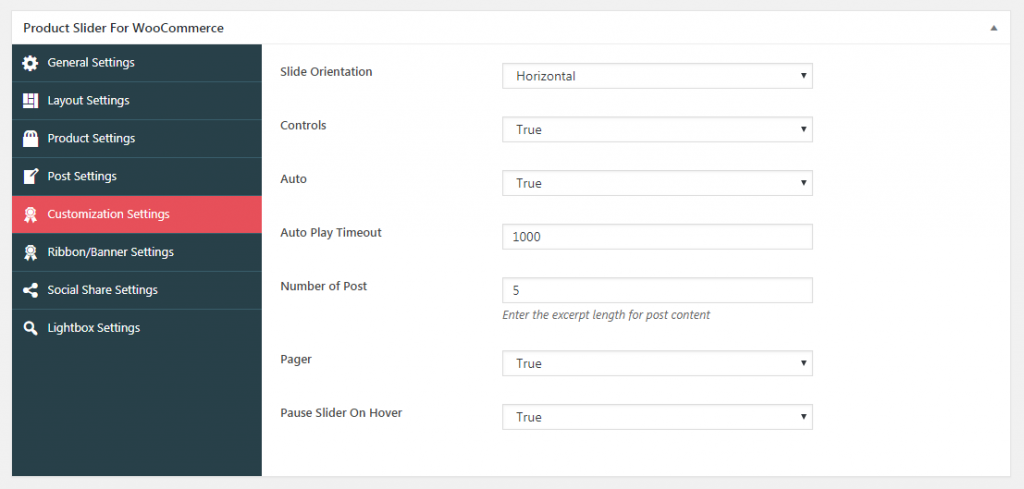
Also, you can set the timeout for autoplay of slides and number of post to display on the product slider.
Ribbon/Banner Settings:
This setting section lets you set the ribbons on the product to highlight any type of sale, discounts, % off etc.
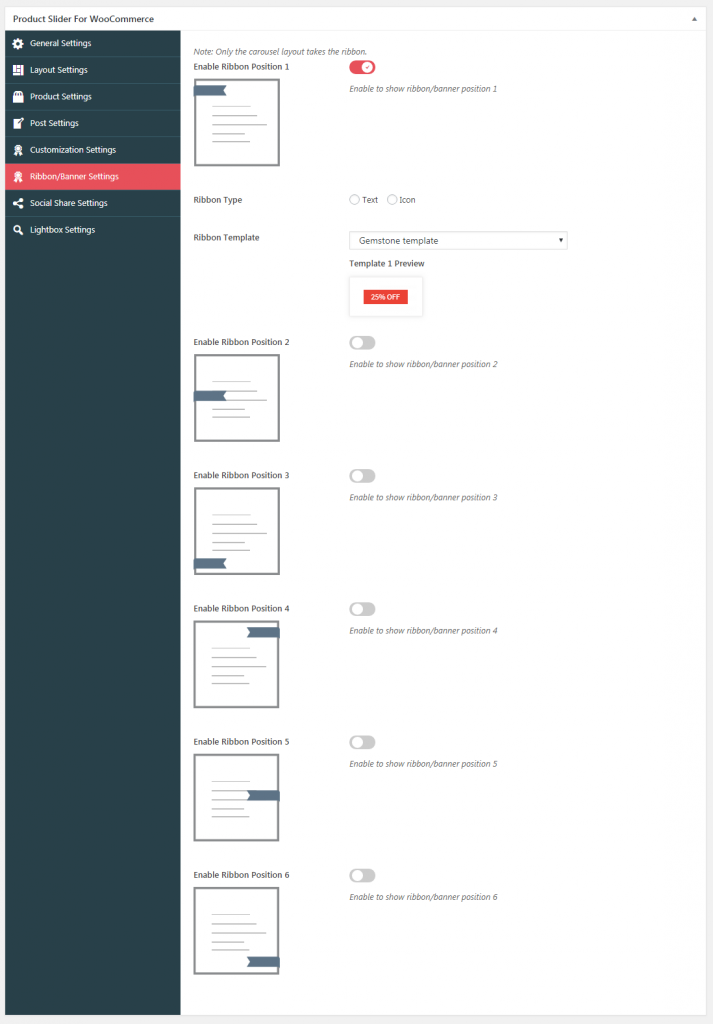
You can enable any of the 6 available ribbon templates then, select the ribbon type, add ribbon text and select any of the 8 ribbon templates available.
Note: Only the carousel layout slide supports ribbons.
Social Share
From here, you can enable the social share of your WooCommerce products on various social media networks.

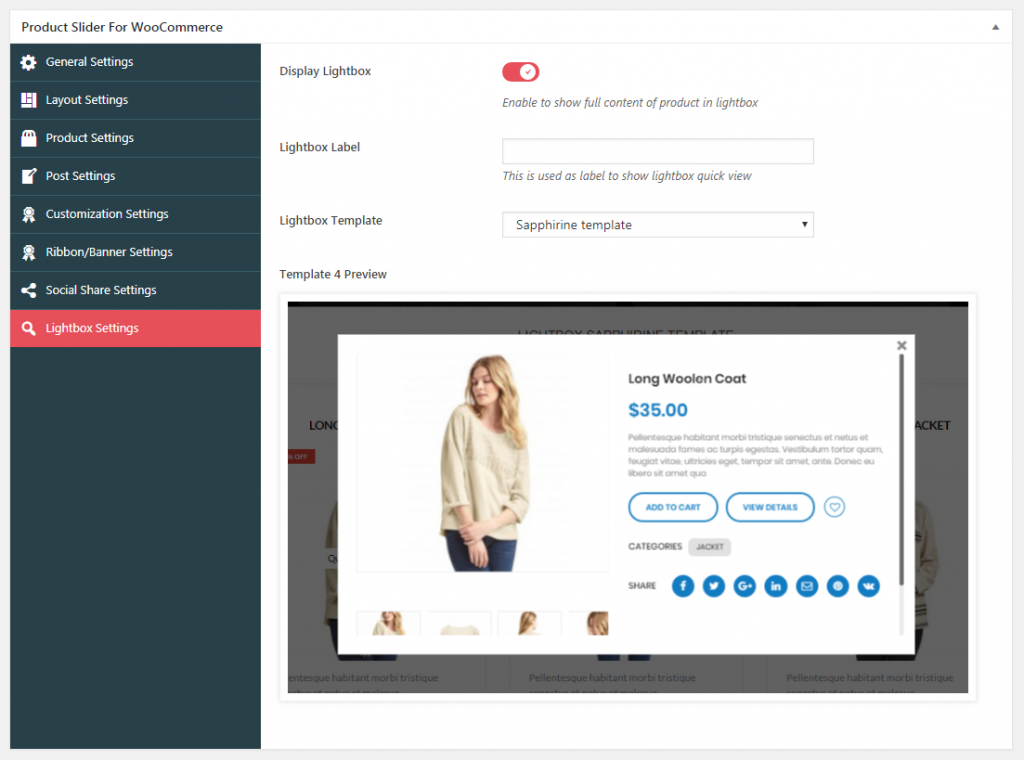
Lightbox Settings:
This settings section allows you to enable the lightbox to display the product detail upon clicking or hovering them. You can add custom label for the lightbox and select any of the 4 lightbox templates available.
Step 4: Making your Product Slider Live
After you have completed customizing the product slider, click on the “Preview” button to get the quick view of your product slide.
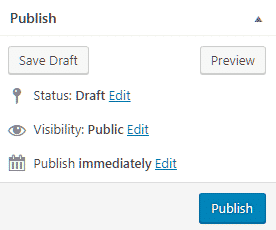
If everything is alright, click on the “Publish” button to make your product slider live.
Step 5: Adding Product Slider Via Shortcode
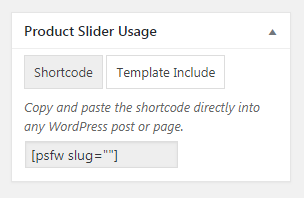
After you have made your product slider live, copy the generated shortcode from Product Slider usage and paste it on any page, post or custom post type to showcase the product slide.
How does the Product Slider look Like?
After you have copied the shortcode on your website, you can see the following result on the product page of your online store:

Further reading


")
")
")