")
Last updated - November 10, 2022
Online products, like physical store’ products, come in a variety of shapes and sizes. WooCommerce has enough features to accommodate almost any form of eCommerce store. One of the popular features you can now use as a WooCommerce store owner is the ability to provide several choices for a single product.
Despite its use, exploring WooCommerce variants may be difficult, especially for novice users. However, once you’ve mastered them, you’ll immediately see how useful they are and how they may greatly benefit your shop.
Variable products can have a multitude of options, each with its own SKU and price. Consider an item of clothing that comes in a range of sizes and colors.
One of the most common product variations we face is the size (ex: choosing between Small, Medium, Large, or XL). As a result, we’ll show you how to create a WooCommerce product in various sizes.
Before we get to the technical steps. Let us understand attributes and variations.
Attributes
Attributes are basic descriptors or attributes that are provided to distinct product variations to provide essential information to the consumer about what they’re going to buy. Size, material, color, model, or something else totally might be considered product qualities.
Variations
A product variant is a final decision a buyer takes based on one or more attributes. While attributes can exist without variations, they must first be added before variations can be set up.
Setting up WooCommerce Variations
If you’ve worked with WooCommerce before, setting up WooCommerce variants with this step-by-step tutorial should be a breeze. All you have to do is modify a few options in your WordPress dashboard, which are provided by default.
Before we start, make sure WooCommerce is installed and activated on your WordPress. Now that we have the basics in place, let us start the process.
Step 1: Adding Global Attributes
We’ll start by adding attributes to your shop, as we’ve already highlighted their importance in setting up variable products. By adding global attributes, you may simply apply them to new or current products in the future.
All you have to do is go to Products > Attributes on your WordPress dashboard to add new global attributes to your shop.

On the attributes page, you can set up all the necessary properties by entering the required details in the appropriate fields. The process is self-explanatory, but we will go through each field for your better understanding.
Listed below are the settings to create an attribute:
- Name: This is the title of the attribute that appears on the front-end of your site (for example, ‘Color’ or ‘Size’).
- Slug: The slug substitutes the attribute name in the Uniform Resource Locator if it is included (URL).
- Archives: You may enable archives for the attributes you’re working on. When this property is enabled, WooCommerce produces a page with all the products related to it.
- Default Sort Order: On the frontend, you have four options for how you want the terms in this attribute to be arranged. You can, for example, choose the Name option. This implies that if a ‘Size’ property has values like ‘Small,’ ‘Large,’ and ‘Medium,’ these words will be sorted alphabetically. Similarly, you may use Custom ordering to move the words to the next page by dragging and dropping them.
Then, to save your selections, click Add attribute. After you’ve generated your first global attribute, go to Configure terms and fill in the required values.

You can add new values to your attribute on the following page. Because the attribute name is ‘Size,’ we must fill the fields under the Add new Size section in our situation. For example, if our attribute was color, the section would be named ‘Add new Color’.
The Name and Slug sections are the same as those on the previous page. In addition, you may give the new attribute value a description.

Your WooCommerce store may have as many attributes as you like. Similarly, you may assign as many values to each one as you like. Click Add new Size after you’re finished, and your global attributes will be ready to use.
Step 2: Adding products and Product Types
Now that you’ve created global attributes, it’s time to add the new product to which you’ll apply them. There are 6 different product types. They are as follows:
- Simple Product
- Grouped Product
- External/Affiliate Product
- Variable Product
- Virtual Product
- Downloadable Product
Variable products are the only product kinds on WooCommerce that allow you to add variants. Go to WooCommerce > Products to create a new variable product or edit an existing one.
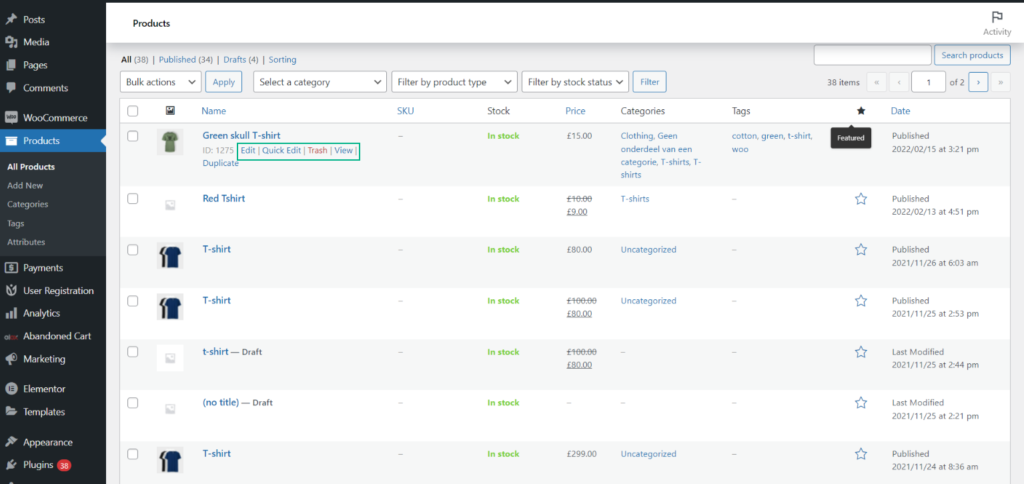
To make a new product, click Add New. If you want to edit an existing product, hover the mouse over it and select Edit from the menu.
For the purpose of demonstration, we will select an existing product.

Scroll down to the Product data area on the product settings page. You may choose the product type from the dropdown menu in this section.

Select the Variable product option from the dropdown menu. The settings menu changes right away to assist you in configuring your variable product. You may configure the product using the different tabs on the left side of the settings.

For the purpose of this article, we’ll focus on adding attributes to the variable product while creating WooCommerce variants.
Step 3: Assigning Attributes to Variable Products
You may assign attributes to your product in two ways. You can create custom attributes or utilize global attributes (the ones we created in the first step).
If numerous products in your store have the same attributes, global attributes are ideal. Custom attributes, on the other hand, are more appropriate if they are unique to a certain product.
Global Attributes
Navigate to the Attributes tab under the Product data section to assign global attributes to a product. You may now choose from any of the traits you defined before.
After you’ve selected your preferred global attribute, click Add to apply it to the product. The options menu for the chosen attribute opens after that. You can add as many values as you wish here.


Don’t forget to check the boxes for Visible on the product page and Used for variations.
Then, to save all of your modifications, click the Save attributes button.
Custom Attributes
Alternatively, you may assign a specific product with custom attributes. Select the Custom product attribute option to do so. This approach also allows you to quickly and simply add attributes and their values. All you have to do now is fill in the Names and Values fields with the appropriate values.

When adding multiple attribute values, use the “|” character to separate each phrase. Then tick the boxes for Visible on the product page and Used for variations. When you’re finished, click Save attributes, and you’re all set.
Now let’s move on to the final step…
Step 4: Display the Product Variations
Navigate to the Variations tab to get started. Simply press the Go button next to the Add variation field. You may now create variations based on a mix of existing attribute values.
You may, for example, create a variable for a ‘Medium’ ‘Green’ T-shirt. Click Save changes when you’re finished.
To make things even easier, go to the Add variation dropdown option and select Create variations from all attributes.
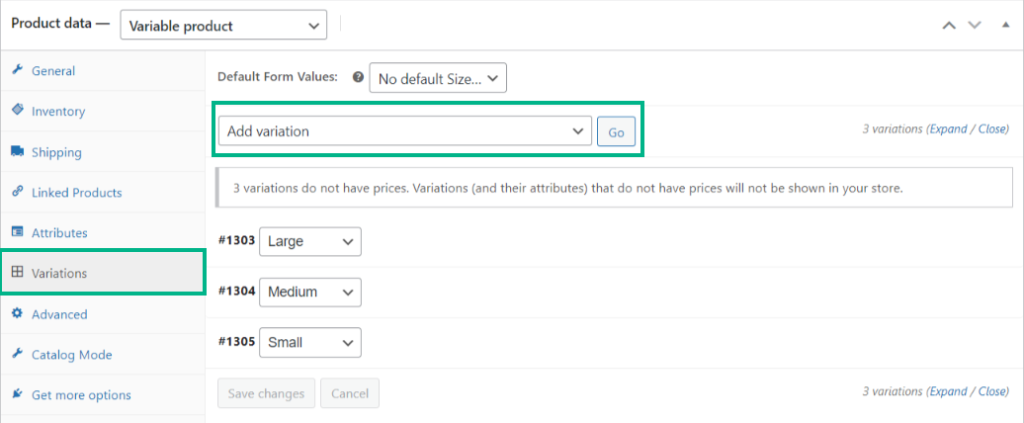
WooCommerce produces variants from all the attributes assigned to the products when you click Go. These product variants, however, do not yet include pricing or other crucial attributes. Hover over any variant field and click on the empty white spot to change it. This brings up a settings editor.

You may modify the variant in the same way that you would any other WooCommerce simple product.
There’s enough area to include a product image, a standard price, and a sale price, as well as weight and measurement values and the option to make it downloadable. Similarly, by checking or unchecking the Enabled box, you may turn on or off the variant.

You can simply configure various pricing or dimensions for multiple versions of the product because each variation has its own options menu.
Once you’re done customizing the products, click Preview on the top right-hand side of the page, to view changes.

Below is an example of the frontend version of the above changes.

Using Plugins to Optimize WooCommerce Variations
Although WooCommerce provides a lot of leeway and usefulness for product variations by default, you can extend the functionality of your variable products with extra plugins.
There are several WooCommerce variation plugins available to do multiple tasks. We’ll go through a handful of the most fascinating and effective ones.
Size Chart for WooCommerce

You may use the plugin to build various size charts and link them to certain products and categories. Size charts can be manually made or uploaded as an image. You may also opt to show it as a popup or inside a tab on the product page. Furthermore, the plugin provides the option of automatically displaying the appropriate size chart based on the customer’s nationality.
YITH Product Size Charts for WooCommerce

You will be able to apply many size charts to a single product with this plugin. Furthermore, the plugin provides three display choices for the popup like tab, popup, and tabbed popup. The plugin also allows you to personalize the popup button by selecting your preferred colors and styles.
Product Size Charts Plugin for WooCommerce
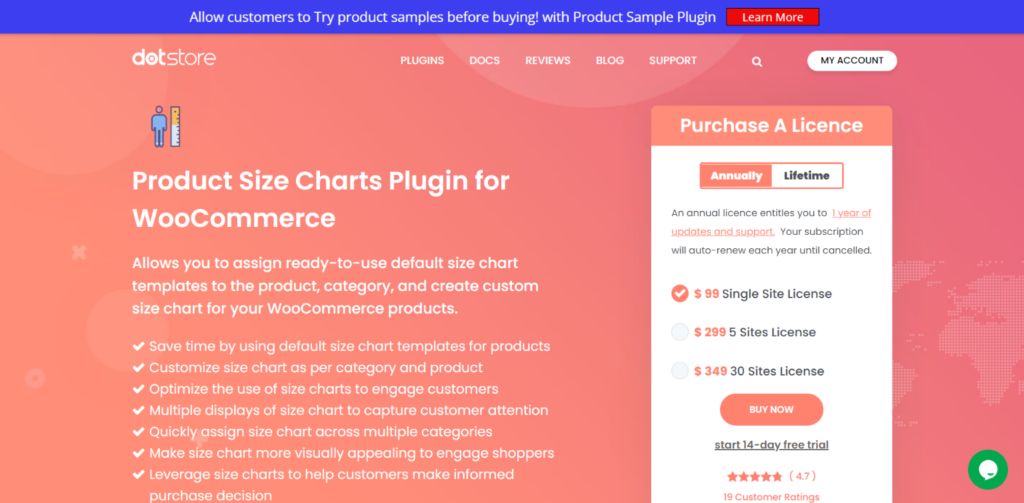
This plugin provides a variety of size chart layouts that you may modify to meet your specific needs. You’ll be able to tailor the sizing charts to particular goods or categories. Additionally, the plugin allows you to experiment with various display styles in order to improve the client experience.
WooCommerce Product Size Guide

Size charts in your WooCommerce store may be set up in a variety of ways using this plugin. You may either use the pre-designed skins that come with the plugin or build your own. The plugin comes with a simple table editor that makes it simple to build up numerous size guides.
WooCommerce Product Chart Sizes Table
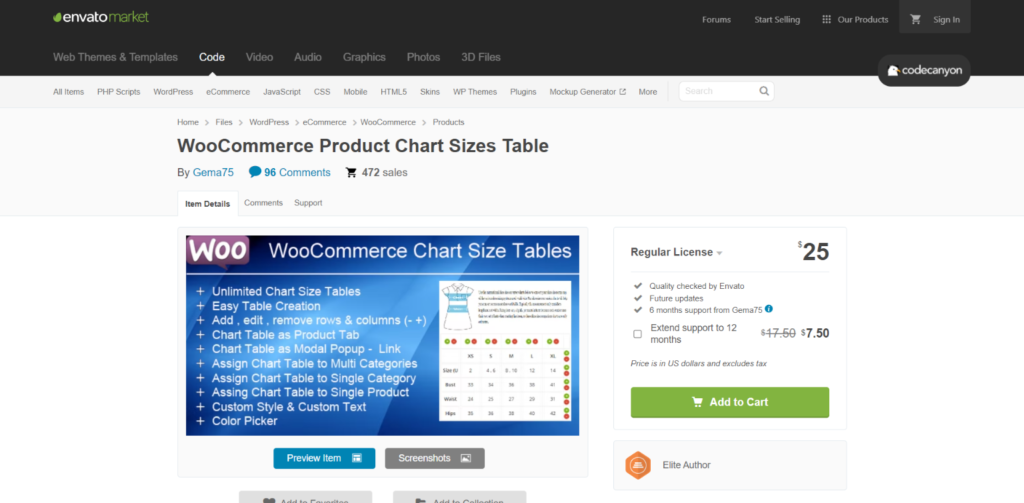
You may use this plugin to make a table for certain products or categories. It allows you to build and allocate numerous tables based on your needs. You’ll also have the option of displaying the size chart table in a tab or as a modal window.
To get a better understanding and know more about similar plugins, check out 10 Best WooCommerce Product Size Chart Plugins 2022 (with Video).
Conclusion
That concludes the discussion. You now know how to add size to WooCommerce products. Variable products provide this kind of capability. You are not limited to only adding sizes; you may also add colors, weight, and other changes to your products.


")
")
")
Thanks for the article.
I have a question, though – if you had a store that sold products where size is described in 2 different ways, how would you set up the attribute?
eg the store sells socks in Small, Medium and Large and dresses in 10, 12, 14, 16, 18 sizes
Would you set up one attribute size:Small | Medium | Large | 10 | 12 | 14 | 16 | 18
or
two separate attributes?
The reason I ask is because the google shopping feed plugin I use allows only one attribute to be assigned against size.
Ideally, it should be two attributes. In that way, it should become compatible with most of the leading Facebook Feed plugins for WooCommerce. Here is one of the plugins we recommend – https://learnwoo.com/refer/elex-woocommerce-catalog-feed-facebook-instagram