")
Last updated - November 29, 2022
If you are an ecommerce store owner, I am sure you would agree that owning and managing an online store is not as simple or easy as it may seem. As you would be aware, there are too many variables involved in ensuring it runs smoothly without a hiccup (which can happen at any point in time). Given the digital world we are living in now, the possibility of getting scammed is high. So ensuring that all the aspects of your store, from product pages to add to cart to checkout, run smoothly is a round-the-clock job. One small glitch, and you could end up losing out huge amounts, and not to forget customer value.
The best way to avoid this kind of situation and be able to avoid losing thousands of dollars is to have proper security measures in place, along with timely backups. Having timely backups will ensure that your store is secured, even if something goes wrong.
In this article, we explain to you in detail about the need to back up, what it entails, and the different ways you can back up your WooCommerce store.
- Why back up a WooCommerce store?
- What WooCommerce backup entails?
- What are the ways to backup your WooCommerce store?
Why back up a WooCommerce store?
As mentioned earlier in the article, having a backup of your ecommerce store is the right thing to do if you do not want to lose out on huge amounts of your money. In fact, it is advisable for any online business or any sort of web business/presence, such as blogs, web agencies, services, etc., to do the same.
The most common reasons/situations that warrant the backup of your online store are human error and hackers. Online stores being hacked has become one of the most common reasons for online businesses to lose their business, along with their customers, orders, data, and a lot more. That being the case, even your website can be easily hacked. Another major reason for having a backup of your store is the possibility of human error. If your website goes down while you are trying to update on your WooCommerce dashboard, you would be at the losing end. Hence, to avoid all such possibilities, the best thing to do is backup your store.
What WooCommerce backup entails?
Before we explain about the different ways to back up, it is necessary to understand what does backup of your store mean and what it entails. The foremost reason to back up your WooCommerce store is to save your web files and the database.
It is imperative that you take regular backups of your WooCommerce store, as there would be ongoing customer registrations, along with orders being placed. Regular updates ensure that no data is lost to human error or hacking incidents.
What are the ways to backup your WooCommerce store?
There are three tested and tried ways to backup your WooCommerce store.
- Automated backup with plugins
- Contacting hosting provider
- Manual backup without plugins (FTP Client)
Method 1: Automated Backup with Plugins
As the title suggests, automated backup can be done with backup plugins. There are many WordPress backup plugins available in the market, both free and paid, and most of them do a pretty good job of backing up data and other stuff. Some examples of such plugins are mentioned below:
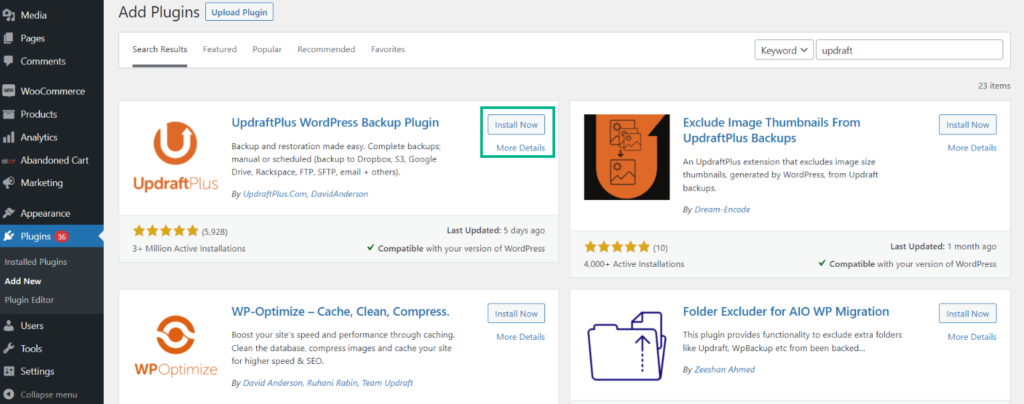
- UpdraftPlus WordPress Backup Plugin: This is one of the best and most popular free backup plugins available in the market with some premium features. All it takes is one click to back up your files and restore them.
- BlogVault: This is a backup plugin that also offers migration service. Though it is a paid plugin that comes with a 7-day free trial in order to test the reliability of the system, it is also one of the best plugins out there. This plugin offers customized WooCommerce backups that ensure zero order loss and also provide backup history for up to a year.
- BackupBuddy: This is another premium plugin by iThemes that comes with a license. It offers backup and migration service. The license-based service that BackupBuddy provides lets you use the plugin for any website that is mentioned in the plan while purchasing.
- Jetpack: provides easy restoration and saving of every small change made to the website, hence considered quite safe).
- Duplicator Pro: This is a site migration and backup plugin that enables scheduled backups with different cloud storage options such as Google Drive, Amazon S3 Dropbox, etc.
- WP Time Capsule: Ensures automatic backups every time a change is made in the site.
- BoldGrid Total Upkeep: This plugin ensures automatic backups and fast restoration options.
- BackWPup: Thai plugin is considered one of the best backup plugins, this plugin ensures automatic backups, along with standalone backup for emergency restores, among a few others.
The UpdraftPlus plugin has been considered in this article for the purpose of demonstration. Mentioned below are the various steps for installing the plugin and getting it running.
Installing and Configuring the Plugin
The first step is to install the backup plugin – WooCommerce Dashboard > Plugins > Add New > Install the plugin.
The UpdraftPlus backup option will appear under the Settings Tab.
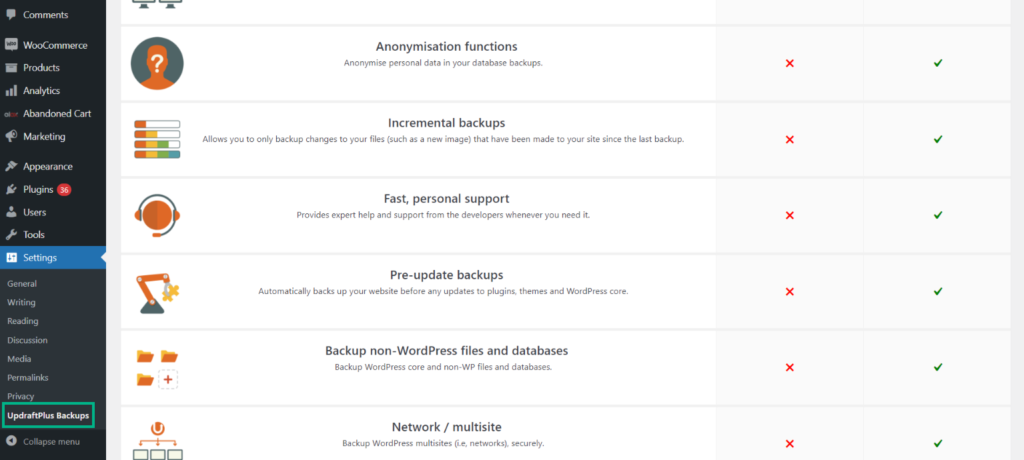
You can configure your backup policies here. It is preferable to automate backups and reduce backup frequency as much as feasible. The greatest frequency you may select in the accessible version of this plugin is one backup every four hours.
Next, click on the Settings Tab.
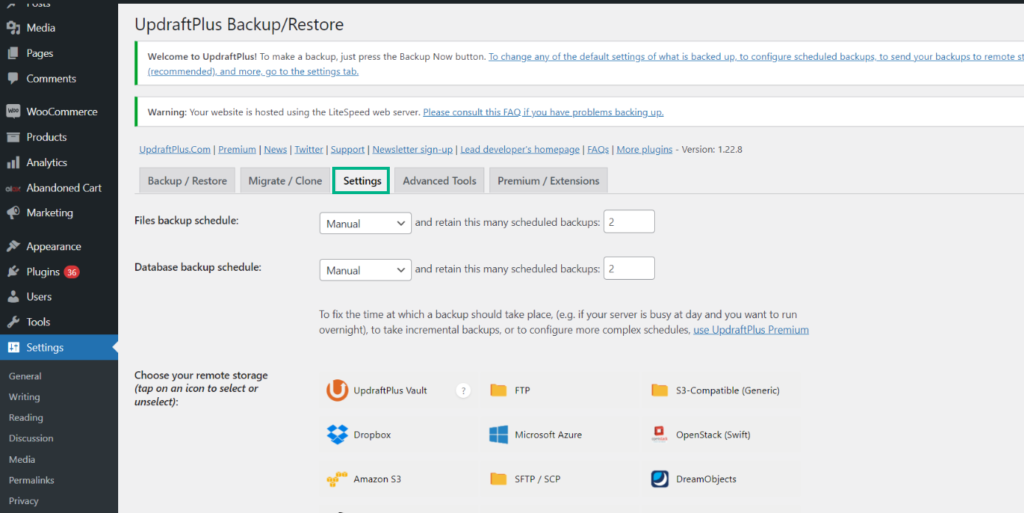
File Backup Schedule
The next step in setting up the plugin is to schedule file backup, which can be scheduled on an hourly, daily, weekly, and/or monthly basis.

Database Backup Schedule
Data is the most crucial aspect of any business and without a proper data backup it can literally bring an online business to a stop. Hence, it is advisable to have scheduled backup of all WooCommerce databases, at the same frequency as that of web files.

Choosing Remote Storage
A wide range of remote storage options are offered by this plugin, which include Microsoft Azure, Amazon S3, OpenStack (Swift), Rackspace, DreamObjects, SFTP/SCP, Google Drive, Google Cloud, Email, and Backblaze. It also offers rage services such as Dropbox, Microsoft OneDrive, WebDAV, FTP, S-3 compatible.

Any service that is used needs to be authenticated first and Dropbox has been considered for the purpose of explanation in this article. An account sign up is necessary for a Dropbox account.
Go to Dropbox in the drop-down menu > Click the link after “Authenticate with Dropbox” in order to authenticate the service.


Including & Excluding in the Files Backup
In this step, you can select the files that you want to include or exclude while backing up web files. Ideally, it is necessary to take a backup of plugins, folders, files, and themes, which are default settings and to be retained as is. In case, you would like a particular file to be excluded from being backed up, type the folder name with an asterix [ * ] trailing.

Receiving Emails Regarding Backup
We are sure you would like to get status updates once the backup is done and this is possible by enabling reporting, post which you will receive an email with all the details of the backup.

In order to complete the backup process, go to Backup/Restore tab > Click on “Backup Now” > Select from the options that show up in a pop-up.

Once you select from the options seen in the pop-up, a Progress bar appears.

Once the backup is done, a notification pop-up will let you know that the backup has been successfully completed.

Viewing Existing Backups
Once the backup is complete, you will be able to view all the existing backups in the same window, which can be either downloaded or restored with just a click of a button.
Method 2: Contacting Hosting Provider
While most WooCommerce web hosting providers have a backup policy in place, some offer the service as an add-on at a cost and some others take backups of the entire servers, which may not necessarily be WordPress or WooCommerce specific.
Going to Server Settings
For explanation purposes, we have considered Cloudways. The first step is to log in to your Cloudways account and then go to Server (from the top menu bar) > Server Management >


Backups
Note: A free backup service is available with Cloudways. This enables you to set up a backup frequency of one hour each. Downloading the backups to your local machines is another possibility to help you feel safer.
Taking On-demand Backups
An on-demand backup of your server is possible and if your Local Backups has been enabled, it will create a downloadable copy of all the applications on your server. You will get a notice on successful completion of the backup process.

Backing up WooCommerce Database
In this step, your WooCommerce database can be backed up. The MySQL Manager on Cloudways helps to export the database files.
Navigate to Application Tab > Launch MySQL Manager > Click on “Export” > Change the radio button of “Output” to “Save” > Export (this will enable downloading the entire copy of your database to your machine).


Restoring Backup
To be able to restore your WooCommerce backup, Login to your Cloudways account > go to Applications from the top menu bar > Click on your WooCommerce application > Application Management > Click on Backup & Restore Tab


The above will take you to the next screen with a drop-down menu with all your backups.
Select the backup you want restored > Click on the Restore Application Now button > will show a message “Your Application has been restored successfully”.
Method 3: Manual Backup without Plugins (FTP Client)
A manual backup of your WooCommerce files and database is suggested in case you do not want to go in for a backup plugin or do not have a hosting provider who can take backups.
Manual backup involves two steps:
Step 1: Downloading WordPress Files
Taking a backup of web files is the first step, which includes the following steps:
- Connect to your web server with the help of an FTP client, such as FileZilla (this downloads all the web files in the root of where you WordPress is installed).
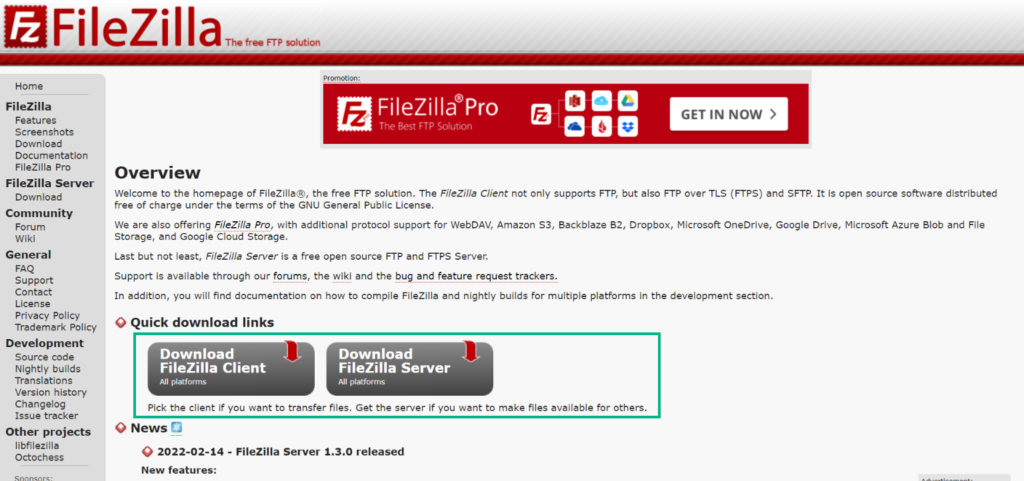
- Open FileZilla on your system and Create a directory of your local computer system (where backup of your WordPress files can be added).
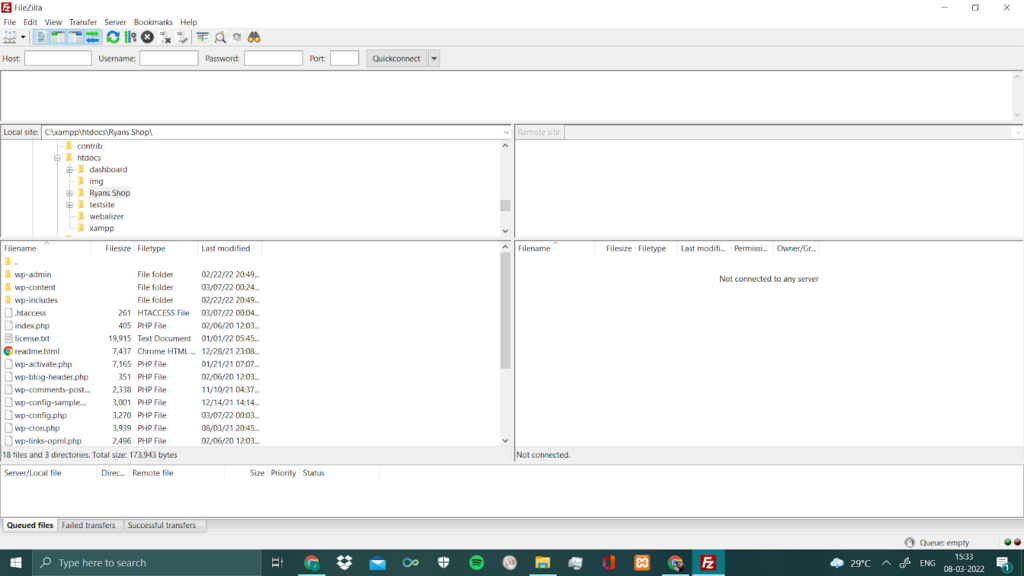
- Connect the server > Navigate to WordPress installation > Go to FileZilla server and check on “Force showing hidden files” > Download and Install your WordPress file (in the already created local folder).


Step 2: Backing Up WooCommerce Database
Now, we’ll take a database backup. Each of your pages, content, posts, categories, and other items are stored in the database. You must go to your hosting platform’s database administration panel to make a backup of your database. Go to PHPMyAdmin after that.

Now you must choose your database, which you established throughout the website creation process. If you can’t remember the name of your database, you can look it up in your wp-config.php file.
After you’ve chosen the appropriate database, all of the tables will appear on your screen.

Then, from the menu, select all of the tables and click the Export tab and click Go.
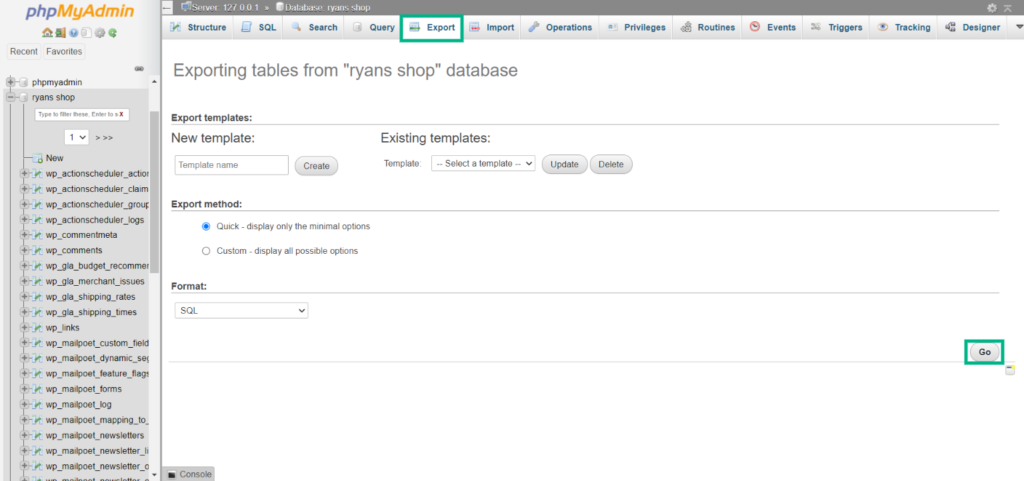
You have now successfully generated a manual database backup.
Conclusion
Backing up your WooCommerce business on a regular basis should be your top concern. You should always have a backup, no matter how secure your web hosting server is. Finding and repairing a compromised website might take a long time, but restoring to the most stable version is simple. Hope this article has helped you understand the entire process, as it does get a bit complicated at times and can be solved by repeating the process a few times.


")
")
")