")
Last updated - November 10, 2022
WooCommerce is an open-source WordPress eCommerce plugin. Today, we’ll look at how to adjust the pricing of a product on WooCommerce. By modifying the product in WooCommerce, we can easily change the pricing. Doing the same with multiple products is slightly different. In this article, we will go through methods on how to change the product pricing with different criteria.
Change product pricing on WooCommerce
The easiest way to change or set the price of a product without the use of any plugin is by going to the WordPress dashboard > Products and hovering the cursor over the product you want to change the price of and clicking the edit button.
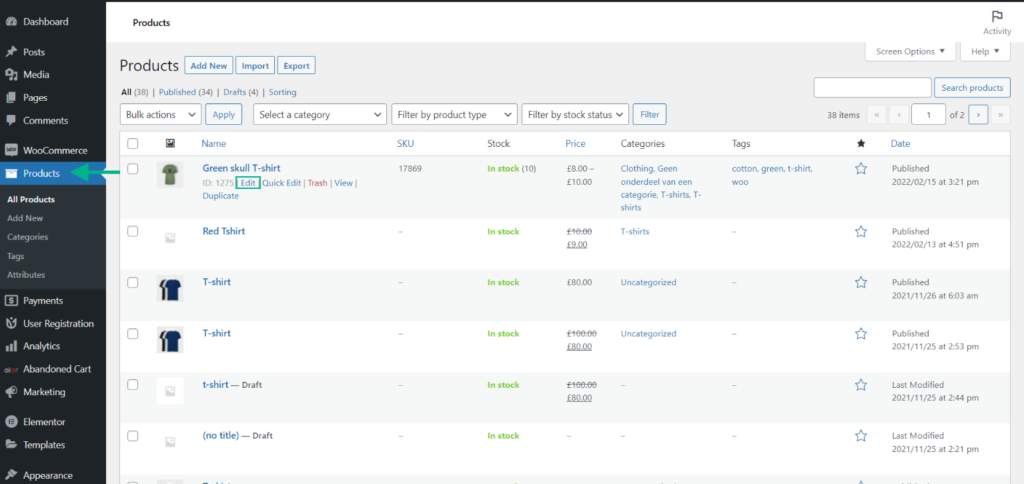
This opens the product’s data page, where you can customize multiple aspects of the product such as price, image, description, etc. For the purpose of this article, we are going to focus on the price aspect.
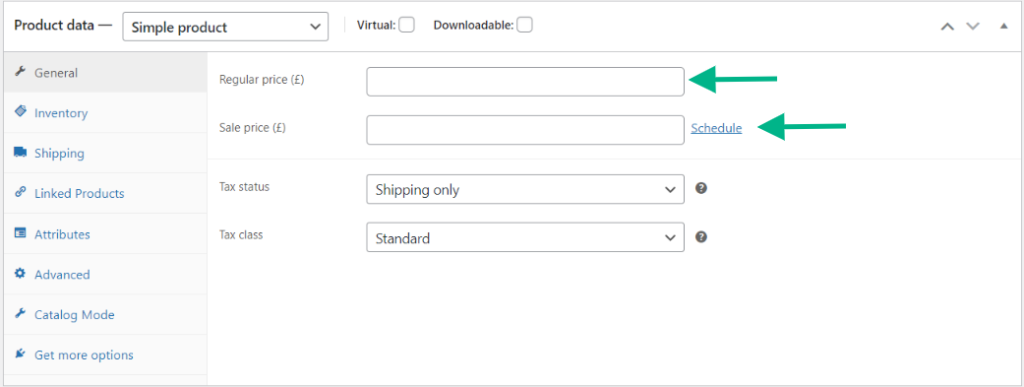
Scroll down to the product data metabox and go to the General tab. Over here you will find two options:
- Regular price – The regular price is the default price of the product.
- Sale price – The discounted price of the product is the sale price. Keep in mind that the sale price must be lower than the regular price.
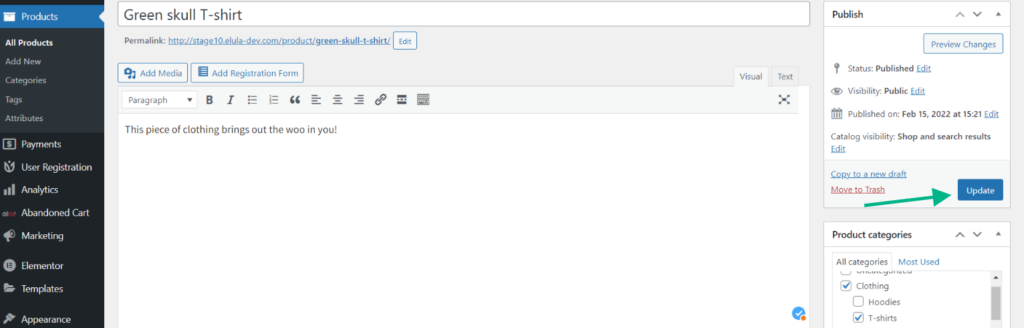
Once you are done editing the price of the product, click Update on the top left of the page.
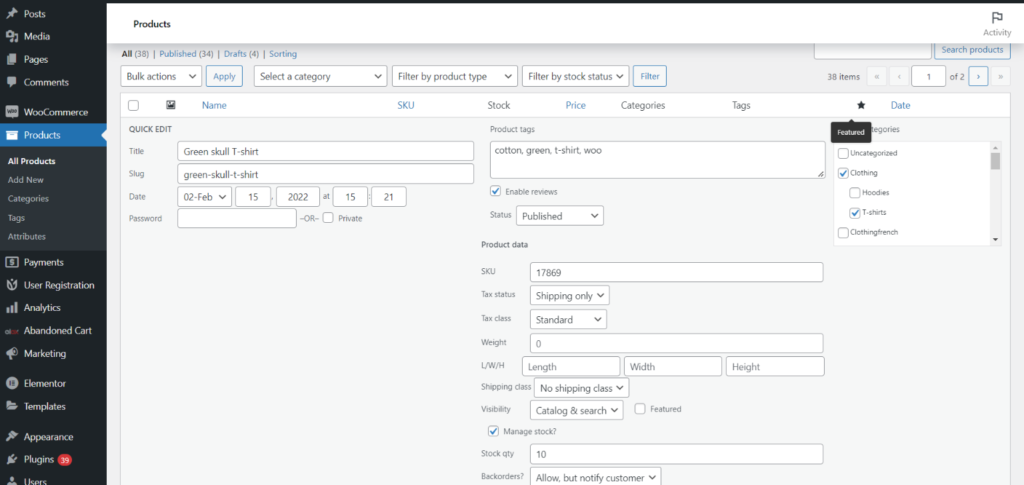
You may also use the quick edit option by following the same steps as above, but clicking the Quick Edit button instead of the Edit button. This opens a panel on the same page with the product date metabox and the remaining steps are the same as above.
Change product pricing using bulk action on WooCommerce
If your store only sells simple products, and you need to adjust the pricing of several products, WooCommerce’s default settings will suffice. Variable goods, grouped items, and subscription products are not supported by the default settings.
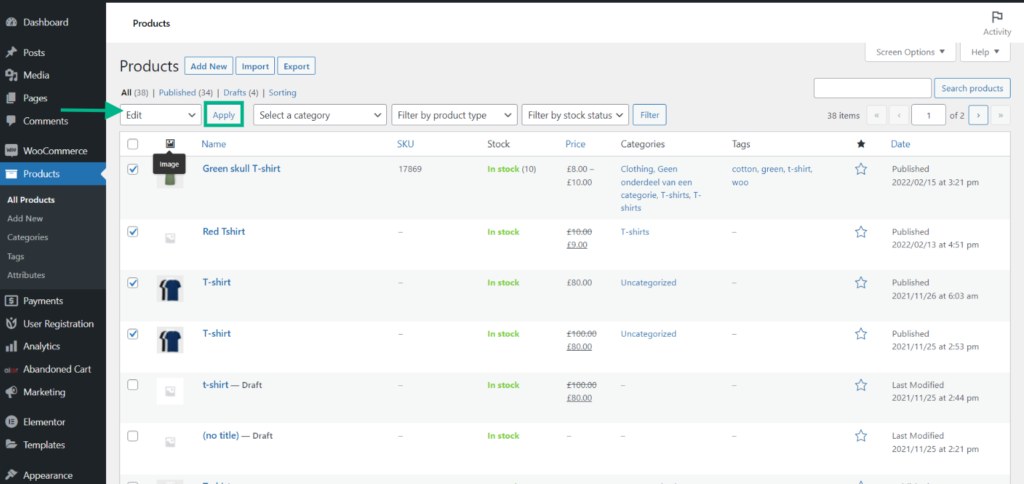
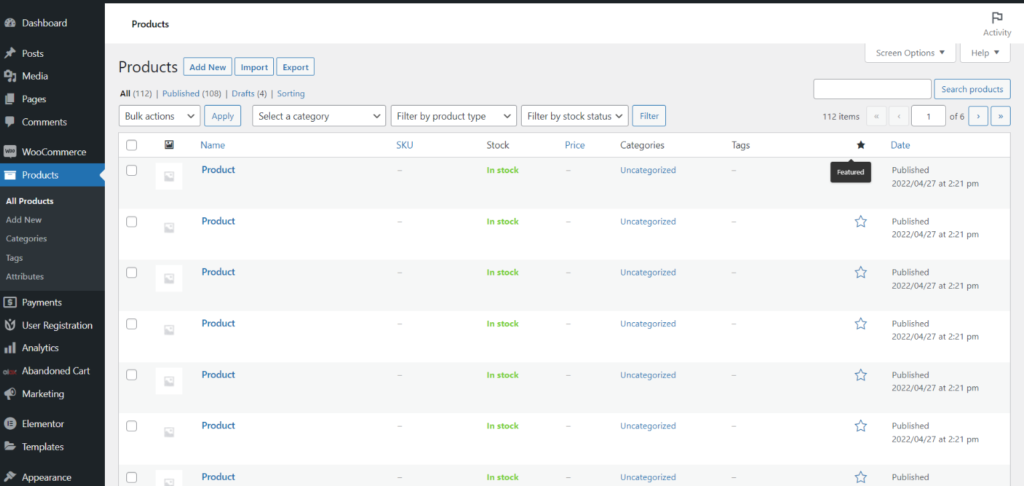
To begin, go to Products > All Products on your WordPress admin panel. Pick the products you wish to change, either manually or using filters, and then select Edit from the Bulk Actions drop-down menu and click Apply.
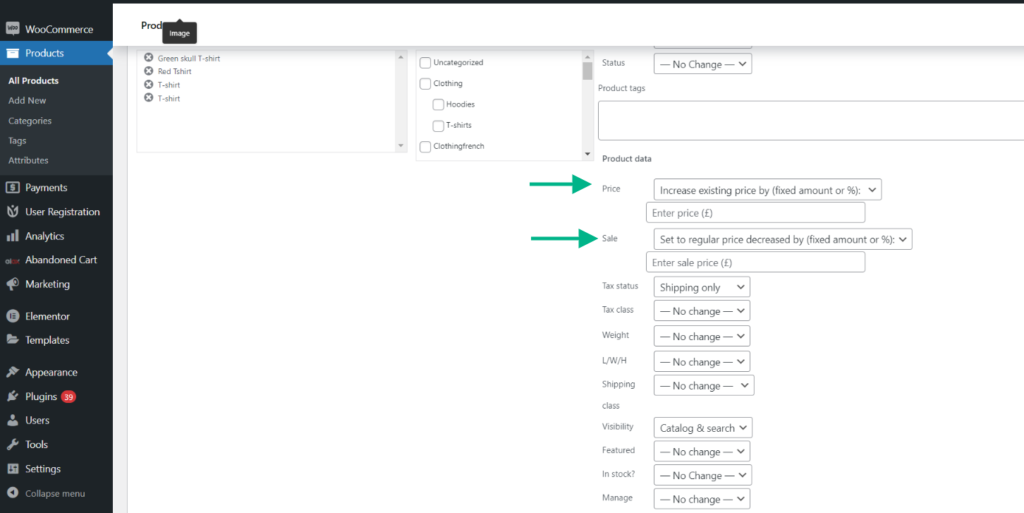
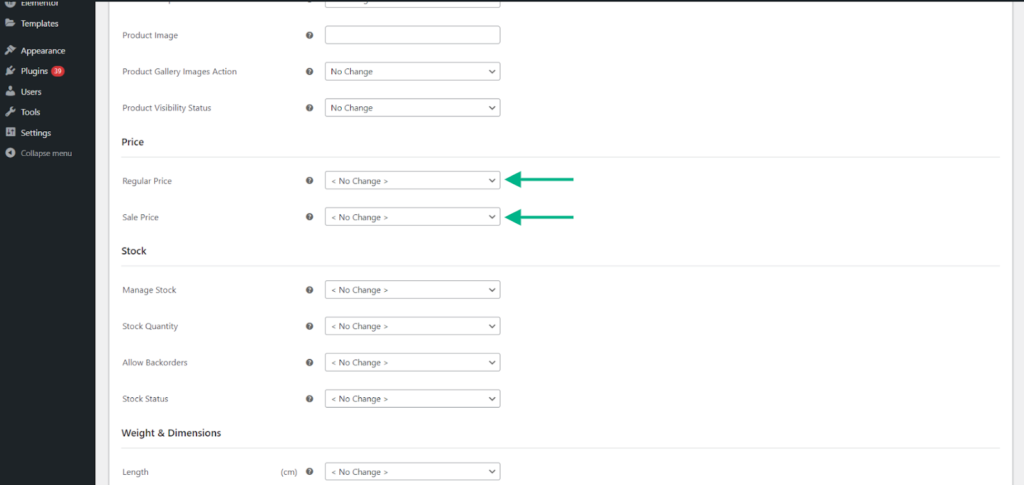
A product editing form will now appear. Because we only want to change the price, navigate to the Product data section and look for the Price and Sale options. You may adjust all of your product pricing at once here.
The following are the default WooCommerce options for changing product pricing in bulk:
- Price – Increase or decrease the existing price by (fixed amount or %): You can change the price of all the items by a defined amount or percentage.
- Sale – Increase or decrease existing sale price by (fixed amount or %): You can change the sale price of all the items by a defined amount or percentage.
- Sale – Set to regular price decreased by (fixed amount or %): You can reduce the regular price by a specific amount or percentage to determine your sale price.
When you’re satisfied with the new prices, scroll down and click the Update button to apply the adjustments.
Bulk edit variable product pricing using a plugin
You may use ELEX WooCommerce Advanced Bulk Edit Products, Prices & Attributes to apply a set regular price and sale price to all product variants produced using global and custom attributes in your shop. We are going to see how to bulk edit variable products and their variations
After installing and activating the plugin, you can access the plugin settings by going to the
WordPress Dashboard > WooCommerce > Bulk Edit Products.
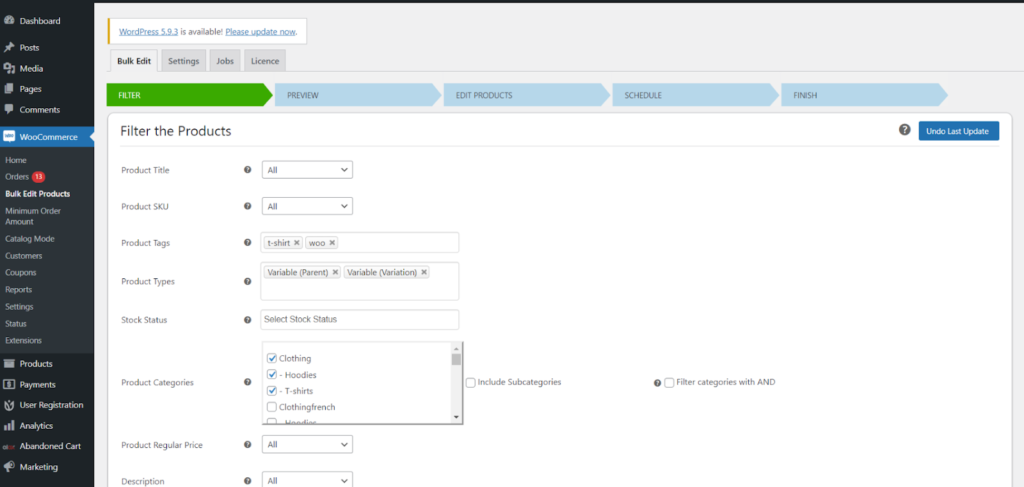
The first step is to filter the products you’d like to bulk edit. The filter page offers a large array of customization options. For the sake of this demonstration, we will stick to the pricing options.
Step 1: Change the price of existing variable product variations
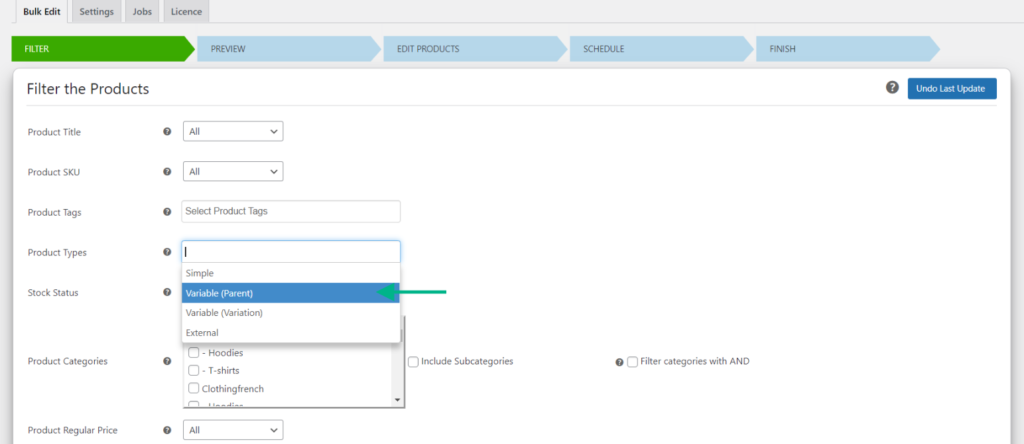
After accessing the plugin settings, go to the Filter section and select Variable (Variations) under the Product Type section.
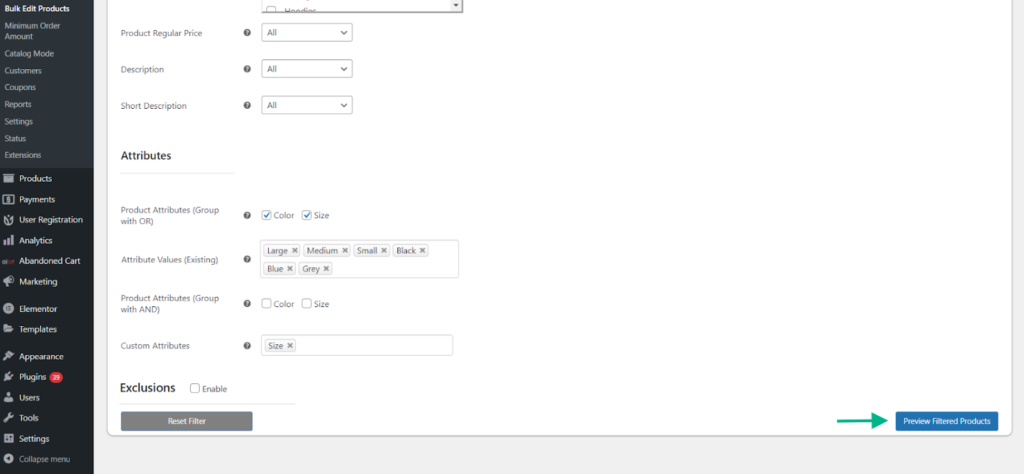
In order to filter the regular price, select from the options greater than “>”, Less than “<”, or equal to “=”. Once you have filtered out the products you want to bulk edit, click Preview Filtered products.
You may head to the Edit Products tab of the plugin after filtering and having a preview of the filtered variable products to apply the pricing.

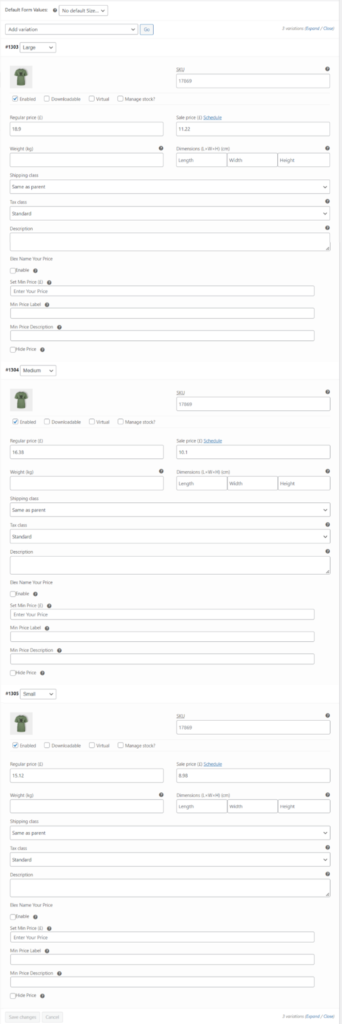
Once you are done filtering, click Continue and preview the selected products. After you have selected the products that you want to change the price for, go to the Edit Products section. Go to the Price section and customize the regular and sales price as per your requirement.
Once the customization is complete, you can go to the product metabox following the same steps as before and preview if the new price has been implemented.
Step 2: Change the price of existing variable product parents
The variable product parent is, as the term suggests, the main variable product which consists of different variations like size, color, etc. For example, a WOO T-shirt is the variable (parent) and the different sizes and colors it is available in are the variable (variation).
The steps for this process are very easy and similar to previous steps. In order to do so, access the plugin and go to the Filter Products section. This is where the step diverges a bit. In the Product Type area, select Variable (parent) rather than Variable (variation).
The rest of the process is the same as the previous step. Once the required customization is complete, you may check if the new price has been applied by going to the product metabox.
Change product pricing by importing product files
To use this approach, you must first export all product data to a CSV file. After that, you’ll alter the file before importing it into WooCommerce, which will update all of your current products with the new modifications. Let’s go through the process.
Step 1: Export product data to a CSV file
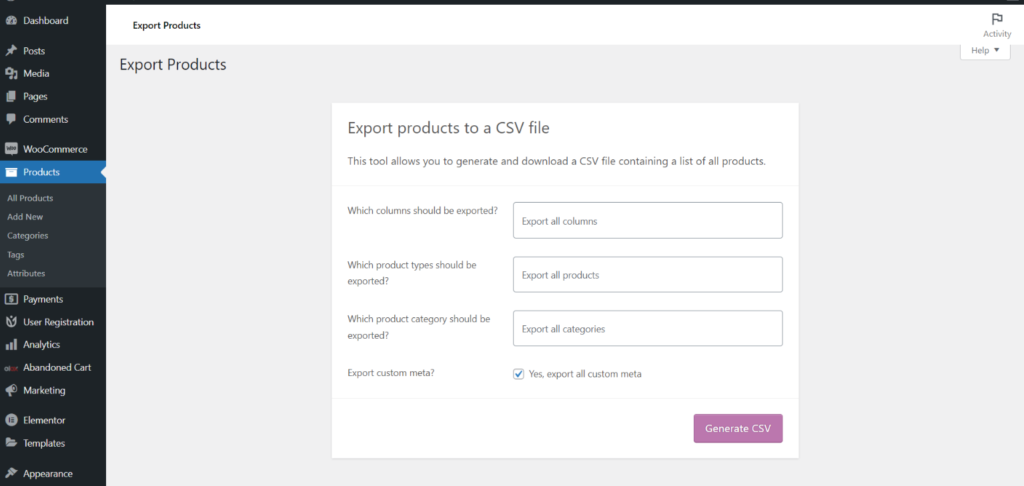
You must first export your product data. To do so, go to Products > All Products on your WordPress Dashboard. Choose the products you wish to export and then click the Export button.
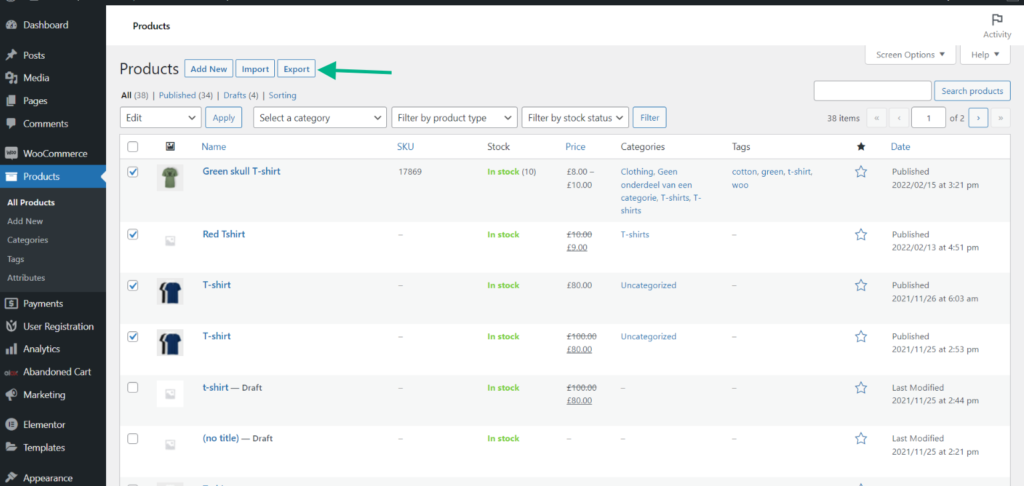
This will lead you to the wizard for exporting products. You can also pick the product type and category you want to export. Check the box that says “Yes, export all custom meta” and then click Generate CSV. This will create a CSV file with all the information about your products.
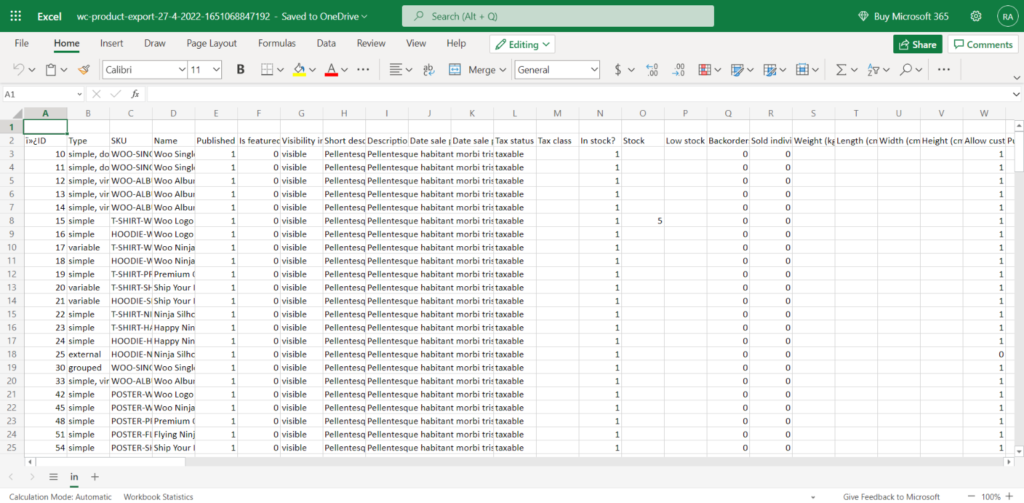
Step 2: Edit the CSV file
Look for the sale price and regular price columns in the downloaded CSV file using any appropriate software, such as Microsoft Excel. The current pricing of each product is listed in those columns. Simply change the prices to your liking and save the file. You may use formulae to provide all products a fixed or percentage discount, establish the same pricing for items in the same category, and more.
Step 3: Import the updated CSV file
Return to your WordPress Admin Dashboard and click the Import button under Products > All Products. Select the CSV file you just updated and make sure the “Update Existing Products” box is checked before clicking continue.
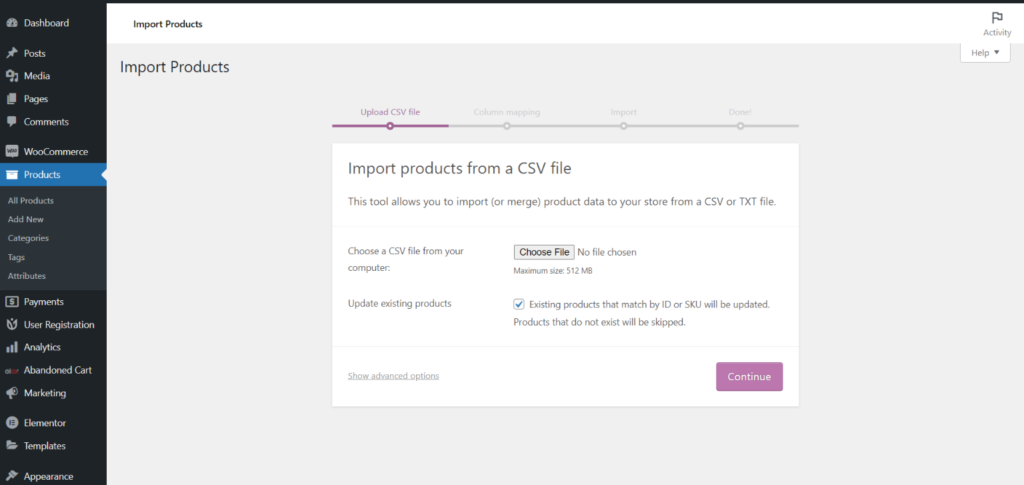
You’ll be asked to map CSV fields to products via the import wizard. Simply leave everything as is, scroll down to the bottom, and click Run the Importer. This will begin the process of importing data from the CSV file. When the process is finished, you’ll get a success message stating that the products were successfully updated.
You may now check the modifications on your products page.
Change product price per country using plugins
We will be using the Price Based on Country for WooCommerce plugin. The plugin makes it simple to establish and sell the same product in several currencies. These currencies are based on shopper locations, allowing you to sell your physical and digital products to people all around the world.
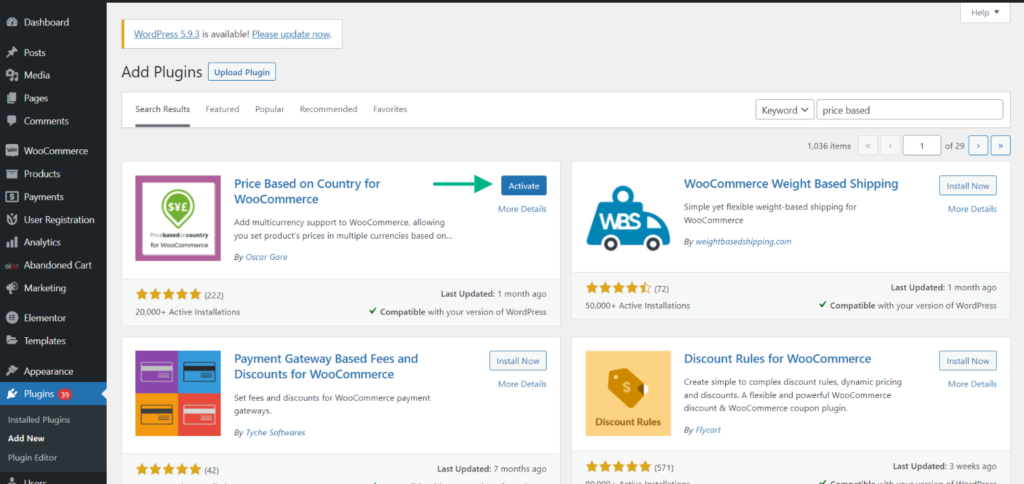
Start by installing and activating the plugin, as you would with any other plugin.
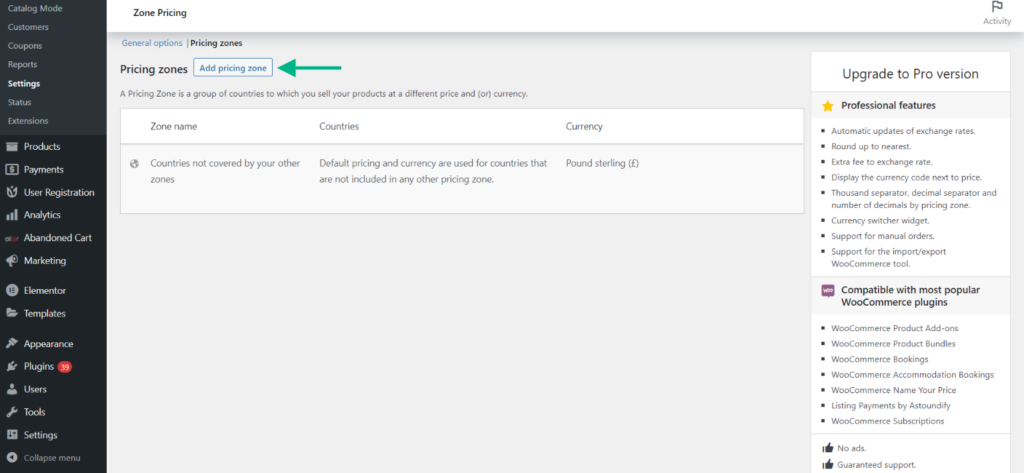
You can access the plugin settings by going to WooCommerce > Settings from your WordPress dashboard. Then choose Zone Pricing from the drop-down menu.
This is where you can add a price zone for a certain nation. It’s used when you want to use currency conversions to adjust prices in WooCommerce.
To begin, click Add pricing zone and enter the required details in the fields provided. After that, pick a zone name (country), currency, and exchange rate for your Zone.
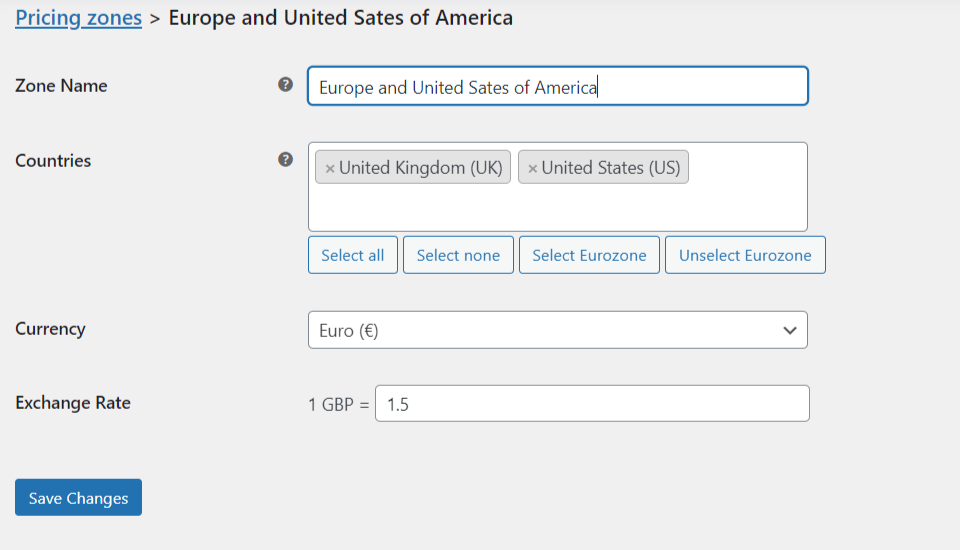
Once you are done entering the data, click Save Changes.
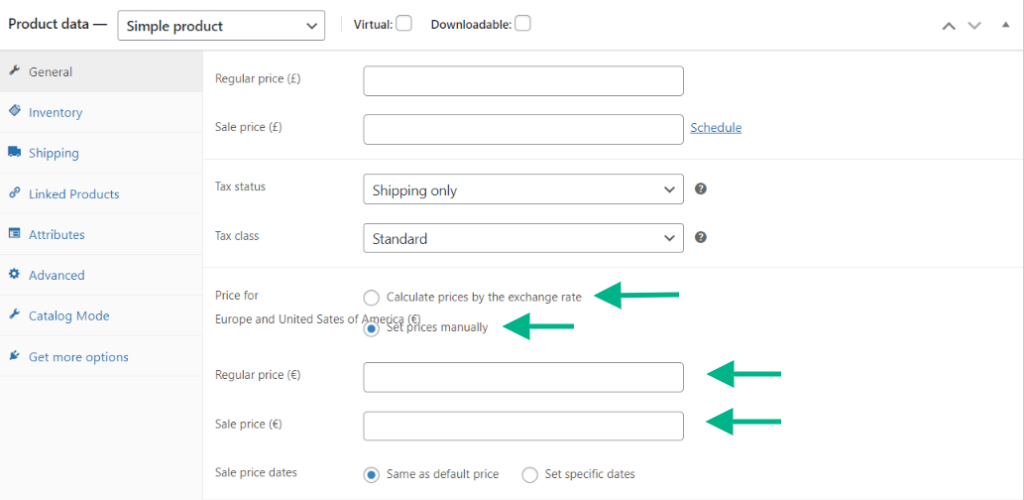
Now go to WordPress dashboard > Products > All products and select a product and click Edit. Scroll down to the product data metabox and click on the General tab. You can find the newly added country with the option to enter a Regular price and a Sale price.
You have the option to enter the price manually or let the plugin automatically calculate the price based on the current exchange rate by enabling Calculate prices by the exchange rate. You also have the option to set the sale price for a specific date by enabling Set specific date.
Conclusion
WooCommerce offers multiple methods to change the price of a product, and we have covered a few of them. The default options to change the price are easy to follow but if you need further customizations, it is possible through plugins. We hope this article has helped you with the process of changing the price for single and bulk products.


")
")
")