
Last updated - September 14, 2022
As you and we love Instagram, so do your audience. Considering connecting it with your WooCommerce store is something undoubtedly important. It is after this that you will be able to upload your product catalog to this widely used platform and create shoppable posts and stories, display products to your customers, and define specific product hashtags for targeted and expanded reach. Let’s use Instagram’s fantastic interface and filters to give your WooCommerce store a strategic front on every mobile device. In this article, we will discuss how to connect WooCommerce to Instagram.
What is Instagram?
A colorful icon called Instagram on your mobile phone is a platform that is entirely visual, unlike Facebook. The motive of Instagram is to allow users to share images or videos with their audience. This is where you can view, comment, and like a post uploaded by your network or anyone publicly sharing.
You will see it as a social networking service that is free of cost with myriad features both for the general public and businesses. This is where creativity, understanding, talent, ideas, and skills are converted into passion, learning, and earning.
Instagram holds a vast variety of user-friendly features ranging from filters, stories, Instagram Live, and highlights to IGTV. Apart from generating direct income, the direct benefits you will see are finding like-minded users, branding your business, marketing your content, creating engagement, and sharing photos and videos anytime and anywhere.
Features of Instagram
- Instagram live video.
- Story features.
- Shoppable tags in stories.
- IGTV
- Turning existing posts into Ads
- Hyperlinking Username and Hashtags in Bio
- Filters
- And many more.
Benefits of connecting WooCommerce and Instagram
- Easy setup to increase traffic.
- Since Instagram is a visual platform, it can prove to be a powerful source that displays your products efficiently.
- Determine your product hashtags and you will see people tagging their images with the same.
- Heighten the level of your store visibility.
- Easily upload your product catalog and create stories and posts on Instagram.
- A hike in sales by redirecting social media audiences to direct product pages (linking posts to the site).
- Greater transparency so increased trust levels.
How to connect WooCommerce with Instagram
Take help from the below guide to go through all the stages seamlessly! Simply, you will be ready to create Instagram shoppable posts.
Connecting Instagram and WooCommerce through ELEX WooCommerce Catalog Feed for Facebook & Instagram plugin.
Another way out for integration is through this plugin. It will simply fetch details from your store to create an Instagram shop. You need to install it on the WooCommerce store and it will automatically do its work.
- Install the ELEX WooCommerce Catalog Feed for Facebook & Instagram plugin.
- Activate it.
- Find Plugin settings in the WordPress admin panel then go to the Facebook Shopping Feed option from the left sidebar.
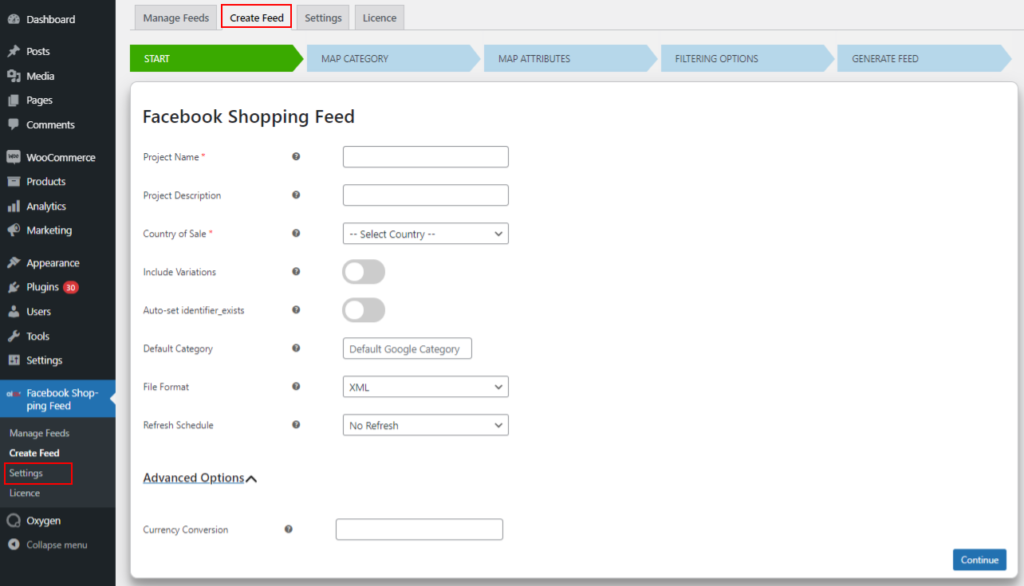
- Click Create Feed and fill the columns of the project name, description, refresh schedule, permissions for variations, etc.
- Click Continue.
This will redirect you to the Map Category section.
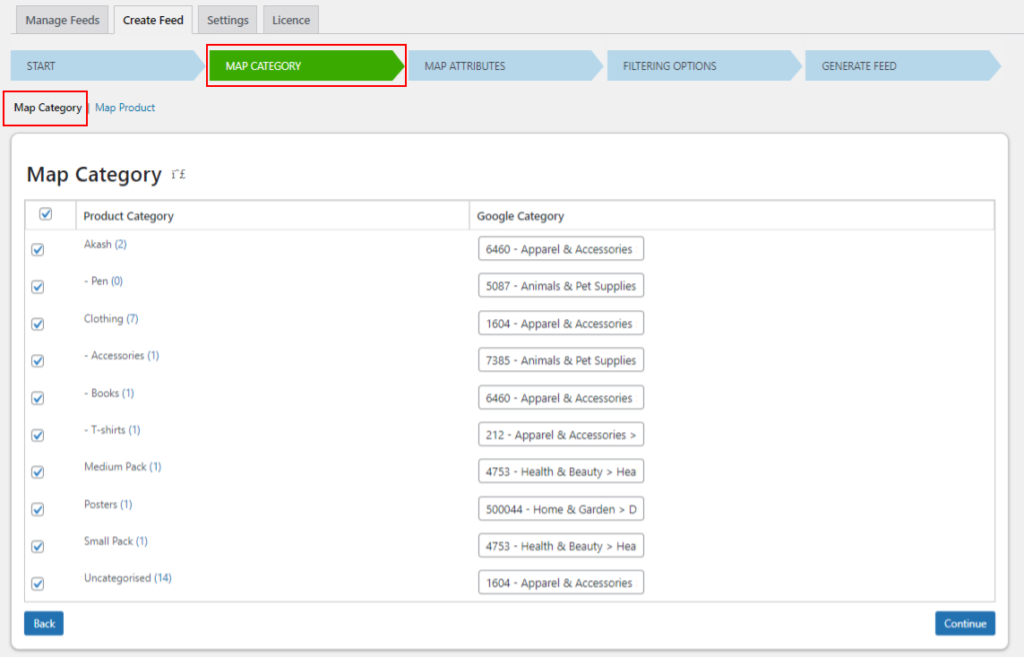
Here, you need to connect your WooCommerce product categories to relevant Google categories. When you type in the field, you will get the list and choose from the possible categories.
You can also add Google categories directly specifying product items by going to Map Product.
Map Attributes Section

Here, you do the mapping of product attributes. You will see how the plugin automatically maps the specific attributes relating to the product. You can adopt manual options as well to update, attach, prepend data, or set additional rules.
Click Continue. And move on to Filtering options.
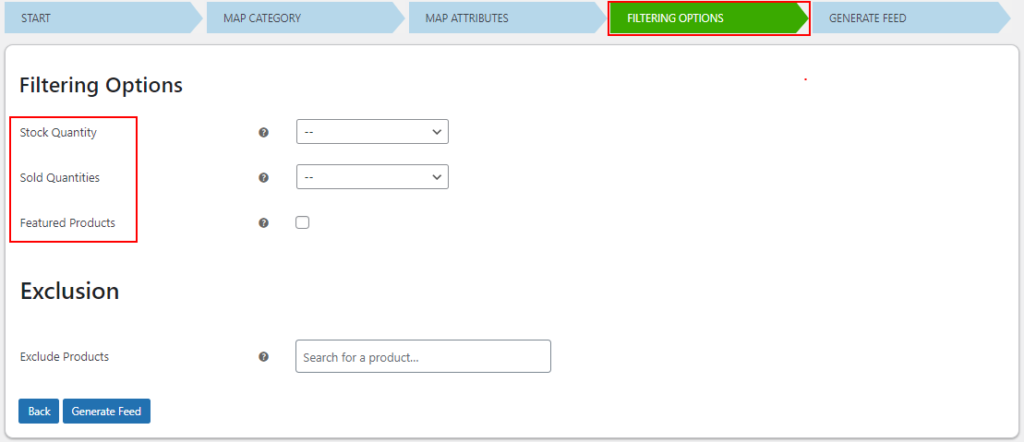
You can select from the provided filtering options: Stock Quantity, Sold Quantities and Featured Products to manage your feed with specific product categories.
Also, the plugin offers a feature of Exclusion from the feed. Just add the names of the products that you don’t want to show in the store catalog feed of social media platforms.
Generate Feed
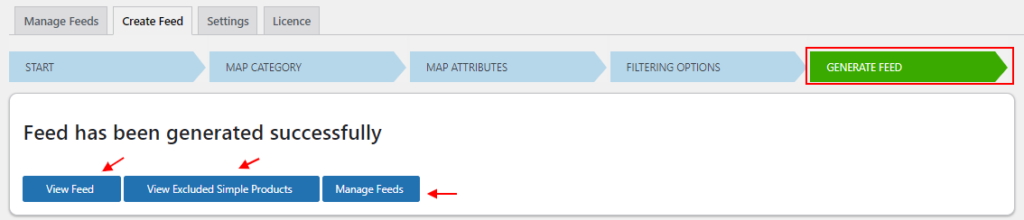
After setting up filtering options, click Generate Feed. You can also view it by downloading or clicking the Manage Feed button for more changes.
Facebook Configuration
Setting up your Facebook Page
- Access your Facebook account.
- Go to Pages.
- Click on Create a Page.
- Add the required information. (Fill in according to what you want to display on Instagram).
- Click Save.
- Keep the category as Product, Product/service, or Shopping and Retail.
- Click on Create Page.
Building up your Shop Catalog
After setting up a Facebook page, it’s time to build a Shop Catalog.
- Open your Facebook Catalog Manager
- Click Get Started
- Go to Create a Catalog
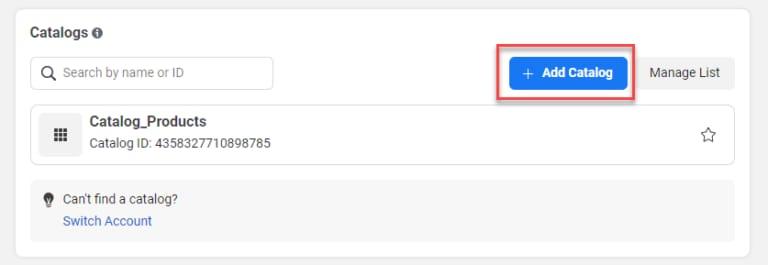
- Click Get Started and here will be able to add a New Catalog, select your Catalog type as Ecommerce.
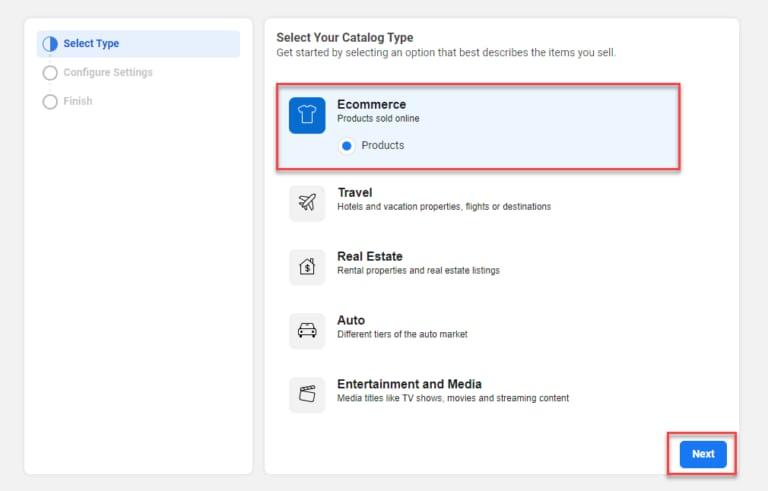
- Click Next.
Click the See Details button and you will get a list of options: Manual, Data feed, Partner Platform, and Pixel.
Click Data Feed and then Next.
- Click the Upload product info under the Upload method.
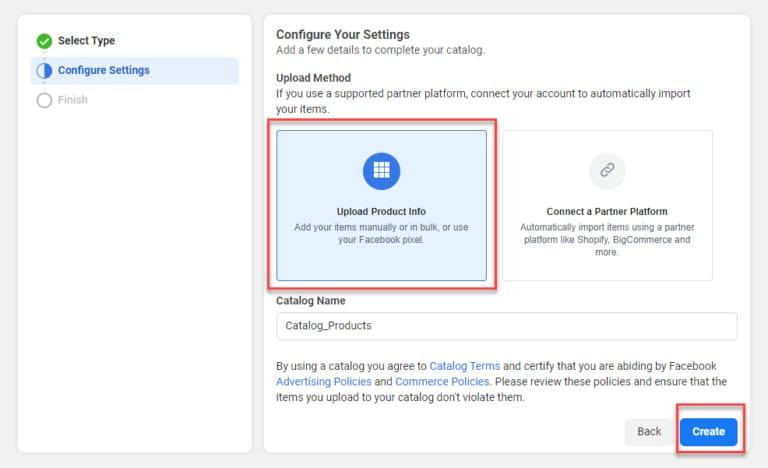
- Upload the previously downloaded data feed with the option ‘File Upload’ and click Next.
Great! You will see automatically added products in the Facebook page catalog.
Now, your Facebook and WooCommerce are connected. Now, let’s connect with Instagram.
Creating Instagram Business Page
- Create a new Instagram account. Or login to the existing account.
- Go to Instagram Settings.
- Click Switch to Professional Account.
- Fill in the required information about the account that matches your WooCommerce store.
Connecting Facebook and Instagram accounts
- Sync your Facebook account with Instagram
- Go to app settings
- Click Accounts > Linked Accounts.
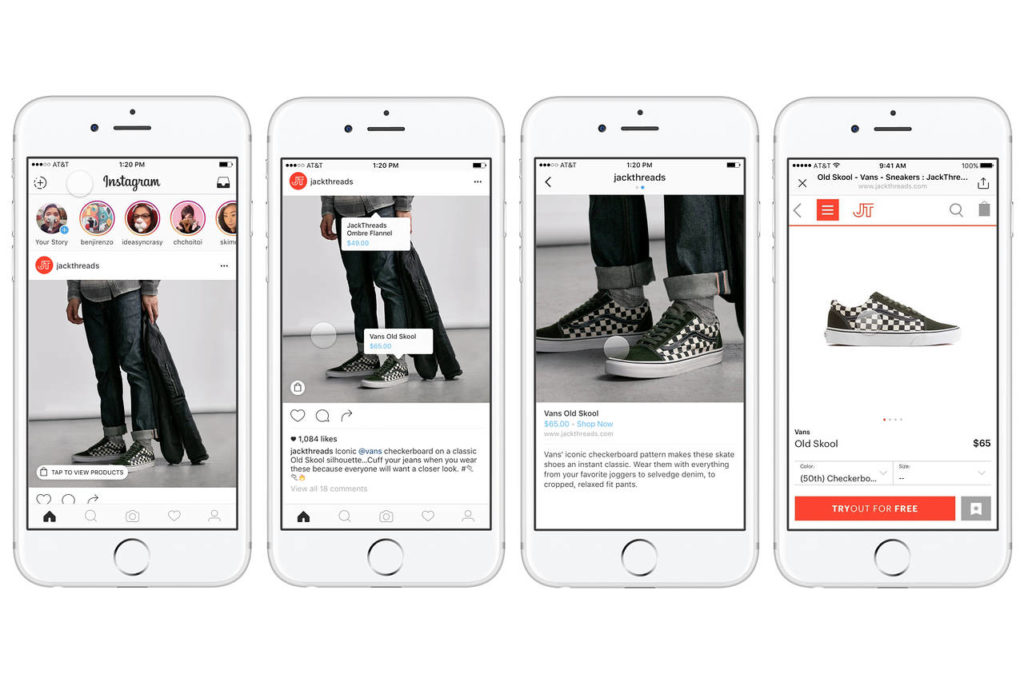
Setting up Product tagging on Instagram with the Instagram shop
- Open Instagram
- Go to your Instagram Settings > then Business > Now, Set up Instagram Shopping
- Click Get Started.
- Connect your Facebook page by logging in to it.
- Click Next.
- Choose the product catalog imported from WooCommerce.
- Hit Next and select the website domain with the WooCommerce store.
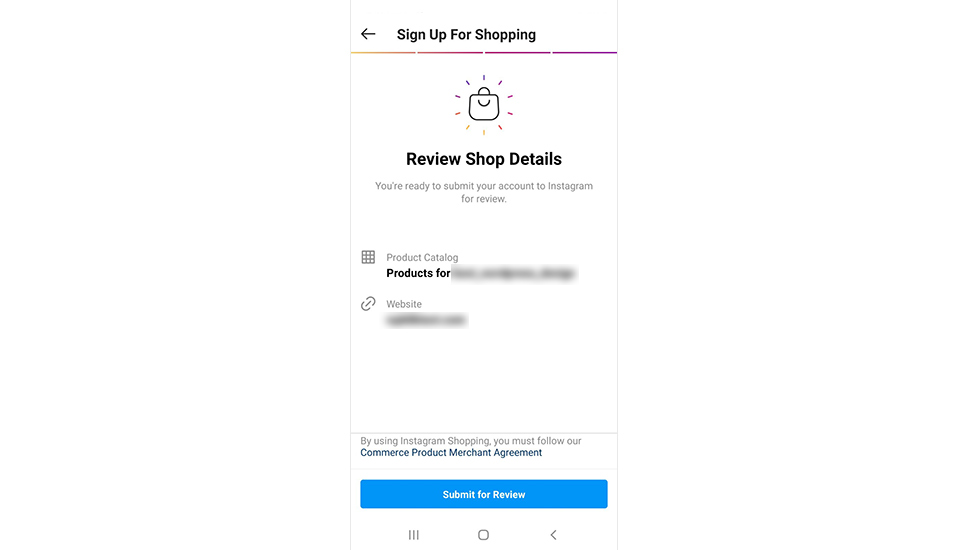
- Click Submit for Review.
Finally, You have completed the configuration. Now easily tag any product through the Tag Products option while uploading any Instagram post. Done! This is how you can display your products on Instagram.
The process seems a bit lengthy but we have curated a detailed yet simple step-by-step guide to follow. So let’s leverage Instagram at its best by connecting it with WooCommerce. If you still want to learn more about this plugin and how to integrate you can visit this article.
Let’s upload your product catalog to this widely used platform, creating shoppable posts and stories, displaying your customers what you want to, and expanding the reach through this integration. Follow the guide on how to connect WooCommerce to Instagram.


")
")
")