
Cloudflare is one of the most popular CDN providers in the world, and it’s also a powerful security solution. Setting up Cloudflare for your WordPress website can be time-consuming, but with this guide, you won’t have to worry about that! We are going to show you how easy it is to connect the WordPress website with Cloudflare so that all of your visitors are served from their nearest location.
First of all, I want to tell you that this is a free method to connect your WordPress website with Cloudflare. let us see;
What Is Cloudflare and How Does It Work?
Cloudflare is a Content Delivery Network (CDN) that stretches across the globe. The company has over 1 billion IP addresses and its network covers more than 200 cities in 90 countries!
Cloudflare works by caching your website so visitors are not always re-downloading each page. What this means is that when a visitor types in either of the URLs below, their computer will automatically download all content from Cloudflare’s server instead of yours.
How to Connect WordPress Website with Cloudflare
Let’s discuss step by step how to connect Cloudflare’s CDN with the WordPress website easily.
Step 1
Open “Cloudflare” in any browser. Click on “Sign Up”. If you already have an account then click on “Log In”.
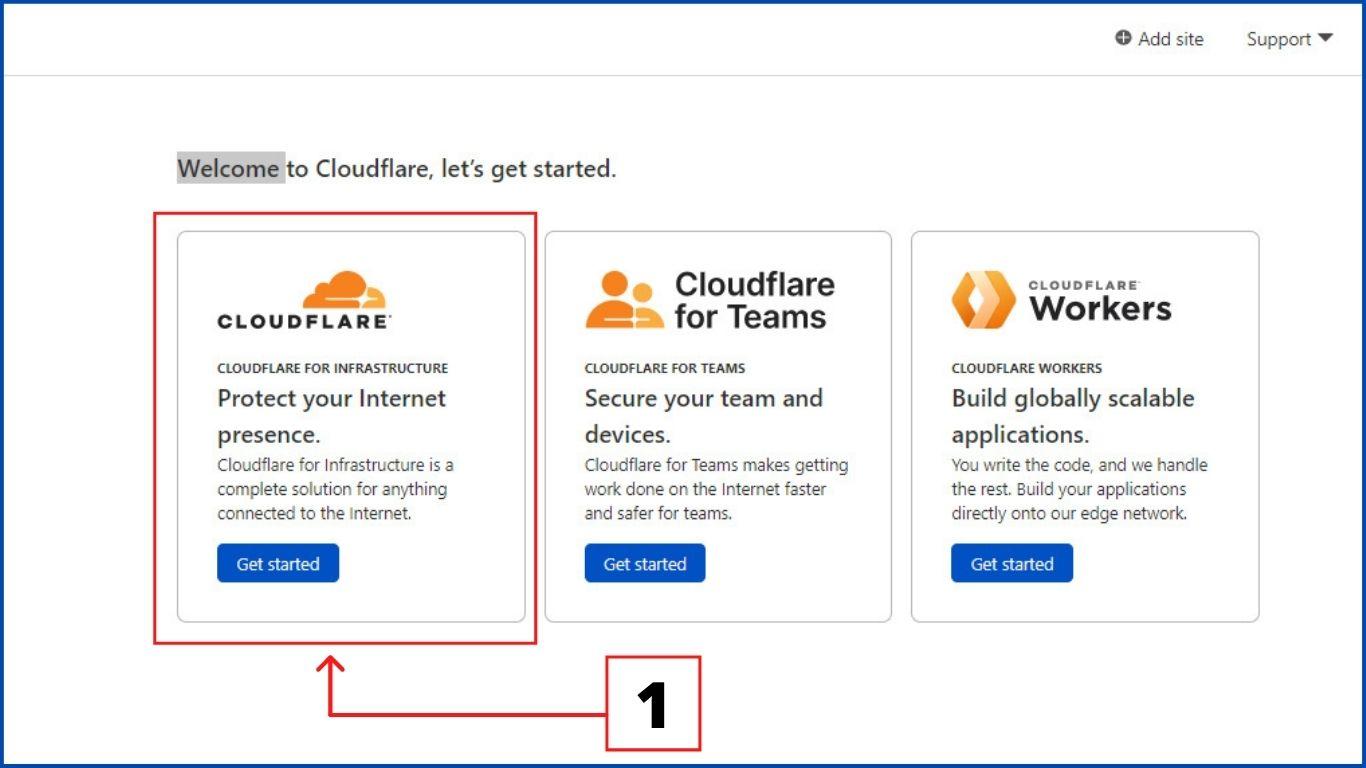
Step 2
Now you will see three information boxes you just need to click on the “Get Started” Button of the first box,
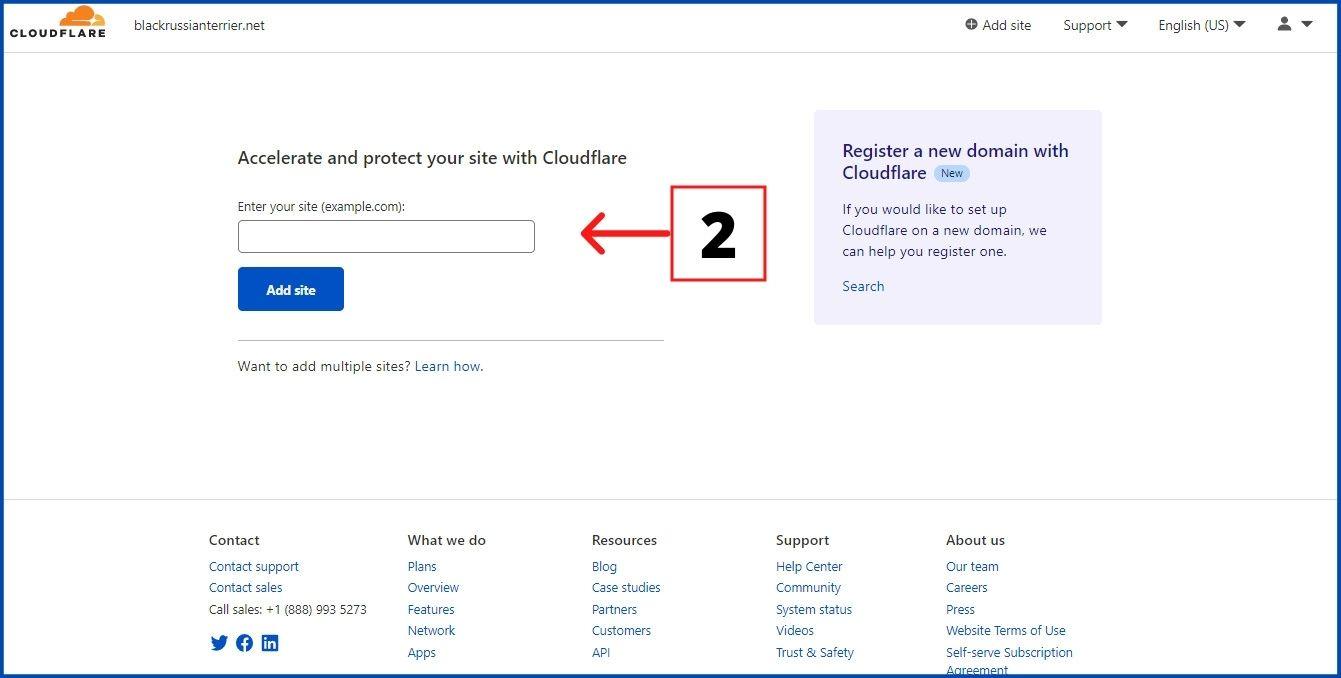
Step 3
Now you will see the add site option; enter your website domain name and then click on “Add Site”.
Step 4
After that, you will see multiple plan options. Just scroll down and click the “Free plan” box. After that click on “Continue”.

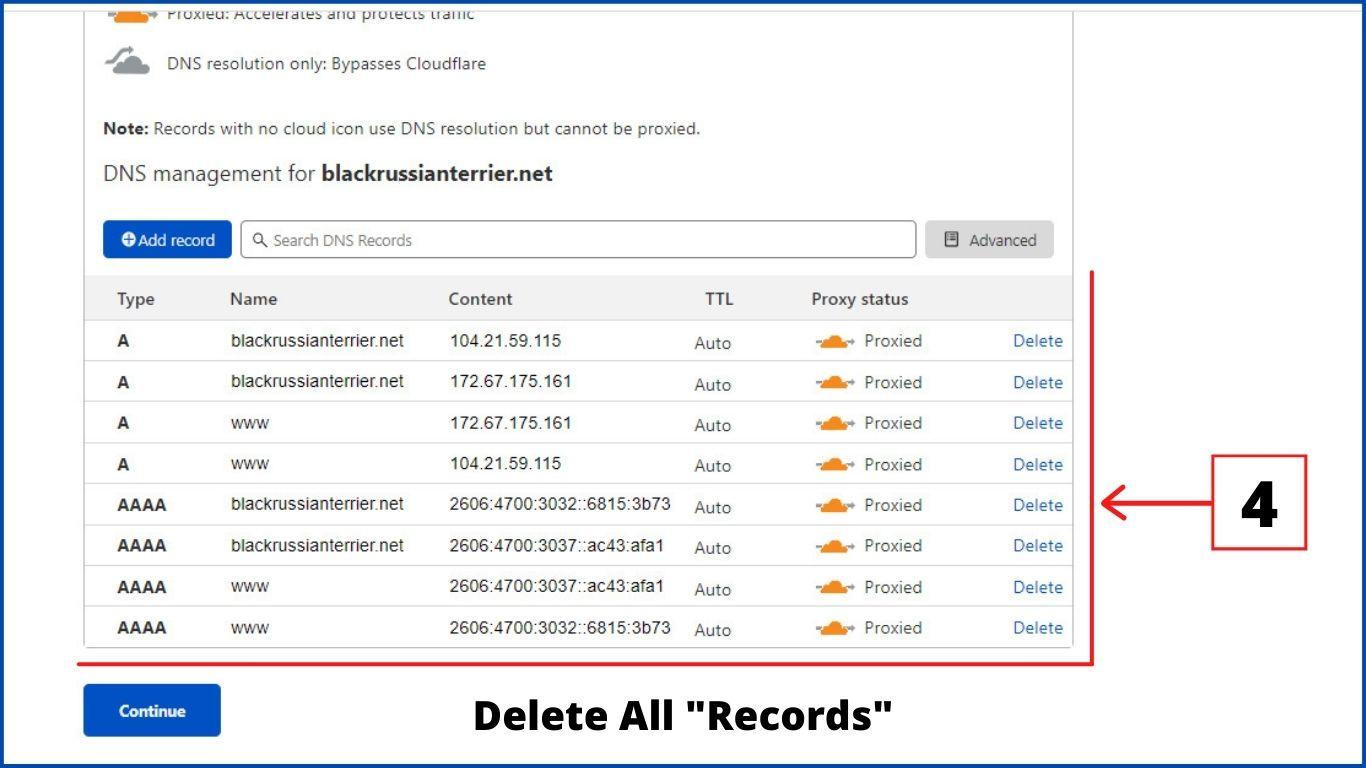
Step 5
Now you will see multiple records. If you don’t see records then click on “DNS” you will see multiple “Records”. Now delete all “Records”.
Step 6
We have to add only “Two Records” to connect the WordPress website with Cloudflare. For this, open your website “CPANEL”.
Step 7
Now click on “Add Records”.
- Select Type “A”.
- Put your website domain name in the “Name” section.
- In the IPv4 address section, you have to add your website “Shared IP Address”.
After that click on the “Save” button.

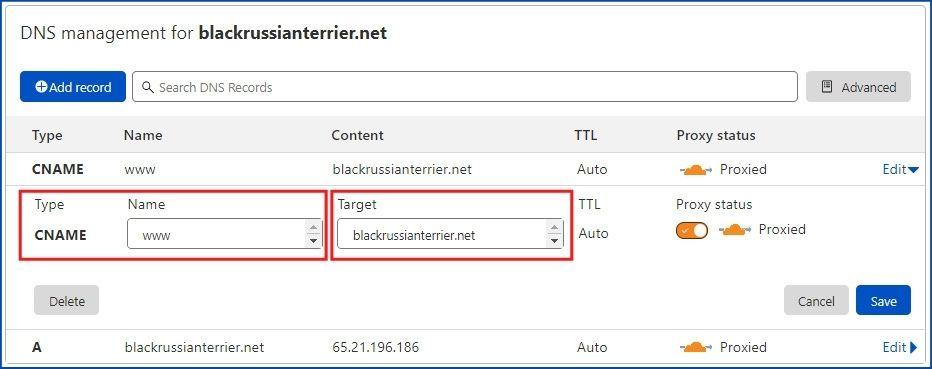
Step 8
Now we are going to add a second record. Click on add record and
- Select Type “CNAME”
- Write “www” in the “NAME” section
- In the “Target” section you have to add your website “Domain Name”
After that click on the “Save” button.
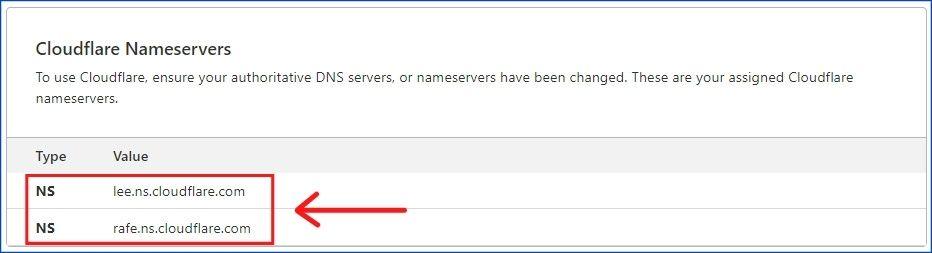
Step 9
In the end, you just need to change the name servers of your hosting with the Cloudflare name servers.
Benefits of Cloudflare
1. Free CDN
One great benefit of Cloudflare is its free CDN service. It’s easy to integrate and I have never had any performance or SEO-related issues with it.
2. Browser Caching
Cloudflare is a service that can give your website an important advantage. It will help you speed up page loads by caching static resource files, such as images and stylesheets from websites like Google fonts in the user’s browser cache for longer periods of time after every visit so they don’t have to reload those pages again from scratch each time!
You may not need any third-party plugins or .htaccess tricks either because CloudFlare has these options built right into their settings menu under “Caching.”
3. Load Balancing
Load balancing is the process of splitting up your website’s traffic among multiple servers in order to make sure that you are serving content from whichever server was nearest for each visitor.
The load balancer also does this based on geography, which means if one backend goes down then it will be replaced by another geographically closer location without missing a beat!
Although not just any old tech can do what Cloudflare offers automatic failover and geographic routing among other things.
4. Optimized Network Routing
Argo is a new Cloudflare service that aims to reduce the latency in delivering content. Argo can be activated under any plan and it’s billed based on usage, which means you’ll never have an issue with unexpected costs when using this tool!
5. Image Optimization
Cloudflare Optimize your Images to Help Them Load Fast. Cloudflare’s compression service can help you optimize the size of images on your website and make them load faster.
They offer lossless or lower quality compressed files for those who want smaller file sizes, but don’t need as much bandwidth (i.e., mobile users).
The best part is that this will work with any device; whether desktop computers/laptops, tablets such as iPads and Android devices everything!
Additionally, if we’re talking about WordPress site owners then there are even more options available:
- WebP 2x PNG support is currently only available through our PRO plan at $25 per month ($150 annually);
- Joomla Compression Module
Wrapping Up
If you are looking to protect your website from hackers, speed up load times and make it more secure, Cloudflare is a powerful tool worth considering. You can also experience benefits like improved SEO rankings or reduced bandwidth costs by using our free services.


")
")
")
Hi, I have connected my WordPress website yesterday with Cloudflare by following your tutorial but since then I can’t access my website’s dashboard and It’s showing this error message: “ERR_TOO_MANY_REDIRECTS”. Can you please tell me why I’m getting this error message?
Clearing cache, browser data may help, Otherwise, better to contact hosting provider support.
These are a few additional things to try:
1. To purge Cloudflare cache, login to their dashboard, click into “Caching” and click “Purge Everything.”
2. Try to change the Cloudflare Crypto settings from Flexible to either Full or Full (strict).
3. If you only want to use Cloudflare’s DNS, and not their proxy/WAF service, then you should make sure your DNS records are set to “DNS Only.”