Last updated - November 29, 2022
WooCommerce is, without doubt, one of the most popular open-source eCommerce systems available today. It does, however, have some restrictions and downsides, just like any other software.
If you are a WooCommerce user, you have probably been thinking about the tedious process of the WordPress login and registration page, along with the page being quite dull. Because of this, there is every possibility of your eCommerce site appearing unprofessional.
In this article, I’ll show you how to quickly and without much fuss design and build login and registration pages that work with both eCommerce and standard WordPress.
Overview
- Factors that prescribe the need to customize the WooCommerce login form
- Customization with User Registration plugin
- Customizing the login page using Elementor
- Additional Plugins to Customize the Login Page
Factors that prescribe the need to customize the WooCommerce login form
Here are a few reasons why you should modify your WooCommerce Login and Registration page:
Limited Field Options: The WooCommerce login registration form comes in a standard form with enough fields for you to create an account. However, if you wish to add more fields, such as Checkboxes, dropdown menus, billing and shipping addresses, etc., you won’t be able to do so by default. Such fields cannot be shown as needed or requested.
Separate Login and Registration Pages: This is a default feature, wherein WooCommerce’s login and registration forms are shown on the same page. Moreover, specific pages for login and registration forms cannot be built, even though they are quite useful. One way to circumvent this problem is to utilize code or a plugin.
Limitations in design: WooCommerce does not allow you to alter the visual appearance of the default login and registration forms, even if it looks drab, monotonous, and unappealing. Owing to this, multiple colors, font types, or borders cannot be used on the form, even by default.
What’s the solution? Here, we will show you three ways to customize the login page.
Customization with User Registration plugin
A WordPress plugin is the simplest method to customize your WooCommerce login page.
We understand how tough it is to find the ideal plugin that is both simple to use and customizable, for your WooCommerce My Account page.
For this purpose, we suggest the User Registration plugin, a WordPress plugin that focuses on making your website’s login and registration forms more effective. It includes a simple drag-and-drop interface that allows even a novice, with no coding experience, to be able to personalize it.
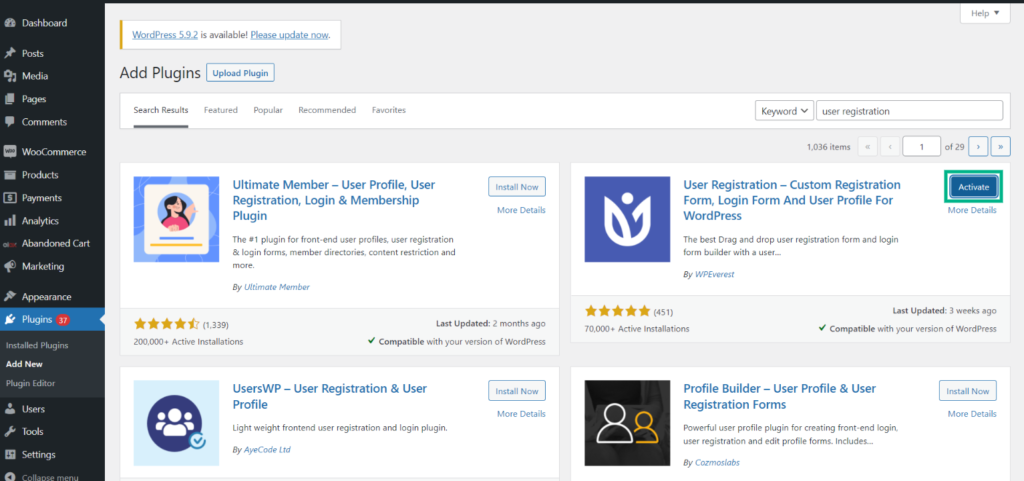
Start by installing and activating the plugin. Go to your WordPress dashboard and Click Plugin > Add New > search for User Registration in the search panel. Click Install and then Activate once you’ve found the plugin.

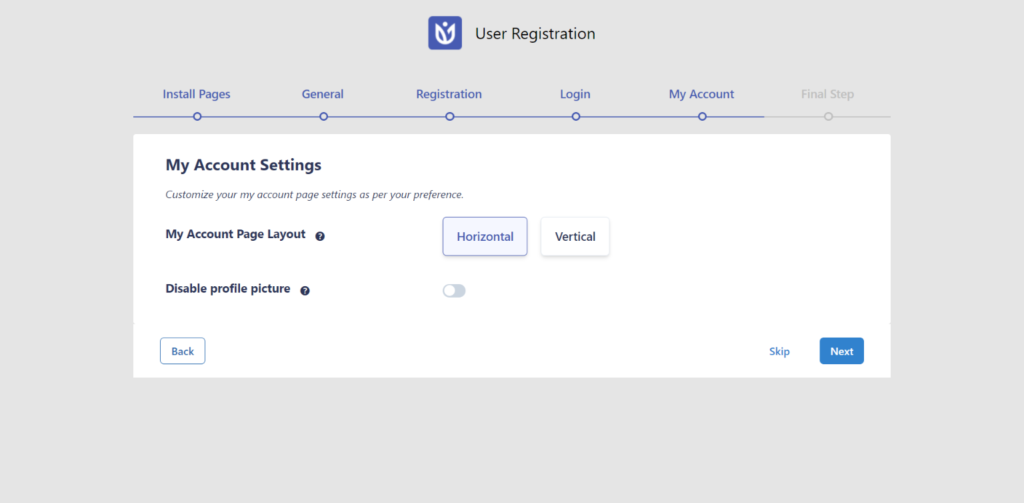
This opens a setup wizard for the plugin which guides you through the entire process. You can either skip or follow the steps.


It creates and installs all the necessary pages, and the rest steps allow you to customize the style and fields on the login page.

Once you have completed this process, you can access the plugin by going to the dashboard and clicking ‘User Registration’. This opens a window where you can customize all the aspects of your login and registration page.
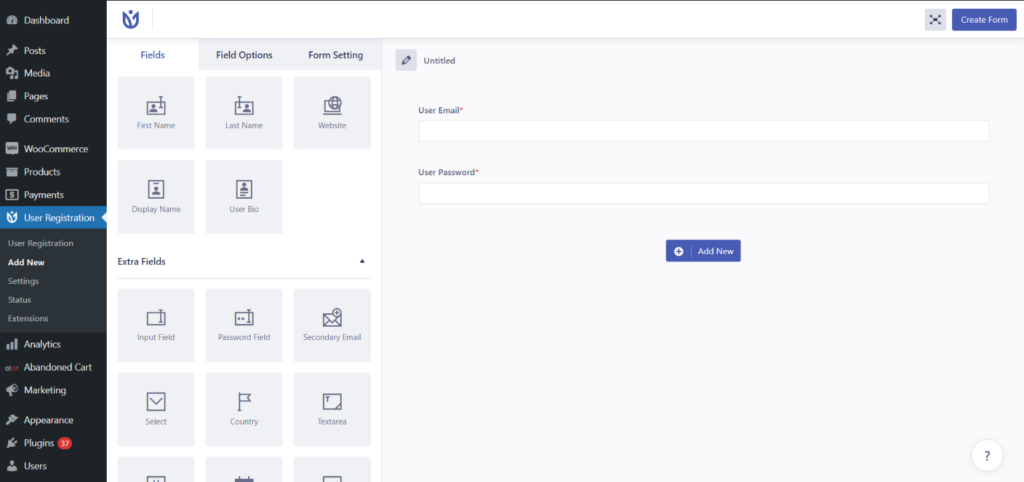

Now that we have everything set up, let us have a quick look at the plugin in action.
On the form, two default fields have already been added:
- User Email
- User Password
You can keep them or get rid of them. Click the Add New button to create a new field. Then, from the left panel, drag and drop the WooCommerce fields you want to the right side. You may generate as many fields as you want. Don’t forget to name your form.
If you like, you may easily remove the fields. Simply move your cursor over the field and pick Trash. A pop-up window will open; choose Delete. You can clone the field in the same way.
Form Fields and Form Settings
Let’s set up the form fields and settings now that you’ve added the essential information. The Form Fields tab is located adjacent to the Fields tab. You can customize the following settings.
General Settings
- Label: Add text to the label for the form field.
- Description: Add a description to the form’s fields.
- Field Name: Add a field name to the list.
- Placeholder: Fill in the placeholder text for the field.
- Hide Label: Hide This option will be hidden if it is enabled.
- Required: If all the mandatory fields are not filled out, the user will be unable to submit the form.
Similar to Form Fields, the Form Settings provide you with extended functionality. The settings are easy to understand. Once you are done customizing, click the Create Form button on the top right.
Once you have created the form, copy the shortcode. Create a new My Account page and paste the shortcode on that page and publish. Make this the default My Account page.


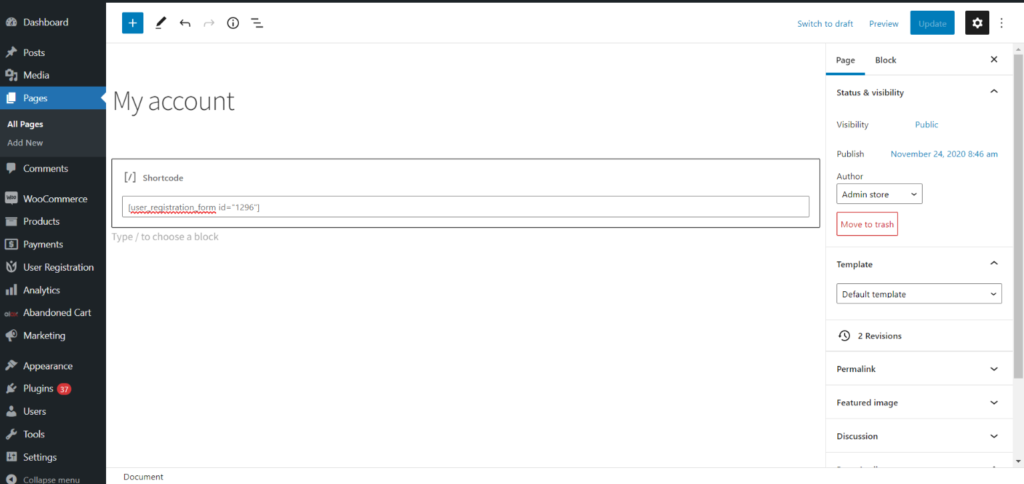

Now go to the Advanced tab under WooCommerce > Settings. On the My Account page option, select the new My Account page and Save Changes.
Replace the default WooCommerce login
You’ll need to replace your new WooCommerce login and registration form with the default WooCommerce form after you’ve generated and altered it. All you have to do is go to WooCommerce > Settings and make the necessary changes.
Select Accounts & Privacy from the drop-down menu. Check the ‘Allow customers to create an account’ on the “My Account” page option under the Account creation column, then Save Changes.
Now select the WooCommerce tab from the User Registration > Settings option. From the dropdown menu, choose the Registration Form we made before. Other fields will show below when you pick the form. Enable ‘Click on this option to Replace registration page’ from the menu. When you enable this option, it will take the place of WooCommerce’s default registration and login forms. Finally, click the Save Changes button.
Let’s move on to customizing the login page.
The User Registration plugin offers add-ons for extended functionality, such as Style Customizer, but that requires you to Upgrade to User Registration Pro. For the sake of the new users who are not sure about spending right away, we will continue using Elementor.
Customizing the login page using Elementor
Start by installing and activating Elementor onto your WordPress. Once you have activated it, go to your WordPress dashboard > Pages and select the login page that we created in the previous steps with the login/registration form shortcode and click ‘Edit with Elementor’.
The Elementor page builder will open, allowing you to customize the Login/My Account page. Since we have already customized the login/registration form, you need to customize the background of that page to your liking.


This section depends upon the user’s creativity, as background changes along with any other changes rely on your website’s aesthetics. Having Elementor pro will give you an upper hand as it will provide you with additional tools to use. You can add a ton of customizations to your newly created login/Registration page, such as:
- Add a new Background.
- Change the color of the background, texts, and buttons.
- Add new images and borders for the images, along with the color for the borders.
- Customize the size of images, texts, and buttons.
- Add new buttons in the form of drag and drop widgets.
- Customize the animation for the buttons, texts, and images.
- Customize the format of the page and much more.
To get an in-detail understanding of how to use Elementor to its full potential, check out Complete Elementor Page Builder Tutorial (with Video).
Additional Plugins to Customize the Login Page
The ability to change and configure both the login and registration pages is one of the most popular requests from WooCommerce users. Many users would want the ability to divide these pages rather than having them all on one page. Another issue is that of Social Login, as it is a very important aspect in today’s internet savvy world. Social login is a feature where a website uses login information such as email IDs to autofill data on another website.
Regardless of the login page customization-related issues, there are plugins that can help solve these roadblocks. The fact that we are having to depend on plugins is because WooCommerce in itself does not allow you to customize the login/my account page.
Below is a list of additional plugins that can help solve this issue:
- WooCommerce Login/Signup Lite: The WooCommerce Login / Signup Lite plugin is a free option, with a premium version available. However, for our purposes, the free version should be enough. It’s quite simple to use. You’ll be able to develop shortcodes that match the type of form you need after it’s installed. After that, you may paste the shortcode onto any page you choose.


- Login/Signup Popup: Instead of on-page forms, the plugin allows you to generate popup login forms that may be activated by a link or button on your website. Popups are useful because they conserve space on the page and allow users to log in from anywhere on the site without being forwarded to a separate login or registration page.


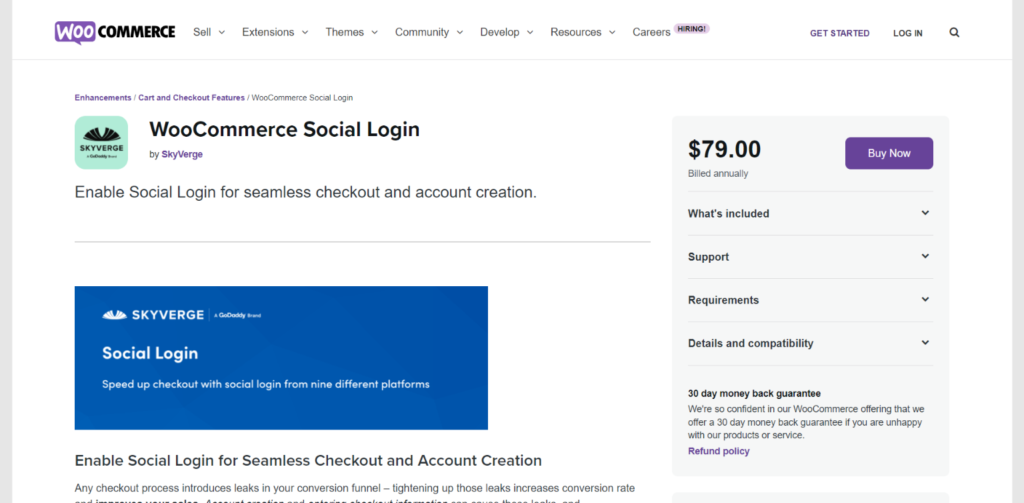
- WooCommerce Social login: This plugin makes it possible for your clients to log in to your site using any of their popular social network accounts, such as Twitter, Facebook, LinkedIn, Google, Amazon, etc. All the social media platforms are supported by this plugin. Furthermore, your consumers can easily utilize their existing login credentials on these platforms rather than establishing new credentials. In addition, your existing clients will be able to link their social media profiles to their accounts without much hassle

- Nextend Social Login: Nextend is a free plugin that allows you to add social networking login to your WordPress site. To make it function with your WooCommerce shop, you’ll need to utilize the add-on. Customers will be able to connect to your WooCommerce store using their various social network accounts.


Conclusion
WooCommerce does not allow you to change the default WordPress login form, which might clash with your website’s style. With a customized interface for clients to log in to their WooCommerce account, it may be a tremendous aid in attracting numerous customers to your site. Small nuances like these are critical for your online store’s success in attracting and retaining clients.


