
In this article, we will discuss how to print shipping labels in WooCommerce and use 2 plugins that are easy to integrate and simple to use for both customers and the store owner.
What is a shipping label?
A shipping label is a piece of detailed information that is pasted on the packaged item to identify the delivery destination and product-specific instructions. A shipping label usually includes the name of the customer, address details, barcode, shipping label number, tracking number, shipping service details, etc.
How To Print Shipping Labels in WooCommerce
You can print shipping labels using the additional WooCommerce Shipping services.
You can install the above free plugin available on the WooCommerce store. Now, to access default WooCommerce shipping services you can navigate to WooCommerce > Settings > Shipping > WooCommerce Shipping > then click the Add packages button. Here, you can see that only the services for USPS and DHL are provided by default. To integrate more shipping courier companies you need to install additional plugins that we will discuss later in this article.
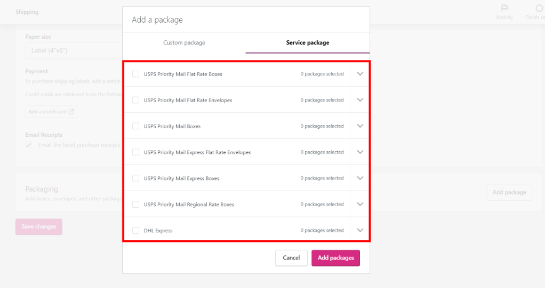
For now, let’s discuss how you can print shipping labels for USPS and DHL through the WooCommerce Shipping service.
Once your shipment partner is set up you can visit the WooCommerce > Settings > Shipping > WooCommerce Shipping section.
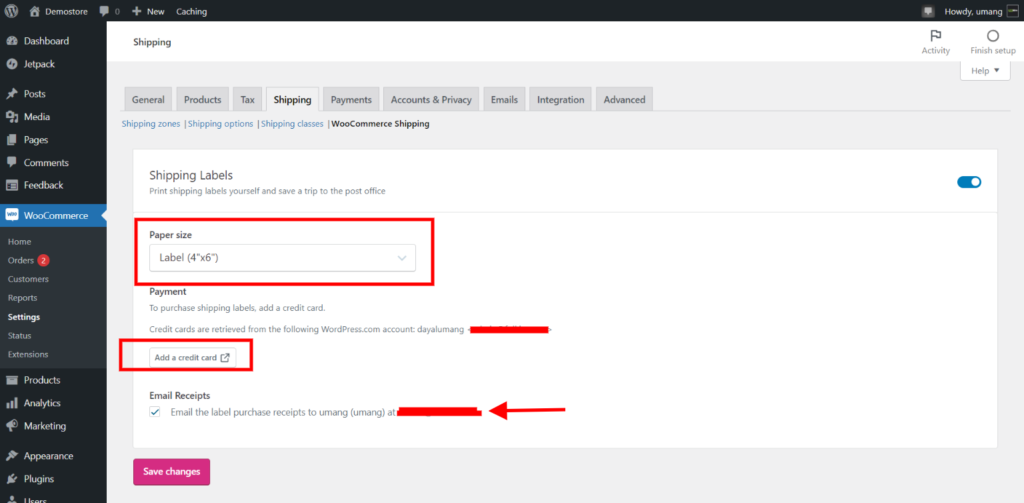
Here, you can set the default print label format among 3 existing options that are Label, Legal, and Letter.
Later, you can add a credit card and save it for future transactions.
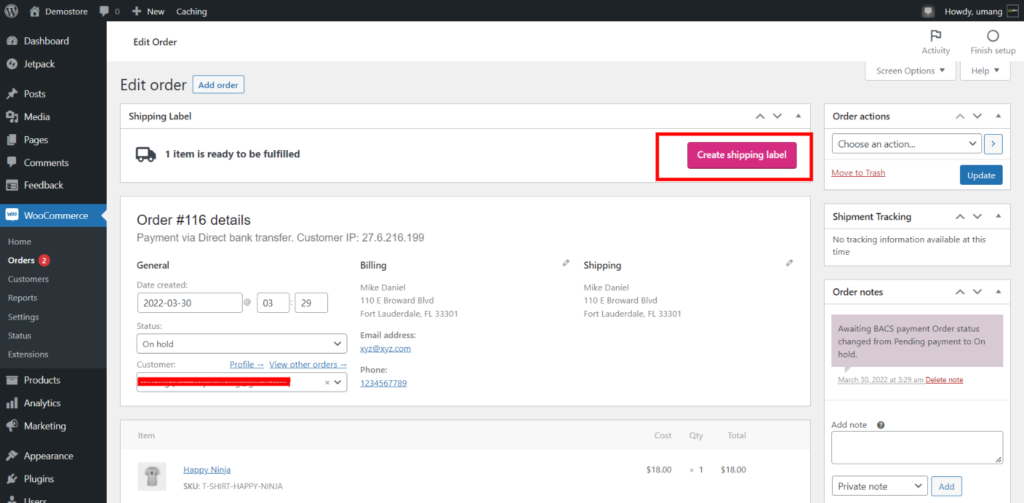
After saving these changes you can order a product from your WooCommerce store to test. From the Checkout page, you can choose the available shipping services between DHL and USPS after comparing their shipping rates. Now, head over to WooCommerce > Order page and open the latest order. At the top, you will find a Create Shipping Label button. Click this option.
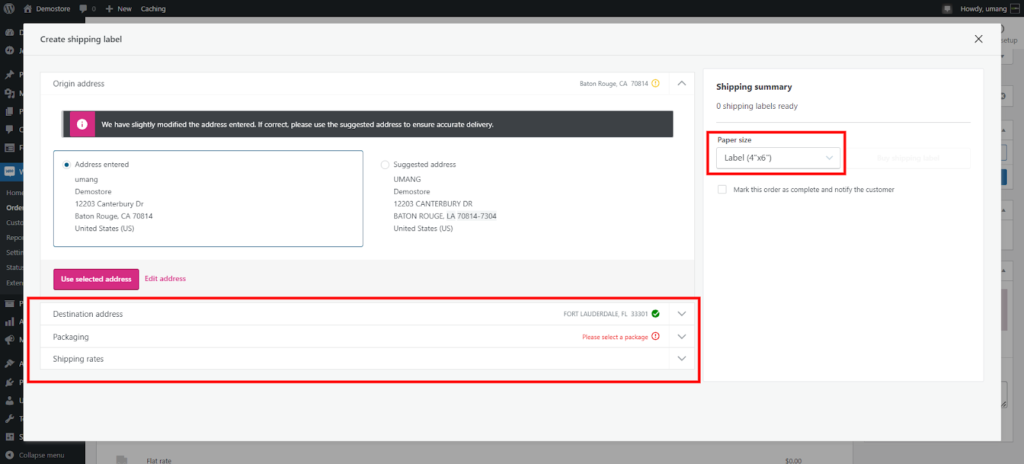
- This will open a new screen where you can confirm the delivery address.
- Choose a packaging option.
- And finally, select a shipping rate from the available options.
Once all the above steps are completed you can choose the paper size from the right sidebar and buy the shipping label.
How to Print Shipping Labels in WooCommerce Using Plugins?
If you consider integrating other courier shipping companies with your WooCommerce store, you can easily set up shipping services and print labels for FedEx, UPS, Canada Post, etc. Print label plugins allow you to include multiple courier options on the Checkout page and customers have the flexibility to choose their desired shipping partner to receive orders.
To print shipping labels for your products on WooCommerce we will use 2 plugins.
- ELEX WooCommerce DHL Express
- ELEX EasyPost (FedEx, UPS, Canada Post & USPS) Shipping & Label Printing Plugin for WooCommerce
ELEX WooCommerce DHL Shipping Plugin
This plugin aims to display shipping services and rates on the cart and the checkout page. You can simply integrate this plugin with your WooCommerce store and generate shipping labels for all orders. Furthermore, customers and WooCommerce store owners have the flexibility to track the shipments from the order page.
How to install and activate the plugin?
After you have successfully purchased the plugin from ELEXtensions, you can access your WP dashboard > Plugins > Add new. Use the Upload New button. When your plugin is successfully installed you can click the Activate button to start using this plugin.
To gain full information on how to set up the ELEX DHL shipping plugin follow this detailed article.
To Enable real-time settings go to WooCommerce > Settings > Shipping > DHL Express. Go to the General tab and enter your account number, Site id, and Site Password. Now, enable 2 options: Real-Time Rates and Shipping labels.
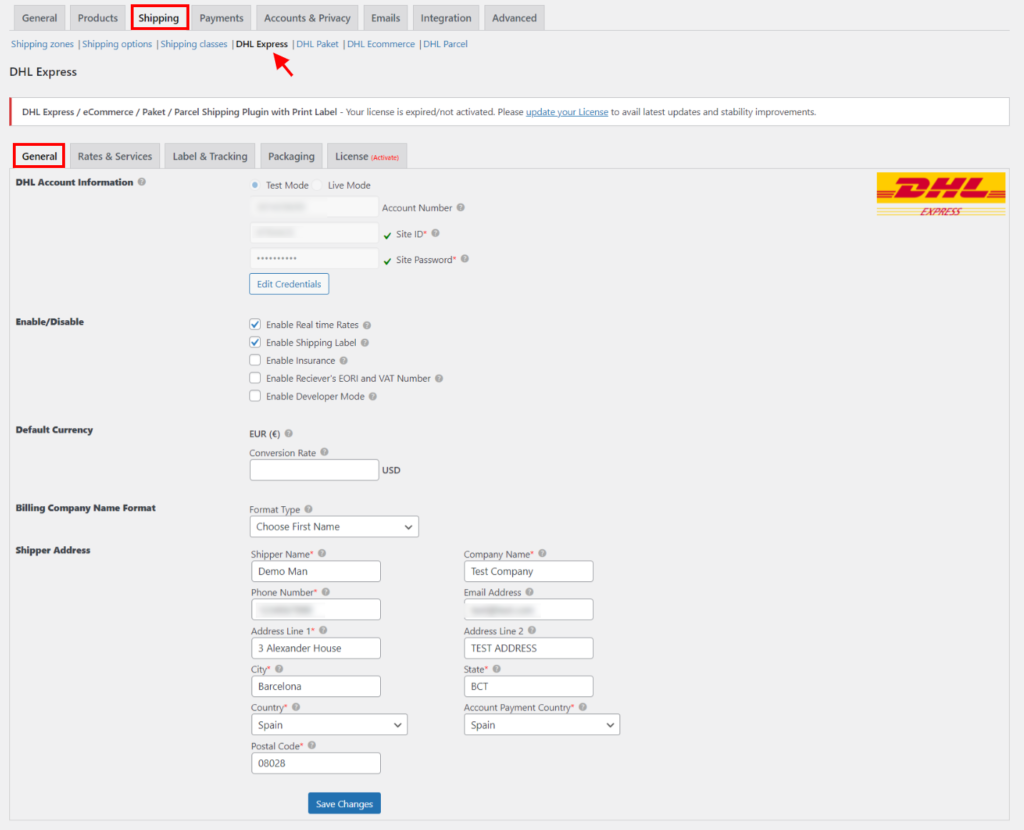
Once you are done you can enter your store address and save these settings. These options will allow you to display DHL real-time rates on the Checkout page.
How to Print Shipping Labels using the ELEX WooCommerce DHL Express?
Let’s head over to your WooCommerce store and place an order.
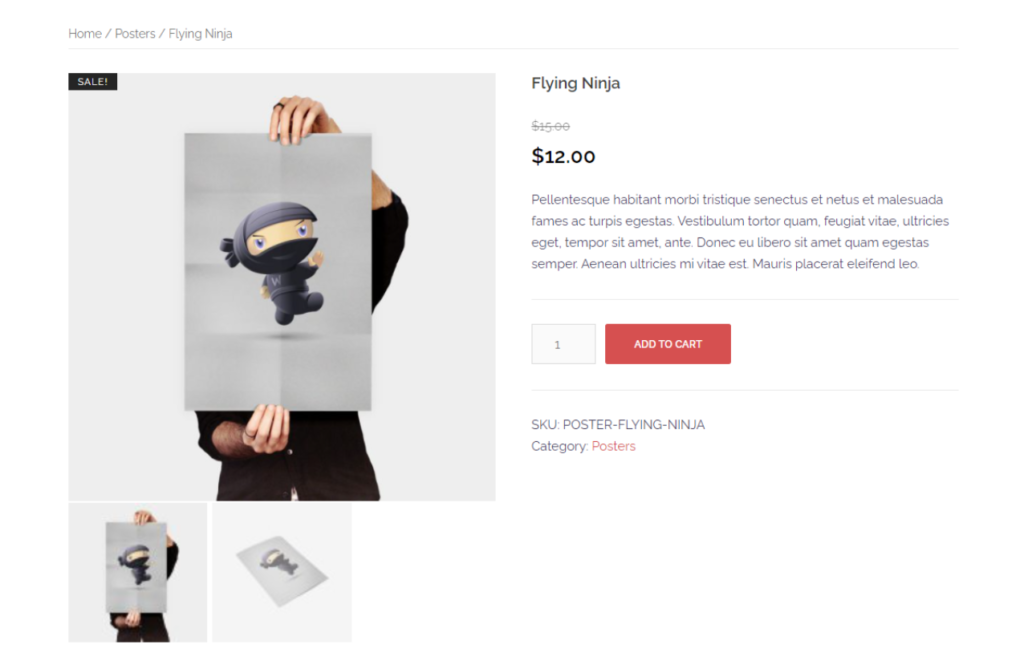
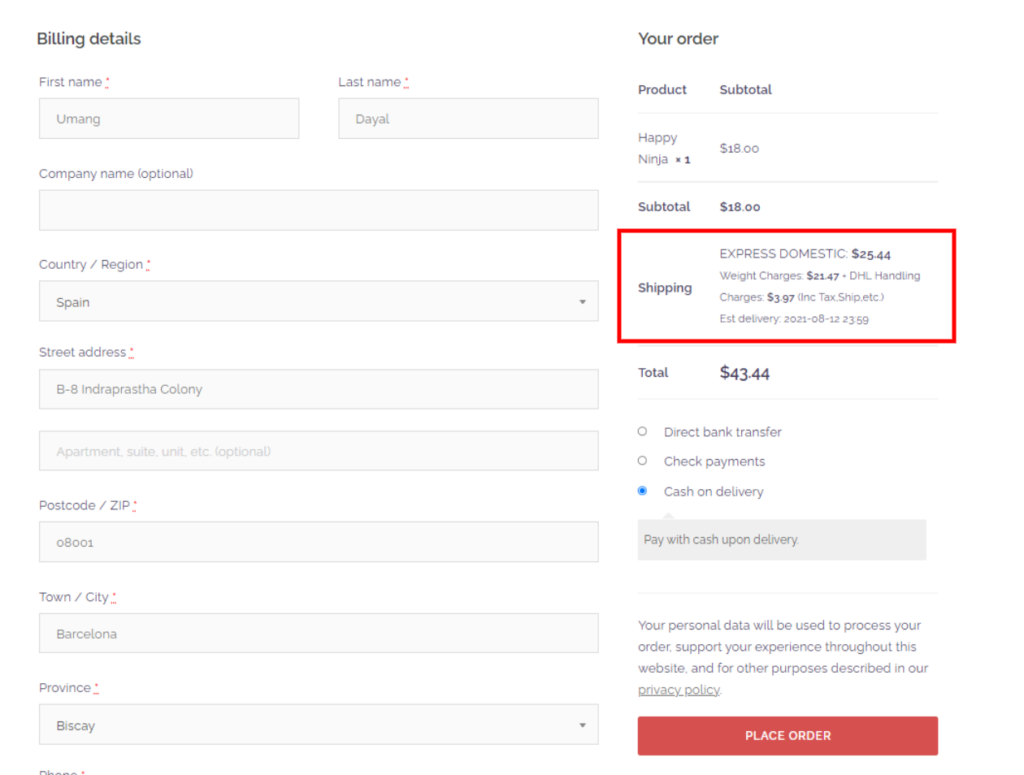
From your WooCommerce store, select a product and add it to the cart, then proceed to the Checkout page. For placing an order use any payment method which is already activated on your WooCommerce store. The plugin will display shipping details along with corresponding rates for customers. Click the Place Order button.
You will be redirected to an order completion screen once your order is placed. To complete your shipment or modify an order you can visit WooCommerce > Orders. Choose the order as per your order id or customer name and you will see a single order page option as displayed below.
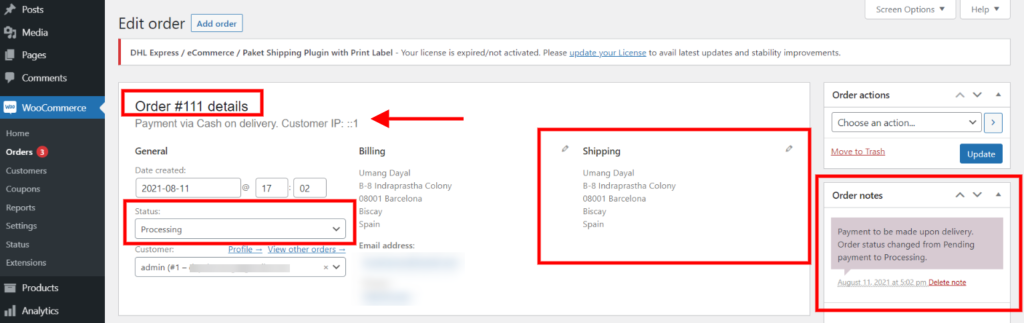
At the left corner of the screen, you can see the order number, and the payment method used to place that order. In Status, you can see the progress of the shipment. When you switch the status to Completed the customer will receive an automatically-generated email that their product has been shipped.
The single order page allows you to customize Billing and Shipping details if necessary. You can also type any product-related update in the order notes to communicate with the customer.
After checking or modifying the above customer and delivery details you can scroll down and click the Generate Packages button.
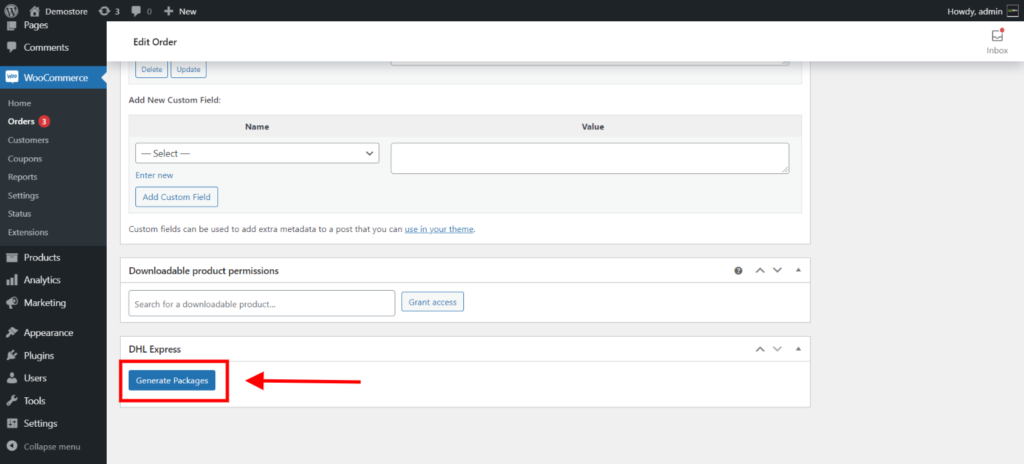
This button will allow you to see additional information as mentioned below.
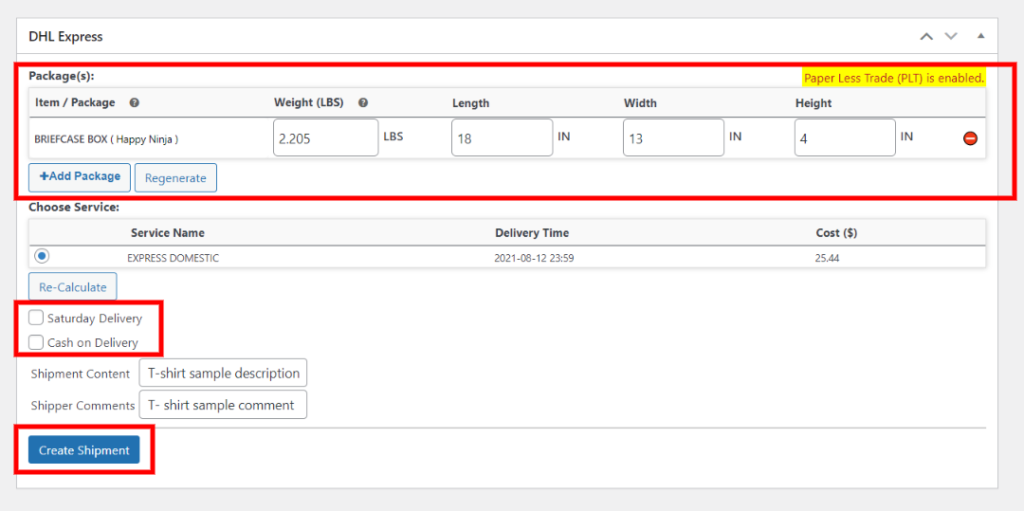
In the Package(s) tab you can see the dimensions such as weight, width, length, and height used for the package. You can even re-edit these dimensions. You can view the delivery service name, delivery time for the package, and the total cost applied for shipping.
Once you are done checking these details you can click the Create Shipment button.
Your shipment is created and you will see further details as displayed below.
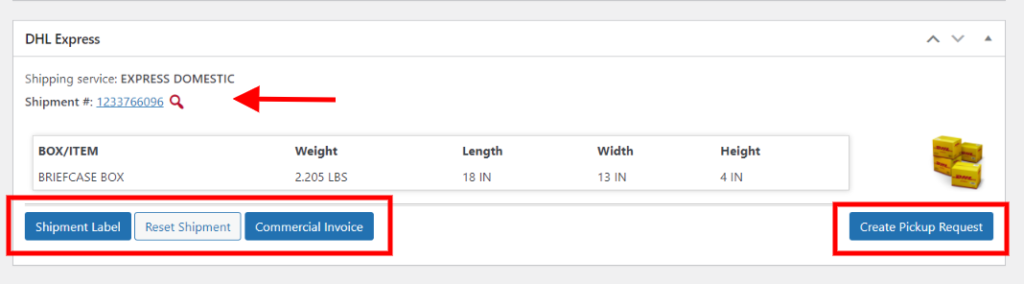
Shipment Number: An automatic shipment number is generated that can be used to track your shipment location and overall progress. Click this option to redirect to the official DHL website and view your shipment details.
This plugin allows you to create Commercial invoices. During export, a business or a person provides a customs document that works as proof of what item is being exported, the country of manufacture, and which all parties are involved in the shipping process. In simple terms, a commercial invoice is an official document and works as a proof of sale between the customer and the buyer.
If you want to repeat the above process you can click the Reset Shipment button.
Shipment Label: Click this option and you will be redirected to a new page where you can see your WooCommerce shipping label.
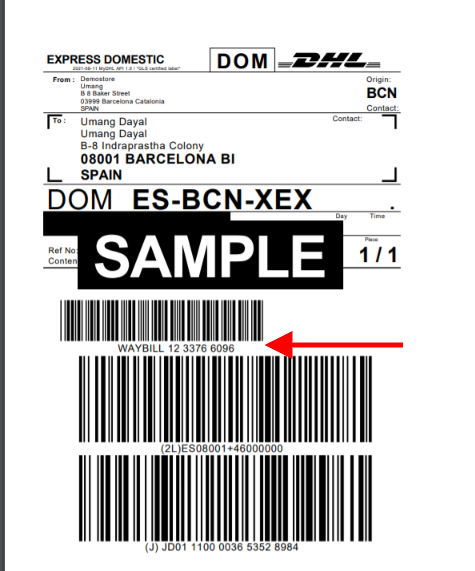
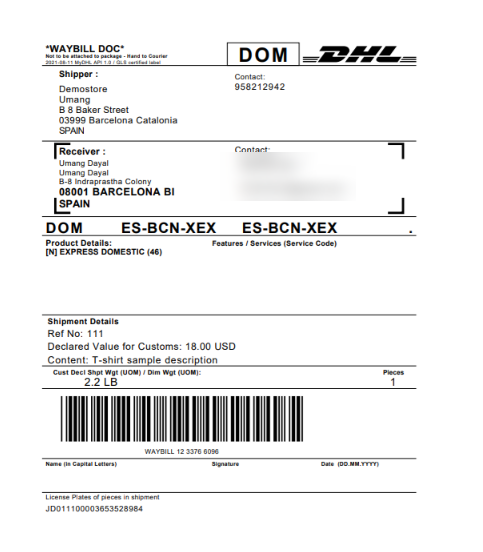
In the shipping label you can see all the shipping details such as the receiver’s contact details and delivery address, shipment service code, barcode, and product-specific details. Furthermore, in shipment details, you can view the reference number, customs info, and any specific instructions related to the package. The shipping label will also include the product weight and the total number of pieces included in the package.
ELEX EasyPost Shipping & Label Printing Plugin for WooCommerce
This plugin allows you to integrate major courier services such as USPS, UPS, FedEx, and Canada Post and displays their rates and services on the cart and the Checkout page. Use the above process to install the plugin and activate it. Later, you can setup up and customize the plugin.
How To Print Shipping Labels Using The ELEX EasyPost Plugin?
Place an order on the WooCommerce store and access the Order Page from your WordPress Dashboard. Go to WooCommerce > Orders > Select the placed order (check the order id/date). This will redirect you to the single order page.

You can modify the billing and delivery information, access the customer’s contact information, and view and edit order notes or communication. Scroll down on the page and go to the EasyPost tab Generate Shipping Label By Using EasyPost API.

To create a shipment package click the Generate Packages button. This will generate product-related information such as product dimension, shipping service name, package rates, etc.

Once you are satisfied with the details you can click the Create Shipment button. This option will confirm your shipment with EasyPost. Now, you can access the tracking id and print label for your package.

You will see the tracking number and the shipping label button. You can click the Print Label button to open a new tab window where you can view all the package-related details.
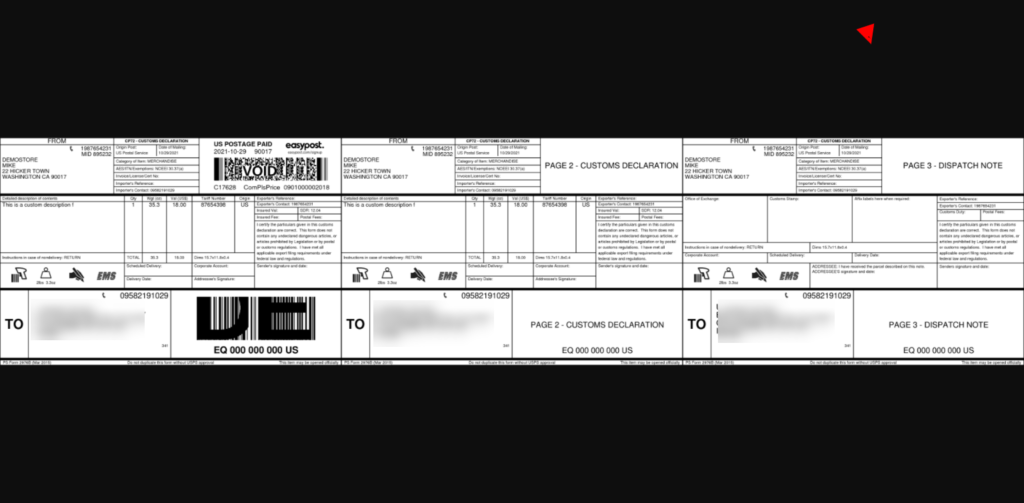
This label includes the billing address of the customer, barcode, and specified information for delivering the product.
If you are in the initial phase of starting your WooCommerce store you can try the free version of ELEX EasyPost plugin. It includes basic features such as access to real-time rates from FedEx, UPS, and USPS, adding a custom title, setting up a fallback rate, and selecting real-time rates between Residential or Commercial. Furthermore, you can also use the bulk label printing add-on to generate multiple packages at the same time and even print them collectively in a single PDF File.
A shipping label allows you to differentiate among other shipping items and keep a documented record of shipped items. Follow the above steps on how to print shipping labels in WooCommerce. If you still have any doubts you can use the comment section below for any related queries.
Further reading


")
")
")