")
Last updated - March 28, 2022
When it comes to payment gateways, we are sure your WooCommerce site must have payment options such as PayPal and Stripe, being the most common ones. However, with the growing popularity of Near-Field Communication (NFC) payments and the need to provide your customers with other payment options, eCommerce businesses such as yours are already opting for Apple Pay, an NFC payment gateway that is on the rise.
Another good reason for you to opt for Apple Pay is the increase in conversions on your site because of this new, technologically advanced payment gateway.
In this article, we will throw light on how Apple Pay can work with WordPress, along with highlighting a few plugins that can be used to integrate Apple Pay with WordPress and how this payment gateway can be used with WooCommerce.
Overview
- Apple Pay & WordPress
- Cost of the Apple Pay Service
- Why use Apple Pay for WordPress?
- Apple Pay WordPress plugins
- Settings up Stripe Payment Gateway
- Enabling Apple Pay through Stripe
Apple Pay & WordPress
Any payment that is not supported by WordPress cannot be integrated into your WooCommerce site without a third-party service. Apple Pay is one such third-party service that can make it happen.
The main reason we suggest that you go for Apple Pay payment gateway on your website is because it enables your customers to make payments with their debit and credit details that they have on their phones without having to re-enter the details every single time they make a purchase on your site.
Apple Pay is popular not only because of its NFC integration but also because it is built into the iOS ecosystem, which makes it easy for your Apple customers to trust this payment mode as they are familiar with it and trust it is secure.
Cost of the Apple Pay Service
With Apple Pay, there are no debit card charges; however, credit card payments are charged a 3% base fee, which is a little higher than the traditional payment gateways such as PayPal and Stripe. In the long run though, as a business owner you would find Apple Pay to be more beneficial as it does not charge anything extra other than the base fee of 3%, unlike other payment gateways.
Why use Apple Pay for WordPress?
It is a well-known fact that plugins can add a lot of value and new features to your WooCommerce website with WordPress. Similarly, adding Apple Pay to your website is simple and easy, just like adding any other plugin.
Note: Apple Pay is presently available for WooCommerce through the WooCommerce Payments, Stripe, and Square plugins.
Apple Pay WordPress Plugins
There are various Apple Pay WordPress plugins available if you browse around. On closer study, though, you’ll notice that most of them are associated with WooCommerce Stripe. That’s because Stripe’s infrastructure makes it simple to add Apple Pay functionality to your website. Apart from that, WooCommerce uses WooCommerce payments that provides access to Apple Pay among many others.
The WooCommerce Stripe Payment Gateway plugin, for example, supports Apple Pay, Alipay, and traditional credit card payments.
There’s also Braintree for WooCommerce, one of the few non-Stripe alternatives. Credit cards, PayPal, Google Pay, and Apple Pay are all supported by this extension.
It’s worth noting that WooCommerce already supports Apple Pay integration, so you won’t require an add-on. However, because the process of activating it is time-consuming, we’ll show you an additional method on how to set up Apple Pay for WordPress using Stripe as well.
Before we begin, make sure you have WooCommerce installed and activated.
Setting up WooCommerce Payments
WooCommerce Payments integrates Apple Pay into your business, making it easy for consumers to pay using their Touch/Face ID on Apple devices. After you’ve set up WooCommerce Payments, Apple Pay is instantly configured and ready to receive payments.
If you need to set up WooCommerce payments manually, go to WooCommerce > Settings > Payments and click Install next to WooCommerce Payments. Once your installation is complete, you can find a new section called payments on the dashboard.


In order to enable Apple Pay manually, follow these steps:
- On the Dashboard > Payments > Settings.

- Enable express checkouts.

- Save your changes by clicking the Save button.
You may modify the appearance of the Apple Pay button by going to Payments > Settings and selecting Customize appearance.
Setting up Stripe Payment Gateway
It’s worth mentioning that enabling SSL on your WordPress website is required for Stripe to operate with WooCommerce.
WooCommerce will lead you through a setup wizard when you initially install the plugin. You may implement Stripe payments on your website there.

Toggle this option on, then complete the wizard’s remaining steps.
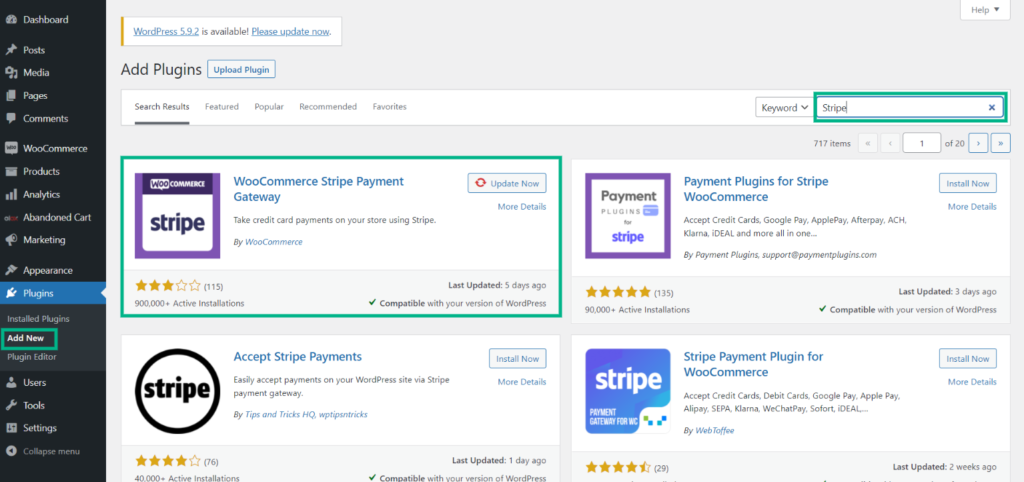
Don’t worry if you installed WooCommerce previously but forgot to enable Stripe. Stripe integration for WooCommerce is still available. Use the search box to find the WooCommerce Stripe Payment Gateway extension in your dashboard’s Plugins > Add New tab.
Give the platform a second to set things up after clicking the Install Now button (Since, we have already set up Stripe it shows the update button, but for new users it will show the Install Now button). When the plugin is finished, click the Activate button.
Enabling Apple Pay through Stripe
You’ll need to establish two things before you can start accepting Stripe and Apple Pay payments. The first step is to import your Stripe account credentials into WooCommerce, followed by enabling Apple Pay payments.
You can fortunately do both on the same screen. Look for the Stripe setting under WooCommerce > Settings > Payments on the WooCommerce > Settings > Payments tab. Once you’ve found it, go to Manage.

You’ll see two fields labeled Live Publishable Key and Live Secret Key on the following screen.

Both of these may be obtained through your Stripe account. After that, copy and paste them into the appropriate areas. After that, scroll down till you see the option for Payment Request Buttons, and turn it on.

When someone attempts to pay with Stripe in Safari, this option immediately enables Apple Pay. All you have to do now is save your WooCommerce settings, and you’re ready to go.
Conclusion
Your payment gateway selection has an impact on more than just the amount of fees you pay. In an ideal world, you’d pick an option that’s as simple as possible for your visitors to utilize. Adding Apple Pay to your website is a sensible choice, and the procedure is straightforward with WooCommerce.
Further Reading
WooCommerce Stripe Plugins – Alipay, Apple Pay, Subscriptions and more
The Essential Guide to Set Up a Secure Payment Gateway on your Website


")
")
")