
Before we head into the WSDesk set up, let us discuss what a helpdesk is. A helpdesk support is a service offered by an organization to its customers. Traditional helpdesks were literal desks where customers could seek help from a support professional. In software, the name has stuck and refers to the system that provides an all-in-one place for providing customers help, solving issues, and communicating better in an organized environment.
Helpdesk software helps provide said help from a system that automates tickets based on criteria like distributing tickets to agents based on their specialty, making sure none of customers’ and visitors’ queries goes unnoticed and providing a positive customer experience.
For eCommerce stores, helpdesks are a convenient solution to keep track of early customer queries to complete more sales, build brand reputation and as the store grows, handle customer affairs efficiently.
ELEX WSDesk HelpDesk & Customer Ticketing System
ELEX WordPress HelpDesk & Customer Ticketing System is a complete helpdesk solution for businesses of all sizes. It brings all the features you need to provide comprehensive customer support. The plugin stores your data in local storage instead of the cloud as an added privacy measure. Let’s now see how to install and use the ELEX Helpdesk plugin.
Search for the WSDesk plugin in the WordPress plugin store. Download it and go to your WordPress Dashboard > Plugins > Add New > Upload Plugin and upload the .zip file from your device.
Now install the plugin by navigating to WordPress Dashboard > Installed Plugins > Activate and you are greeted by the WSDesk quick setup wizard like this. I’ll attach relevant screenshots as I go with this guide.
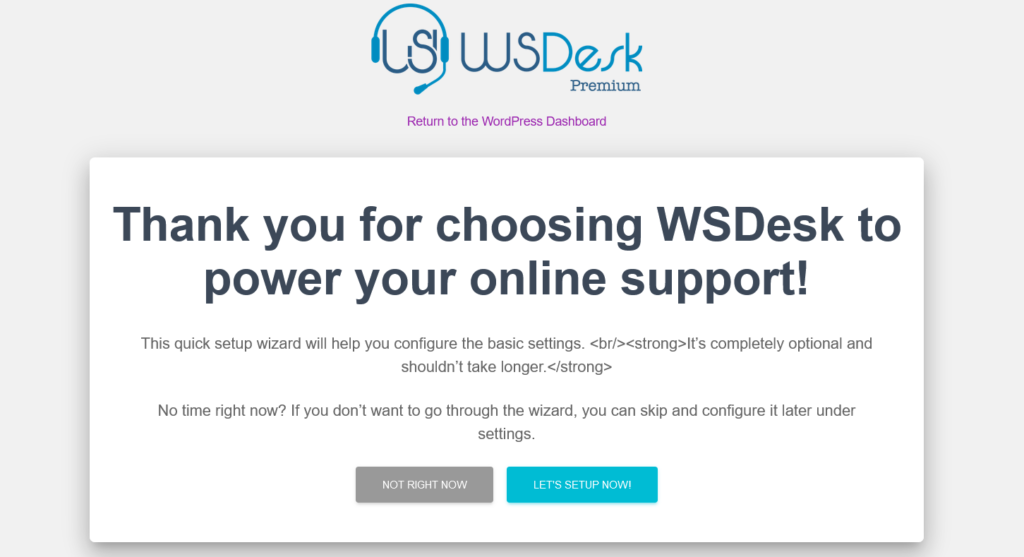
Click LET’S SETUP NOW to start with the setup. The next screen will look like this.
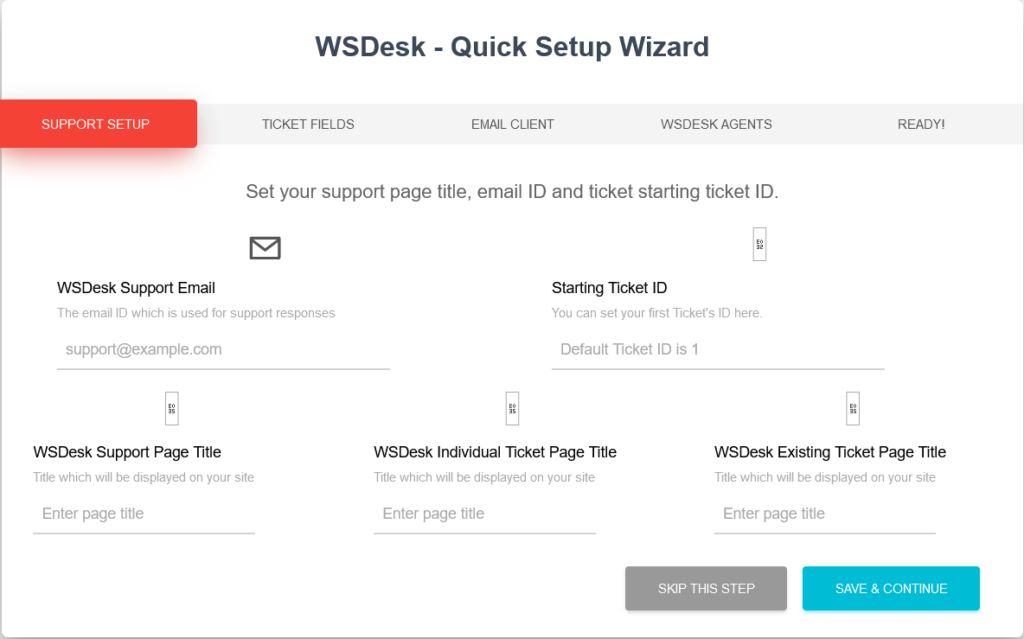
Enter the email address which you want to use for the support. Enter the starting ticket ID, the default ticket ID starts from 1 but you can customize it as you need.
Now enter the titles for your Main Support Page, Individual ticket pages, and the page displaying existing tickets on the website. Finish, and click SAVE AND CONTINUE.
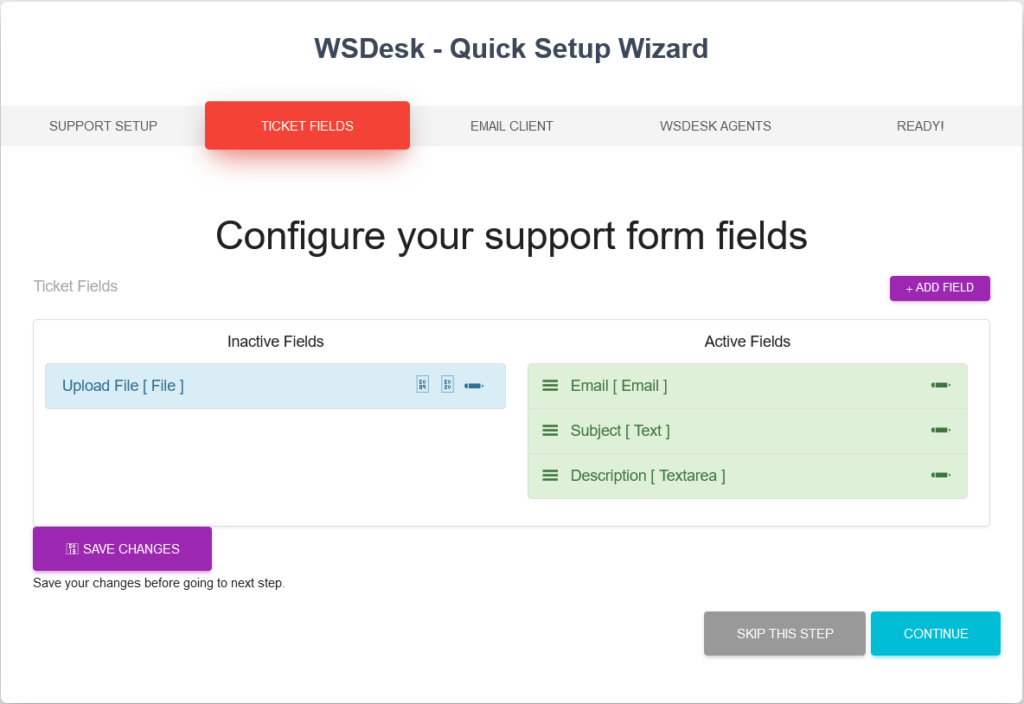
Now the WSDesk setup wizard prompts you to configure the ticket fields.
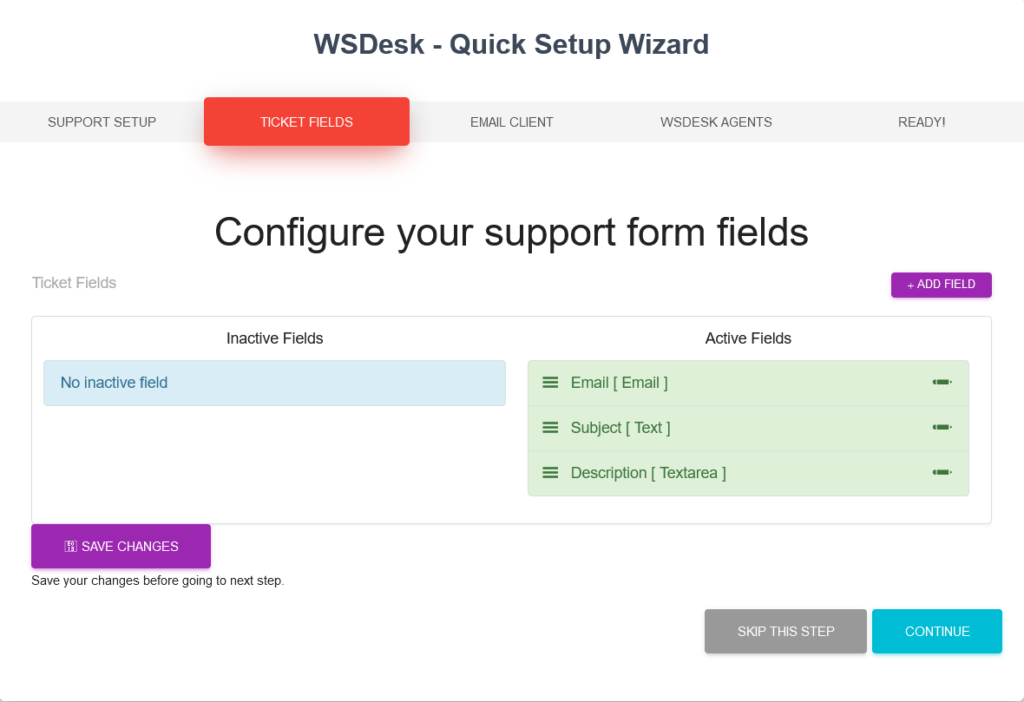
By default, three active fields collect the email address, subject, and description of the ticket which is to be submitted by the visitors. You can edit the active field and add additional fields by clicking ADD FIELD in the top right corner of the screen.
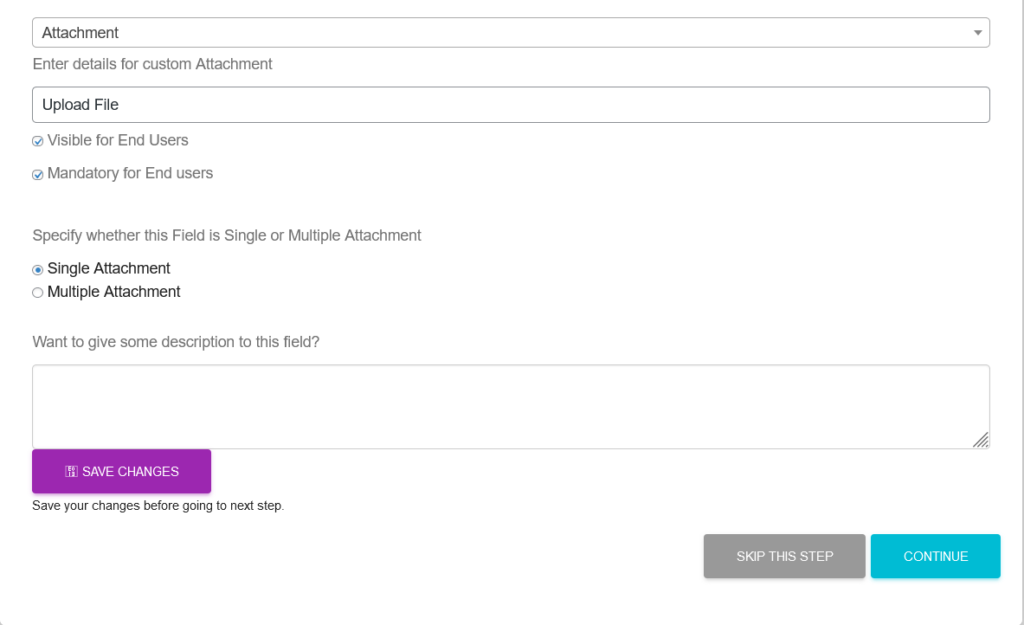
I have added a new field that collects files that might be an image or other sort to accompany the ticket. Optionally, make it mandatory for users to submit a ticket with a file.
You can also describe this field, and add the option to receive multiple attachments with the ticket.
After adding additional fields as you need, click SAVE CHANGES and your ticket configuration screen will look like this.
The additional field I created is now in the inactive fields section. Drag and drop it into the active fields to make it active in the ticket form.
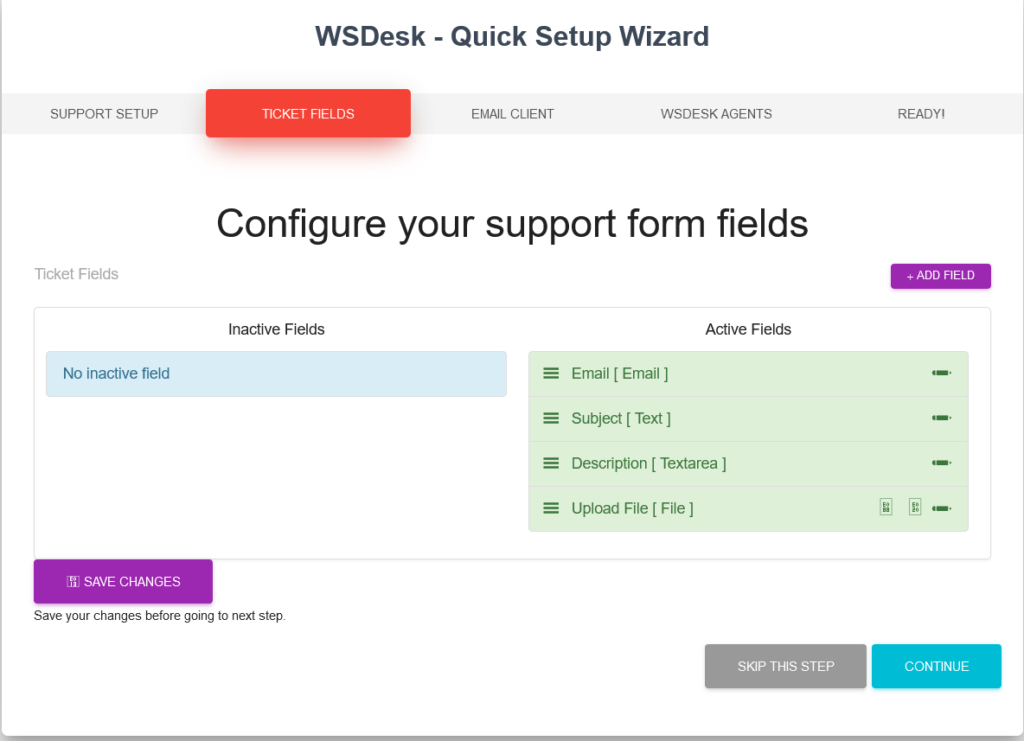
With the new field in the active section, save changes and click CONTINUE to move to the next part of the setup.
This step is configuring your email client. With an active IMAP, this is the screen where you enter the details of the email address in which emails will be fetched as tickets.
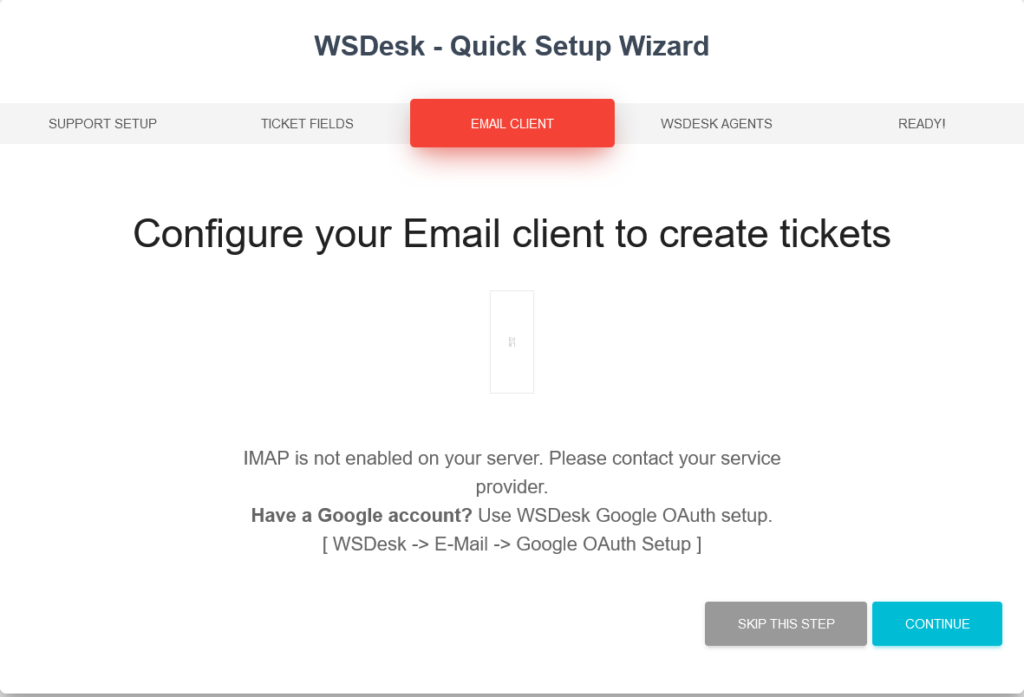
Having entered the information, save and continue to the next screen again.
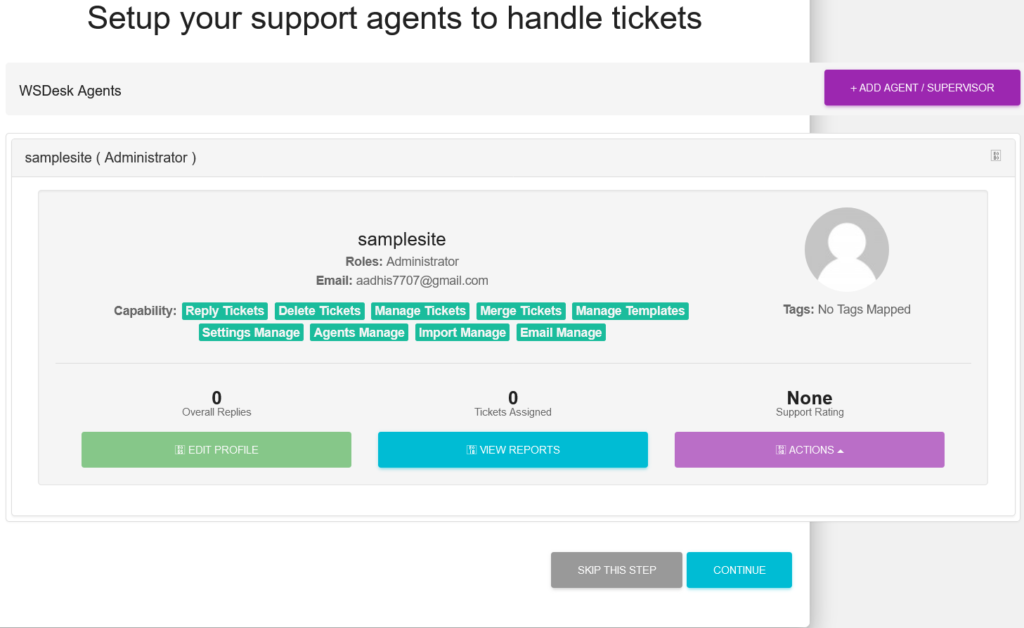
By default, you are the administrator of the ticket system in WSDesk. You can view and edit the capabilities of the administrator by clicking the drop-down button next to the administrator field.

The administrator role has more capabilities than agents from viewing and managing agents to deciding whether an agent can view the tickets that are not assigned to them. Save changes after editing the administrator profile and move to agents assignment.
You can add more agents to split the ticket handling task to more people as it suits the traffic your website attracts and the necessity of your business requires. To do that, click the purple ADD AGENT/SUPERVISOR button on the side.
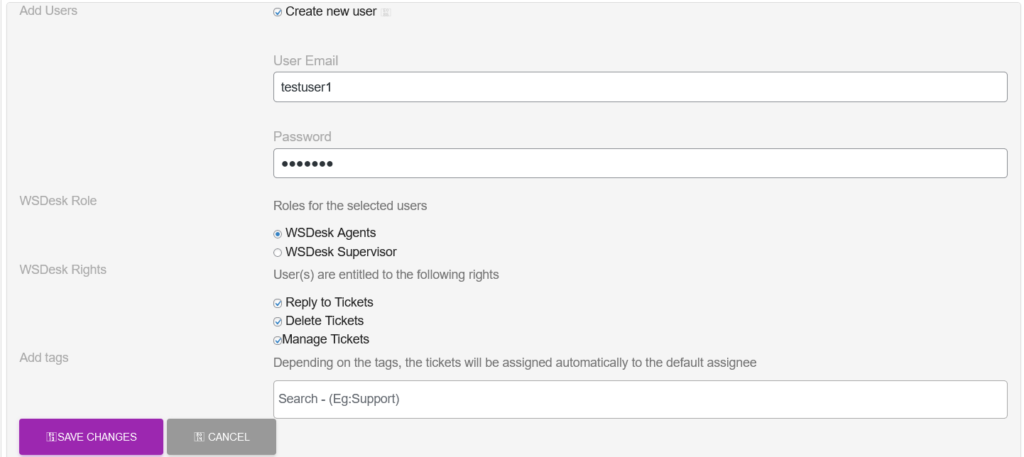
Add the new user details in this section, their password, and their role. WSDesk offers two types of roles which are agents and supervisors. Click on agents, for now, to add members and decide whether they can reply, delete and manage tickets.
You can also add ticket tags to the agent to further assign tasks based on the agent’s specialty. Again, save changes and you can see the new agent in the field now. Save and now the WSDesk setup is complete and you should see this.
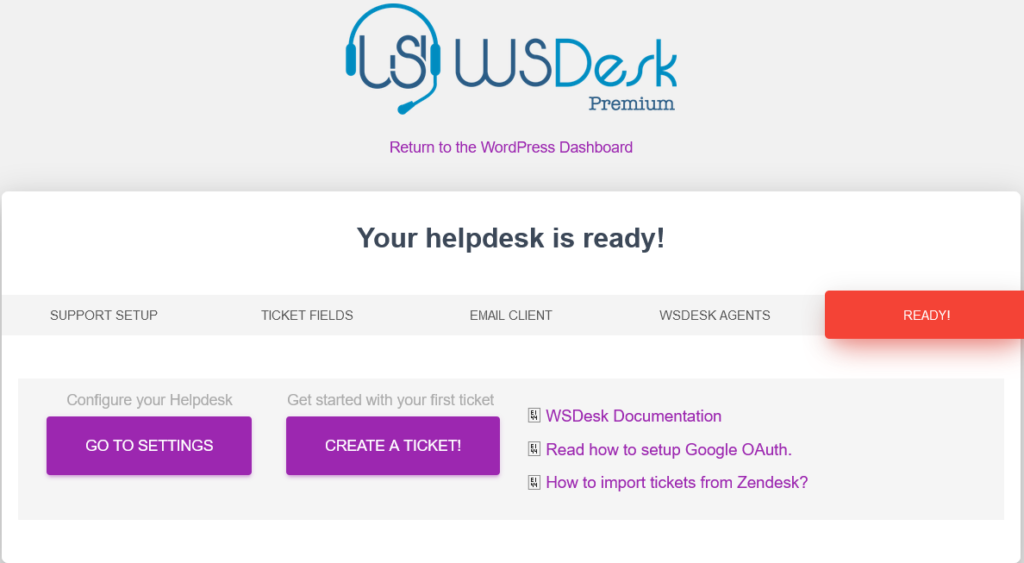
You can now further configure the plugin in the settings or create a ticket from the site in the frontend to test it before setting WSDesk live. Let’s first test the plugin with a sample ticket before tweaking it further.
Click CREATE A TICKET in the last screen of the setup wizard and go to the ticket submission page on your website. You can see the form with the fields you had set up in the wizard.
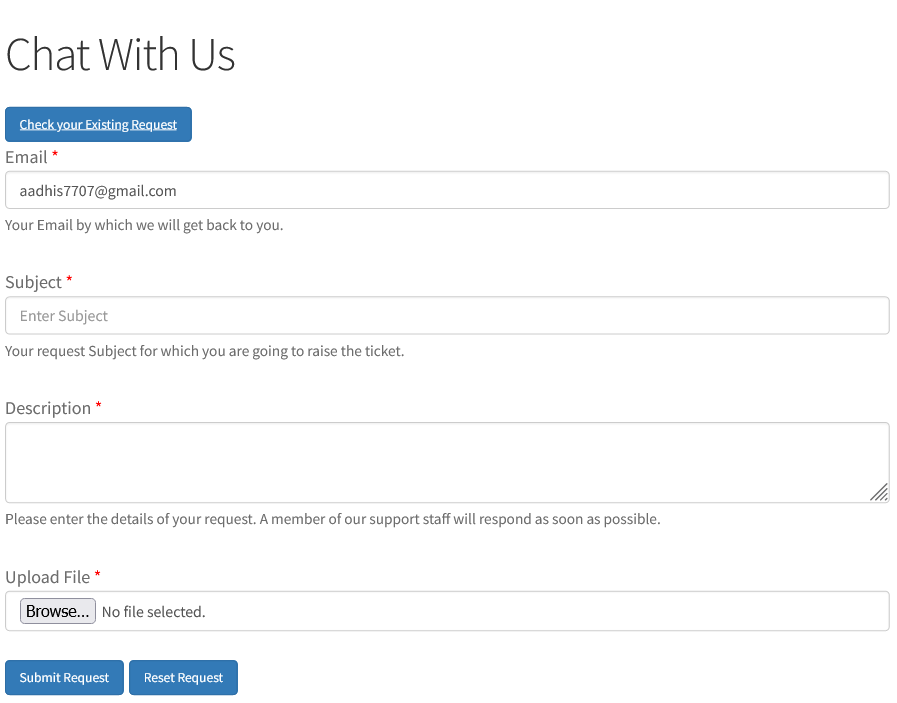
Fill out the form with appropriate responses. We are now emulating the ticket creation process as it would appear for the website visitors. I have created a ticket request for example that the product I got is not fit and asking about the possibility of a replacement. I have also attached an image file that supports my claim.
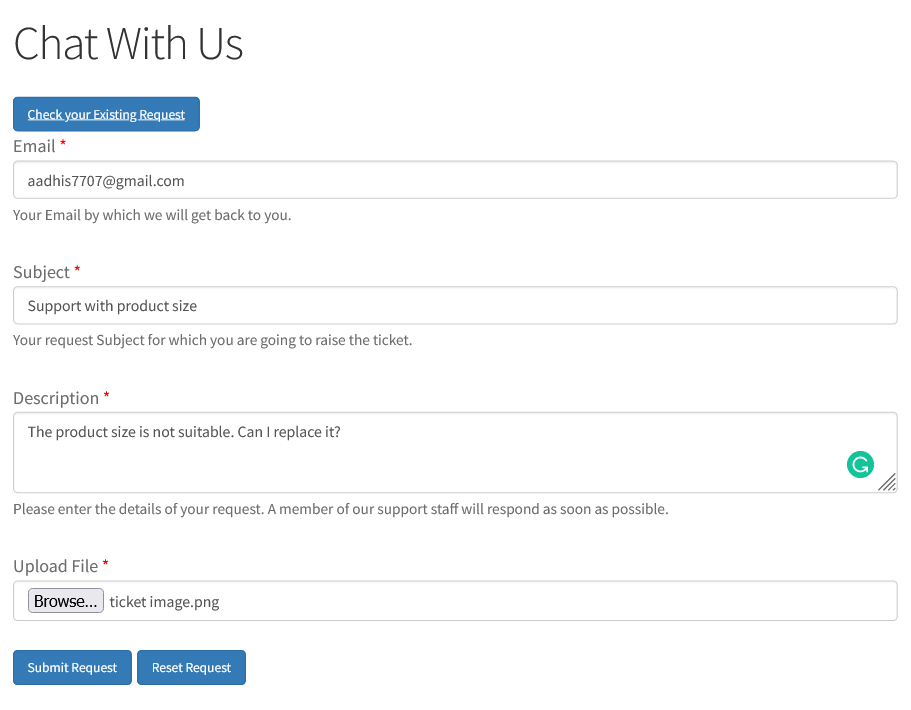
Click Submit Request. Now the ticket is active, let us look at it from the backend.
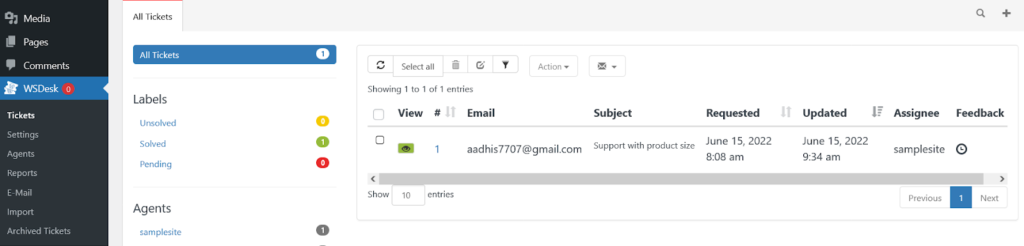
Move to WordPress Dashboard > WSDesk > Tickets > Unsolved to view the ticket raised and respond.
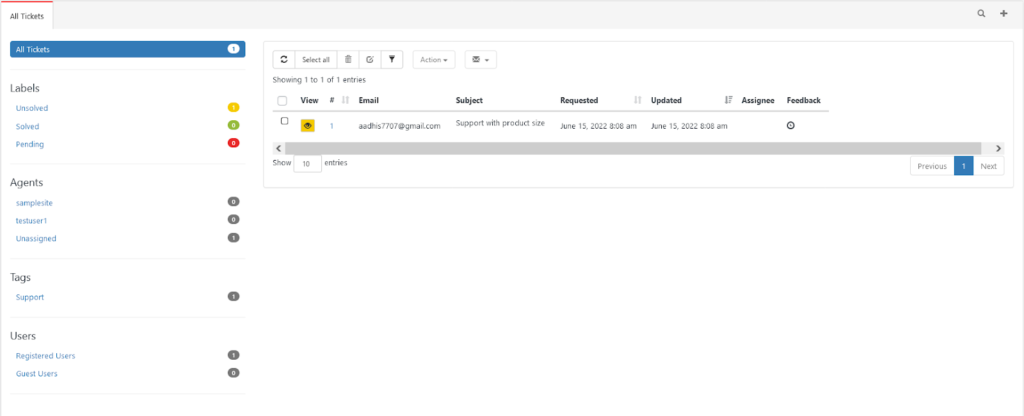
Select the ticket and you get the options to respond to the ticket. You can also view the customer’s order details, the ratings they have given, purchase amount, and so on.
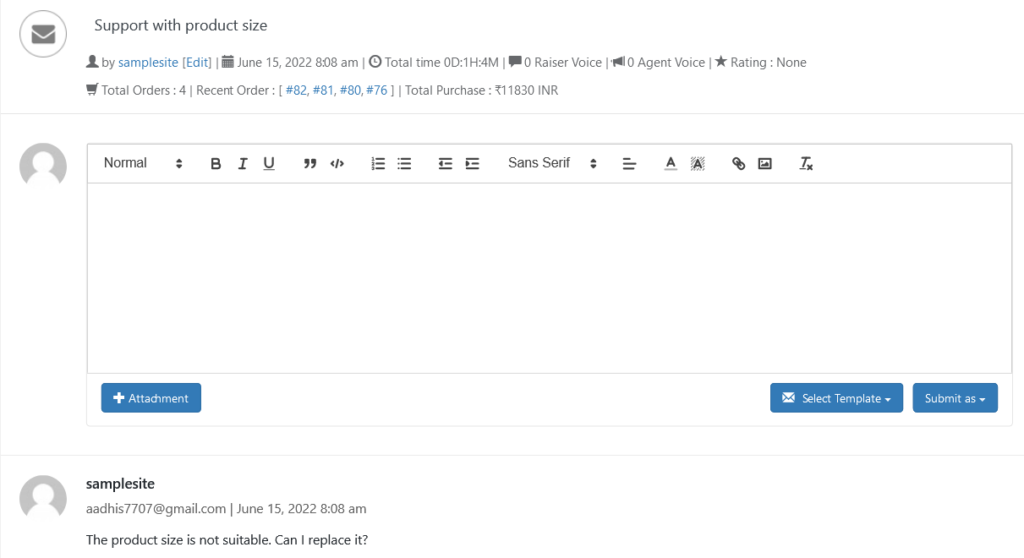
You can choose to answer with a template. Since we didn’t create a template, reply manually. Depending on the nature of the ticket, you can submit your reply as unsolved or pending if you require further information from the user to solve the ticket, or as solved if it is a simpler one.
I have given a short reply that they can get a replacement if they send the item in its original condition and marked it as solved. Now let us see how this is reflected for the user in the front end.
Click Chat With Us > Check your existing request to view the status of your ticket as the customer would.
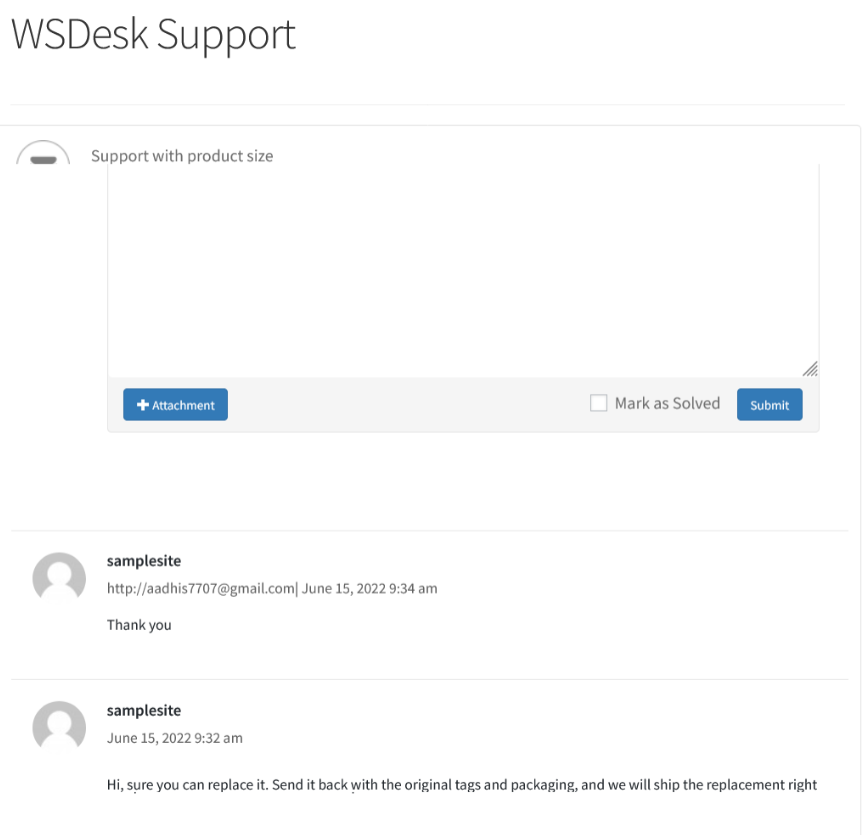
I have sent an additional reply to thank the support personnel. Now let us take a look at how this reflects in the backend.
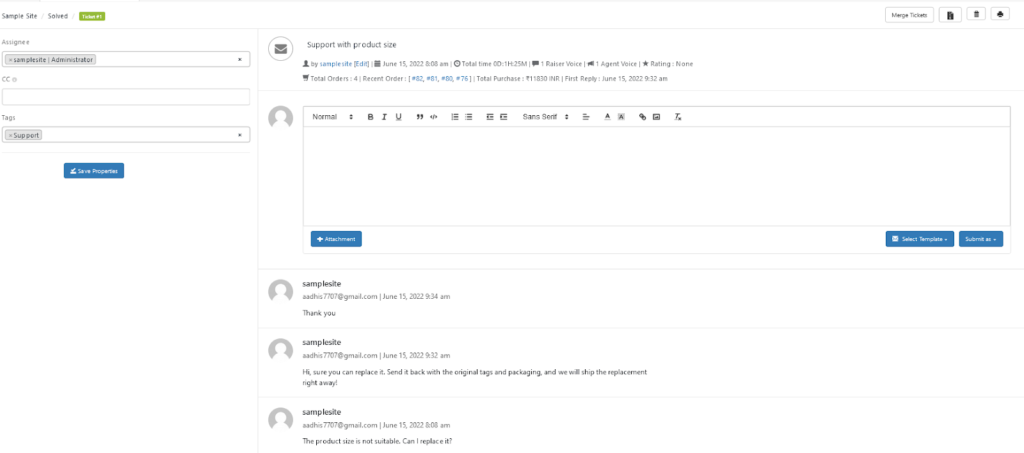
Also, note how I have added a tag to the ticket. Now users can add the tag to their requests. We will see more about the tags, and how you can assign tickets based on tags in the coming sections as we move to further configuration of the plugin from the dashboard.
Open the plugin from the dashboard. You can see all the features of the plugin under it from tickets, agents, reports, email, import, and archived tickets.
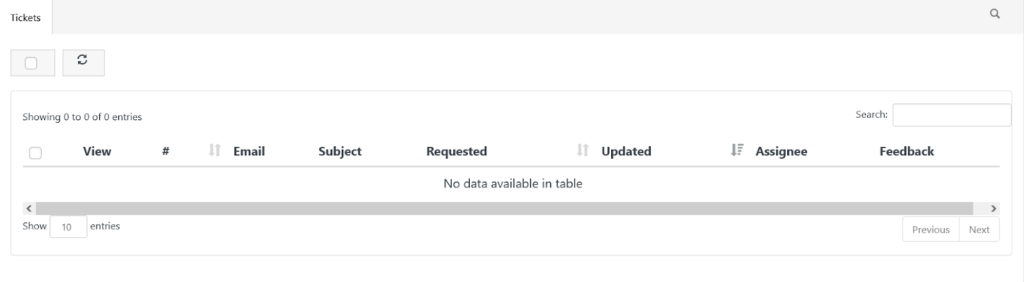
Tickets
We’ll start with Tickets. This is the backend location from which you can manage tickets raised by visitors.
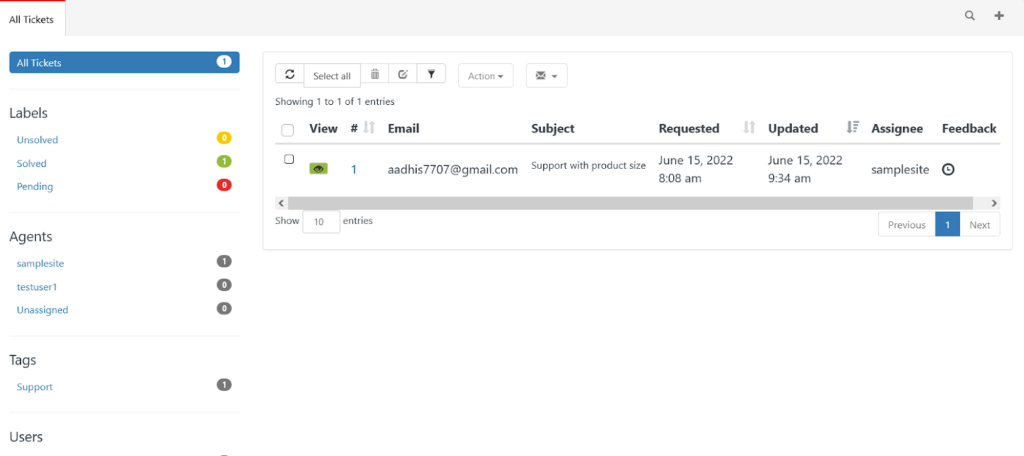
Here you can view and manage the status of tickets, tickets handled by agents, and tags associated with the tickets.
Next, access the settings by Moving to Settings > General. There are two options in this section, basic and advanced settings.
Basic Settings
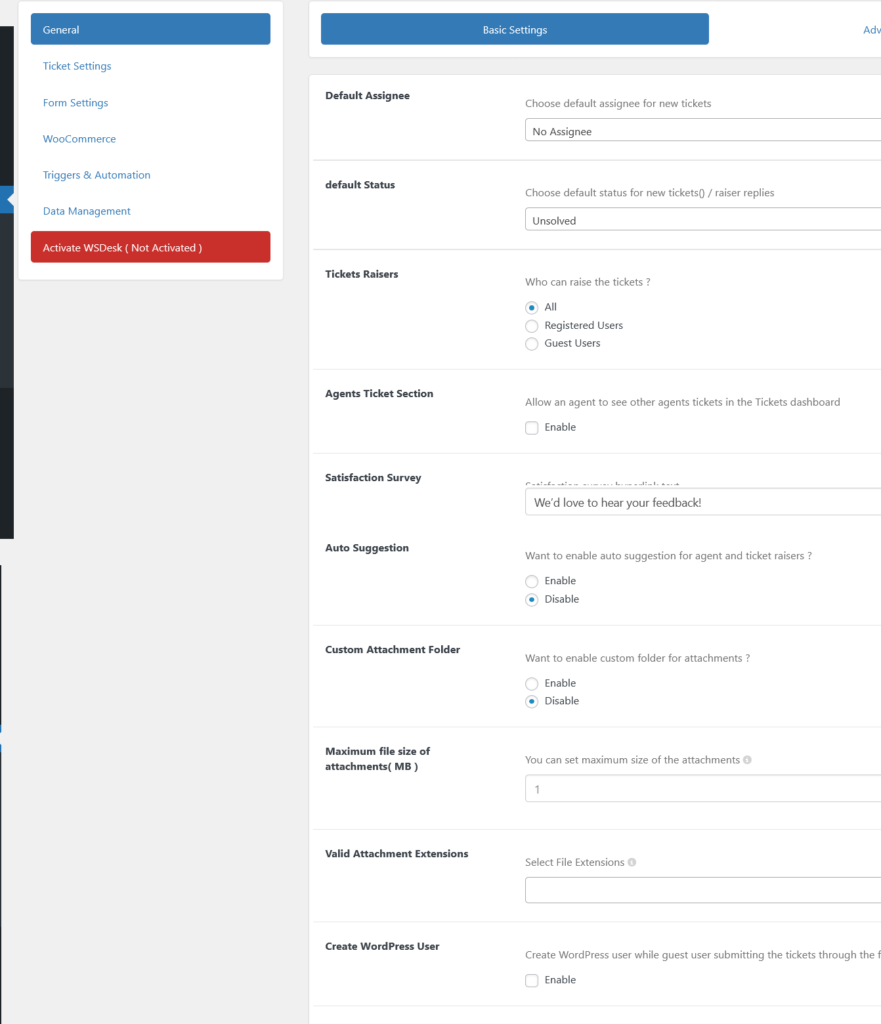
The basic settings of the plugin are where you can set up things like the default ticket assignee, the default ticket status, whether agents can see the tickets of other agents, optional surveys, ticket raiser eligibility, attachment types, size, and so on.
Advanced Settings
The advanced section has fancier settings for the more advanced user.
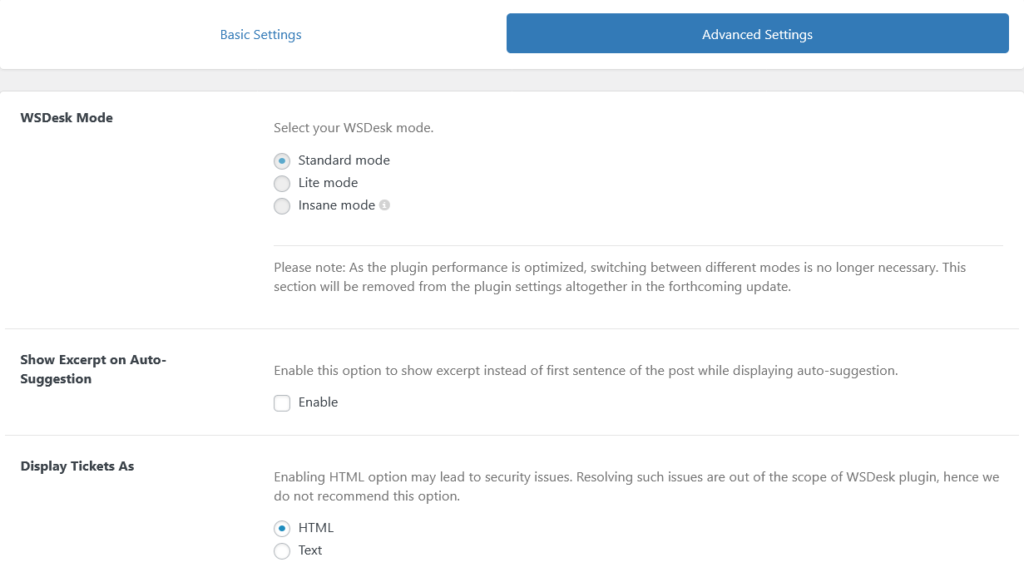
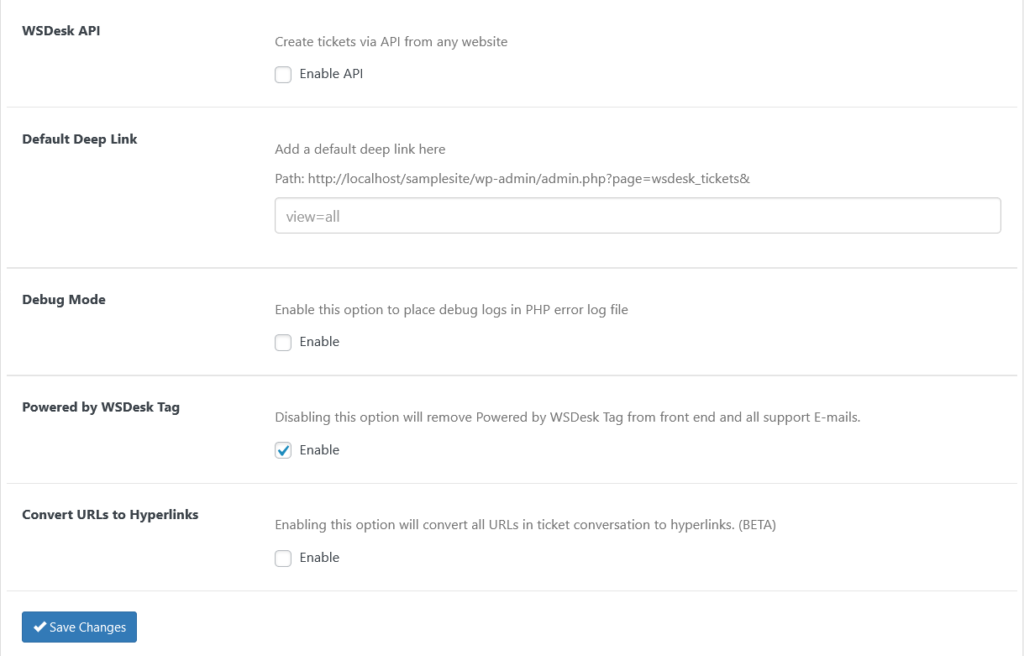
Here you change the mode of the plugin which is not necessary anymore with the plugin being regularly updated, showing excerpts in auto-suggestions, the choice to display the tickets as either HTML or text, creating tickets via API, editing the link of the support page, adding debug logs, disabling the “powered by WSDesk” tag and lastly, converting URLs in tickets to hyperlinks.
Ticket Settings
Ticket Fields
Next move to the ticket settings. You can see the ticket fields settings here which you might remember setting up in the quick setup wizard.
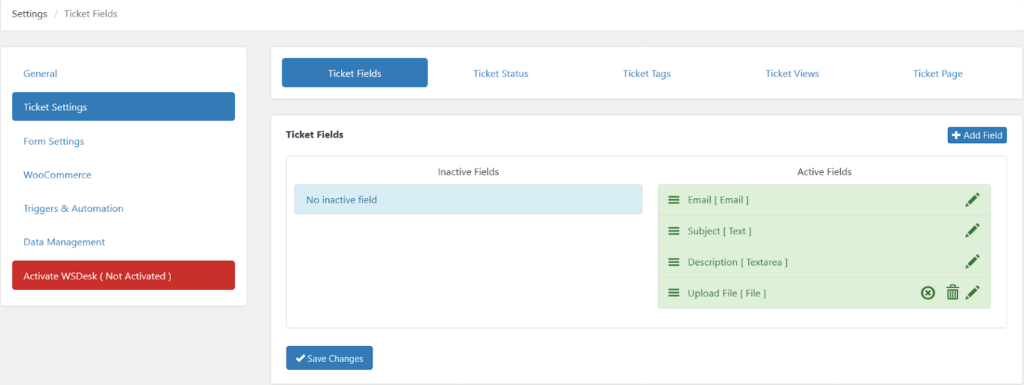
Edit it again as you need or move to Ticket Status.
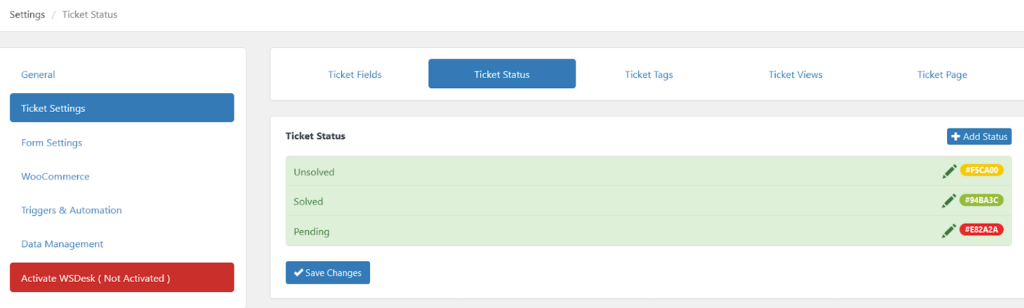
Ticket Status
Here you can edit the name and appearance of the ticket statuses.
Ticket Tags
Remember the tag I set up with the sample ticket? Here you can edit and add more tags so you can assign tickets based on tags to your agents.
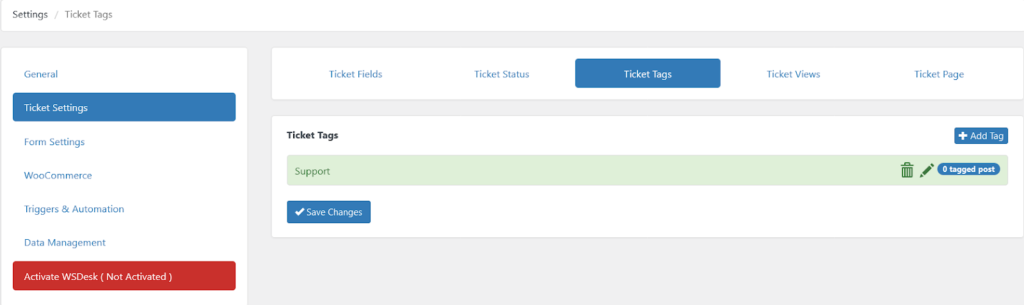
Add as needed, save changes and move to Ticket Views.
Ticket Views
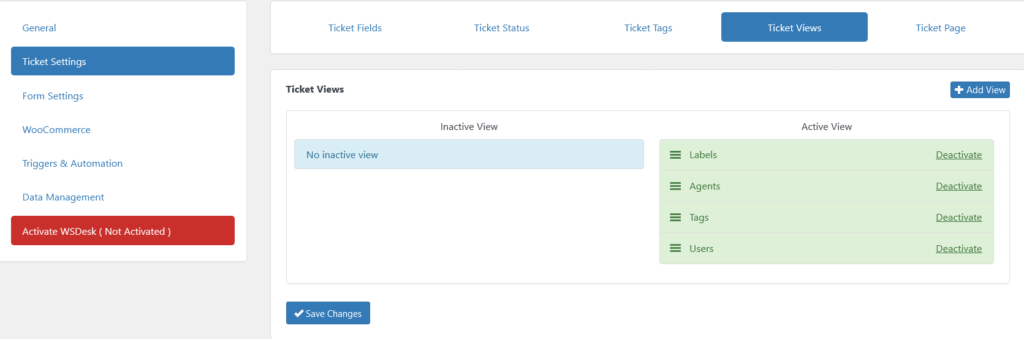
You can customize the way tickets appear in the backend Tickets menu in the Tickets view. By default, tickets appear based on labels, agents, tags, and users.
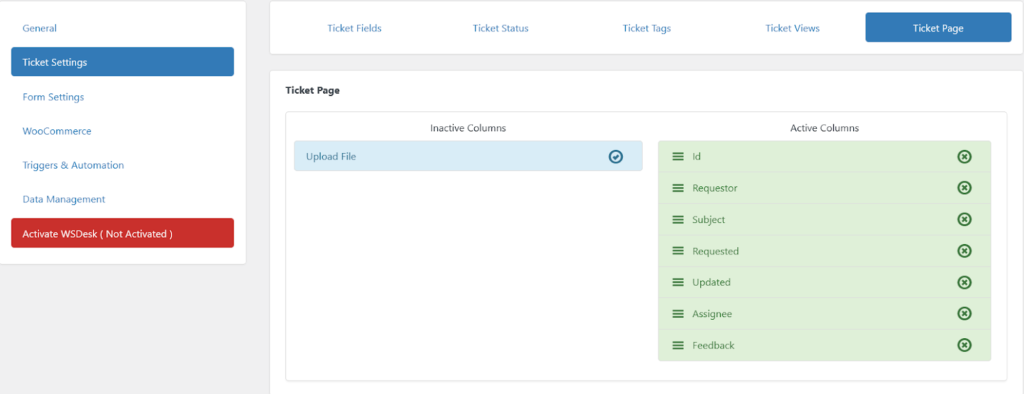
Ticket Pages
Ticket pages now. This also affects how the tickets appear in the backend, and you can add or remove fields that add or remove columns with information about the ticket in the backend.
Form Settings
Next click Form Settings in the settings menu.
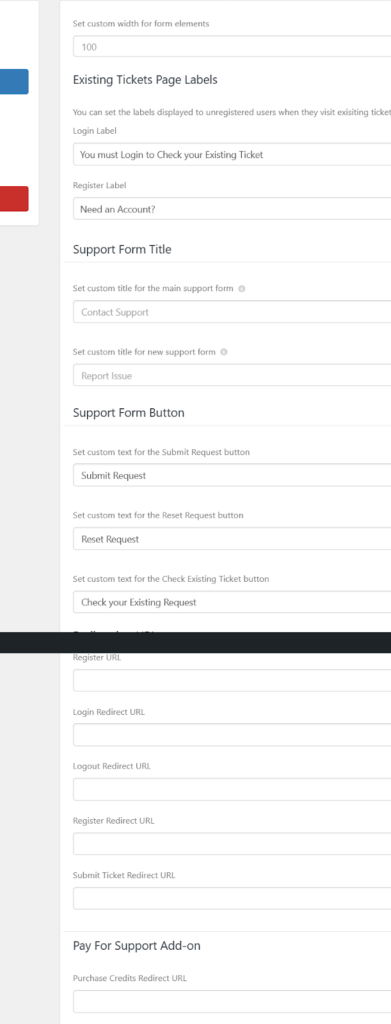
You can add and modify the titles and labels in the form, add redirect URLs register, login, logout, submit the form, etc.
WooCommerce
Now move to the WooCommerce settings.
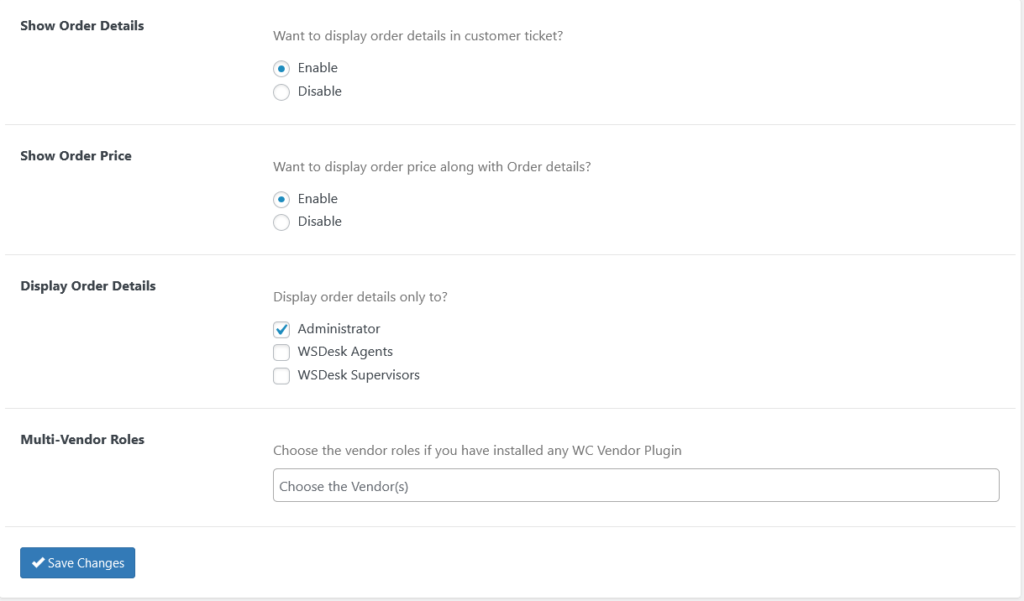
You can enable or disable whether order details are displayed along with the ticket here. Next is the Triggers and Automation section.
Triggers and Automation

Here you can set triggers for tickets based on conditions to perform actions like auto-assignment to agents, labels and tags and so on. You can add as many triggers as you want with AND/OR conditions to suit the use cases that you find suitable.
Data Management
Last in the settings section is Data Management.
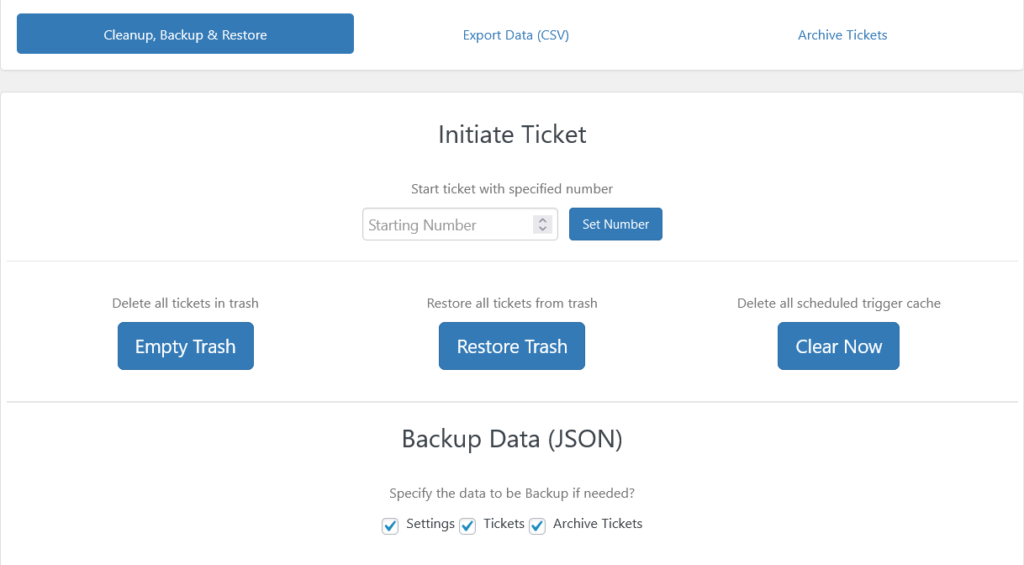
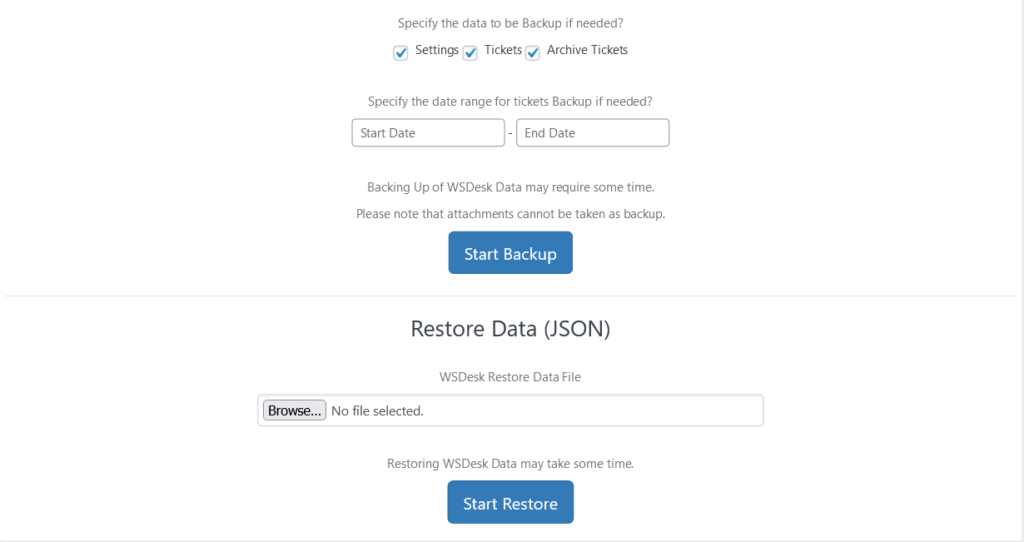
Here you can add ticket ID, delete backup and restore ticket data within time ranges as you want. Let us move to the next section in the plugin dashboard.
Agents

The Agents section lets you manage agents in your plugin. Again, this is something I set up in the quick setup wizard. Add agents or supervisors, edit their capabilities as you see fit here and move to the next section.
Reports
The Reports section as the name suggests presents a visual representation of the data of your ticket management.

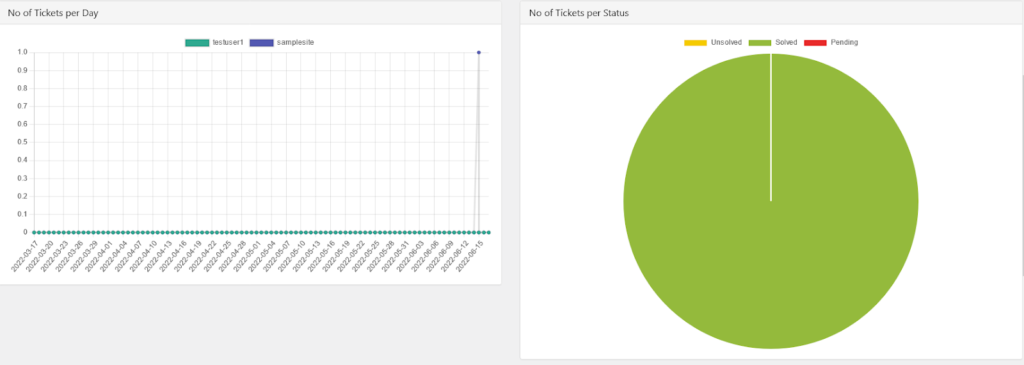
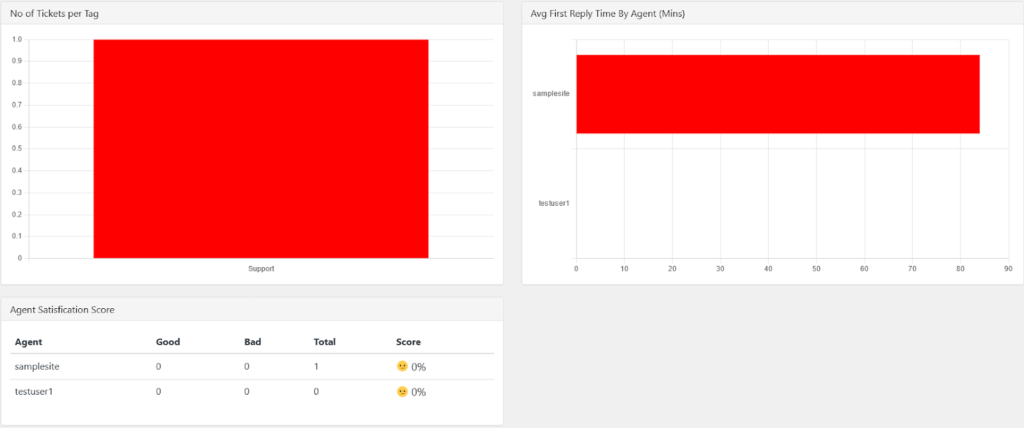
The reports show data such as average time taken to resolve, replies sent per day, tickets per day, tickets per label, tag, and average first reply time by individual agents and the satisfaction score earned by them.
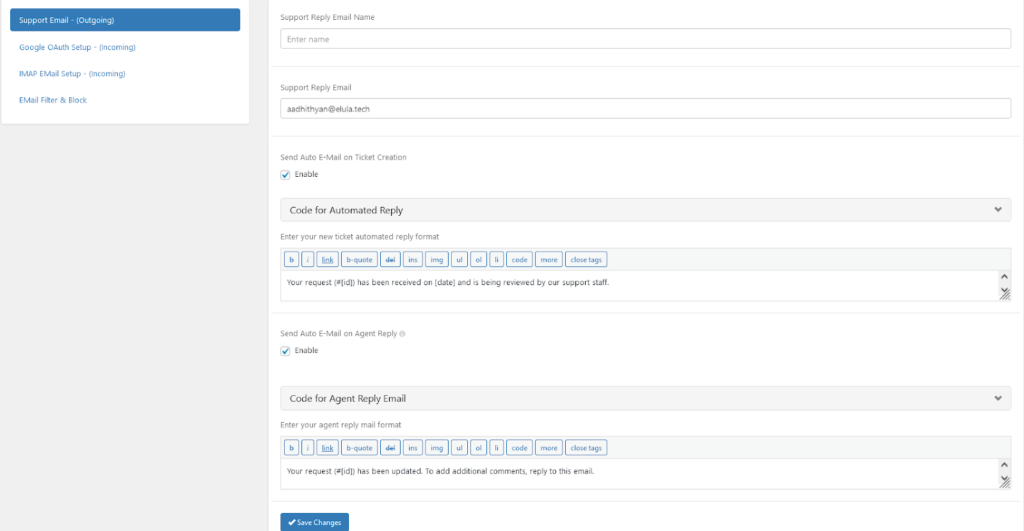
Emails
In the email section, you can set up automatic replies, restrict or block email addresses from sending support ticket requests, and set up Google OAuth to send and receive tickets as emails without your credential.
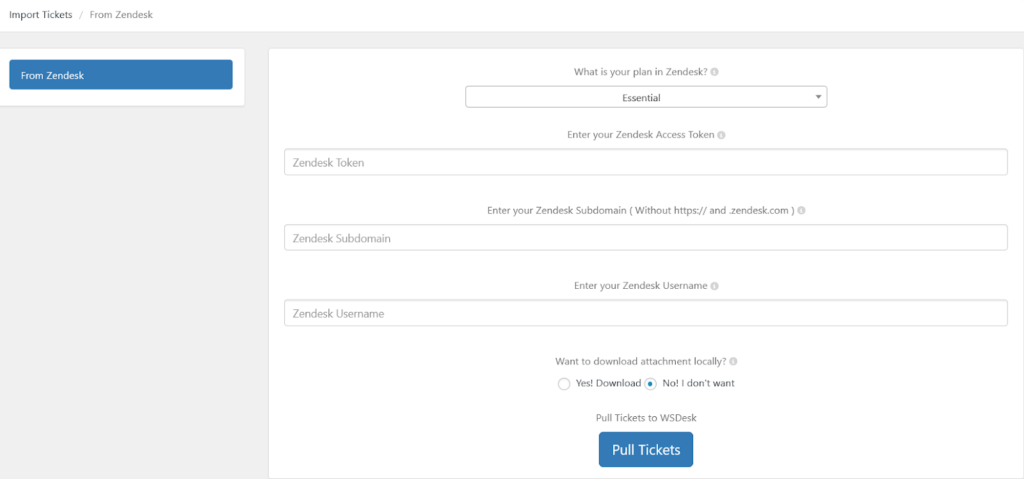
Import
The Import section lets you import data from other customer support systems and Zendesk is currently supported. Enter your Zendesk data and retrieve tickets you have received there and handle it from WSDesk.
Archived Tickets
Archive and access older tickets as you need by archiving tickets in this section.
Some Popular Helpdesk Plugins
SupportCandy
Support Candy is a really good support plugin for websites running in WordPress. It has unlimited tickets and agents and you can set up the ticket submission form with many readily available shortcodes. It also offers a lot of custom fields to add to the tickets. A highlight of SupportCandy is it supports multiple languages and appeals to a large prospective customer base.
WooCommerce Support Ticket System
This plugin has a clean and simple support system but it lacks automation and it has limited options to customize the ticket forms. The plugin is competent for small businesses with basic support system needs but is not suitable for stores seeking enterprise-level support solutions.
Awesome Support
Awesome support is awesome indeed with features like unlimited tickets, allowing users to attach multiple files in several formats along with their tickets. A notable feature is how a single ticket can be allotted to multiple agents, offering a collaborative support system. It provides integration with not just WooCommerce, Envato Market, Easy Digital Downloads, and Mailchimp among others.
Zendesk
Zendesk is a dynamic support platform that offers omnichannel support like live chat, voice-assisted, email, SMS, and social media support. It has automated replies, and detailed report creation and analysis. Zendesk offers a cloud-based solution where data is stored in cloud servers which may raise privacy concerns.
Fluent Support
Fluent Support is another capable support plugin that offers support through contact forms, support ticket forms, emails, and remote websites. It has a dashboard with graphs and charts to display the overall metrics of your support system. Fluent Support offers integration with WooCommerce, and Discord, and the paid version offers saved replies, custom fields, and automation.
Read this article for some Open Source WordPress Helpdesk & Customer Support plugins that might interest you.
A Comparison of Popular Helpdesk Plugins
| Plugin | Free Version | Paid Version | Active Installations | User Rating |
|---|---|---|---|---|
SupportCandy | Yes | Starts from $49, billed annually | 10,000+ | 4.8 out of 5 (129 ratings) |
WooCommerce Support Ticket System | No | Regular license at $27 for 6 months | 831 paid users | 4.90 (58 ratings) |
Awesome Support | Yes | Annual plan starting at $149 | 10,000+ | 3.5 out of 5 (171 ratings) |
Zendesk | No | Starts from $49/month billed annually | 40,000 paid users | 7.9 out of 10 from Trustradius (806 ratings) |
Fluent Support | No | Starts from $129 | 2000+ | 4.8 out of 5 (27 ratings) |
There are lot of helpdesk plugins in the market but WSDesk – ELEX WordPress Helpdesk & Customer Support Ticket System Plugin is our pick because of both the relative ease in setting it up combined with the feature rich product that will help you provide top quality customer support for you store’s customers.


")
")
")