
Last updated - July 6, 2022
If you own or run a WordPress website, you’ll want to constantly enhance the ways it looks and works. However, the more plugins, page builders, and content elements you use, the slower your website gets.
And a slow loading website is a big turn off for visitors, regardless of how good your website looks or how essential of a job it does.
Which is why managing a WordPress website requires you to make use of any and every website performance measure you can find. And an important measure worth taking is leveraging browser caching.
In this article, you’ll learn what it means and how you can leverage browser caching in WordPress.
What is browser caching?
Whenever a user accesses your website, resources like images, JavaScript, CSS, and others need to be uploaded to their computer from the server. This means the user needs to repeatedly load the same resources between subsequent pages and site visits.
Enter: Caching.
Caching indicates the period of time for which browsers locally store the cacheable resources available on the website. When a user requests the webpage, the information is instantly fetched from their computer.
That way, you can leverage browser caching in WordPress to provide a faster website performance.
You can use tools like Google PageSpeed Insights and GTmetrix to test whether your website already leverages browser caching.
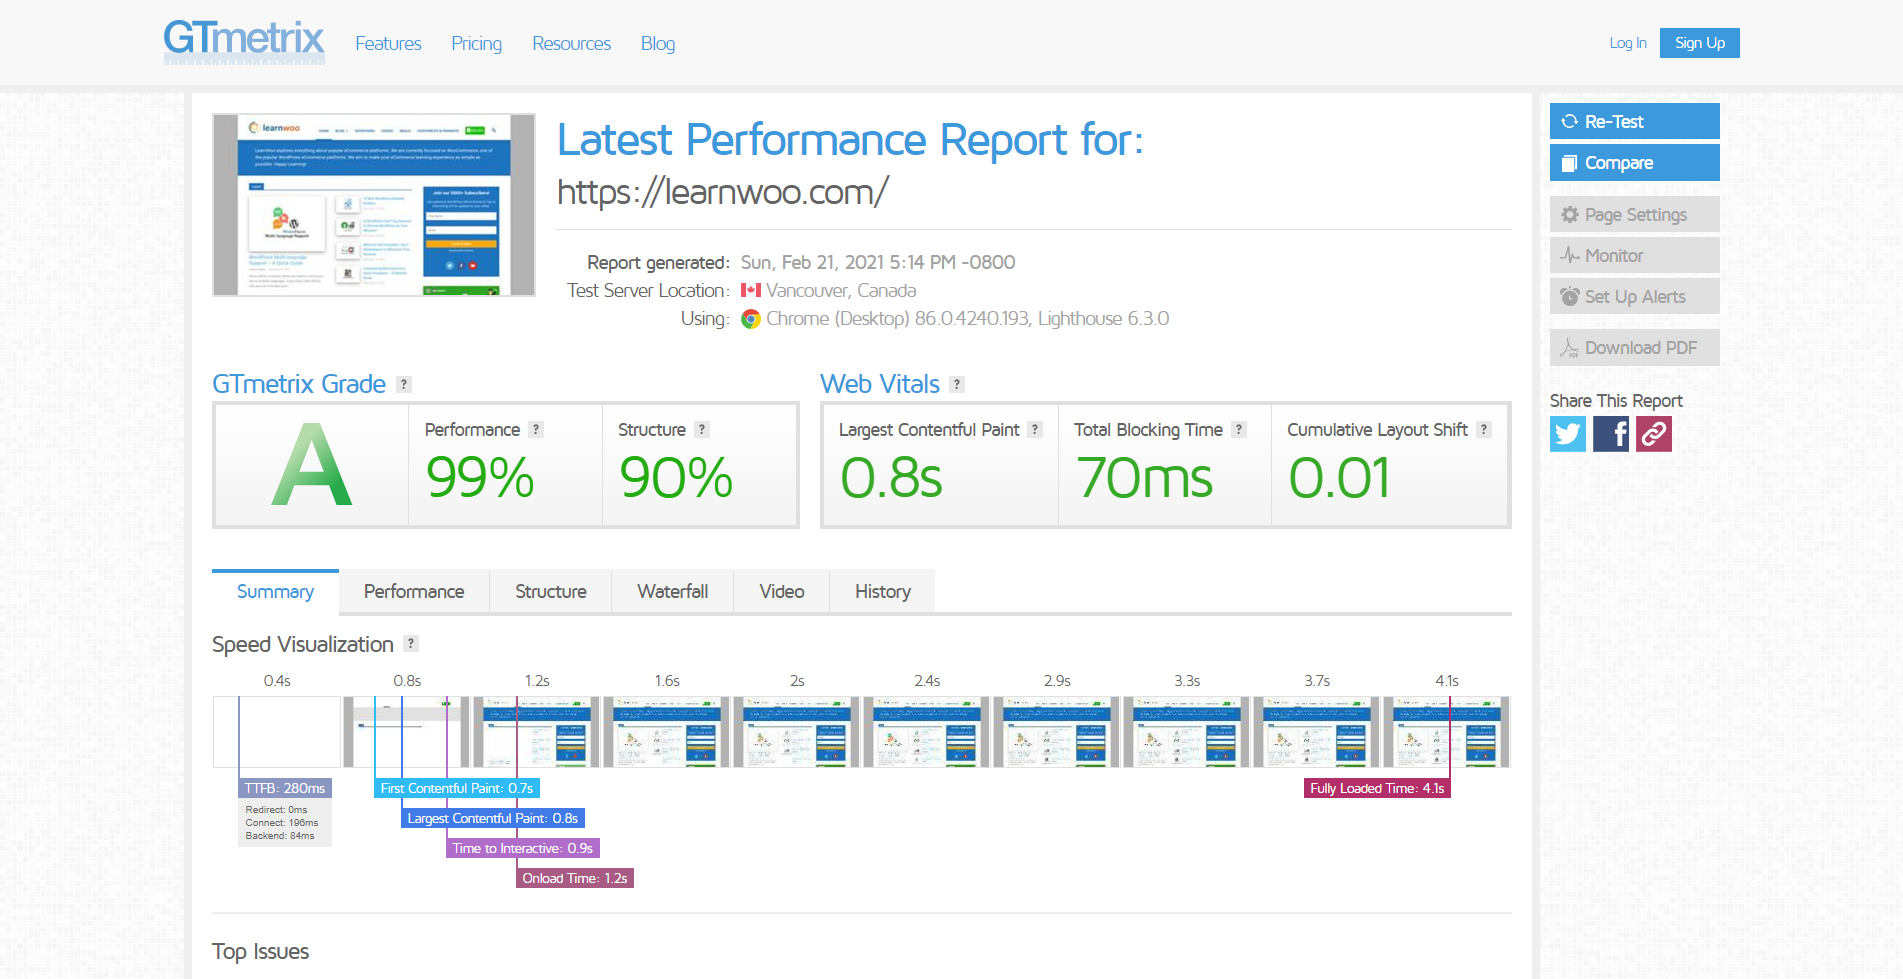
Just paste your website’s URL in the field provided and click “Analyze”. The tool will provide your website a score, between 0 to 100 in case of PageSpeed and an alphabetical grade in case of GTmetrix.
The tool will also provide you with suggestions to improve your website’s performance. A common suggestion is to opt to leverage browser caching in WordPress. If you get this suggestion, here are two ways to do it.
Manually Leverage Browser Caching in WordPress
You can manually leverage browser caching in WordPress by adding a bit of code to the .htaccess file. In fact, you need to add three pieces of code for three different purposes:
- Add Expires Headers
- Add Cache-Control Headers
- Turn ETags off
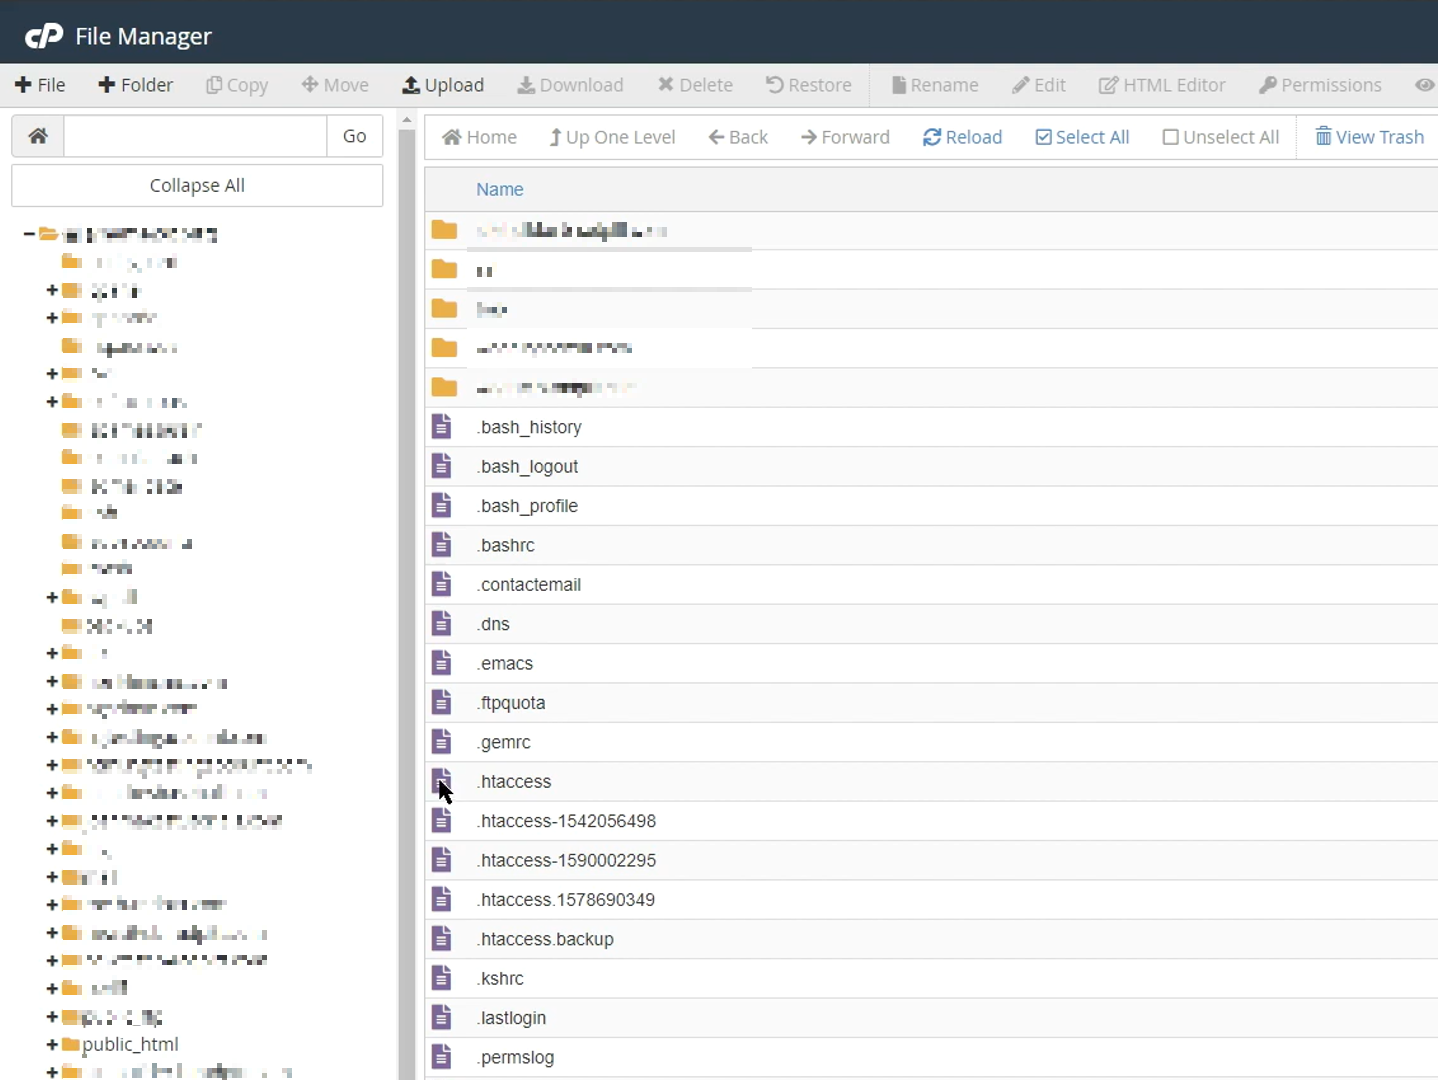
To add this code, you need to access your website files, which you can do by logging in to your hosting account or cPanel. You need to navigate to the file manager and “Turn On the Hidden Files” option in the website’s settings.
You will then find the .htaccess file in the public_html folder. Right click the file and edit it to add the code provided below.
1. Add the browser caching code
Copy the code below and paste it at the end of the .htaccess file content. Do not make any other changes in the file.
#Customize expires cache start - adjust the period according to your needs
<IfModule mod_expires.c>
  FileETag MTime Size
  AddOutputFilterByType DEFLATE text/plain text/html text/xml text/css application/xml application/xhtml+xml application/rss+xml application/javascript application/x-javascript
  ExpiresActive On
  ExpiresByType text/html "access 600 seconds"
  ExpiresByType application/xhtml+xml "access 600 seconds"
  ExpiresByType text/css "access 1 month"
  ExpiresByType text/javascript "access 1 month"
  ExpiresByType text/x-javascript "access 1 month"
  ExpiresByType application/javascript "access 1 month"
  ExpiresByType application/x-javascript "access 1 month"
  ExpiresByType application/x-shockwave-flash "access 1 month"
  ExpiresByType application/pdf "access 1 month"
  ExpiresByType image/x-icon "access 1 year"
  ExpiresByType image/jpg "access 1 year"
  ExpiresByType image/jpeg "access 1 year"
  ExpiresByType image/png "access 1 year"
  ExpiresByType image/gif "access 1 year"
  ExpiresDefault "access 1 month"

</IfModule>
#Expires cache end
The above code tells the browser to serve a cached version of the page instead of downloading a new version.
The settings also include the following refresh/expiration times:
- 600 seconds for HTML
- One month CSS and JavaScript
- One year for images
These expiration periods make sure visitors don’t have to download certain resources too often. However, you can easily edit the expiration times if you need.
2. Add cache-control headers (Apache)
We need to add Cache Control headers to specify browser caching policies regarding how a resource is cached, where it’s cached, and the maximum age before expiring. However, we’ve already specified expiration times above, so we don’t need to repeat them here.
Copy and paste the following code:
# BEGIN Cache-Control Headers

<IfModule mod_expires.c>
  <IfModule mod_headers.c>
    <filesMatch "\.(ico|jpe?g|png|gif|swf)$">
      Header append Cache-Control "public"
    </filesMatch>
    <filesMatch "\.(css)$">
      Header append Cache-Control "public"
    </filesMatch>
    <filesMatch "\.(js)$">
      Header append Cache-Control "private"
    </filesMatch>
    <filesMatch "\.(x?html?|php)$">
      Header append Cache-Control "private, must-revalidate"
    </filesMatch>
  </IfModule>
</IfModule>
3. Turn Etags off
We will turn e-tags off to force browsers to rely on cache control and expires headers instead of validating files. Here’s the code:
<IfModule mod_headers.c>
            Header unset ETag
</IfModule>
FileETag None
Browser Caching for NGINX Server
You won’t be able to locate the .htaccess file if your website uses NGINX. In that case head to /etc/nginx/sites-enabled/default and paste the code below:
server {
    listen       80;
    server_name  localhost;
    location / {
        root   /usr/share/nginx/html;
        index  index.html index.htm;
    }
    location ~*  \.(jpg|jpeg|png|gif|ico|css|js)$ {
        expires 365d;
    }
    location ~*  \.(pdf)$ {
        expires 30d;
    }
}
Add Cache-Control Headers (NGINX)
location ~* \.(jpg|jpeg|png|gif|ico|css|js)$ {
expires 90d;
add_header Cache-Control "public, no-transform";
}
After editing NGINX, save the file to leverage browser caching on the NGINX server.
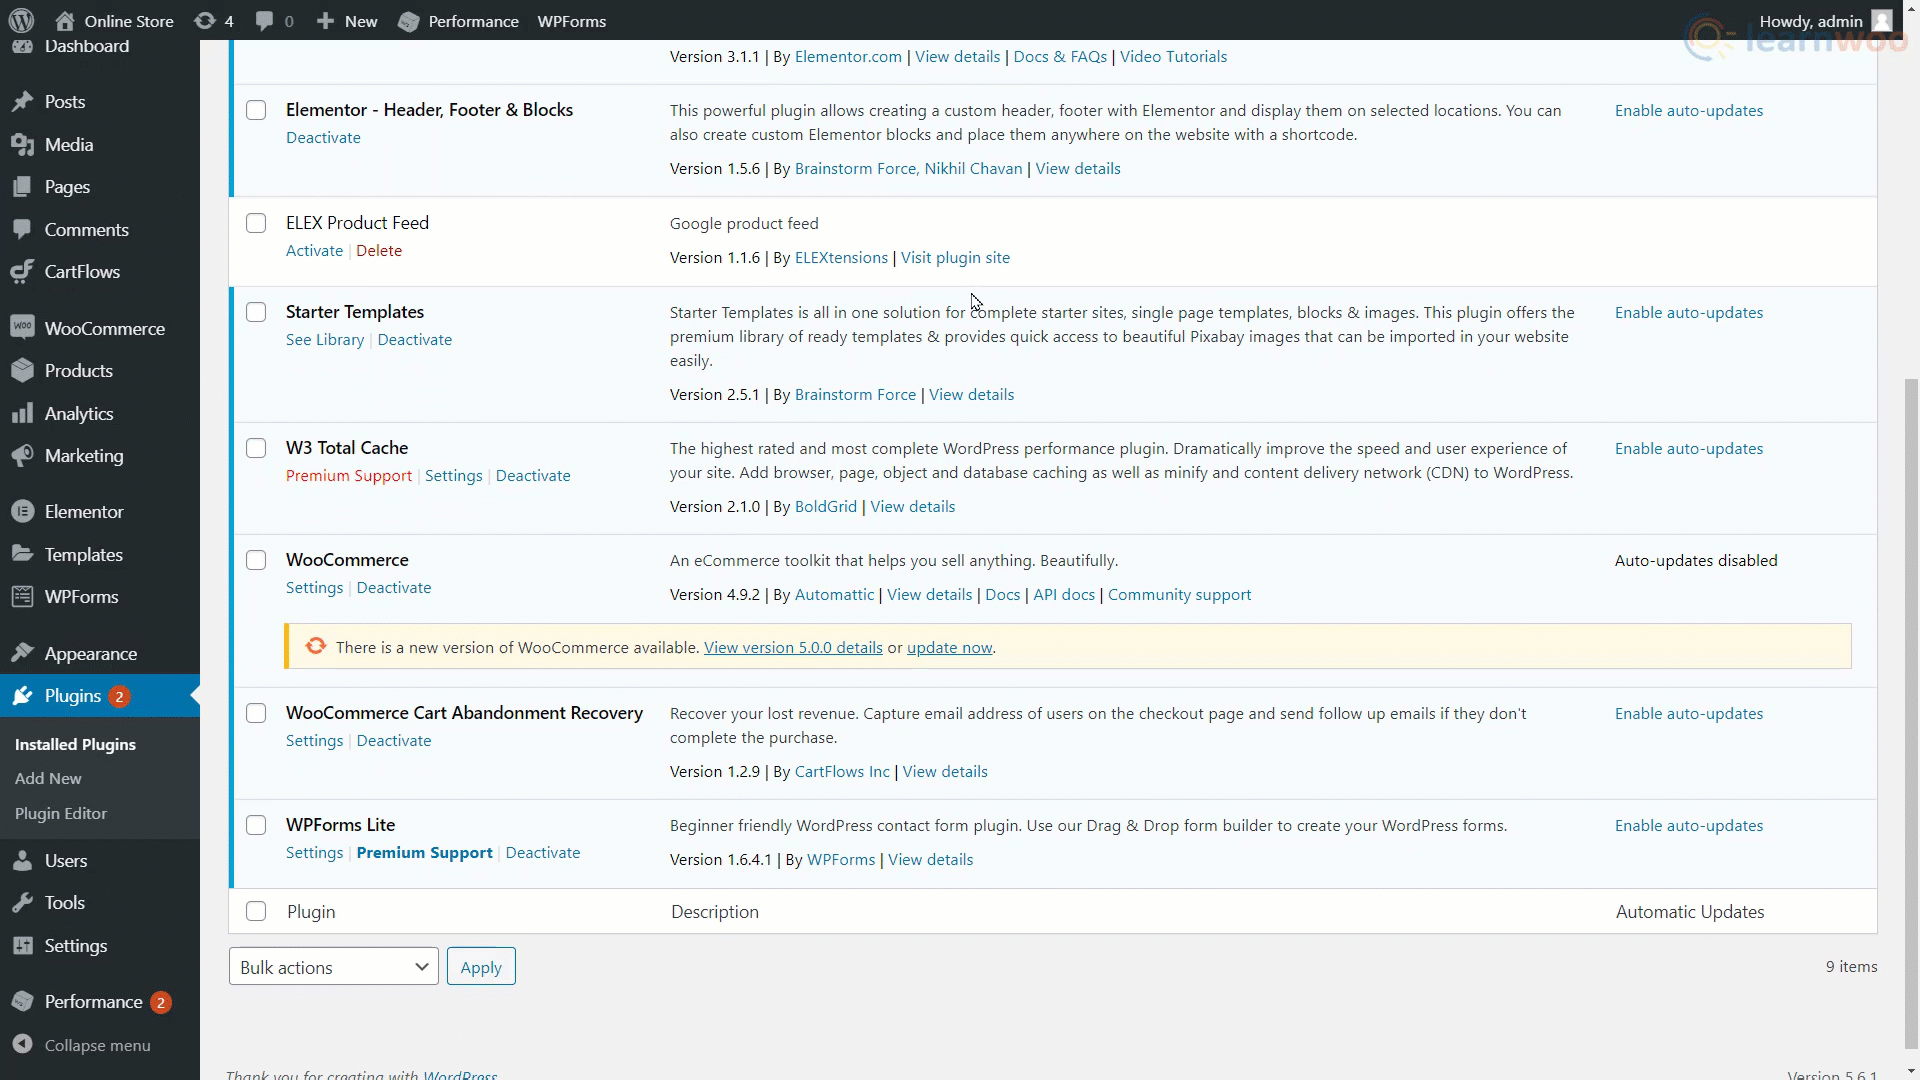
Leverage Browser Caching in WordPress Using Plugins
Editing the .htaccess file can indeed be quite risky, as a single mistake can break your whole website. So if you don’t want unnecessary risk, you can use plugins like W3 Total Cache and WP Fastest Cache.
Here’s how you can leverage browser caching using the W3 Total Cache plugin, one of the best ones for the job.
After installing the plugin, head to its settings page. Here, make sure that Browser Cache is enabled. Next, head to the browser cache settings from the sidebar. And make sure the expires header, cache control header, and set e-tag options are enabled.
Save the settings if you’ve made any changes.
With that, you’ve successfully leverage browser caching on your WordPress website. You can make sure it’s enabled by using the Insights or GTmetrix tool again.
If you prefer a video version, check out the video below:


")
")
")