")
Last updated - November 3, 2022
$14,900 per second!
That’s how much Amazon, one of the largest giants among other multi-vendor marketplaces, earns on average. Who wouldn’t want to repeat Amazon’s success?
To help you take the first steps on your roadmap to earn sky-high revenue, we’ve packed this article with helpful instructions on how to build a WooCommerce multi-vendor marketplace from scratch on WordPress.
But first, let’s find out why it is definitely worthwhile to unite diverse sellers and label them with one marketplace name, and why WooCommerce is the best bet to do this. Delve in.
Why Is It Worth Building a Multi-Vendor Marketplace on WooCommerce?
Considering all the factors to make a multi-vendor marketplace, one of the fundamentals is a software platform that can help you apply more accurate and agile business logic.
Why should you select WooCommerce? What is so special about it?
How about this? It’s a leading WordPress tool for eCommerce with a market share of 36.68%, according to Statista.
WooCommerce is a highly beneficial plugin created to manage your eCommerce business seamlessly and painlessly. It can also boast various integrations and extensions that enhance the functionality of your multi-vendor store.
Did you know that over 6.5M websites around the globe use WooCommerce? While roughly 94% of eCommerce-oriented WordPress site owners prefer WooCommerce as the #1 plugin for their needs. Not at all surprising, if you look at the value it brings to customers, marketplace owners, and vendors.
Advantages for Your Customers
Without any doubt, customers always go first. A customer-centric approach is a key ingredient to a successful WordPress WooCommerce store.
Here’s what online shoppers may get when visiting your WooCommerce multi-vendor marketplace:
- Easy access to several stores at once
- A broader range of goods
- Unbiased comparison of products
- Optimal price for a product
- Better customer service
Advantages for You as an Owner
Now over to you.
Creating a multi-seller online store with WooCommerce, as its operator, you get the following benefits:
- Steady income flow (from commissions, ads, memberships, etc.)
- Huge customer base
- Increased traffic
- Faster business and sales growth
- Partnership Acquisition
- Minimal management effort
- Seamless coordination and operational mobility (non-stop sales)
Advantages for Sellers
What about merchants?
They also get some valuable gains:
- Wider target audience
- Less marketing headaches
- Zero expenses on design and system management
- Efficient logistics
- Full control over inventory and products
- Statistical analysis and sales reports
As you can see, setting up an online marketplace and putting numerous eCommerce businesses under one roof (like eBay or AliExpress did) is a winning solution for everyone: online buyers, you, and sellers.
How do you do that with WooCommerce on WordPress? Follow our step-by-step guide below.
Ultimate Guide on How to Set Up a WooCommerce Multi-Vendor Marketplace in WordPress
Take the following six steps for setting up a powerful WooCommerce marketplace with multiple vendors.
Step 1. Coin a domain name and pick a hosting provider
Domain name
Avoid falling for the domain name myths and opt for the .com extension. It lets users remember your marketplace website better.
More importantly, as Jerry Han, CMO of PrizeRebel puts it, “Your primary concern should be to coin an easily readable and pronounceable domain name, descriptive and catchy at the same time. Note that hyphens and numbers can seriously damage readability. But you can always go with creative spellings like Airbnb or Fiverr or coined words like Zomato or Etsy.”
Consider X-word phrases – OnlineGrasp, ShopTime, or TheRealReal, as well as compounds or blends – UberEats, Instacart, or Flipkart. As an alternative, you may invent a partial abbreviation like Walmart which stands for Walton’s Market.
Why bother, anyway, if you’ve got domain name generators? They will make it easier for you to concoct something smart.
Hosting service
Where will your site live?
What hosting option is the most suitable for your marketplace on the web: shared vs dedicated vs managed? Hint: of course, a managed one. Among other advantages, it eliminates all the headaches with security and downtimes.
When choosing the best WordPress hosting service, consider the top suggestions that are inexpensive, secure, and stable:
- Bluehost
- Cloudways
- WP Engine
- Dreamhost
- Namecheap
- SiteGround, etc.
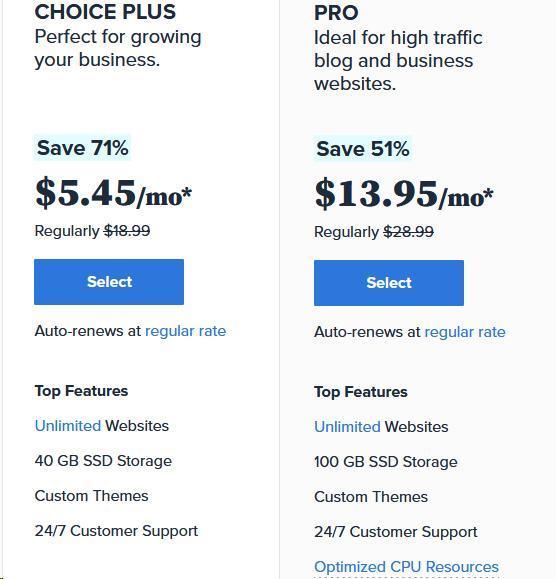
You may check some other managed WordPress hosting providers, but Bluehost is the most reliable solution. Not to mention that it’s the #1 recommended web hosting company by WordPress itself. Compare two plans that Bluehost encourages eCommerce website owners to use: Choice Plus and Pro.
Step 2. Get to WordPress and add WooCommerce
With Bluehost, WordPress is already installed automatically for you. Once you Log in to your account, select one of the suggested themes (you’ll be able to change it later).
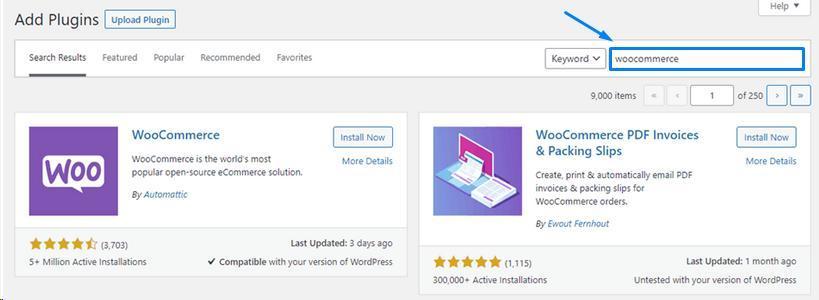
When that is done, you’ll get to the WordPress dashboard and need to add WooCommerce. Navigate to Plugins > Add New > type WooCommerce in the search bar. You’ll see the WooCommerce plugin appear as the search bar auto-completes the word for you. Click Install Now and Activate it.
Once you have WooCommerce in WordPress, you should customize your eCommerce store settings: store details (address, country/region, city, postcode), industry, product types, etc.
But you aren’t aiming at a lonely selling experience with WooCommerce, are you? You need to make a marketplace with numerous sellers. To do so, follow the subsequent step.
Step 3. Install a multi-vendor plugin
Top 5 Plugins for Managing Multiple Vendors in WordPress
WooCommerce Product Vendors is by far one of the most popular and recognizable plugins to manage a multi-store marketplace.
Here’s a list of the top five multi-vendor plugins similar to Product Vendors:
- Dokan
- WC Vendors Pro
- WC Marketplace
- YITH
- WCFM Marketplace
Consider some other plugins here before reaching your final decision and continue reading to find out what to focus on and how to make a wise choice when it comes to a proper multi-vendor plugin for your WooCommerce store.
How to Choose the Best Multi-Vendor Plugin for WooCommerce
“A fully-packed subscription with pro features for business ranges between $80–$500 per year, but you can always go with a starter version which is considerably cheaper,” suggests Michael Nemeroff, CEO & Co-Founder of Rush Order Tees.
“Dokan offers the widest range of features and the most convenient system navigation for managing multiple vendors,” Michael adds.
You can get into the detailed comparison of the two best plugins Dokan vs Product Vendors and see how each of them fares.
Decided on the plugin?
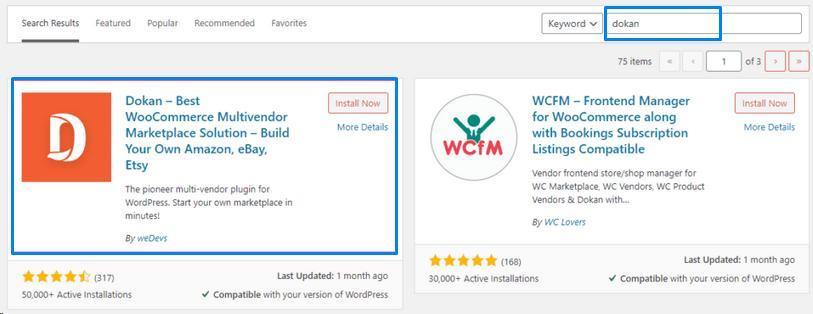
Hurry up to install it: Plugins >> Add New and type the name of the chosen plugin. For example, Dokan.
Step 4. Proceed to configure your marketplace
Let’s see how everything should be arranged in Dokan: from the commission type to your site appearance.
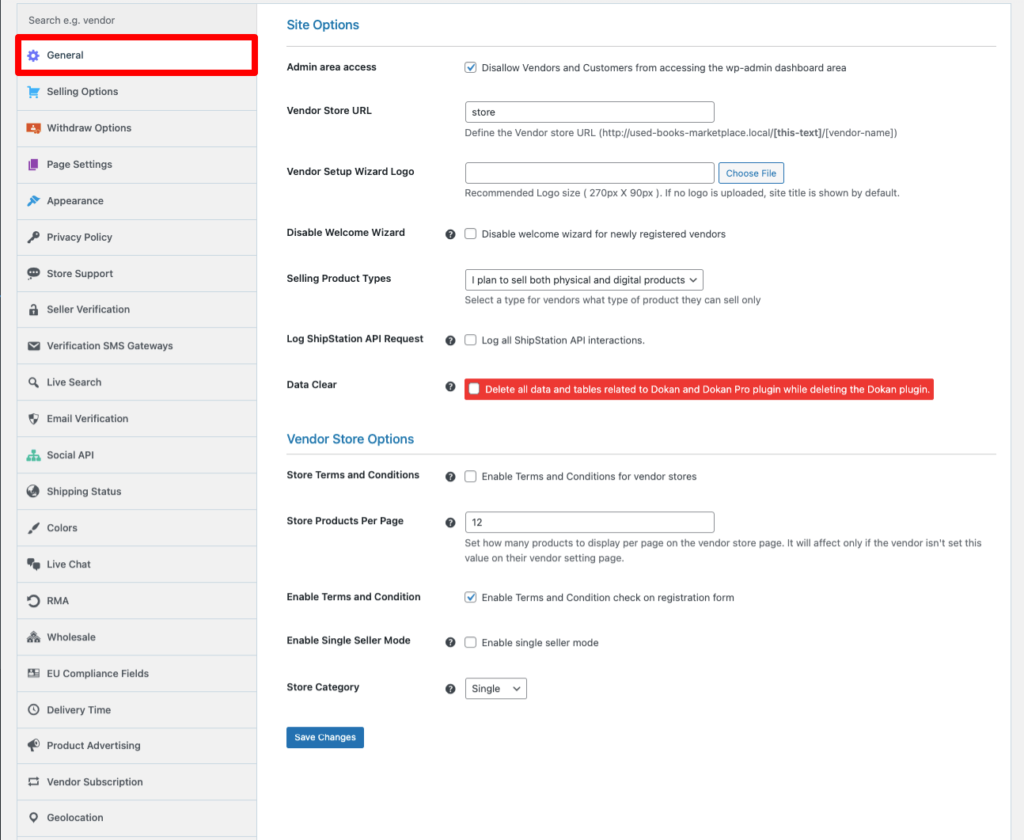
If you’ve installed Dokan already, you can now see it in the WP Admin Dashboard. Go to Dokan >> Settings >> General and set up the Site Options and Store Options.
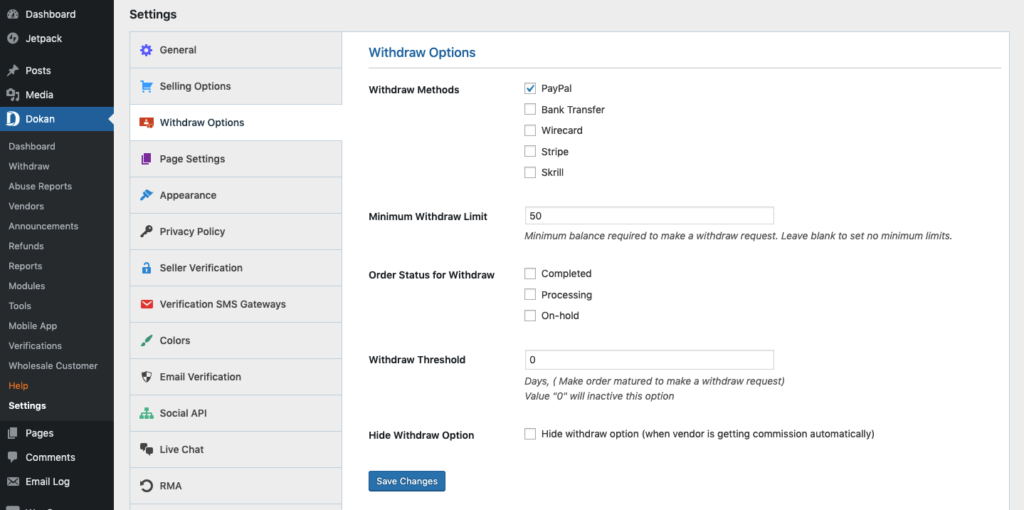
The next step is to configure the Selling Options and Withdraw Options.
Commission, shipping, and tax fees recipients, and vendor capability
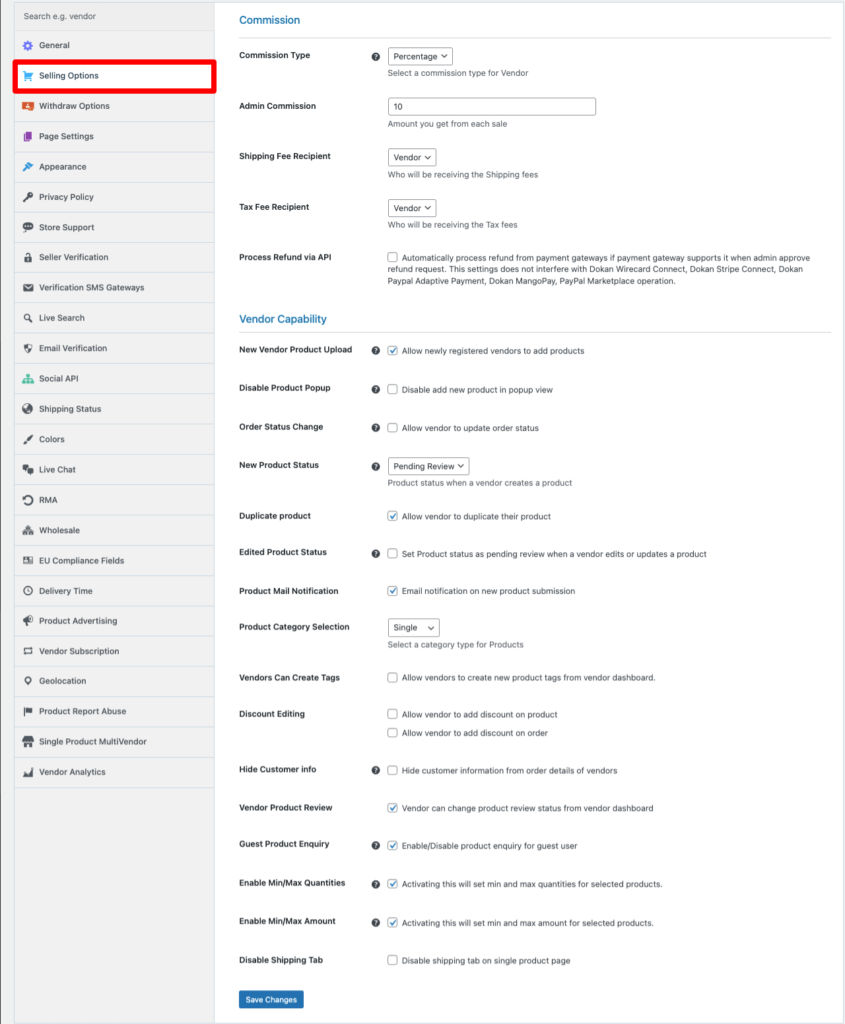
Payment gateways and withdrawal methods for sellers
Appearance (theme)
Scrolling through the best WordPress WooCommerce themes, give preference to those that have powerful customization options to satisfy your requirements, wants, and needs.
Besides, make sure the theme offers a solid integration with the multi-vendor plugin of your choice. If you go with Dokan, here’s a list of top WooCommerce multi-vendor themes that are fully compatible with it:
- Storemate Dokan
- Marketica
- Electro
- Martfury
- Marketo
Step 5. Open your e-door for vendors and let them register
To let other sellers register, go to General Settings and make sure the Membership option “Anyone can register” is enabled.

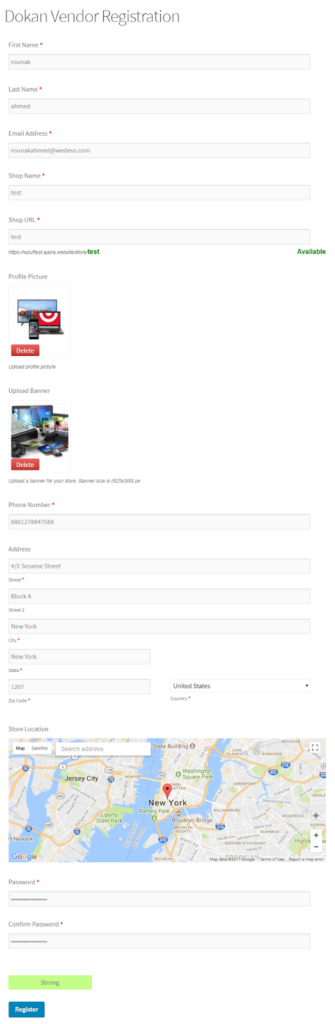
After that, move on to customizing the signing-up form for them. To modify it and add more fields, use the Dokan Vendor Registration Template.
Here’s what the registration form may look like.
Step 6. Expand your plugin pool
RegistrationMagic should top your “plugins-to-install” list. It’s a hands-on plugin for total control and management of user sign-ups on your website.
If you have already added it, great! Explore some other useful tools for your WooCommerce multi-vendor marketplace:
- Chat plugins
- WooCommerce subscriptions
- Booking plugins
- Shipping plugins
- Payment gateway plugins
- Plugins to boost conversions and sales
The toolset above will open more opportunities for your WooCommerce marketplace and help it achieve a desired competitive edge.
Last Note on Making a Multi-Vendor Marketplace with WooCommerce
With these steps under your belt, you’re well-armed to make a successful multi-vendor marketplace on WordPress using WooCommerce. It is now time to build a community of vendors, start selling together and enjoy the rapid growth of your business.
Once you follow our guidelines, peer into the WooCommerce upkeep checklist for flawless maintenance of your multi-vendor store.
Keep your online marketplace in tip-top condition and see your profits skyrocket.


")
")
")