")
Last updated - November 29, 2022
Starting a Shopify shop can be both thrilling and overwhelming for most individuals. You undoubtedly have grandiose ideas about what things to offer, how you want it to impact your consumers’ lives, how you’ll obtain favorable feedback and keep your firm afloat for years to come, and so on.
However, as a newbie, you are likely to be unaware of many aspects of the eCommerce sector, which may be irritating. Without any specific design or coding expertise, eCommerce systems like Shopify make it relatively simple to create an online store that looks fantastic and functions well.
This article is for you if you want to build a Shopify store, but don’t know where to start. This article will cover everything you need to know about starting a Shopify store, including the advantages of selling on the platform, what you’ll need to get started, the fees involved, and the actions to take to get started.
How Does Shopify Work, and What Is It?

Shopify is one of the most popular eCommerce systems, with over two million daily active users. It’s a prominent eCommerce platform with capabilities to help you create and manage your online business effectively. You can accomplish all of this without any design or coding experience.
Shopify’s business model is simple, appealing to small and medium-sized businesses while still being capable of serving giant corporations. You must pay a monthly subscription fee, and Shopify will give you all the tools you need to effectively build, launch, organize, and administer your online store.
How Much Does Shopify Cost?

The following is a breakdown of each plan’s pricing:
- The Lite Plan – The Lite Plan, which costs $9 a month and includes a Buy button, is the most affordable option.
- Basic Shopify Plan – $29 per month plus 2.9 percent and $30 per transaction
- Shopify Plan – $79 per month plus 2.6 percent and 30 cents for each transaction
- Advanced Shopify Plan – $299 per month + 2.4 percent and 30 percent on each transaction
- Shopify Plus Plan – Pricing levels for Shopify Plus start at $2000 per month + 2.15 percent per transaction.
What Are the Benefits of Selling on Shopify?
The cost of designing and developing your own eCommerce website can range from $5,000 to $500,000, depending on numerous criteria such as your specialty and the number of items you want to include.
If you had that kind of money, this would be a good long-term investment for your company. For small business owners, though, this may be too much.
Despite being the most popular platform for hosting an online business, Shopify isn’t the only one available. There are various Shopify alternatives, and most of them provide features that are comparable to Shopify.
Regardless, many internet business owners choose Shopify and believe it to be the finest option. This is why:
- Shopify is one of the most well-known eCommerce platforms available today.
- With a 20% market share, it is one of the fastest-growing platforms for running an online business.
- It offers a comprehensive set of eCommerce features, as well as design and customization possibilities.
- Mobile users will appreciate Shopify’s responsive design.
- Cross-channel selling is simple to set up with Shopify.
- Shopify’s point-of-sale app is widely regarded as one of the finest.
- Users of Shopify may create accelerated mobile pages (AMP).
- It features a reliable and effective order fulfillment system.
Shopify has numerous payment options and channels. Shopify Payments, Point of Sale (POS), and others are among them. It also provides one of the best shipping services (Shopify Shipping) for a low or free cost. Users of Shopify may also incorporate a variety of third-party apps into their stores.
In terms of cross-channel selling, Shopify has developed a system that enables customers to simply link their Shopify stores to other channels in order to boost conversion and sales. Users can now reach a larger audience and turn their followers into buyers, thanks to Shopify’s ability to interface with social media networks like Instagram and Facebook.
How to Create a Shopify Store
The simplicity of setting up a business is one of the reasons Shopify is so popular. Setting up an eCommerce site used to take a lot of effort and technical knowledge. You can now set up your online business in minutes using major eCommerce systems like Shopify.
Let’s get down to business and talk about the steps you’ll need to follow to get your Shopify store up and running. Here are 11 measures to assist you to get your new shop off to a good start:
1. Plan ahead of time
There are a few things you need to do before you start setting up your Shopify account. This should include your business concept, name, things to offer, a logo, and even product photographs.
To set up a working store, you’ll need to have most of the above in place, then conduct your study.
Before you get started, you’ll need high-quality, optimized product images.
2. Sign up for a Shopify account
If you haven’t already done so, establish a Shopify account. All you’ll need is your email address and a password for this. You will not be asked to validate your email address at this time. This means you may start setting up your store right now.
After that, you’ll be asked to fill out some additional information about yourself and what you want to sell.
Some of the information you submit will be used by Shopify to customize things like taxes and currencies.
Learn how to increase sales and revenue with special ideas and insights exclusively available to subscribers of my private newsletter.
3. Include Products
The next step is to add goods to your store after it has been created. That is self-evident.
To do so, go to the Products tab and select Add Products, then enter your product information.
You’ll need to provide some information about your items after you’ve listed them. A product image, a product title, a price, and a product description are all included. All of this contributes to giving your consumers additional information about your offerings.
Different labels may be used to arrange your merchandise. Product availability, product type, vendor, tags, and collections are some of the labels that are accessible. These tags assist you in grouping your items and making shopping easier for your clients.
4. Create Pages for Your Website
The next stage is to add pages to your website once you’ve added items. Start with the most crucial, such as Contact, About Us, FAQs, and Privacy Policy and Terms of Service.
Your Contact page allows clients to contact you if they have any questions, while your About us page allows you to develop a more personal relationship with them. Your FAQ page should address the most frequently asked questions by your clients.
A Privacy Policy page is required, especially if you want to use Google AdWords. Using Shopify’s free policy generator, you may create a privacy policy after entering your address and email.
5. Customize Your Store Using a Theme
Your shop is starting to take shape at this time. Working on your store’s view and customizing its style is the following step.
To do so, go to the Online Store tab and select Themes from the drop-down menu.
You must first choose a theme before you can begin customizing. Themes are design templates for your store. They just serve as a starting point for future customization. Shopify has themes for a variety of sectors and company kinds, both free and premium. Check out 25 Best Shopify themes handpicked for design inspiration.

You may make further changes to your homepage after you’ve selected a theme. Play around with some features and rearrange some pieces as you see fit. This is so you can understand how your homepage can best serve your unique company objectives. You may also change the colors and fonts in your store to match your brand and navigation menus.
If you do not wish to go though a number of themes, you may checkout the the most powerful Shopify theme – Boost Sales & save over $281/month on Apps!
Booster Theme will turn your visitors into buyers. It’s more than a simple theme; it’s a complete marketing toolbox. Inside Booster, you will find integrated apps, conversion-optimized designs, and loading speeds that you can’t find in any other theme. Increase your sales today. Get your license today at BoosterTheme.com
6. Personalize Your Checkout Page
Customize your checkout page to complete your Shopify store setup. To do so, go to the Theme Settings tab and select Checkout. You may change the graphics, layout, and background color, among other things.
You probably won’t need to use any kind of complicated script as a beginning. You can allow consumers to leave tips or compel them to check out using their email addresses. It will be easier to reach out via email marketing as a result of this.
7. Arrange for shipping
Shipping is another aspect of your eCommerce business that has to be considered. This is due to the numerous variables and aspects that go into setting it up. Product weight, shipment locations, packing expenses, marginal profitability, and carrier rates are all factors to consider.
Go to the Settings tab and pick Shipment from the drop-down menu to set up shipping. You may set up and adjust your shipping options on this page. You can choose a third-party delivery firm with whom you wish to collaborate if you want to. You might provide the measurements on this page if you offer bespoke packaging to your consumers.
Shopify allows you to set up free delivery for your business, which may be of interest to you.
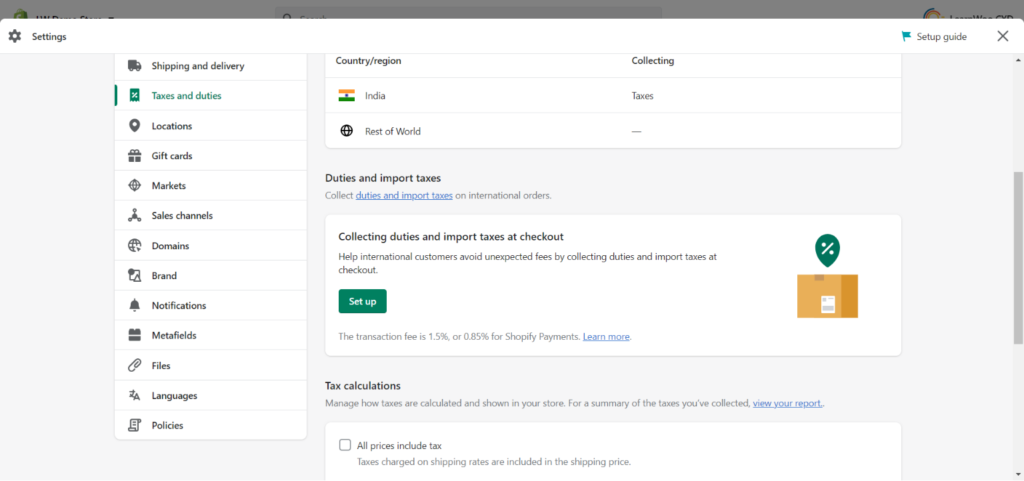
8. Set Up Your Taxes
You must pay taxes to the government on every sale you make, just like any other profit-making firm.
Shopify makes this procedure simple for you by automating the tax computations. It accomplishes this by employing a global sales tax rate. Regardless, it’s still a good idea to conduct some study or hire a tax specialist to be sure you’re charging and paying the correct amount of taxes. You can also verify with your local tax agency to be sure.
You can opt to alter these settings if your location has particular tax obligations. Edit the rates or override the default rate by going to Settings, Taxes, and then Edit Rates.
9. Establish Payment Gateways
This is the final stage in creating a fully operating Shopify store. To take payments on your store, you must first set up your payment gateway.
Navigate to Settings > Payments to do so. At this stage, you must fill in some information about yourself and your company. These include your name, address, Social Security number’s last four digits, banking information, and a few other details.
Because Shopify offers most of the main payment methods, setting up your payment gateway is simple. You will be able to receive payments at no additional cost if you utilize Shopify Payments, Shopify’s own payment system.
In addition to over 100 other options, Shopify allows all major payment methods, including PayPal, Amazon Pay, Square, and even Bitcoin. Shopify continues to increase its payment alternatives, particularly for local vendors, to help company owners improve conversion rates.
Shopify Payments users will not be charged any additional transaction fees, which range from 0.5 percent to 2 percent per transaction for all other payment methods. Currently, Shopify Payments is only available in 17 countries. If you live in one of those countries, make sure to utilize Shopify to avoid the extra charge.

At this moment, your store is ready to go live.
10. Get ready for the launch
These next two stages are critical in ensuring that your Shopify store runs easily and successfully.
To begin, you’ll need to create a custom domain. A domain is just the URL of your website. You may connect your Shopify store to an existing domain if you have one. If you don’t already have one, you can purchase one through Shopify.
A standard “.com” domain will cost you roughly $14 per year. It will instantly link to your store after you purchase it. This isn’t required, but without it, your store will have to run on a Shopify subdomain.
11. Launch Your Shopify Store
You will have successfully set up your Shopify store at this point, and it is ready to be launched and made public.
To do so, go to Settings and select Preferences from the drop-down menu. You’ll find a button to delete your password page at the bottom of the page. Once you’ve completed this, you’re ready to go.
Conclusion
There are numerous benefits to starting an eCommerce business rather than a brick-and-mortar one: the initial investment is much lower, you can start small or large, and your online store can operate 24 hours a day, seven days a week for customers all over the country (or the world, if you’re willing to ship that far). It’s also easier and less expensive to grow operations if necessary, making e-commerce all the more appealing to ambitious entrepreneurs.
If you want your company to become an online success story, you’ll need to take some key measures and invest some money. Stay compliant with tax rules, secure the required permissions, invest in client retention and communication, and don’t forget to design a mobile-friendly platform for your e-commerce website, just like you would for any other business.


")
")
")