
Last updated - February 13, 2024
The availability of multiple eCommerce platforms has completely democratized the way people can make money nowadays. Anyone who has a hobby can turn it into a business by setting up an online store and selling their product or service.
For anyone who is serious about making money by monetizing their hobby, WooCommerce is the best option! It’s the most popular eCommerce platform which is built on WordPress and is currently used by 5+ million websites. It’s the perfect platform as it allows you to sell literally anything and you can have your store up and running in just a couple of hours.
The best part is that you can do it without any coding skills or the help of an expert.
So if you’re thinking of turning your hobby into a full-time profitable business, this step-by-step guide is for you. We’ll handhold you throughout the process of using WooCommerce and WordPress.
Let’s get started!
Turn your hobby into a business – 10 steps
Here are the 10 steps to follow:
1. Decide and buy a domain name
This is the most important and basic step to starting your online business.
Your domain name or site name or URL is basically your web address. It’s how your customers will find you.
For instance, www.yourstore.com, .in, .net, etc.
Pick something that’s unique, easy to remember, and not very expensive. After all, it’s YOUR business.
2. Buy web hosting for your store
The next step involves choosing the right hosting provider. A hosting provider is a company that will store all your files on the internet. To build any website you need to have web hosting to store all your data.
Consider it as a remote computer that stores all your files. While choosing the right web hosting you can keep the following in mind:
- Speed: If your website pages load slower than you might lose out on customers. Therefore, it’s important for you to choose a web host that promises.
- Protection: To run your online store securely, you need to protect your customer’s information as well as your data. Essentially, you need to choose a plan that protects you against email spam, and malware offers SSL security and automatic backups.
- Extendibility: You won’t need to worry about scaling your business right away when you first start out. But as your business grows you will need to maybe upgrade to a higher or better plan. Choose a hosting provider that offers scalability!
- Uptime: You may have noticed how sometimes websites ‘go down’. Well, that can happen to your site too. During this time your users won’t be able to access your site. So you need to make sure that you choose a hosting plan that offers the highest percentage of uptime.
The hosting cost will depend upon what services you need. Hosting companies like Bluehost, Siteground, and Godaddy are some of the providers recommended by WooCommerce themselves.
After getting the domain name and web hosting, we can move on to the next part.
3. Install WordPress
WordPress is the most popular CMS that powers over 455 million websites on the internet. The reason it’s so popular is that it’s powerful, highly customizable, and completely free. You can do as much and as little as you want with it.
To use WooCommerce You need to have an up and running WordPress website. The setup is pretty simple. You need to install WordPress on your computer. To do so you can simply check their official website and follow the installation process.
After installing, you check the settings to make sure everything is in place. Just go to your WordPress dashboard and click on settings.

After checking all the settings like site name, tagline, email address, etc. your basic WordPress site should be ready.
4. Select a theme for your online store
Once your basic site is ready, you will need to download a theme to determine the look and feel of your online store. Try to choose one that is lightweight, fast, responsive, and adds functionalities that are going to help you enhance the shopping experience for your customers.
Installing a theme isn’t that hard. You just need to navigate to WordPress Dashboard and click on Appearance > Themes > Add New or choose from an existing theme. After that, simply Install and Activate.

There are tons of themes to choose from. To decide which theme will fit your needs you can check out this article on 5 Awesome WordPress themes for WooCommerce.
Most of the themes come with ready-made templates, meaning you only need to replace the demo content with your content and you’re ready to go
5. Install WooCommerce
With this step, we’ll finally start adding the eCommerce functionality to your WordPress site. WooCommerse has all the features that are needed by nearly any kind of store that you want to start.
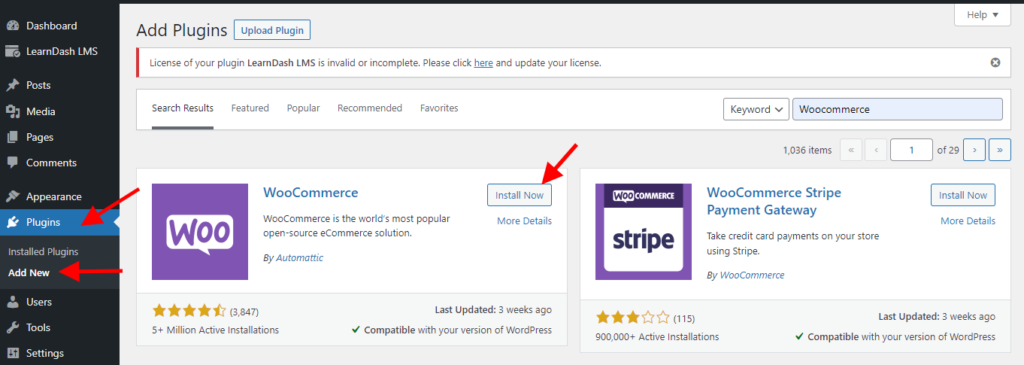
To install WooCommerce just follow the steps below:
- Go to WordPress Dashboard > Plugins.
- Add New > Search ‘WooCommerce’.
- Install and Activate. WooCommerce.
6. Configure the initial setup
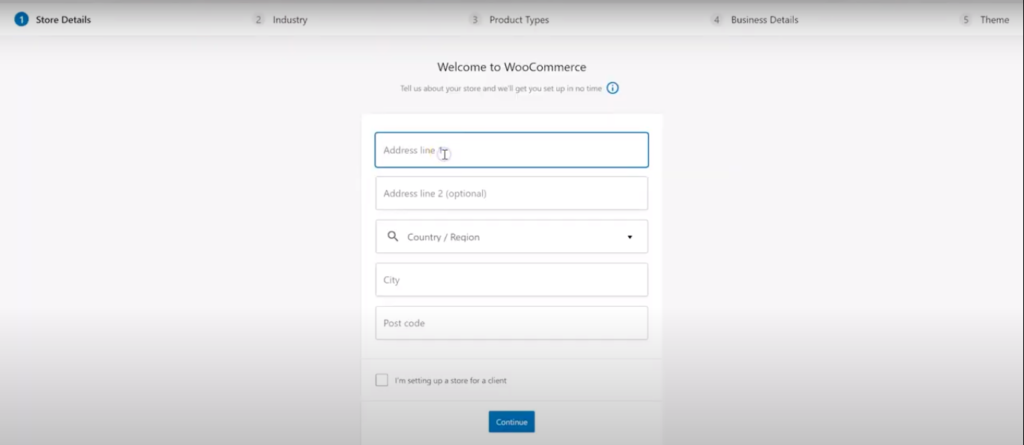
Once you’ve installed the plugin, a setup wizard will pop up to guide you through the initial setup of your WooCommerce store. The wizard will ask you all the basic questions to gather information about your store and will make the onboarding process extremely smooth.
All the settings that you configure in the beginning can be changed later too. Here are the details it will help you with:
6.1 Store details – This will include information like where’s your store based. What currency will you accept the payment in, and what kind of products do you plan to sell like physical, digital, membership, and subscriptions.
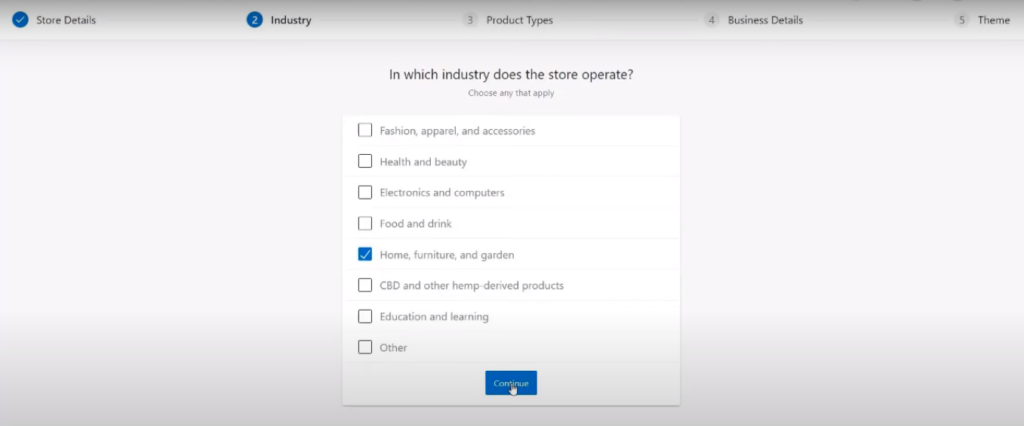
6.2 Industry – On this page, you need to select the industry your product falls in. For example – fashion, home furniture, health, beauty, etc.
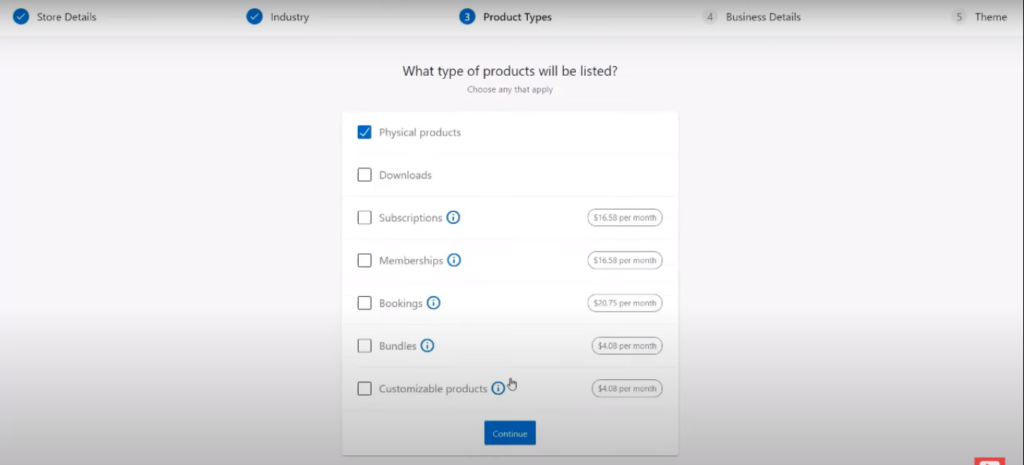
6.3 Product Types – This is where you list the kind of products you will be selling. For example physical goods or downloadable products. You can also sell memberships or subscriptions etc. but those are premium features and you’ll need to sign up for them.
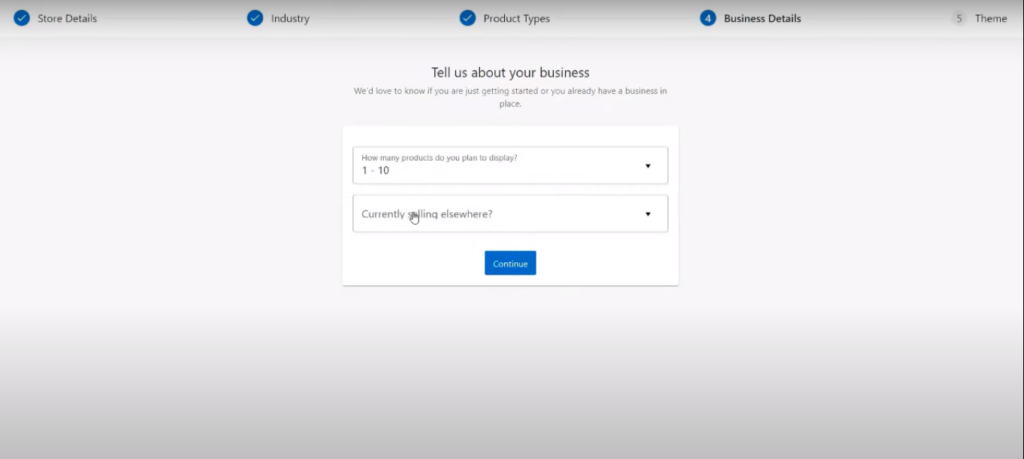
6.4 Business Details- On this page, you’ll be asked questions like, how many products will you sell on the site and whether or not you’re selling elsewhere along with some options which you can leave unchecked for now.
6.5 Themes – You can install a new theme or activate the one you already have!
7. Add products and product pages
After the initial setup, you can now begin adding your products to your store and also creating pages for them. WooCommerce allows you to add different kinds of products. You can choose from:
- Simple: A basic product without any options like a painting that comes in only one size.
- Grouped Products: A collection of products that can be purchased, It’s made up of simple products. Ex – A bundle of courses, a set of plates, etc.
- Variable: A product where a customer has a lot of options to choose from like a shirt in different sizes and colors.
- Virtual: A product that does not require shipping like an online course.
- Other Products: Other than physical and digital products, you can sell subscriptions, memberships, and bookings with the help of WooCommerce subscriptions, and WooCommerce bookings.
Adding products is easy. All you need to do is :
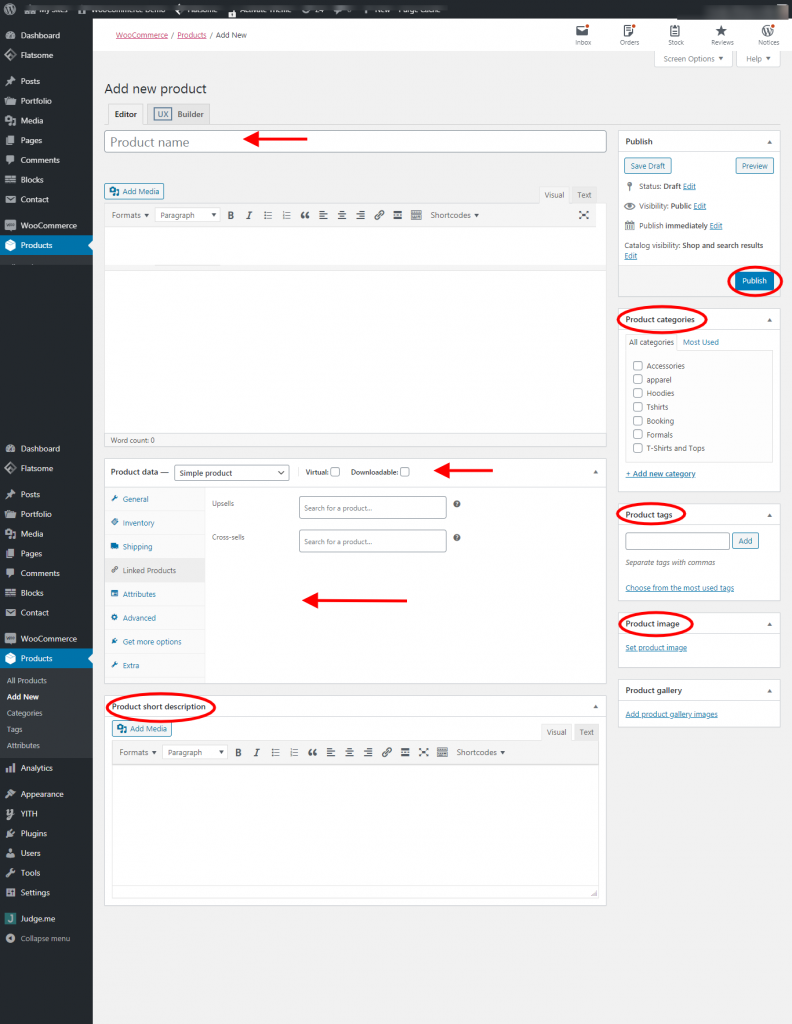
7.1 Go to WooCommerce > Products > Add Product.
7.2 Type in the product Title and Description.
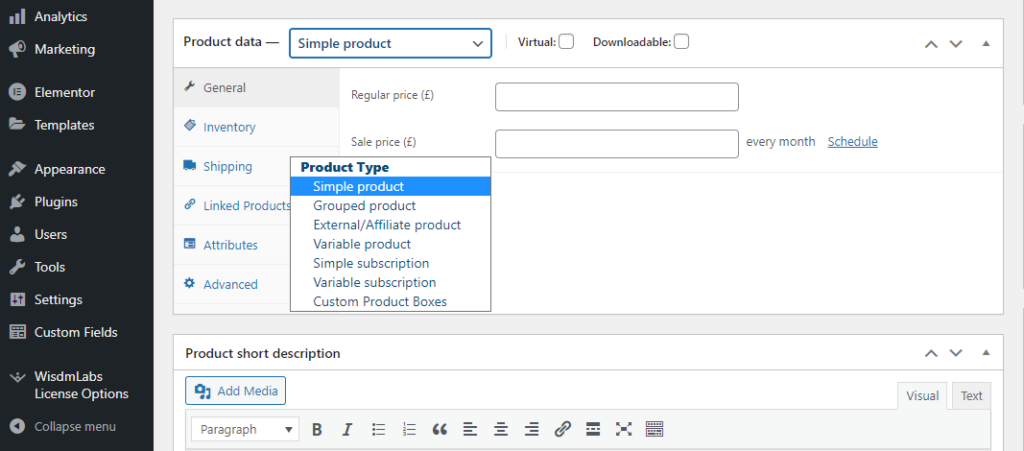
7.3 Go to the Product Data section, and select downloadable (digital) or virtual (service) if applicable.
7.4 Under Product Data, you can find other important data like General where you can set pricing, inventory where you can mention and manage the stock level, linked products to add other recommended products to upsell and cross-sell.
7.5 Add a product description that will show up under the product’s name.
7.6 Add Categories to make it easier for customers to find the products. For example Under the main category ‘bags’, you can add different subcategories like ‘handbags’, ‘tote bags’, etc.
7.7 Adding Product Tags will make browsing easy for your visitors.
7.8 Finally add high-quality product images to make it more appealing. After you’ve done everything, make sure to recheck and hit publish!
For adding multiple products, you can simply repeat all the steps mentioned above.
8. Create other essential pages
After you’ve added your products, It’s time to create other important pages for your online store to give your customers all the information they need. Generally, you’ll need:
- Home Page – This is the main web page of your website. It will contain information about your store, and your products and will have all important links. You can also add your best-selling products here.
- Shop Page – This is where all your products will be listed, visitors can check out all your products from here.
- Cart Page – On this page, customers can see all the products they’ve added to their cart.
- Checkout Page – The most important page for your customers. It’s where they will make the transaction by filling in all their billing details.
To add a page, simply go to:
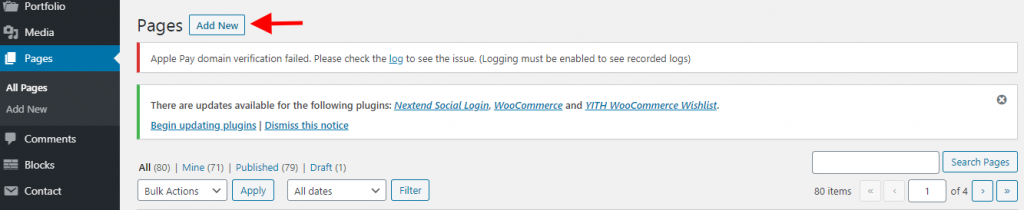
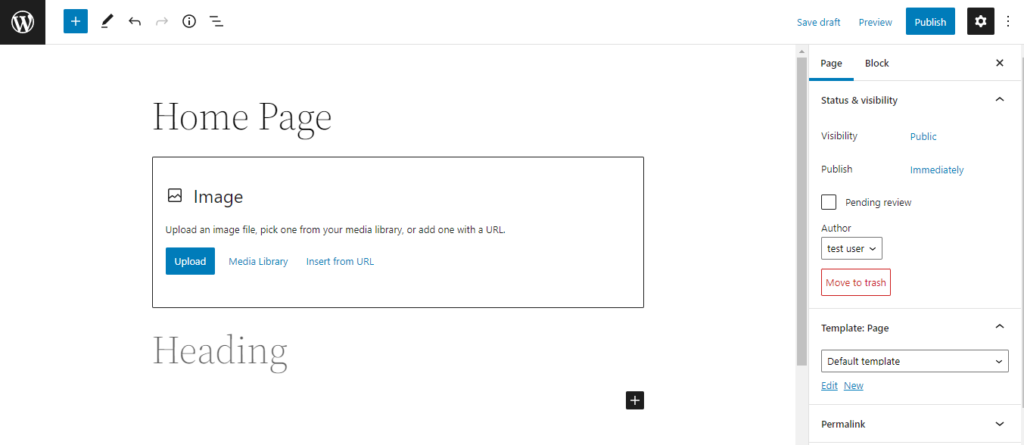
8.1 WordPress Dashboard > Pages > Add New
8.2 Use the built-in block editor to design pages and customize them as per your needs. You can add images, text, products, links to other pages, etc.
Similarly, you can add a contact page, FAQ page, T&C page, etc. by following the same steps.
After adding products and creating all the important pages your store is ready to go live, but before that let’s look at what else you might need.
9. Add features and functionalities
WooCommerce has tons of native extensions and 3rd party plugins to extend the functionality of your online store. You don’t have to install them right away but they’re surely worth checking out. Let’s take a look at some of them:
- WISDM Customer Specific Pricing. Use this plugin to set up dynamic pricing and discounting rules for different user roles, groups, and customers in your Woo Store.
- WISDM Custom Products Bundle: With this plugin, you can sell group products as packages, offer shopping deals on the product bundles, dynamically price the kits based on the products added, and much more!
- WISDM Product Enquiry Pro – This lead generation plugin allows you to add ‘Inquiry’ forms and the ‘Request a Quote’ option on your products page.
These are just a few plugins that we think might help you. For a more comprehensive list, check out these 30 best WooCommerce plugins.
And with that being said you can make your store live and start selling your products and services.
10. Promote your products!
Now that you’ve created products and are ready to sell them. The only thing left to do is market them. A lot of first-timers overlook this part but we’re here to tell you that it’s extremely important.
You can start off by growing your email list, set up a business account on Instagram, Facebook, etc., and start promoting your products by posting about discount offers, seasons specials, flash sales, etc,
You can place google ads so that your store shows up in the search results when someone searches for a product similar to what you’re selling. This is a great way to increase traffic and even sales on your site.
Additionally, you can also do search engine optimization (SEO) to come up organically in the search engine results.
Again these are only some of the ways you can use to push your products to reach a wider customer base. You can try other marketing channels and strategies. Bear in mind that you will need to experiment a lot and stay consistent, and find a way to enhance the process over time.
Ready to start your own online store?
Setting up an online store to start a business can be daunting at first. But, with some effort, you can have your own store up and running in no time.
With the help of WordPress and WooCommerce, you can turn your hobby into a profitable business and hopefully leave your 9-5! Just be confident, follow these steps, and start selling.
We hope this guide was helpful. If you have any questions, you can ask in the comments below!


")
")
")