
Last updated - March 4, 2022
By activating user registration to a WordPress site, you can allow people to register and perform various actions inside the admin area. Based on the user role, they can submit or publish blog posts, add and reply to comments, and many other things.
While being the chief administrator, you can distribute multiple roles to assign on who to do what. Now you know how beneficial this feature is, but you have to allow users to your WordPress website.
This post will help you understand how to create a user registration form and give access to more people to manage your workload.
Why you should allow user registration in WordPress
User registration is a crucial native feature of WordPress. With this option, you can have people onboarded to work with different roles assigned to them particularly. However, there are many benefits of enabling user registration.
- You can accept guest bloggers to register and contribute regularly
- Registered users can access only the particular areas where you approbate
- You can reach people who registered to the site and let them know about new offers
- Share your brand-related news with registered users
- Change user roles if they need to be updated over the time
- A brilliant solution for distributing workload efficiently
Let’s say you want to allow a user to guest post on your website. With user registration, they can submit their post for review, and you will publish the post later. Furthermore, you can specify which part of the website your users should see.
Please read our article on WordPress user roles for a comprehensive understanding of different roles and their capabilities.
How to enable user registration in WordPress
User registration is a default functionality of WordPress. But you have to turn on the option and decide a few other things. I’ll show you how to enable the feature from your dashboard.
Visit Settings from the left side of your WordPress dashboard and head over to General. Find ‘Membership’ from the below and switch on the ‘Anyone can register’ box.
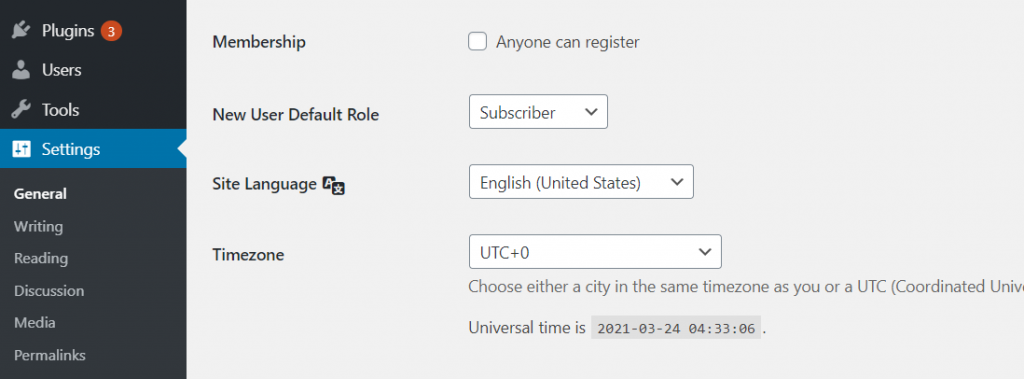
The next part is where you have to define the default user role. You can assign each user a unique role when they register and limit their permissions.
The default user role is subscriber, which you can change to any other user role available. For example, if you want users to write posts on your website, you can change the default user role to Contributor or Author.
You can choose from subscriber, contributor, author, editor, and administrator. By default, it’s ‘subscriber,’ so you can alter the role you like to assign to a new user. Keep in mind that an administrator can change everything on your website. Never use it as the default user role.
Scroll down and save the settings to see it in action.
Add login and register links to your WordPress site
Your site is now ready to allow new user registration. For doing that, users must know where to register and login to access your site. It’s time to display the registration link on your preferred locations.
I’m showing you now how to add the links.
First, you can add the registration option via the meta widget to the sidebar. To do that, follow the steps.
From the dashboard, go to Appearance and then Widgets.

Click the ‘Meta’ widget and drag it to your desired place, be it a sidebar or header. There are multiple locations you can add this widget.

Give it a title or keep it blank, and click the Save button. The widget will look like this although it may appear differently based on the site’s design.

The drawback with the default system
While the above-mentioned method seems quite an easy and efficient way to add user registration feature, it has some disadvantages as well.
One crucial problem is it allows users to the admin area of your website which is not a smart way to handle the security.
With a custom login page, you can give users access to your site without entering the WordPress admin panel.
On the next method, I’ll show you how to create custom registration and login pages with a drag-and-drop form builder plugin.
Create user registration form with a WordPress form plugin
You already know how to allow user registration to your WordPress site and the drawbacks of the default option. With a WordPress form plugin like Fluent Forms, you can customize the entire process and make your user registration more efficient.
Here are some benefits of using Fluent Forms for user registration:
- No coding required
- Multiple options to include
- Easy to customize forms
- Advanced conditional logic
- Double optin for account verification
- Form styling with custom CSS
- Redirection based on roles
- Branding with logo and color
This feature is available with the Fluent Forms pro version. Let’s check out the steps to follow.
Step 1: Enable user registration module
To create a user registration form, you need to activate the user registration module first. Go to Integration Modules from the drop-down of Fluent Forms at the left side of the WP dashboard.

Enable the User Registration from the beginning of that window.
Step 2: Create a new user registration form
Click Add a New Form after entering the dashboard, or select New Form on the left side of your WordPress dashboard. The window of prebuilt forms will appear. Choose a blank form or any of the ready templates available there.

Customize your form until you’re satisfied with it. There are input fields and advanced options with each field. After getting everything done, save your changes.
Step 3: Customize user registration part
Previously you have customized the form. Now, you need to work with this module particularly.
Follow the Settings and Integrations available on top of your form editor. Then go to Marketing & CRM Integrations from the left panel.
Hover over Add New Integration, and it will show active modules. Choose User Registration Integration from the dropdown.

The feed will appear with tons of options. First, give the feed a name and then map the input fields with your preference.

After the first part, there comes the Default User Role with four distinct possibilities. Choose one role from Editor, Author, Contributor, and Subscriber.
I’m going to explain a little more about the other sections.
- User Meta: For collecting additional data, you can use the two fields available under this section. The first one is for meta key, and the other one is for value.
- Auto Login: If you check this box, users will be auto-logged in after the registration.
- Email Notification: If you want to send the default WordPress welcome email, check this box. Otherwise, you can customize your email notification from settings.
- Form Validation: You can prevent users from new registration if they’re already in the database.
- Conditional Logic: Want to trigger something based on some conditions? This feature is for you.
After filling out all the fields, click the Create User Registration Feed button.
Congratulations! Your form is now ready for action.
Create a new page or choose an existing page where you want to show the registration form.
Add a new block by searching Fluent Forms, and select it.
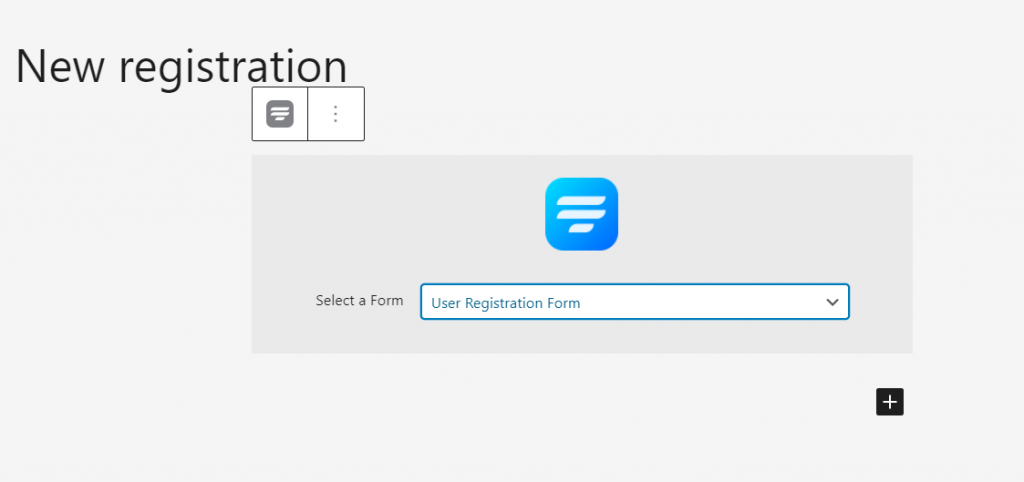
Next, click the drop-down beside Select a Form. All your forms will appear here, and you can select the right one. Now hit Publish if it’s a new page or Update for the existing page. Add this link to your sidebar, header, or footer.
Wrapping Up
I hope now you know how to allow user registration in WordPress. So, what are you waiting for? Start adding users and assign them with different roles. In a nutshell, there are two ways you can accept new users to your website:
- Using the default system and placing the Meta widget to the sidebar
- Create custom registration forms with a WordPress form plugin
The process should feel easy with the two methods because I have tried to explain them with friendly steps.


")
")
")
hello. topic for me thanks kelly
i found this web and i would to help you with evolution. i am from UAE ;D