
Instagram has grown to become a great platform to showcase products thanks to its visual and interactive appeal. It is quite easy to improve the reach of your products using Instagram. You can create a storefront on Instagram where you can share stories and photos of your products to potential customers. Instagram allows you to categorize products into different groups and categories, and also to provide all essential information like product price and description. In this article, we will discuss how you can integrate WooCommerce Catalog feed with Instagram.
An overview of Instagram Shopping
Let’s take a look at some of the features of Instagram Shopping that will be helpful for your business.
- You can feature a storefront, where people can browse and shop your products.
- Curate products into different collections to make them more appealing.
- Product detail pages with useful information on your products.
- For select markets, Checkout on Instagram feature, where purchase can be completed directly on the app.
- Showcase products in your images and videos with appropriate tagging, thereby ensuring better visibility.
- Boost your products’ reach with ads in tags.
- Preview option to create hype around a new product launch (only in select markets).
Basic process to set up Instagram Shopping
Now that you know the benefits of setting up Instagram Shopping, let’s also find out the basic process to set up one.
Understand the eligibility guidelines
Firstly, you need to make sure that you are selling products that are eligible for Instagram Shopping, and also that you are complying to their policies. There should be a webstore already set up with products for direct purchase, and your Instagram account must be present in an available market. You can check the latest information about available markets for Instagram Shopping here. Furthermore, you need to have a business or creator account, and also set up a Business Manager Account.
Choose how you would like to onboard
Instagram Shopping allows different ways for businesses to onboard. First, you need to set up a shop in Commerce Manager. Then you can create a catalog and add items to the catalog. Adding items to the catalog can be manual, or by syncing the catalog feed from your respective platform. If you update the product information in your eCommerce platform, it will be updated in the Facebook Catalog as well. Later in this article, we will describe how to integrate your WooCommerce catalog feed with Instagram, and how you can automate the process with a plugin.
There is also an option to add products directly using the app.
Set up shop details
Instagram offers different options to define how customers will checkout from the store. You can choose a method according to your products and the market you are operating from. There is also an option to choose Facebook and Instagram both as your sales channels. Choose all these options according to your specific considerations and submit it for Instagram review.
How to integrate WooCommerce Catalog Feed with Instagram?
As you have seen above, there are different ways to add products to a Facebook Catalog, which will be used for Instagram Shopping as well. If you have a small inventory with only a few products, you can manually add products to the catalog. However, if you have a larger inventory, with products regularly getting updated, you need a more advanced tool to manage it. For the latter, it is best to use a catalog feed plugin. We will demonstrate this with the ELEX WooCommerce Catalog Feed for Facebook & Instagram plugin.
You can install the plugin on your WooCommerce store, and it will fetch all the required information for Facebook and Instagram and create a product data feed. This data feed you can easily sync with Facebook Catalog. We will show you the step-by-step process.
Install and activate the plugin. Once the plugin is activated, you can see the plugin setting on the WordPress admin panel under the section ‘Facebook Shopping Feed’. Go to Facebook Shopping Feed > Create Feed.
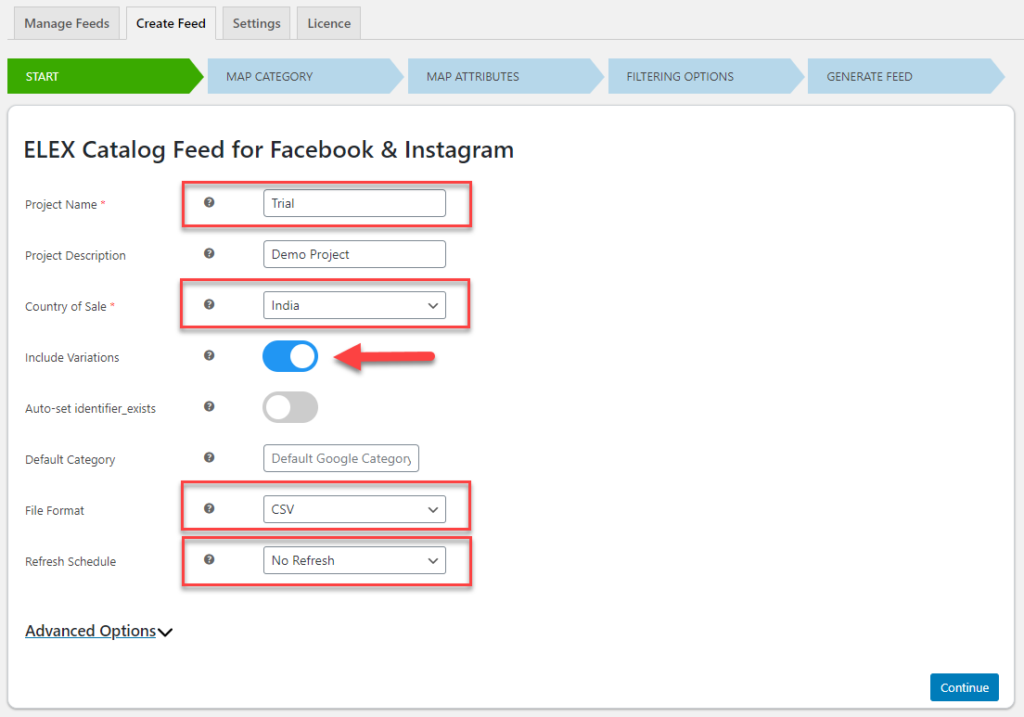
You can add a name and description for the project, and get started. Here you can specify the file format and the refresh schedule (if you want to periodically update the catalog feed) as well. Also specify whether you want to include variations in the feed. Click the Continue button after entering all the required information.
Map categories
In the next step, you can map your WooCommerce product categories with the appropriate Google categories. You can simply start typing in the Google Category field, and all available categories will be displayed from which you can choose.

If you do not want to assign Google Categories for all you categories, you can add Google category specific to products. For this, choose the ‘Map Product’ option on this page.

Map product attributes
The next step is to map product attributes. Against a set of required attributes for the feed, you can specify your product attributes. The plugin will automatically map the relevant attributes. However, you can manually change them, append or prepend values to it, or specify more specific rules for mapping. Once done, click the Continue button.

Filter products for the feed
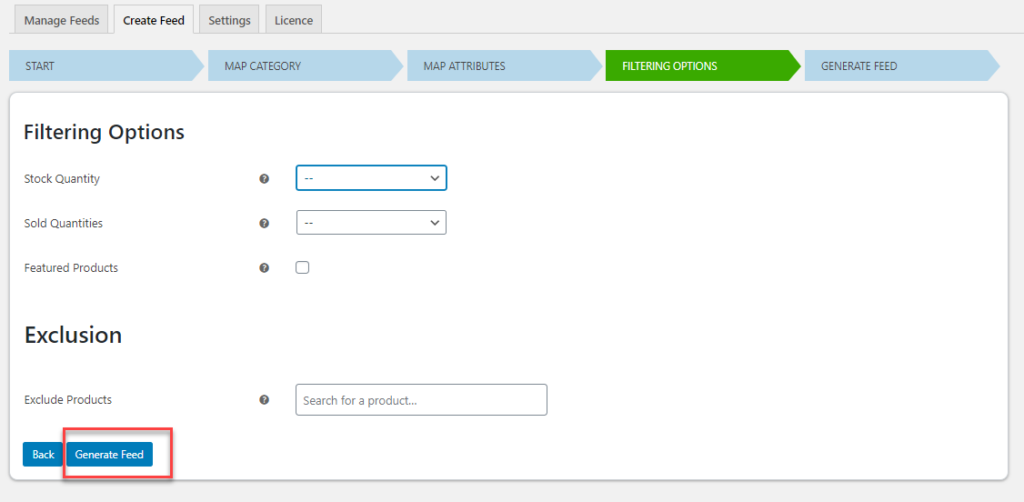
Next you will find filtering options for the feed. If you want to add only a specific set of products to the feed, you can manage it here. For example, if you want to add products only above a certain stock quantity, you can set that here. Similarly, you can filter products also based on what quantity of the product have been sold so far. Another filtering option is to select only featured products from your store.
The plugin also offers an option to exclude specific products from the feed. You can simply enter the name of the products that you don’t want to be present in the WooCommece catalog feed for Instagram and Facebook. One done, you can click the Generate Feed button.
Generate Feed
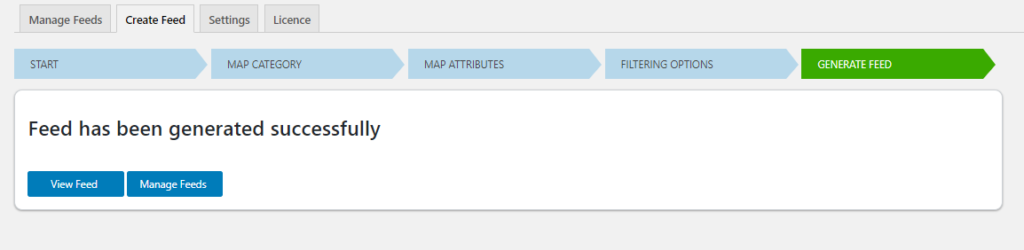
The feed will be generated with all the products you have specified. You can download the feed by clicking the View Feed button. Or you can click the Manage Feed button to further edit the project or to modify the refresh schedule.
Manage feed section
In the Manage Feed section of the plugin, you will find all the different feeds generated by the plugin, and different options to modify them. In the url column, you will see the file path for the feed that is saved on your server. This url can be used for scheduled uploads (we will describe this below).
Setting up Facebook Commerce Manager
In order to add products to the Facebook Catalog, you need to have a Commerce Manager account. Once you have the account set up, you can create a new catalog. For this, on the Catalogs section click the + Add Catalog button.

Now you can select the Catalog type. For this example, we will select eCommerce products.

In the next step, you can specify the upload method. Since we are adding product information in bulk using a CSV file, we will choose the Upload Product Info option, and click the Create button.

Now, a new Catalog will be created.

You can click the View Catalog button, and then fill your catalog by adding items in bulk.

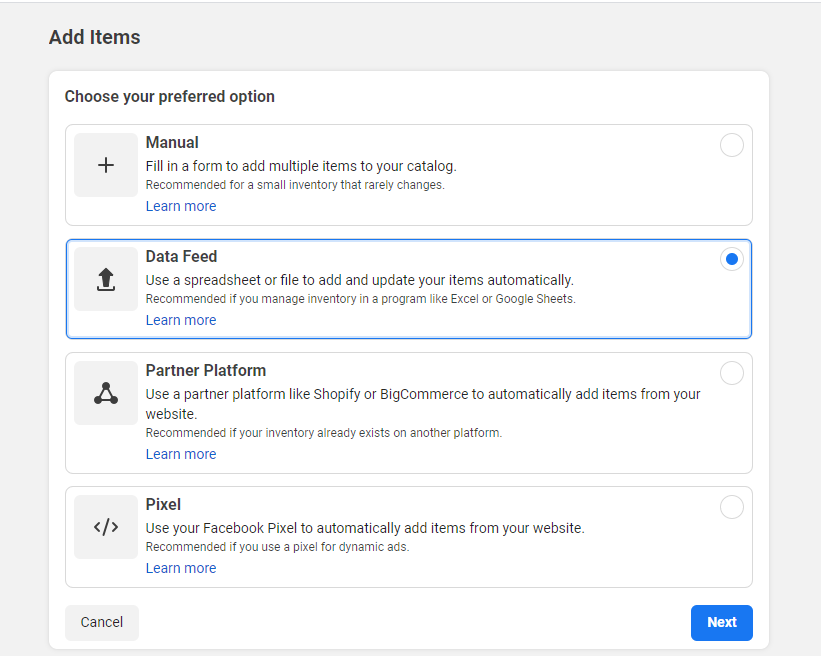
When you click the See Details button, you will see the following options to add items to your catalog:
- Manual
- Data Feed
- Partner Platform
- Pixel
Choose the Data Feed option, and click the Next button.
There are three options again. if you want to simply upload the data feed, choose the first option ‘File Upload’. Click the Next button, and upload the file you have downloaded before.

Scheduled feed
To create a schedule for updating your feed, you can simply enter the url of your domain where the file is hosted, and then the update schedule. To ensure up-to-date information, while creating the feed, on the ELEX WooCommerce Catalog Feed plugin, you can set a refresh schedule accordingly.

Connect the Facebook Catalog with Instagram Shopping
As the last step, you need to connect your Facebook Catalog with your Instagram account. Once the connection is made, your product list will go for review. After the approval, you can start using Instagram Shopping. Please note, this is possible only if you are located in a market that supports Instagram Shopping. Read more in this documentation.
We hope this article has provided you with a basic idea on integrating your WooCommerce Catalog with Instagram. If you would like to share your success story with Instagram as a retail channel, please share in the comment box below.


")
")
")