
Last updated - July 13, 2022
Setting up a helpdesk will be one of the concerns of every eCommerce store owner. If you are managing a WooCommerce store, you can create a support ticket system simply with the help of a free plugin. When you are starting out, this might be really helpful to create a basic helpdesk system. In this article, we will demonstrate how you can easily set up a WordPress helpdesk on your WooCommerce store. We will guide you through the basic features and installation process of ELEX WSDesk WordPress Helpdesk plugin.
How to set up a WordPress helpdesk?

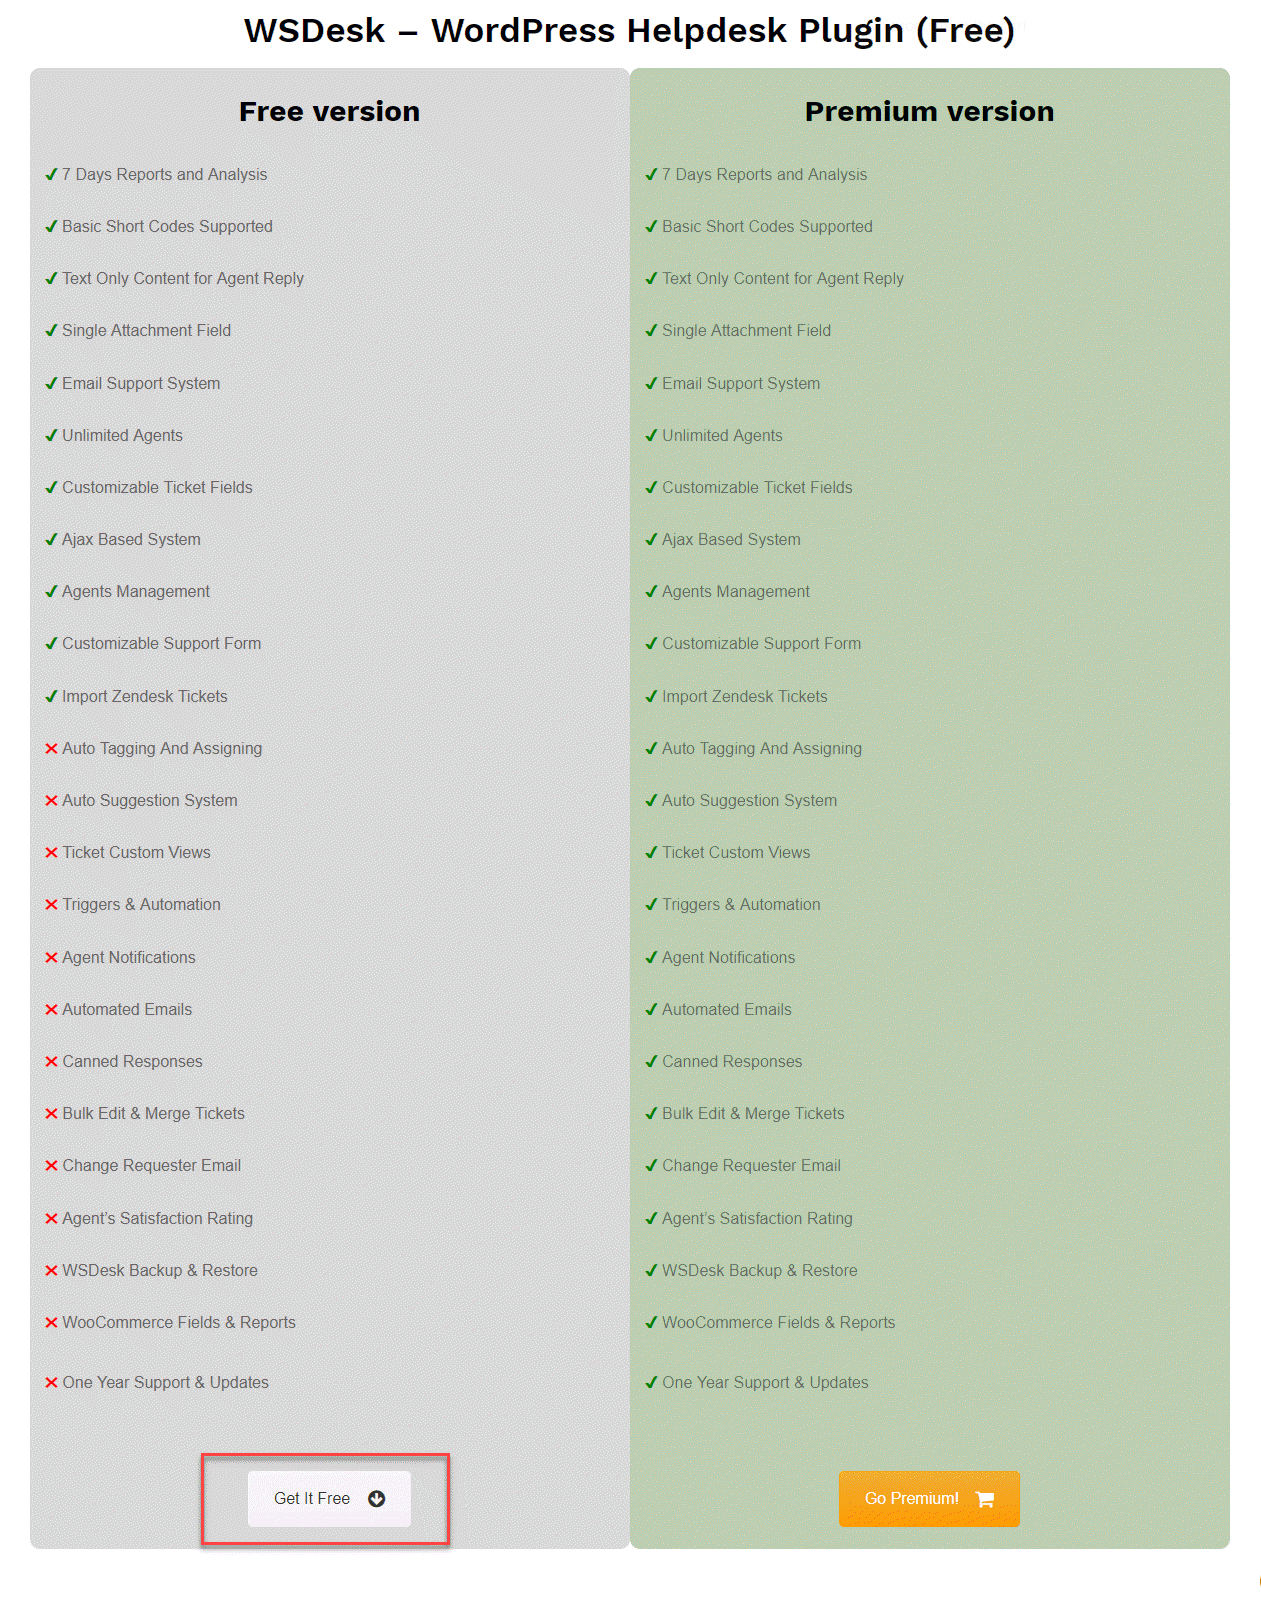
In this article, we will demonstrate how you can set up the basic version of ELEX WSDesk WordPress Helpdesk plugin. You need to choose the basic version and go through the checkout process first.
Getting the plugin zip file
First we will show the steps that will lead you to the plugin zip file. When you click on view details, you will find a comparison table between the Free and Premium versions. Click the Get it Free button.
This will take you through the checkout process.
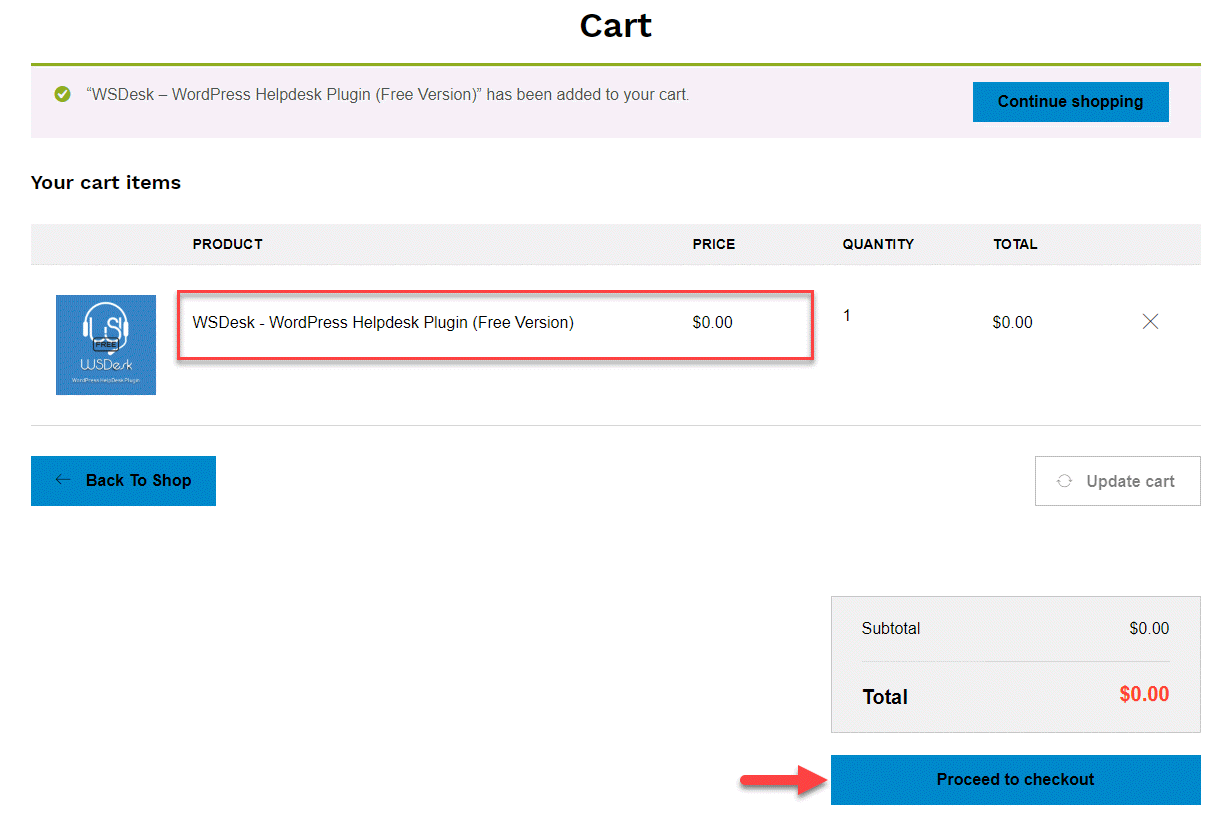
Once you complete the checkout process, you can download the plugin zip file from your My Account page. Simply click Plugin (Free version) to download the zip file.

Now you can install the plugin zip file on on your WordPress site. Under the plugin settings on your WordPress admin panel, click Add New > Upload Plugin, and choose the downloaded zip file of WSDesk Basic version.

Quick Setup Wizard
Now the plugin will be installed on your WordPress site. When you are starting out, WSDesk has a setup wizard that will make your job much easier. Click the Activate button to launch the Quick Setup Wizard. The setup wizard is launched automatically. You can click the Let’s set now button to start.

First, you have to set up the basic aspects of a support page. You can enter a title for your support page, the email id, which you want to receive the support queries, and a starting ID for your tickets. The first ticket will have this id, and later tickets will follow a series starting from this one.

On the next screen, you can set up ticket fields on your support page. The tickets fields you configure here will be displayed on the Support page.
By default, there will be three active fields already on your support form. You can add new fields according to your requirement. Click Add Field button to start configuring additional fields on the support form.

When you click the Add Field button, a new option will be displayed where you can choose a field type. You will find the following options:
- Text Box
- Select
- Password
- Radio
- Checkbox
- Number
- Text Area
- Attachment
Based on the selection that you make, you will find further options to configure each field. For example, we have selected Radio button, and you can see the displayed options in the below screenshot. After setting up the field, you can click the Continue button to proceed further.

Next screen will help you set up the email client. Basically, by setting this up, you will be able to convert mails sent by customers to your support email id into tickets. You can find the details for configuring IMAP for WSDesk here.

Next, you can configure support agents on your store. Click the Add Agent / Supervisor button to create a new agent.

WSDesk allows you to choose existing users from your WordPress site, or choose a new user. When you choose a new user, you need to enter the credentials of the user.
You can create two different types of WSDesk user roles – WSDesk Agents or WSDesk Supervisors.
Here, you will be also able to specify the rights allowed for each user. The options include Reply, Delete and Manage tickets, from which you can choose according to your store requirement.
Here you can also specify tags for a user. Depending on the assigned tags, the tickets will be automatically assigned to this particular agent.

Once you create the required number of support agents, WSDesk will be ready for you to use.
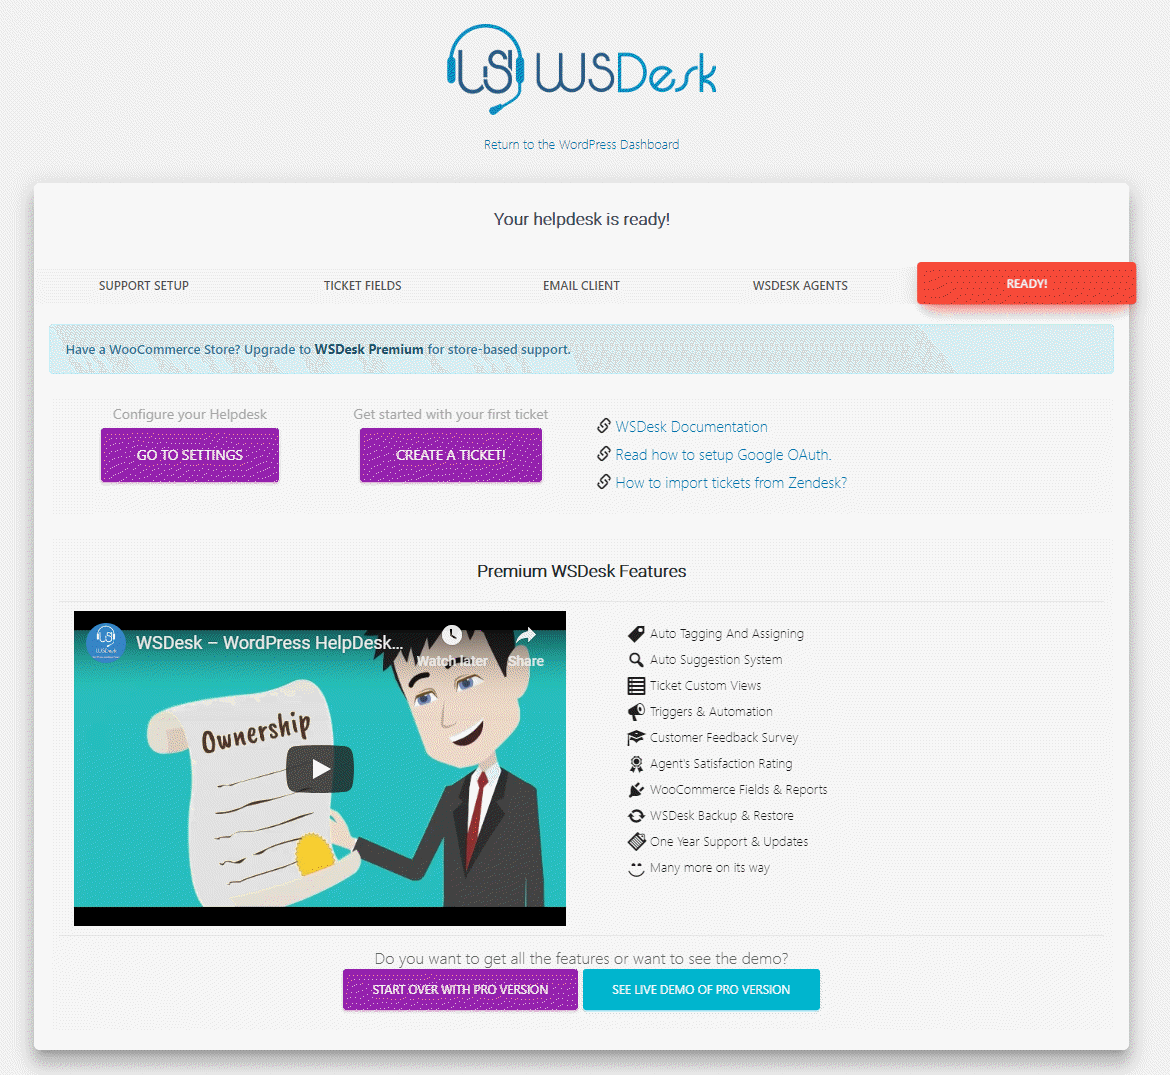
Now you can go to the Settings page to configure your helpdesk further. You can also start creating a ticket to understand how it works.
What customers will see on the frontend?
When you configure WSDesk, a Support page will be automatically created. You can add this page to the navigation menu so that customers will be able to access it.
On your WordPress admin panel, go to Appearance > Menus, and add the Support page to the main menu. Now the WSDesk support page will be accessible to customers.

Now your customers will be able to access the support page with ticket fields you have configured. A basic support page will look like the below screenshot. Here customers can Submit a new ticket or check an Existing ticket. To submit a new ticket, they will have to enter their email ID, subject and a description of the query or issue.
Note: You can add more ticket fields as per your requirements, from the settings page later.

Once they submit the ticket, customer will see a screen similar to the below screenshot.

How support agents will see the tickets?
When a customer submits a ticket on the site’s frontend, your agent will be able to access it from the backend. On your WordPress admin panel, navigate to WSDesk > Tickets, and you will see all the tickets. There are several options to filter tickets on this screen. You will be able to filter tickets based on Ticket Status, Agents, Tags or Users.

You can reply to the ticket by simply clicking on the ticket.

While submitting the reply, you need to select a status for the ticket as well. You can submit the ticket as “Unsolved”, “Pending” or “Resolved”. You can also submit the ticket with a note visible to Agents and supervisors. In this case another agent can look at the ticket and send the reply to the customer at a later time.

Hope you got a basic idea of setting up a free WordPress helpdesk on your WooCommerce store. You can understand the premium features of WSDesk here. Check out the documentation to understand WSDesk settings in more detail.
Advantages of using a WordPress Helpdesk plugin
There are several advantages in using a WordPress helpdesk plugin, compared to the cloud-based SaaS solutions. Here are some of them.
Control over data
When you opt for an on-premises solution like WSDesk, you have much better control over the data of your store and customers. You can guarantee data privacy to customers much more easily. Here is an article that explains why on-premises support solutions might have an edge over SaaS solutions post GDPR.
Easy to scale
Most support solutions charge you based on the number of support agents using the tool. This means you need to pay higher as you grow. It might be a tough prospect when you are still in growing stages. With WSDesk, you won’t find any usage restrictions. You can create unlimited agents and unlimited tickets using WSDesk. This might offer great benefit to rapidly growing businesses.
More value for money
Most SaaS tools require you to pay a recurring sum to use their product. However, with WSDesk, there are no recurring payments for the product. With the purchase of the product, you will also get one year of support and updates as well. At the end of one year, you can renew the support and updates at a discounted rate. Compared to SaaS services, this might be another advantage for small businesses who prefer the economical models of WordPress ecosystem.


")
")
")