
Last updated - July 8, 2021
There will be occasions when you want to serve your site in multiple languages. If you have a WordPress site, you can translate your site into multiple languages effortlessly. In this quick guide, we will demonstrate how you can effortlessly achieve WordPress multi-language support.
How to set up WordPress multi-language support?
For this demonstration, we will use Polylang plugin, a multilingual WordPress plugin that allow easy translations.

Features
- Translate your WordPress site into multiple languages.
- No limits in the number of languages.
- Easily translate pages, posts, widgets, media, menu, etc.
- Display a customizable language switcher as a widget or in the menu.
- Supports custom post types, taxonomies, sticky posts, etc.
- Supports RTL languages.
How to set up Polylang plugin?
Now, we will describe how you can easily set up this plugin to for WordPress multi-language support.
Setup Wizard
Polylang offers a user-friendly setup wizard to help you get started easily. You can download the plugin from the WordPress plugin repository, install it and then activate it.
The Setup Wizard will be run automatically.
If you cancel the setup wizard at the start, and want to access it again later, go to Languages > Setup on your WordPress admin panel.
Step 1 – The first step will be to specify the languages you want to translate your site to. From the drop-down, you can select a language, and then click the +Add new language button to add more languages.
Please remember, the first language you select will be the default language of your website. So, choose accordingly.
Once the required languages are selected, click the Continue button.

Step 2 – In the next step, you can specify whether you want to translate the text attached to your media. These text include the title, alternative text, description and caption. Depending on your requirement, you can enable or disable this option here. Click the Continue button once the choice is made.

Step 3 – The next step is to assign a language to your content that does not have a language. You can specify an option from the dropdown and click the Continue button.

The initial configuration of the Polylang plugin using the setup wizard is now complete. You can go to the dashboard for further configurations. Click Return to the Dashboard button.

Languages
You can access the Languages section on the dashboard by going to the Languages section. Here, you can see the languages you have added using the setup wizard. You can edit or delete an existing language, or add a new language here.

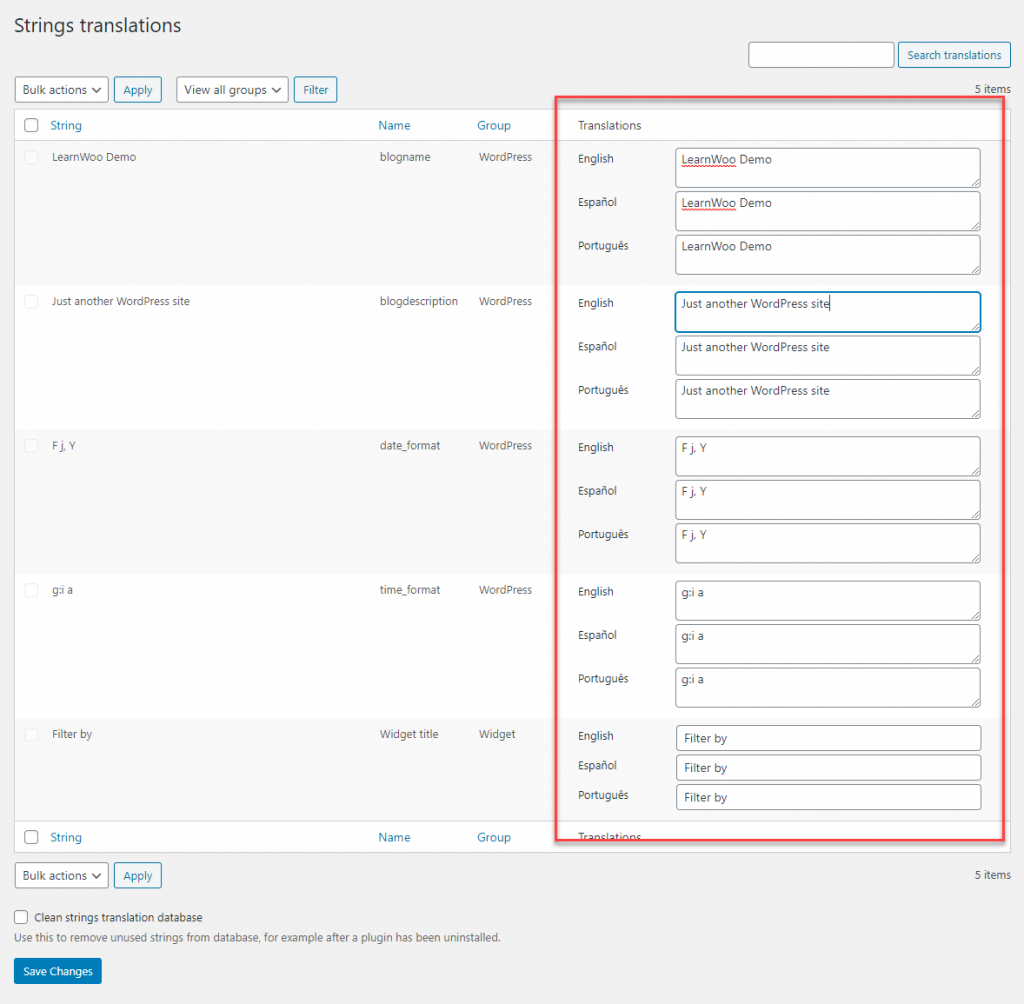
Strings translations
You can access this section by going to Languages > Strings translations. Here you will be able to translate user defined strings such as Site title, widget titles, etc. If you are using other themes and plugins, they can allow you to make translations here. You can use the input field in the right to translate the string to the respective language.
Translating Content in WordPress with Polylang
To translate content on your WordPress site, you can go to the section you want to translate. For example, we will demonstrate how you can translate a post.
Go to Posts > All Posts.
On the top of your website, you can choose languages to display posts. You can choose a specific language or choose to display posts in all languages.
Now, you can see, there is only one post and that is in English – US, which is the primary language of this demo site.

Here, you will see a flag for English – US, and two ‘+’ signs in the column for Spanish and Portuguese. You can click the ‘+’ sign to create a translation for that language.
For example, we will create translations of this post in both these languages. You can click the ‘+’ sign to open a new post editor, where you can create the translation.
Once you create all translations, you can view them in the Posts section. The plus icon will change to a pencil icon, to denote that a translation exists.

Translating Categories, Tags, and Custom Taxonomies
You can use the same process to translate your pages, categories, tags and custom post types.

Displaying Language Switcher on Your WordPress Site
You can display translations options on the frontend of your site in two ways.
Through Menu settings
Go to Appearance > Menus.
Here you will find an option to add the Language switcher to the Menu. Depending on your preferences, you can add flags, or display as a dropdown.

Through Widgets
Go to Appearance > Widgets.
The plugin offers a language switcher widget that you can add to the sidebar or other widget areas on your site.

You can find more options for WordPress Multi-language Support from the following articles:


")
")
")