")
So you want to start creating custom user roles in WordPress, huh? Well, you’ve come to the right place. As an open-source CMS, WordPress gives you a ton of flexibility to customize pretty much everything to your needs. User roles are no exception.
In this guide, we’ll walk you through exactly how to create a custom role, edit its capabilities, and assign it to users. By the end, you’ll have created your very own user role from scratch and have a solid understanding of how WordPress permissions work under the hood.
Understanding WordPress User Roles and Capabilities
To create a custom user role in WordPress, you first need to understand the default roles and capabilities. WordPress comes equipped with five default user roles:
- Administrator
- Editor
- Author
- Contributor
- Subscriber
Each role has different levels of access and permissions, known as capabilities. They are as follows:
- As an admin, you have full access to edit, delete, and manage all areas of your site.
- Editors can publish and manage posts and pages.
- Authors can publish and edit their own posts.
- Contributors can write and edit posts.
- Subscribers can only manage their profiles and comment on posts.
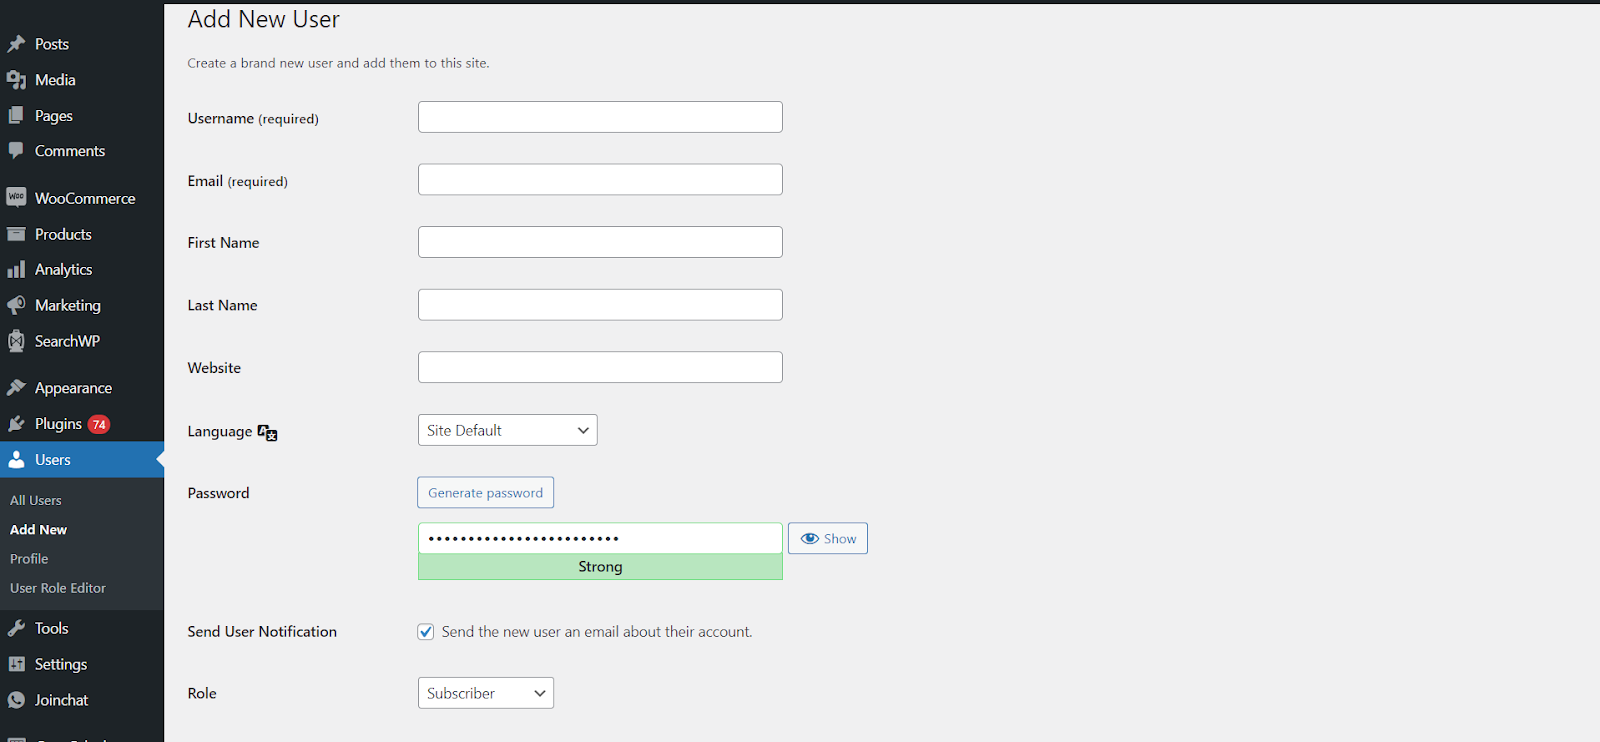
Now, say you want to add someone with a user role. You’ll start by going to Users > Add New in the WordPress admin dashboard. Provide all the details like username, first name, last name, website, and password. Once done, select the user role and click Add New User.
Assigning user roles is a great way to provide targeted access for your team. Start with a specific set of needs for a role, determine the right capabilities, and then assign the role to the appropriate users. You’ll have a tailored level of access and thus your site security under control.
If you wish to learn more about user roles in detail, check out our article, WordPress User Roles – All You Need to Know.
When Should You Create a Custom User Role?
There are a few reasons you might want to create a custom user role in WordPress. Maybe you have a group of users with unique permissions, or you need roles beyond the default ones like Administrator, Editor, Author, and Subscriber.
For example, say you run an online course and want to give enrolled students access to private course content without making them complete Editors. You could create a “Student” role with permission to view and edit posts in a private category.
Or perhaps you have a team of writers and want to give some more senior contributors the ability to publish posts but not mess with site settings. A “Senior Writer” role with permission to edit and publish posts and pages but not access admin menus would work well here.
Custom roles are also handy if you want to provide granular control over what users can access. For instance, you run an eCommerce site and need a “Product Manager” role with permission to edit product posts but not publish blog posts. You could create a role with edit posts capability for the product post type only.
The possibilities are endless. Whatever your use case, creating tailored user roles in WordPress allows you to provide the right level of access for different types of contributors. Your site will be more secure, your team will work more efficiently, and you’ll have more flexibility in how you manage users. Definitely worth the little effort required!
Step-by-Step Guide to Creating a New User Role
To create a custom user role in WordPress, you’ll either need to do a bit of editing in the database or use a plugin. Since editing the database can be a little tricky, we will stick to using a plugin. For the sake of this demonstration, we will be using the User Role Editor plugin by Vladimir Gargulya.
Don’t worry, the process is not too complicated! By following these steps, you’ll have a new user role set up in no time.
Step 1: Install and Activate the Plugin
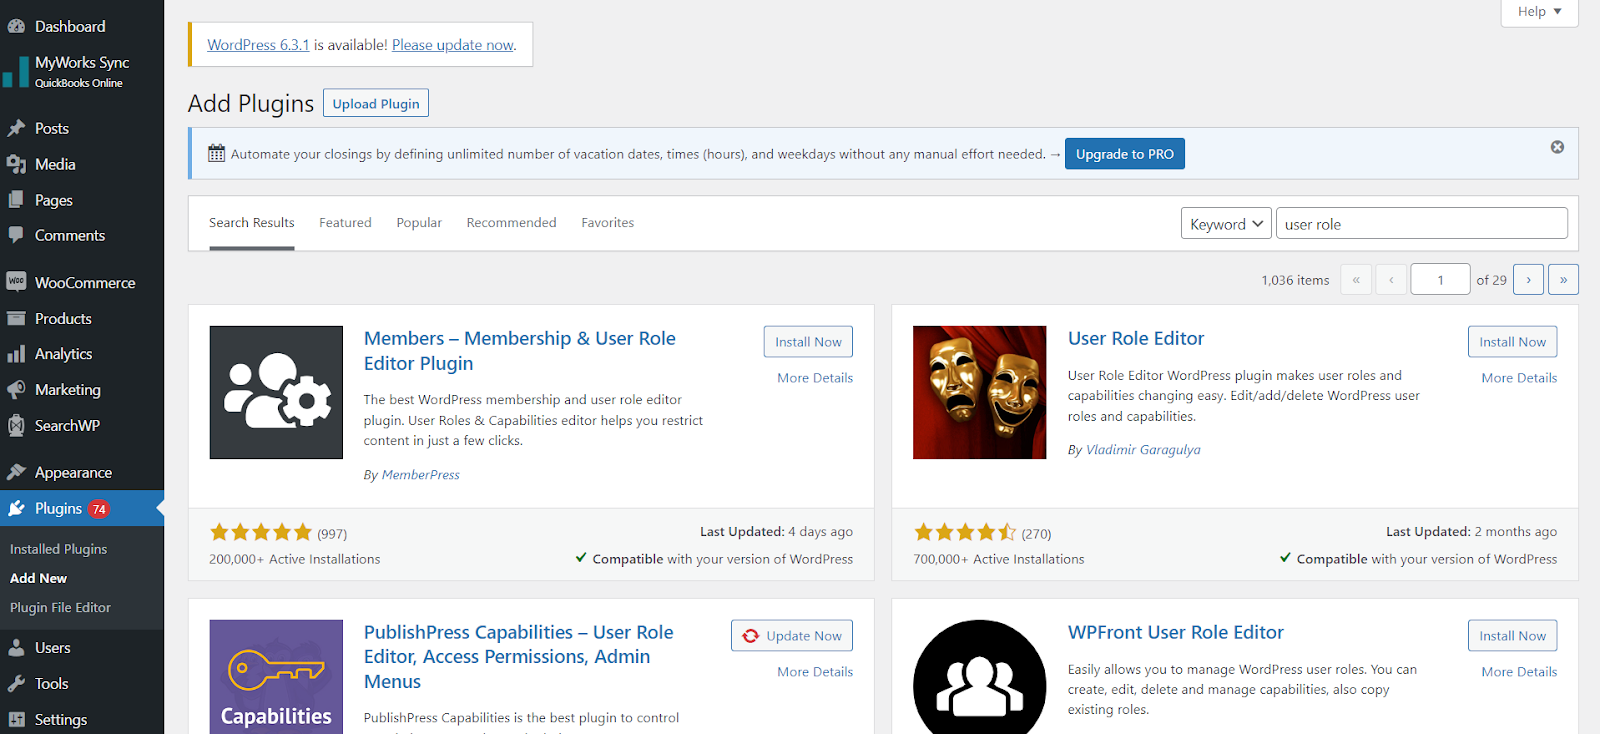
To install the plugin, go to your WordPress dashboard > Plugins > Add New and search for the User Role Editor plugin. Activate the plugin as soon as it has been installed.
Step 2: Access the Plugin Settings

In order to access the plugin, go to WordPress dashboard > Users > User Role Editor.
Step 3: Customize the Plugin Settings
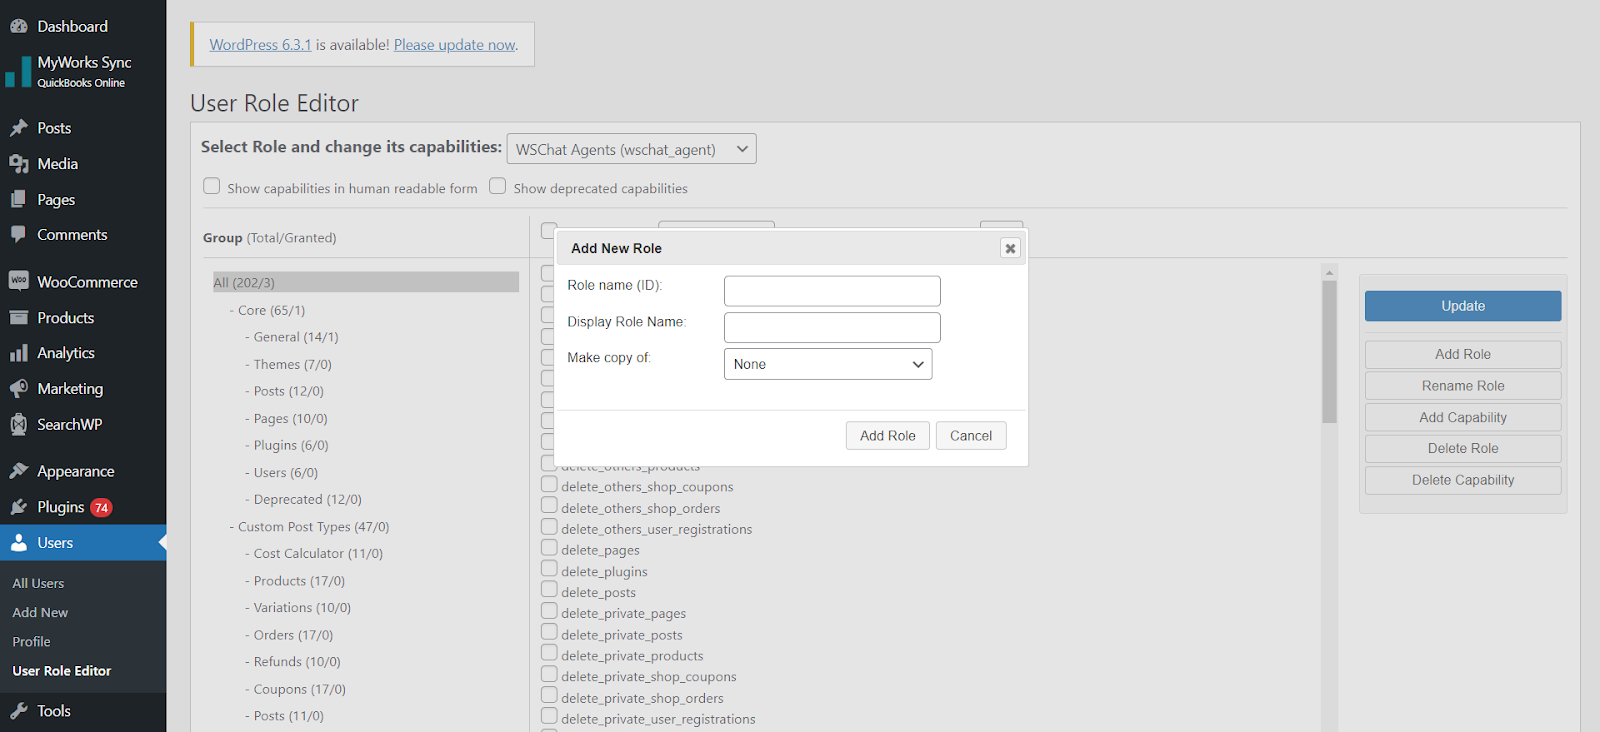
As soon as you land on the plugins dashboard, you will see a number of capabilities displayed and to the right of that you will see a few buttons. Click on Add Role and enter the Role Name (The ID such as Author, Editor, etc.) and the Display Role Name.
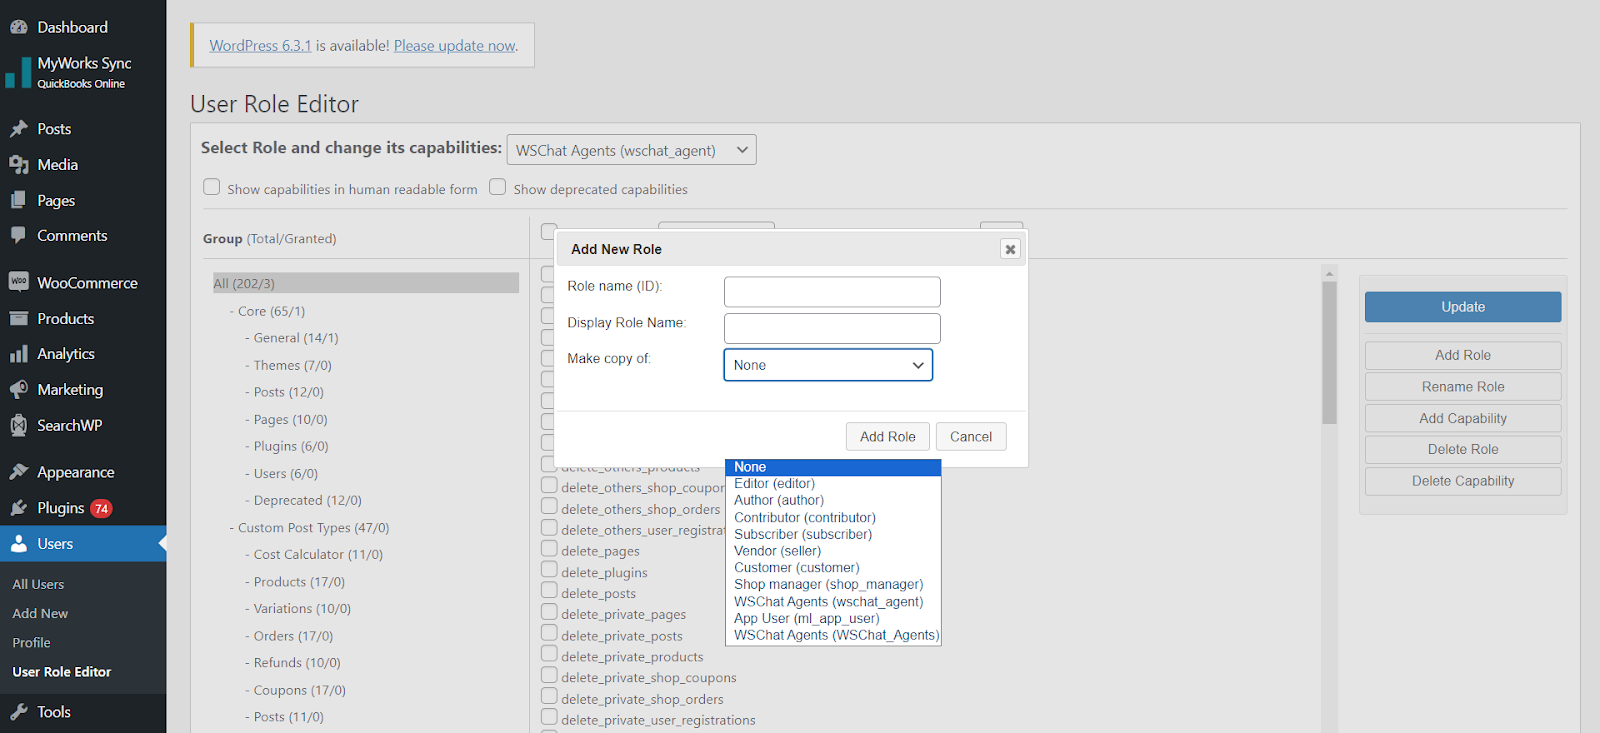
Additionally, you may also choose to make this new role a copy of an existing user role by selecting that default role from the Make copy of drop-down menu. (This copy can be customized with fewer capabilities compared to the original by customizing its capabilities as shown in the next section)
Once you are done with the changes, click Add Role. Congrats, you’ve now created a custom user role in WordPress!
Adding Capabilities to a Custom User Role
Once you’ve created your custom user role, it’s time to assign capabilities to it. Capabilities control what users with that role can do in WordPress. You’ll want to choose capabilities that match the purpose of the role.
To add capabilities to a custom role, follow these steps:
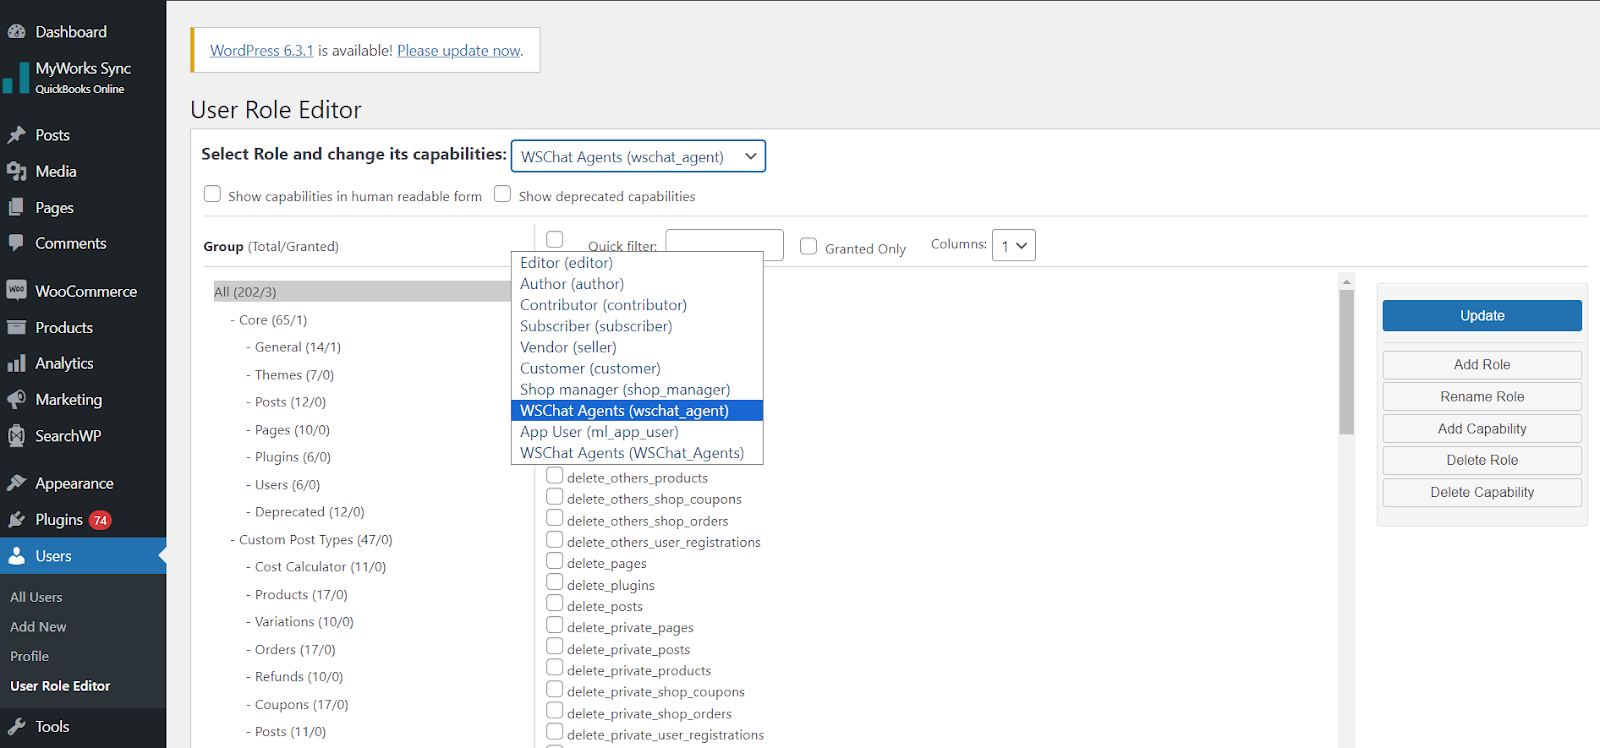
- In the same plugin settings, go ahead and select the custom user role you just created from the Select Role and change its capabilities drop-down. This will display all the capabilities of this user role in the section below.
- Go ahead and enable Granted Only. This will only display the capabilities that have been granted for this role.
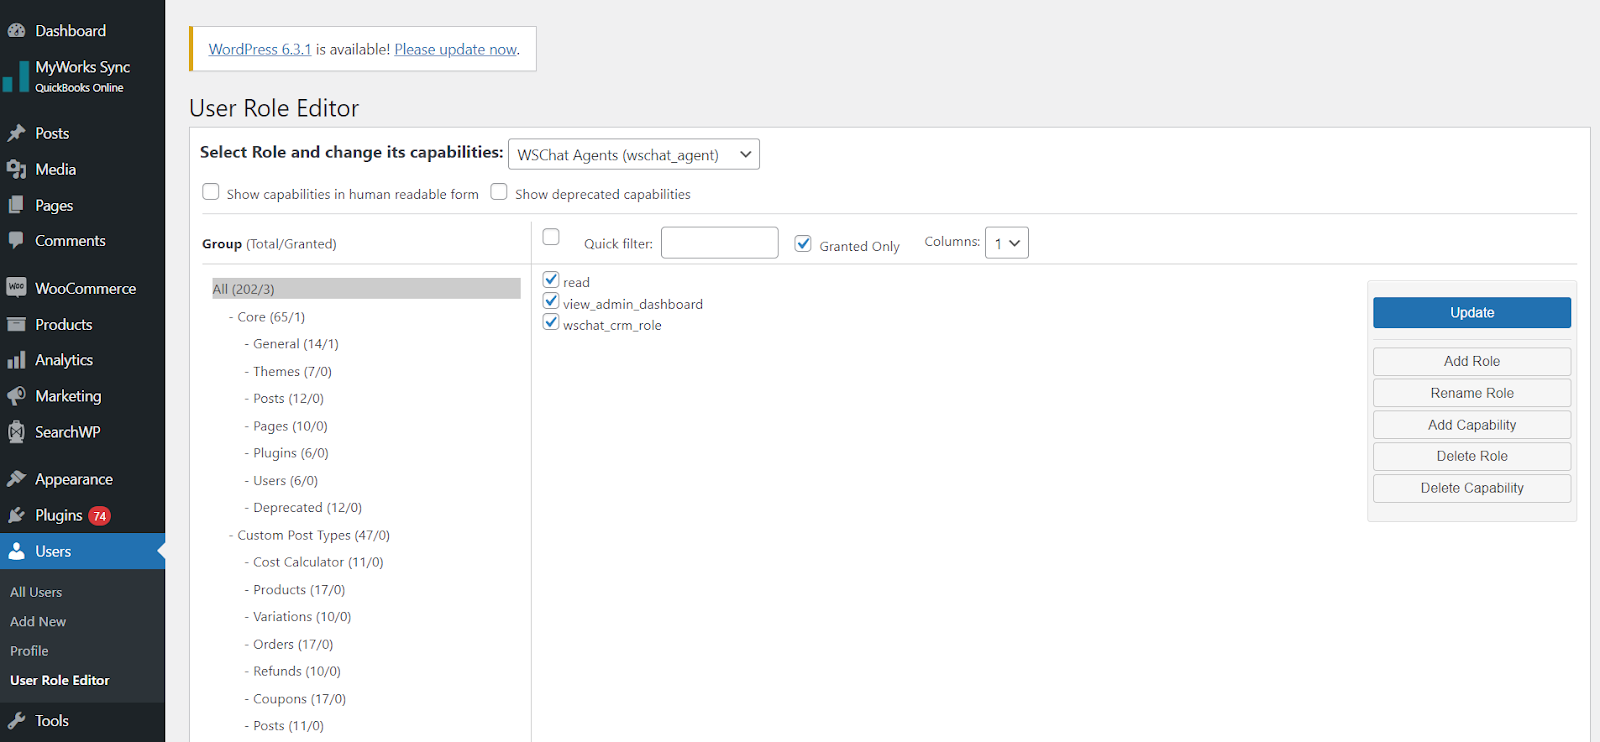
- Now you may go ahead and enable or disable the respective capabilities by selecting or deselecting the options.
- Once you are done customizing the capabilities, click Update on the right-hand side.
You can get granular with capabilities, assigning only what is needed for that user role and nothing more. It’s best to start with a small set of capabilities and add more over time as needed.
Be sure to test the role by creating a new user, assigning them that role, and seeing what they can access in the admin and on the front end of your site. Make any necessary adjustments to the capabilities for that role. With some trial and error, you’ll have a custom user role set up perfectly for your needs.
Best Practices for Custom User Roles in WordPress
Once you’ve created your custom user role in WordPress, it’s important to follow some of the best practices to ensure it’s effective and secure.
Assign Capabilities Carefully
Only assign the specific capabilities that a user role actually needs. Don’t give a role full admin access if it’s not required. Be very selective about capabilities like delete_users, edit_users or delete_posts. Start with a minimal set of capabilities and add more over time as needed. You can always add capabilities, but removing them can be complicated.
Test and Review
Double-check that the capabilities you’ve assigned are working as intended. Log in as a user with that new role and ensure they have the appropriate access and nothing more. It’s a good idea to periodically review the capabilities for each custom role and make adjustments to align with any changes in your site. Roles that are no longer needed can be deleted.
Use Descriptive Role Names
Give your custom user roles names that clearly indicate their purpose, such as “Content Editor” or “Product Reviewer”. Avoid generic names like “Role 1” or “User 1”. Descriptive names make the roles much more usable and help avoid confusion. They also provide context for other administrators in the future.
Consider User Meta
For some custom user roles, you may want to store additional details about the user in the form of user meta. For example, if you have a “Product Reviewer” role, you could store metadata about the types of products the user is allowed to review. User meta gives you added flexibility and customization for your user roles.
Limit Role Changes
Once users have been assigned a custom role, limit who can change or delete those roles. For example, don’t allow administrators to delete the “Editor” role if you have actual editors using that role. Role changes can disrupt user access and permissions, so restrictions help avoid unintended issues.
Following these best practices will help ensure your custom user roles in WordPress and are as effective, secure, and well-maintained as possible.
If you prefer video content to blogs, we have you covered! Check out our YouTube video on the same topic.
Conclusion
So there you have it, a guide to creating custom WordPress user roles with custom capabilities. You learned how to create a new role, give it a name and description, and assign it just the right capabilities so users with that role can do exactly what you need them to do.
Now you have the flexibility to craft WordPress roles tailored to your specific needs. Your users will appreciate the simplified experience, and you’ll appreciate the increased control and security. Creating custom roles does take a bit of time upfront, but the long-term benefits to your site and sanity make it well worth the effort.
If you have any questions, leave them in the comment section and we will get to them as soon as possible!


")
")
")