
Last updated - November 23, 2023
eCommerce store owners often look for ways to perform various data import and export actions on their store site. Product data import and export are among eCommerce’s most common data migration and transfer processes.
This is because online store owners may sell their products on multiple platforms. Also, the import-export of product data can offer an easy way to update product data on your store site.
In this article, we will explain how to import and export products in Shopify. So if you are a store owner using the Shopify platform or a freelancer who manages a Shopify store, dive in. If you are using WooCommerce and planning to migrate your products to Shopify, you can read along as we will also discuss how to migrate WooCommerce products to Shopify.
Having said that, let’s get started.
How to Export Products from Shopify?
As you may know, Shopify has built-in tools to import and export products. But to have better control of the data to be exported and for advanced import-export options, you will need an import-export app. And that’s exactly where the StoreRobo product import export app will come in handy.
StoreRobo is a freemium product import export tool made for Shopify users to migrate product data on their websites easily. In this article, we will be using the premium version of the StoreRobo app.
Follow the below steps after purchasing and installing the app on your Shopify website.
Step 1: Choose an Export Template
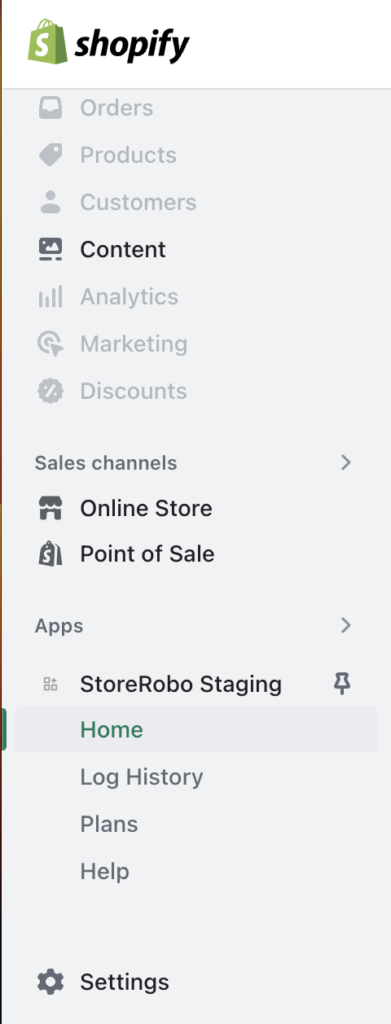
From your Shopify admin page, navigate to Apps and select StoreRobo.
Then, from the Export Products option, choose a file template to export product data from Shopify. Currently, the app only has a single template to export products which is Shopify CSV, so let’s proceed with that.
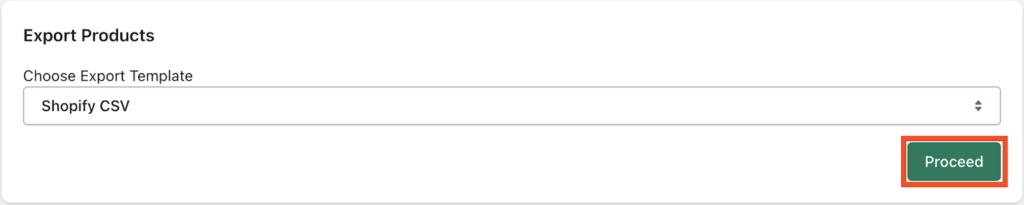
Click on Proceed to continue to the next step.
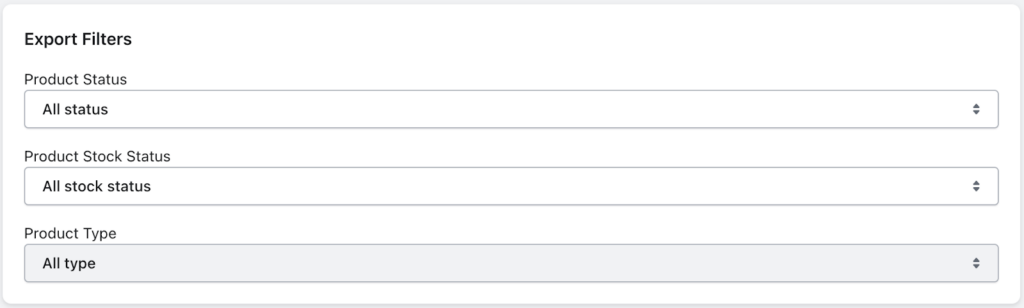
Step 2: Choose Product Filters
Here, you can choose different product filters when exporting product data from Shopify.
- Firstly, you have the Product Status filter, which will let you choose a product status for exporting products. You can choose products with Active status, Draft status, or both.
- Then, select a stock status for the products you want to export from the Product Stock Status filter. You can choose In Stock products, Out of Stock products, or both.
- Now, choose a product type you want to export. Select either simple or variable product types from the available options. Here also, you can choose both options as well.
Step 3: Select Additional Fields to Export
The StoreRobo product import export app lets you export additional product data when exporting products. You can choose various fields to be included in the export file.
Below are the additional column fields available with the app:
- Collections
- Metafields
- Multi-Location Inventory
- Variant Metafields
Please be aware that selecting these fields will increase the export duration.
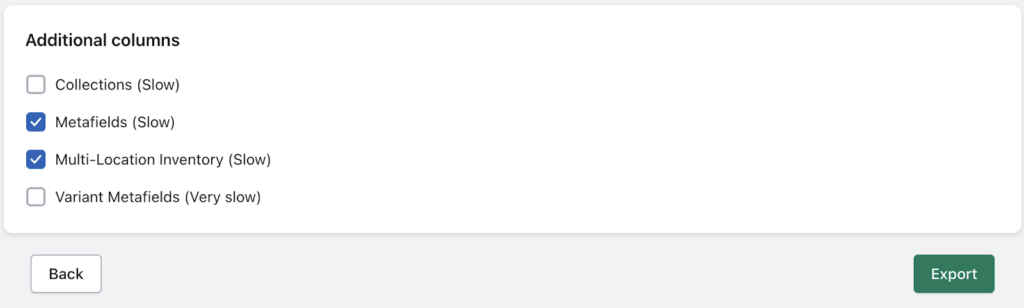
After choosing the relevant fields, click on the Export button to initiate the export process.
Once the export process is complete, you can see a detailed report of the export job.

The report shows the following details:
Job ID: The ID assigned to the export job.
Status: The export job status will be displayed here. You can see the status as Completed once it finishes the export.
Identified: This field specifies the number of products identified in your store.
Exported: This field specifies the number of products exported with the current export job.
Skipped: Number of products skipped during export. This depends on the various product filters we have selected (Refer to Step 2).
Started At: Here, you can see the start time and date of the export job.
Ended At: Shows the end date and time of the export job.
Click on the Download File button to download the CSV file with the product data from your Shopify store.
That’s how you can easily export products from a Shopify store. Now we will see how to import products to Shopify.
How to Import Products to Shopify?
There are many instances in which a store owner may require to import products to Shopify. Some may want to bulk update the existing product data or migrate products from a different platform like WooCommerce. StoreRobo will help you with all such requirements.
The app offers four different methods to import products to Shopify.
- Local Import
- Import using URL
- Import using FTP/SFTP
- Import from WooCommerce API
We will discuss each import method in detail.
1. Import Products to Shopify Using Local Import Method
Firstly, let’s see how we can import products to Shopify using the Local Import method. In this method, we will be using a CSV file from our local storage to import products.
Follow the below steps to import products to Shopify using Local import:
Step 1: Upload the Product Data File
- Go to the Home page of the StoreRobo Product Import Export App.
- Under the Import Products section, select the Local tab.
- Upload a CSV file from your local storage containing the product data. You can use the same app to get the product data exported in a CSV file.
- Then, select an import template for the CSV file. You can choose either Shopify CSV or WooCommerce CSV. If you exported the product data from a WooCommerce store, choose WooCommerce CSV as the template; else, choose Shopify CSV.
- Now, click on the Upload button.

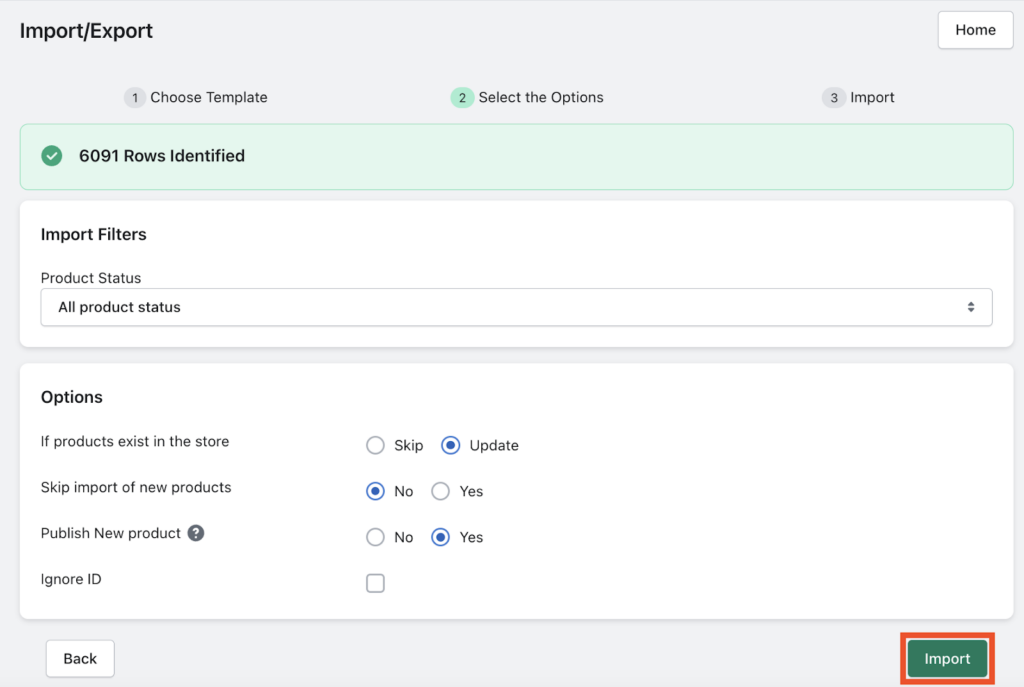
Step 2: Select Filters for Product Import
You can choose different product filters and options from here to have better control of the import job.
- Choose a product status from the drop-down menu under the Product Filter option.
- Then, choose whether you want to skip or update existing products in your store.
- You can choose to skip importing new products to your store.
- Select Yes to publish new products on your store from the CSV file.
- Finally, choose whether you want to identify products using their ID.
- Click on the Import button.
This will initiate the import job on your store site. Once the import job is completed, you can see a success report similar to the export job.

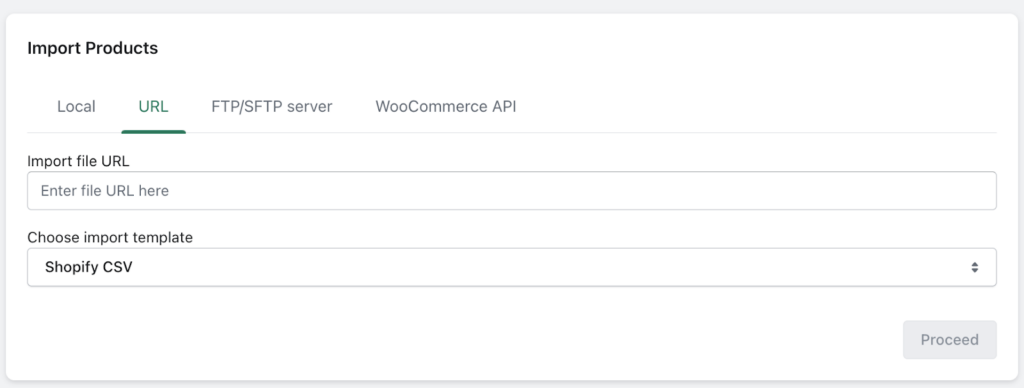
2. Import Products to Shopify Using a URL
In this method, we will be using the product CSV file from an external URL to import products to Shopify. You can import products from any URL that contains a CSV file with the product data you want to import.
Go to the URL tab on the Import Products section on the StoreRobo Home page.
Enter the URL and then choose a template.
Then click on Proceed to continue.
Choose the Import filters and options and then click on the Import button to initiate the process.
3. Import Products to Shopify Using FTP or SFTP
With the StoreRobo app, you can import products to Shopify using FTP or SFTP. Here, you can sync multiple FTP Accounts in this app. This way, you don’t have to manually enter the FTP details each time when you have multiple FTP/SFTP profiles.
Click on the Add Profile button to add a new profile.
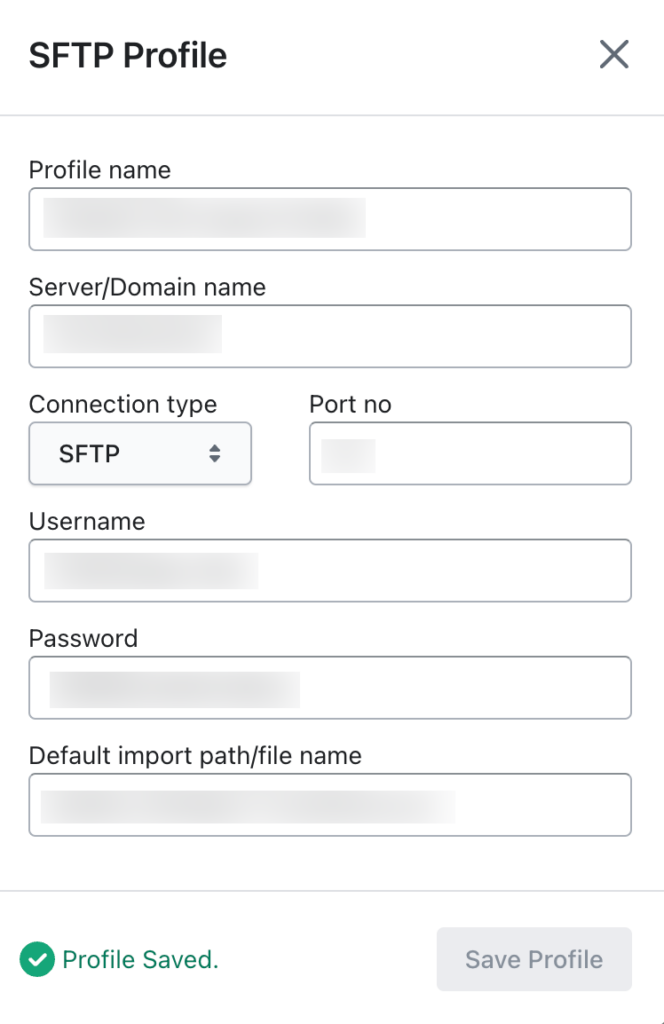
Enter the FTP/SFTP profile details and click on the Save Profile button to save the profile.
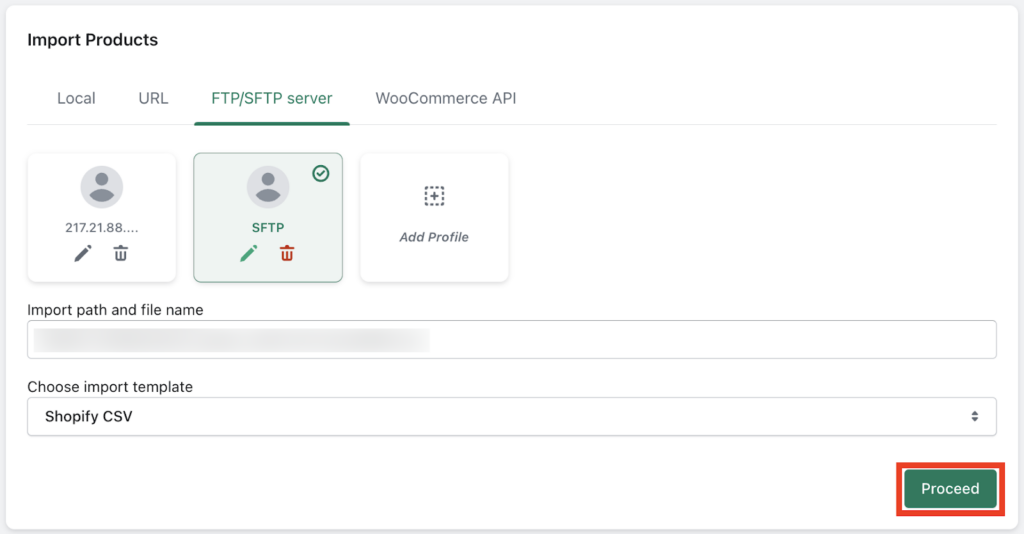
Choose a profile from here and click on Proceed to continue.
Then, choose the Import filters and options accordingly and click on Import to initiate the import process.
Now let’s see how we can import products to Shopify using WooCommerce API.
4. Import products using WooCommerce API
In this method, you can transfer products from WooCommerce directly without any CSV files. We will be using the WooCommerce API keys to import products from WooCommerce API to Shopify.
Firstly, you need to obtain the API keys from your WooCommerce store.
To obtain the API keys:
1. Go to WooCommerce > Settings > Advanced > RestAPI.
2. Click on the Create API Key button.
3. Add the necessary details and click on Generate API Key.
4. Copy the Consumer Key and Consumer Secret.
Now follow the below steps to import products using WooCommerce API.
- Go to the WooCommerce API tab from the Import Products section of StoreRobo.
- Enter the Consumer Key and Consumer Secret you’ve obtained from WooCommerce.
- Then add the domain name of your website and click on Connect.
- Once the app successfully establishes a connection, click on the Proceed button to continue.
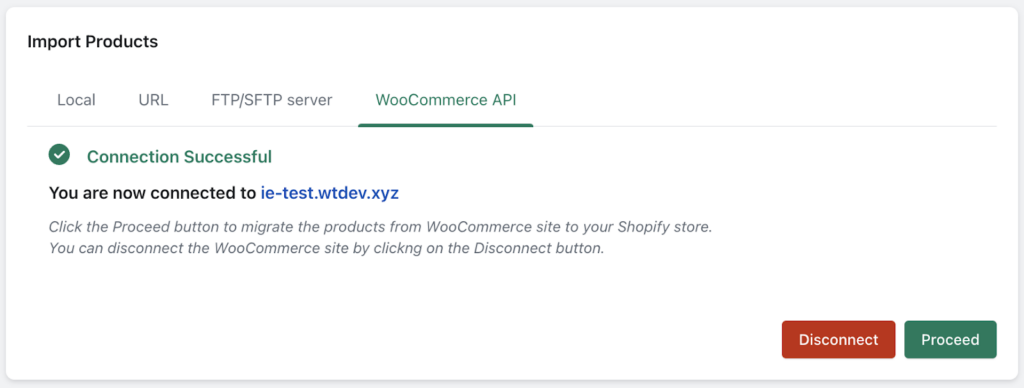
- The later process will be similar to the other methods.
- You can choose the Import filters and options, then click on the Import button to initiate the import process.
That’s how you can successfully migrate WooCommerce products to Shopify. Using WooCommerce API to transfer WooCommerce products to Shopify is a lot easier when compared to other methods.
Final Thoughts
There are many use cases in which a Shopify store owner may look for import export actions. The app mentioned in this article will make the process a lot easier with its simple and beginner-friendly interface. It resolves the product import export requirements for your Shopify store.
The StoreRobo- Shopify product import export app is available for free to download from the Shopify app store. However, the free plan is limited with the number of products to import and export and does not support additional features like Import using FTP, WooCommerce API, etc.
You can try this free app and see how it helps your workflow and requirements. If you need advanced features, you can upgrade to any of the premium plans within the app itself.


")
")
")