
Last updated - March 1, 2022
Planning a move from MyOldWebsite.com to MyNewWebsite.com? If you got your site hosted on WordPress platform, then you’ve come to the right place. This guide will walk you through the steps required to perform this migration.
Find steps on how to install WordPress if you have still not done it.
Let’s lay down the foundation of this process before we proceed to the technical aspect. Simply said, it is CTRL+C on your original WordPress website and a CTRL+V under the newer name you have chosen.
We will follow the outline mentioned below:
- Add the chosen new domain (URL) to your hosting
- Copy the content of the old website to the new one (Backup required in case you are changing hosts)
- Modify the WordPress configuration file to point to the new URL
- Define the new databases (required in case you are switching the hosting)
- Search and replace old values with new values
- Cache cleanup
- Redirect the old URL to the new URL
- Let the Search Engine tools know and Voila!
8 Simple Steps to Configure your old WordPress website to a New One
Here will describe the process in eight simple steps.
Step 1: Add the new domain URL to your hosting
Login to WordPress and open the cPanel. Under the ‘Domains’ section, click on ‘Addon Domains’

Enter the New Domain Name, Subdomain, and Document Root in the prompt that follows. Click on ‘Add Domain’ to complete this step.

By completing this, you have configured WordPress to recognize your new website URL and specify its root location.
Step 2: Copy the contents of the old website to the new one
Adding the new domain created a new folder structure for your website.
Transfer of the website content files from the old website’s folder to the new folder can be easily achieved using the File Manager plugin. Open the Plugins section on your WordPress and click on ‘Add New.’
Type ‘File Manager’ and search for it. The image below shows what we are looking for.

Alternatively, the plugin can be found here – File Manager
Install the File Manager plugin to WordPress, activate it, and open it. The File Manager presents you with the following interface:
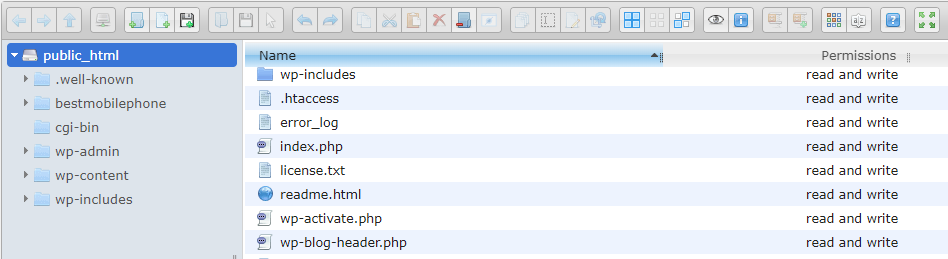
Copy the content from your old website’s folder to the new folder.
NOTE: In case you are switching the host (website provider), you will need to back up the old website using a backup tool and then restore the backup to the new website folder.
Step 3: Modify WordPress configuration to point to the new URL
Use the Settings page to modify this:

Enter the new address in the two fields labeled WordPress Address (URL) and Site Address (URL) and save the settings. You may proceed to Step 4 now.
For those who want to go the old-fashioned way, here is what you need to do.
Use the File Manager to edit the ‘wp-config.php’ file.
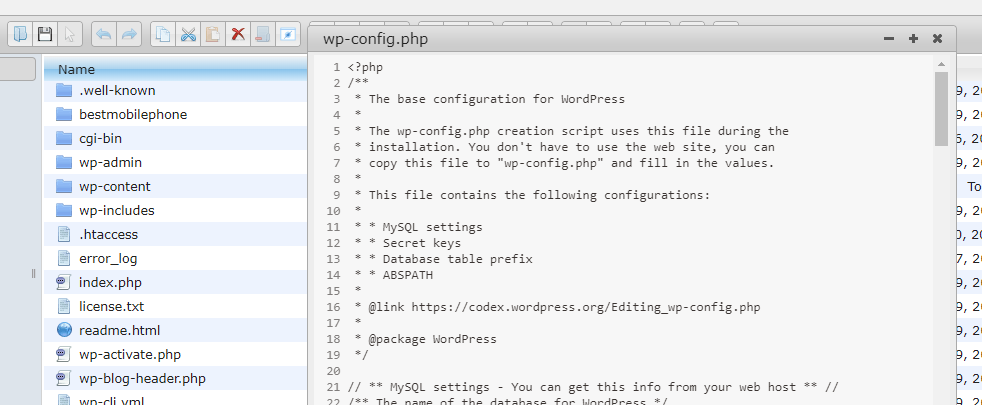
Here, set WP_SITEURL to your new domain.
define(‘WP_SITEURL’, ‘http://mynewwebsite.com’);
Set WP_HOME to your new domain
define(‘WP_HOME’, ‘http:// mynewwebsite.com’);
NOTE: Please ensure correct syntax. The URL needs to be enclosed in single quotes. Any incorrect entry in the configuration file(s) may cause the website to malfunction.
Step 4: Define the new databases (required in case you are switching the hosting)
NOTE: Please skip this step if you have not changed your website host (website provider).
TIP: It is always beneficial to take a backup of the configuration files, especially when handling them manually. One misplaced symbol or character can cause the entire site to malfunction.
Use the File Manager to edit the ‘wp-config.php’ file. Look for the property ‘DB_NAME’

Set it to the new database. In the image above, we have used a sample name ‘mynewwebsiteDB’
If the other properties of the new website – like Username, Password, SQL Hostname, and Database Host are different from your current settings, please update those properties to reflect the new values.
Save and close the file.
Step 5: Search and replace old values with new values
Many configuration files will be configured with the original website address. You need to change ALL those to reflect the new website address.
This can be easily achieved using the Search and Replace plugin, which can be found here.
In case you are searching for the plugin using the WordPress interface, the image below shows the plugin that’s quite popular.

Repeat the steps you followed previously – Install the plugin, activate the plugin, and then open it.
The Search and Replace option is available in the Tools menu.

On the screen that follows – click on the Search and Replace tab, and then use the text boxes to make the modification. Put in your old website name in the ‘Search for’ box, new website name in the ‘Replace with’ box and click on ‘Do search and Replace’.
Once this is done, don’t forget to save in case any prompt appears.
Step 6: Cache Cleanup
Having followed the steps above, you should now be able to use the new URL to open your website. But hold on to your horses, as there is one more step – cleaning the cache of your browser and refresh the browser.
This is not a mandatory step; however, it is best if it is done. There might be some old associations in the cache that are saved with the original name of the website. Clearing it up will save you from potential malfunction.
Step 7: Redirect the old URL to the new URL
The steps that you followed above will allow a user to access the website using the new URL. In order to keep the old URL functional, please add a redirect from the old URL to the new URL.
We will use something called a “301 redirect” which is just a fancy name for a permanent server-side redirect. This is a necessary step since the search engines have been using the original website name.
If you don’t add this, those search engines will lead to a broken link.
For this, we will again use the File Manager plugin. This time we will be editing the ‘.htaccess’ file. Please note that this filename begins with a dot. Open the File Manager, navigate to your website folder using the folder pane on the left.
Locate the .htaccess file and edit it.

Paste this code snippet at the TOP of the .htaccess file:
#Options +FollowSymLinks
RewriteEngine on
RewriteRule ^(.*)$ http://www.mynewwebsite.COM/$1 [R=301,L]
This code ensures that anytime your website is invoked using the original URL, the Rewrite Engine will internally modify it to point to the new URL.
Step 8: Let the Search Engine tools know and Voila!
Rejoice, for you have successfully configured the old WordPress domain to the new one.
One task that remains to be done is to notify the dependencies about the changes. You might be using search engines, analytics tools, advertisement tools, Google’s console, etc. These tools are still unaware of the changes.
Login individually to all these tools, open their settings page, and mention the new URL, and save the changes.
TIP: It would be a good idea to send an email to your mailing list of clients/users notifying them of the changes.
We hope the reconfiguring of your WordPress site was more of a breeze with this handy guide.
Also, check out our articles – How to Easily Clone a WordPress Site? and popular domain name myths.
That’s all from us folks. Please let us know your views in the comments section below.


")
")
")