
Last updated - November 28, 2023
Showing countdown banners on eCommerce shop pages will create a sense of urgency and motivate your customers to complete the purchase. If you are running discount sales on your WooCommerce store, showing a countdown banner during the sale will help you increase sales during the sale period.
In this article, we are going to show you how to create a countdown discount sales banner in WooCommerce.
Before we begin, let’s have a clear understanding of the benefits of showing a countdown discount sales banner.
Why You Should Create a Countdown Discount Sales Banner?
Countdown timers and banners are powerful tools to promote discount sales on your WooCommerce store. This will help you create an urgency for your customers. It is a psychological trigger to persuade someone to take action before the time runs out.
Here are a few reasons why you should have a countdown timer for your discount sales:
- Improve sales and conversion rate
You can leverage the sense of urgency created by the timer to make your customers pay at your store. When your site visitors see time is running out for the discount sale, they are more likely to make a purchase. There is less chance of second thoughts and, thus, have higher chance of conversion.
- Improve the user experience
Countdown banners can improve the user experience on your website. It can create excitement among your site visitors about the discount sale. Also, these banners will navigate users to make a purchase by allowing them to copy the coupon code or go to the product page.
- Promote time-limited offers
Countdown banners are the most effective way to promote time-limited offers and discount sales on your website. New users who visit your site will see your discount sales banner and be aware of ongoing discounts.
If you want to learn more about the advantages of using a countdown timer, check out our article: The Advantages of Using a Countdown Timer to Drive WooCommerce Sales
How to Create a Countdown Discount Sales Banner in WooCommerce?
WooCommerce, by default, does not support creating discount banners. So, you need a third-party plugin to create a countdown banner for your discount sales in WooCommerce. We will be using the WooCommerce Display Discounts plugin by WebToffee.
After purchasing the plugin, you will get an email with a link to download the plugin file. You can also download the plugin file from the ‘My Account’ page. Then, upload the plugin file and install and activate the plugin on your WordPress backend.
Now follow the below steps to create a countdown banner for your discount sales.
Step 1: Create Discount Coupons in WooCommerce
Firstly, you need to create the coupons for the discount sale. If you have already created coupons, you can skip to the next step.
- Log in to your WordPress admin account and go to Marketing > Coupons
- Click on Add coupon to add a new coupon
- Enter the coupon code and the description
- Then, choose a discount type and configure the coupon conditions
- Set an expiry for the coupon
Let’s create a coupon discount for 20% discount for all products. We’ll use the coupon code ‘SUMMER20’
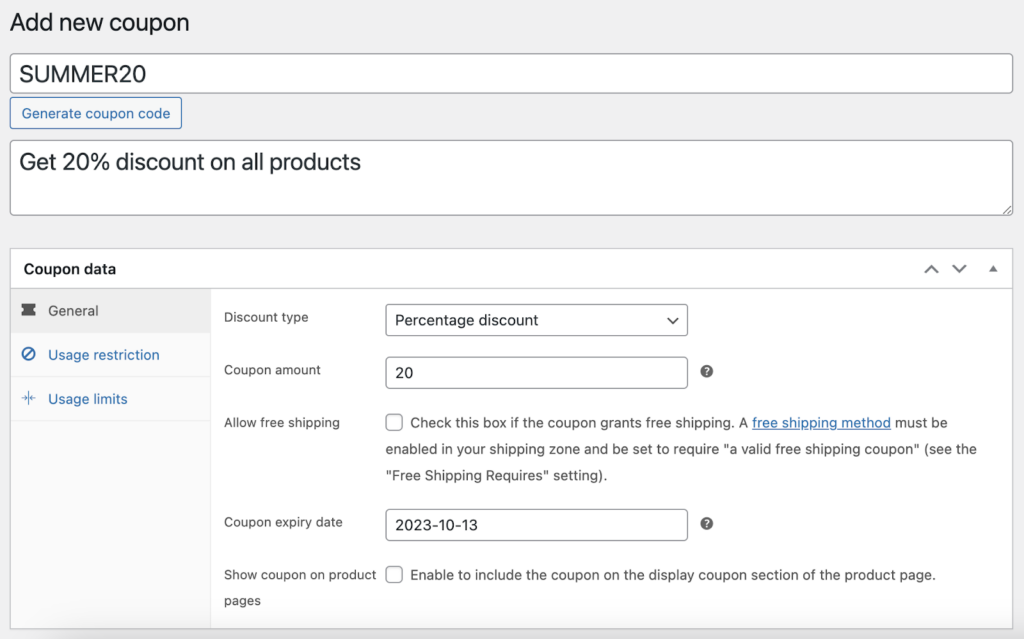
After configuring the coupon, click on Publish to save the coupon.
Step 2: Create a Banner for the Discount Coupon
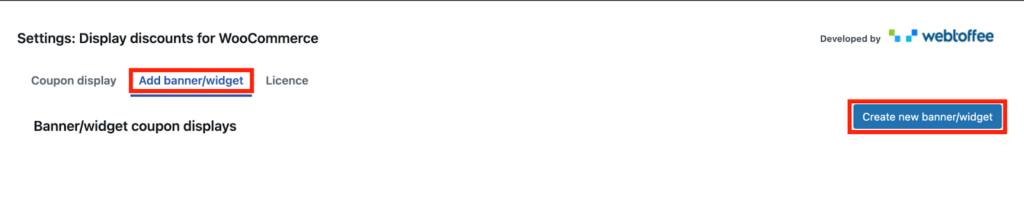
Once you have created the coupon, go to Marketing > Display Discounts from your WordPress admin page.
Go to the Add banner/widget tab and click on Create new banner/widget button.
Step 3: Select the Coupon for the Banner
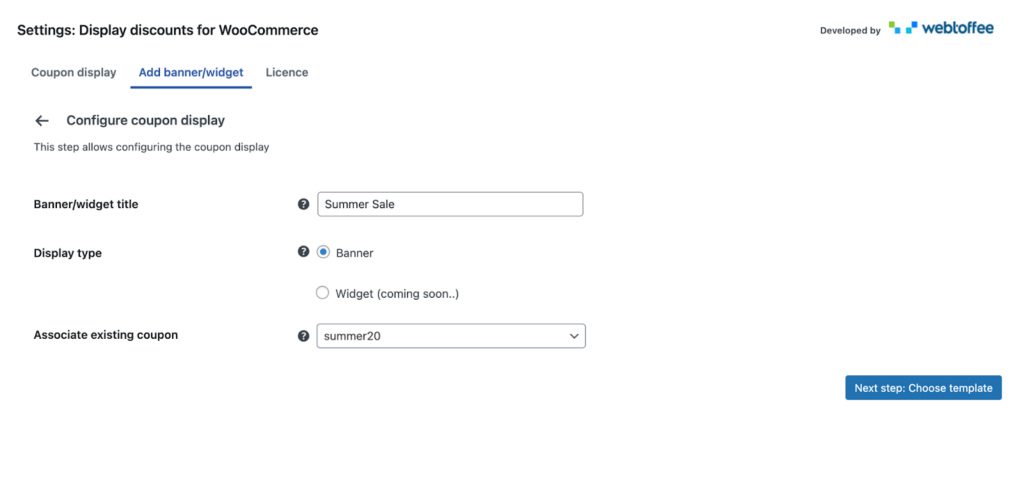
- Enter a title for the banner. This title is for your reference and does not appear on the banner on the front end of your store site.
- Choose the display type as Banner.
- Then, select the coupon to show the countdown banner.
- Proceed to the next step.
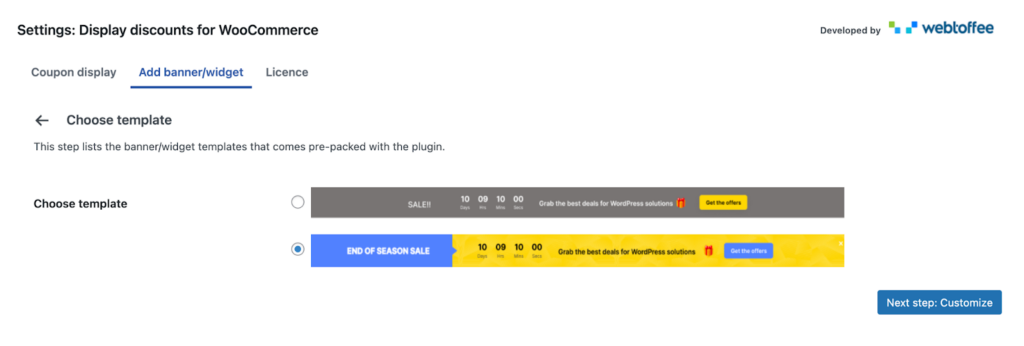
Step 4: Choose a Template for the Banner
In this step, you may choose a template for the countdown banner. Then, proceed to the next step.
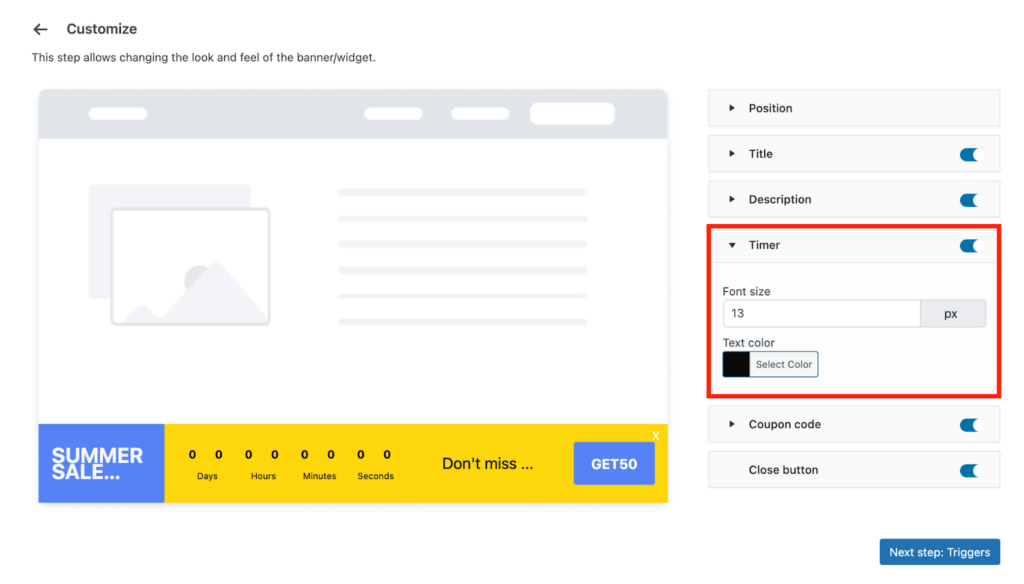
Step: 5 Customize the Banner Appearance
Here, you have some customization options for the countdown banner.
- Choose a position for the banner
- Customize the title text and description for the banner. You can change the text, font size, weight, and color.
- Enable the Timer button to display the countdown timer. You can change the text size and color for the slider as well.
- Similarly, you can customize the coupon code in the banner.
- If you want to add a close button in the banner, enable the Close button.
Step 6: Add Triggers for the Banner
In this step, you can add different triggers for the banner.
- You can add a time delay to load the banner.
- Set triggers for page scroll and exit intent.
- Then, choose the store pages on which you want to show the banner. You can enter a page URL to show the banner specifically on that page.
- If you want to hide the banner on any specific page, you can do that as well.
- Additionally, you can choose specific post types on which to show the banner
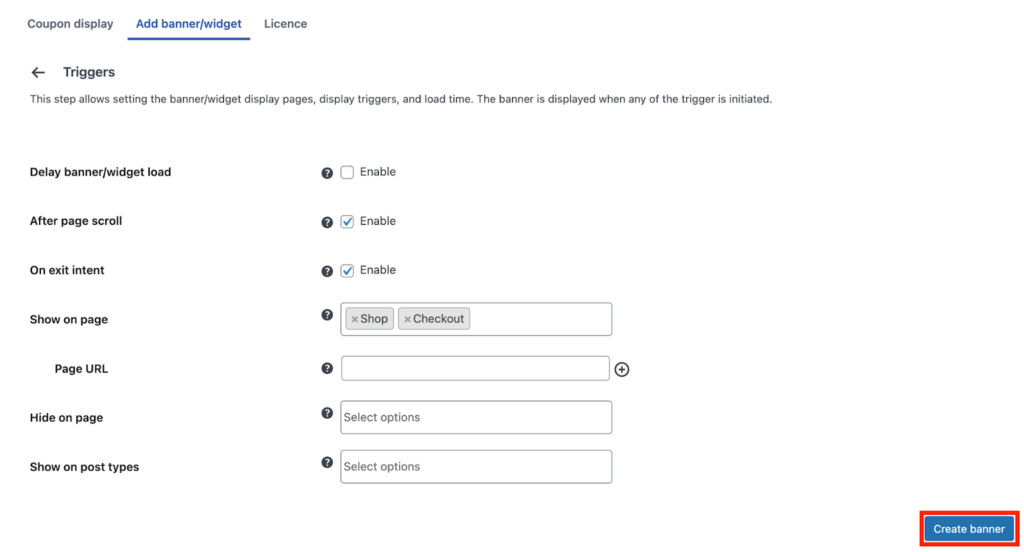
After adding the triggers, click on Create banner to create the banner.
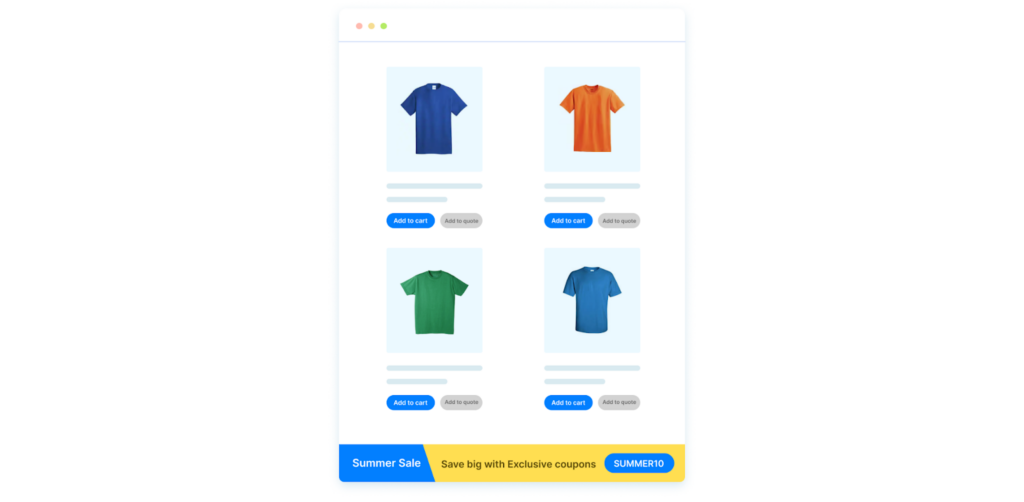
Activate the banner from the plugin settings page.
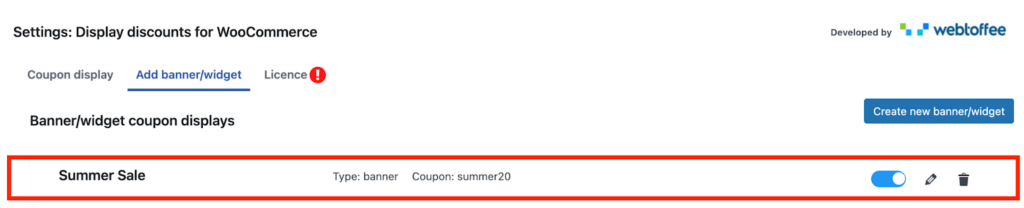
This is how the banner will be displayed on your store page.

Now let’s have a quick overview of the Display Discounts for the WooCommerce plugin.
Display Discounts for WooCommerce – An Overview
Developed by: WebToffee
This WooCommerce Display Discounts plugin lets you showcase your coupon deals and discounts on any page or post type. You can display available coupons on your product pages. The plugin offers multiple templates for the coupons. You can choose different color palettes for the coupon template to match your website.
The plugin lets you show countdown banners and timers for the available coupons. You can display the discount banner on any page or post type. Additionally, the plugin lets you hide the available coupons section for guest users. So you can make the coupon deals only visible to the logged-in users.
Key features:
- Show available coupons on product pages
- Display countdown timer
- Add discount banners on any page or post type
- Hide coupon discounts from guest users
- Pre-built templates for coupons
Pricing:
Display Discounts for WooCommerce is a premium plugin that starts at $49 for an annual subscription.
Other Solutions to Create a Discount Sales Banner in WooCommerce
Smart Coupons for WooCommerce

WooCommerce Smart Coupons is an all-rounder coupon plugin for WooCommerce websites. It lets you create all types of coupons and discounts on your WooCommerce store. You can create BOGO offers, giveaways, purchase history-based coupons, fixed and percentage discounts, etc.
This plugin lets you create a coupon strategy for your WooCommerce store. You can set up various usage restrictions and conditions for WooCommerce coupons. The plugin also allows you to create gift cards and store credits for your customers.
You can create discount banners with this plugin. It lets you showcase all the available coupons on your store pages. So you can ensure more visibility for your WooCommerce coupons and entice customers to make purchases on your store.
Key features:
- Create different types of WooCommerce coupons
- Set up advanced conditions and usage restrictions
- Create purchase history-based coupons
- Show discount sales banners
- Set up gift cards and store credits
Pricing:
Smart Coupons for the WooCommerce plugin is available in both free and paid versions. The pricing for the paid version starts at $89 for an annual subscription.
myStickymenu
The myStickymenu plugin lets you create sticky banners on your WooCommerce store site. You can show welcome banners to new users and display coupon promotions and other notifications. The plugin lets you add custom text and CTA on the banner. You can customize the text, background, and button color in the banner.
With the premium version, you can show countdown timers on the banner for your coupon deals. The plugin lets you add redirection when a user clicks on the banner. You can also add sliding text on the banner.
Key features:
- Create sticky banners
- Add countdown timers on banners
- Add custom text and CTA
- Show sliding text on the banner
Pricing:
myStickymenu plugin is available in both free and paid versions. The pricing for the paid version starts at $39 for an annual subscription.
Conclusion
By showing discount sale banners to your customers, you can inform them about the available coupon deals in your store. The countdown timer will further motivate them to act quickly and complete the purchase.
This article was intended to help you create a countdown discount sales banner in WooCommerce. If you have found this to be helpful, please let us know in the comments.


")
")
")