Last updated - November 28, 2023
In today’s world, where renting is becoming a preferred alternative to ownership, launching your own online rental platform could be a profitable business idea.
In this comprehensive guide, we will walk you through the process of creating a customized rental marketplace for any niche without coding skills using WordPress. Step-by-step, we will show you how to install and set up the essential plugins, expand the functionality of your marketplace, and personalize it according to your preferences.
Let’s dive right in!
What is a Rental Marketplace?
A rental marketplace is a peer-to-peer platform where individuals or businesses can easily rent a wide range of goods from each other. Such marketplaces provide cost-effective solutions, enabling users to avoid the burden of ownership and opt for flexible rental options instead.
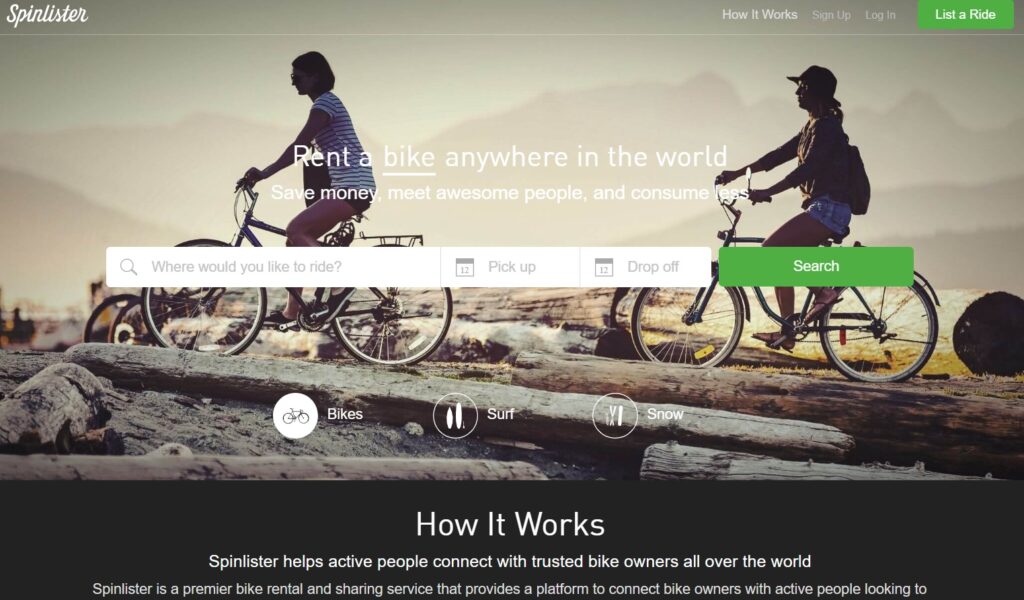
One of the most famous rental marketplaces is Airbnb, which empowers hosts to offer their properties to travelers as short-term rentals and almost everyone has heard of it. Another great example from a different niche is Spinlister, a platform connecting bicycle owners with cycling enthusiasts seeking to rent or borrow bikes all over the world.
What You Need to Build a No-code Rental Marketplace
Here are some prerequisites you’ll need to build a rental marketplace with WordPress:
- Domain name
- Hosting plan
- WordPress installation
- Rental marketplace WordPress theme
- WordPress plugin that powers marketplace features
After securing a domain name and a hosting plan, the next step is to choose a suitable theme and plugin combination for your rental marketplace. For example, there are themes like RentalHive, WP Rentals, Listify, Bellevue, etc. You can check a detailed list of rental WordPress themes to get a better idea of the available options.
For the sake of this tutorial, we will use RentalHive, an all-in-one rental marketplace WordPress theme, and pair it with HivePress, a free multipurpose WordPress plugin that contains all the essential features required to build a successful rental platform. With this powerful combination, you can easily create a fully functional and feature-rich rental marketplace tailored to your specific niche.
Steps to Create a No-Code Rental Marketplace
Following these simple steps, you can launch a rental marketplace website for any niche in no time. So let’s move to the first step – the theme installation!
Installing RentalHive and Recommended Plugins
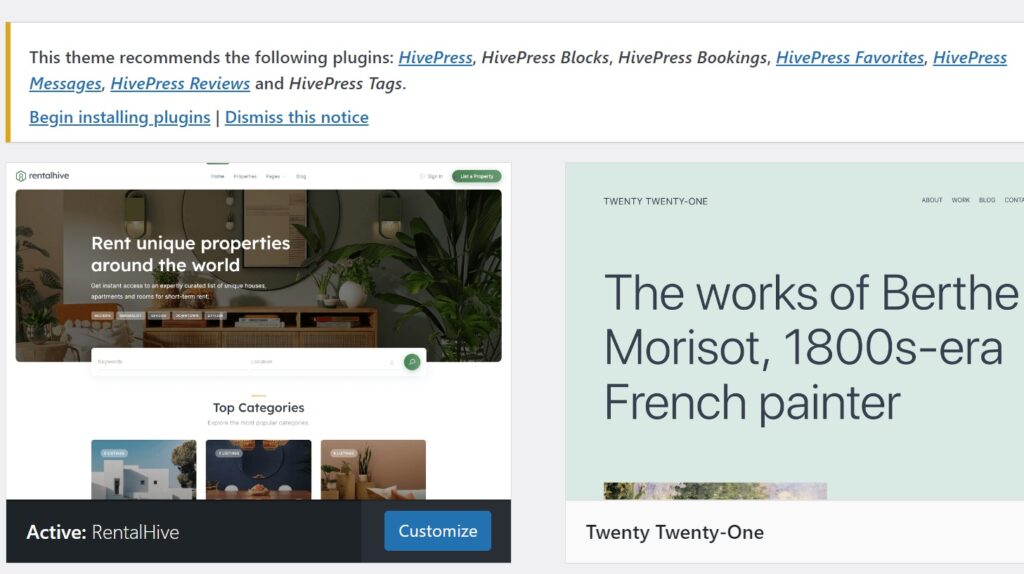
To install the RentalHive theme, navigate to the Appearance > Themes page in your WordPress dashboard, then click on “Add New”, and press “Upload Theme”. Next, upload the RentalHive theme ZIP file and proceed with the installation and activation.
After activating RentalHive, you’ll be prompted to install the recommended plugins, including HivePress, among others. Just click on the provided link, and you can easily install and activate all the recommended plugins in one go. These plugins will equip your rental marketplace with all essential features.
You’ll also need to install WooCommerce, a highly popular and reputable e-commerce plugin designed for WordPress websites, which is seamlessly integrated with HivePress, in order to power your marketplace with all the required e-commerce features. Simply head to Dashboard > Plugins > Add New, find WooCommerce, and install.
Creating Listing Categories
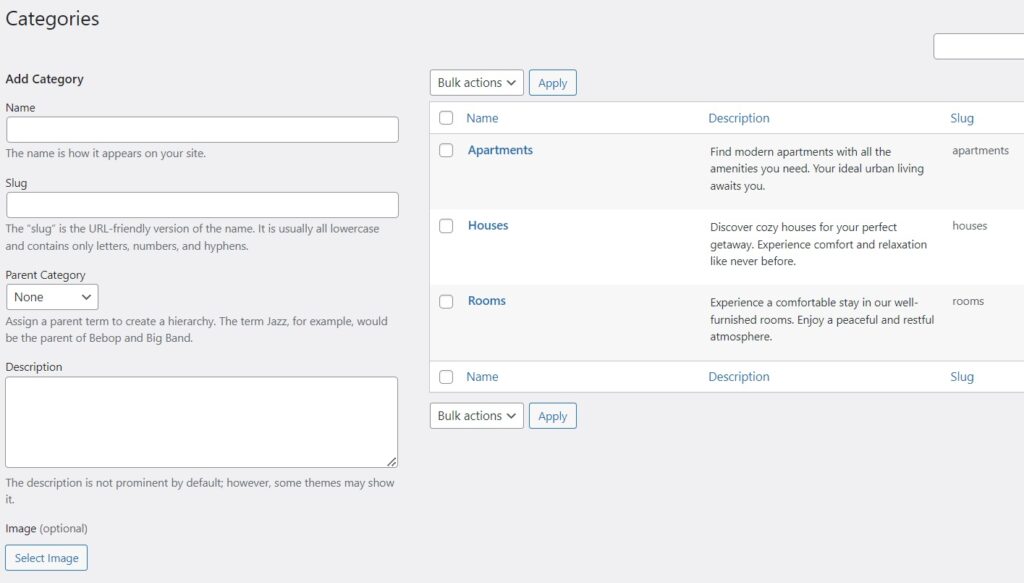
With the theme and all the necessary plugins in place, we can now proceed to add listing categories – they help organize and structure the items or properties available for rent, making it easier for users to browse and find what they need. Let’s imagine that we are building a common real estate booking website and creating “Houses”, “Apartments”, and “Rooms” categories.
To add listing categories to your rental marketplace, navigate to the Listings > Categories section in the WordPress dashboard. Enter the category name, optional description, and upload a relevant image if desired. Click “Add Category” to save.
Remember that you can add unlimited categories for any niche, whether it’s clothes, sports equipment, or cars since there are no hard-coded fields in RentalHive. Moreover, if you want to create a hierarchical structure to organize the categories further, you can easily set parent categories by selecting them from the added ones.
Adding Listing Fields
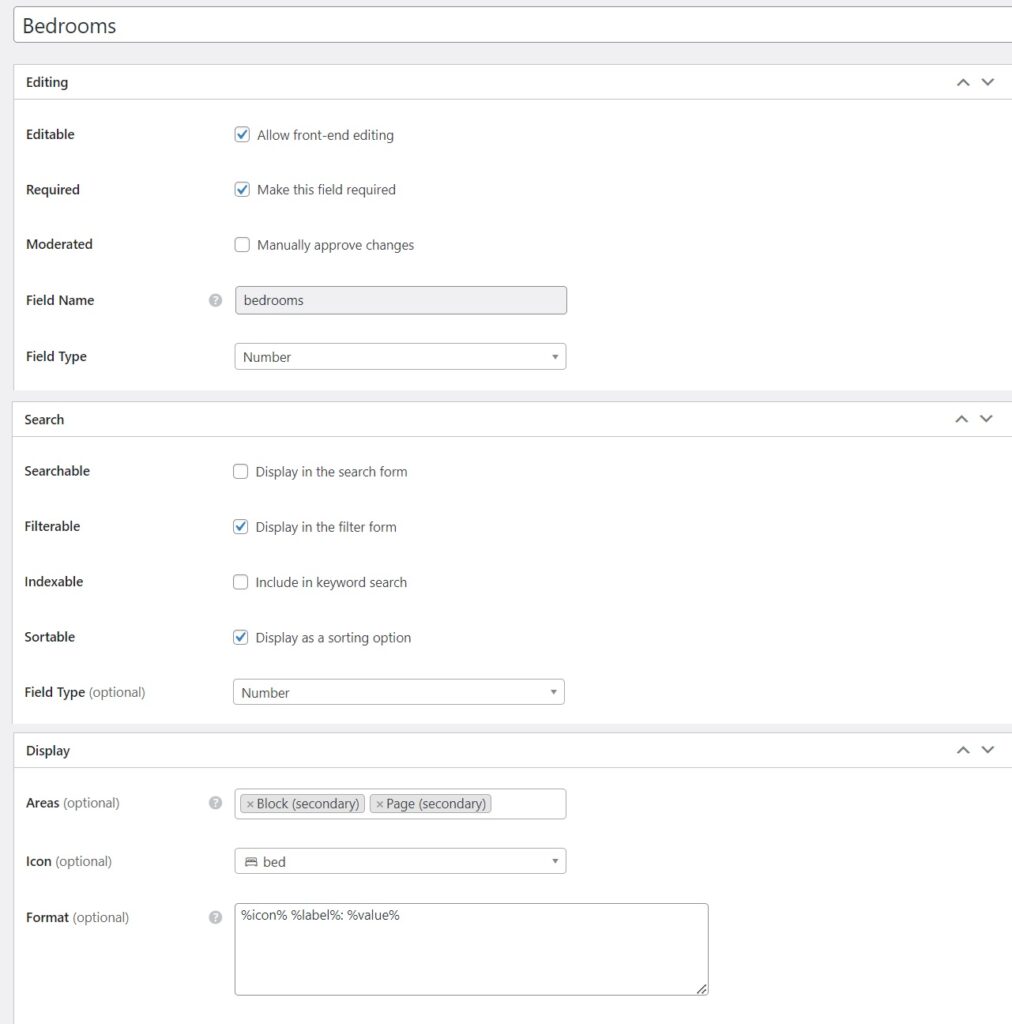
Once you’ve successfully organized the categories for your rental marketplace, the next crucial step is adding the necessary custom fields for the listings. For instance, let’s create a “Bedrooms” field. Head to the Listings > Attributes section, click “Add New,” and type a title. Next, there are three sections:
- The Editing section – we’ll select the “Number” field type and enable front-end editing so that users can enter the bedroom’s quantity when creating their listings. We’ll also make this field required.
- The Search section – here, you can adjust search options for your attribute. Let’s make it filterable and sortable and select the “Number” field type.
- The Display section – here, you can assign the attribute to the relevant areas: let’s make it Block (secondary) and Page (secondary), and then choose a suitable format to display the check-in information. For example, we’ll use a %icon% %label%: %value% format to ensure clarity in displaying the check-in information.
When you finish, click the “Publish” button. Keep in mind that you can create as many custom fields as you may need, including the most crucial ones like “Price”.
Setting Up
The next step is to ensure your booking website is configured properly to meet all the requirements and functions flawlessly. To do it, navigate to HivePress > Settings. There are many different settings available, and we highly recommend you go through them all. Here, we’ll highlight the most noteworthy ones. For example:
- In the Listings tab, you can select which fields will be shown in the listing search form and prohibit new listings submission (if you’re building a single-vendor website). Also, you can enable the quantity-based discounts feature here, too.
- If you want to allow direct registration for hosts on your rental marketplace – this function can be enabled in the Hosts tab.
- In the Bookings tab, you can select which categories will be available for booking, allow syncing with external calendars, and enable time-based bookings, which is a useful option that allows renting something out for several hours instead of the whole day or night.

Creating Pages and Customizing
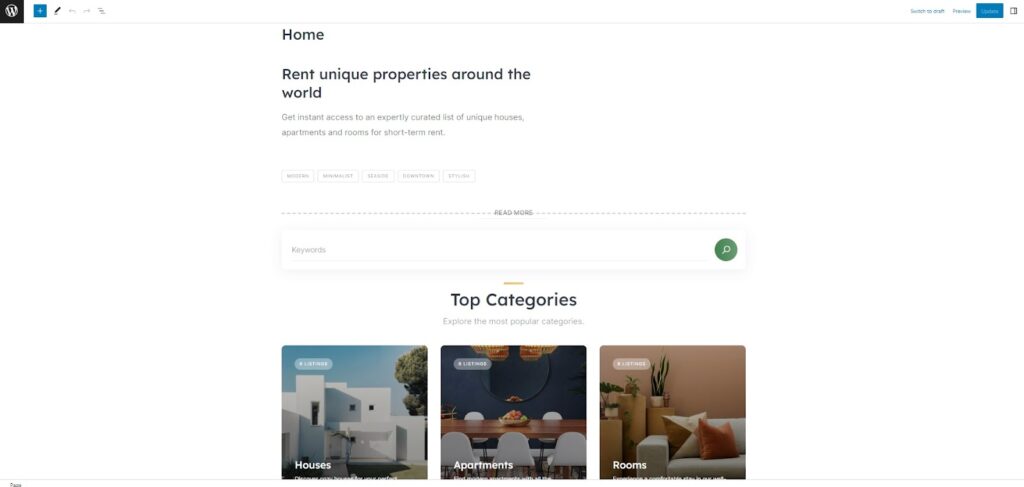
To effectively showcase your rental marketplace, designing well-structured and engaging pages is crucial, and it all starts with creating an impressive homepage.
To create a new page, go to Dashboard > Pages. Click on the “Add New” button to start crafting your page. Give it a suitable title, like “Home,” and start adding layout blocks.
For instance, you can integrate the listing search form by clicking the “Plus” icon and selecting the “Listing Search Form” block. Similarly, you can showcase your categories by adding the “Listing Categories” block. You can simply enter “HivePress” in the block search to see all available HivePress blocks. Personalize the page content to match your desired style and preferences, and once you’re satisfied with the design, publish it for your visitors to see.
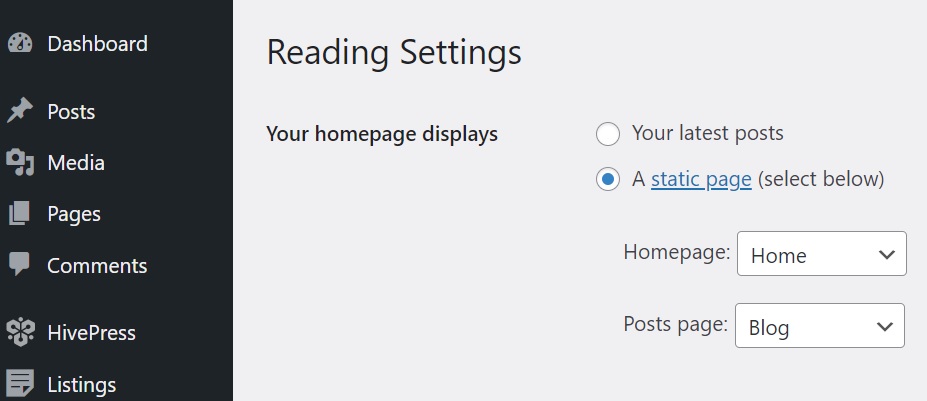
To set this page as the homepage, go to the Dashboard > Settings > Reading section, select this page from the drop-down menu, and save the changes.
Now you can customize the created page to give it a unique look and feel. To do this, we recommend watching the video below:
Adding Listings
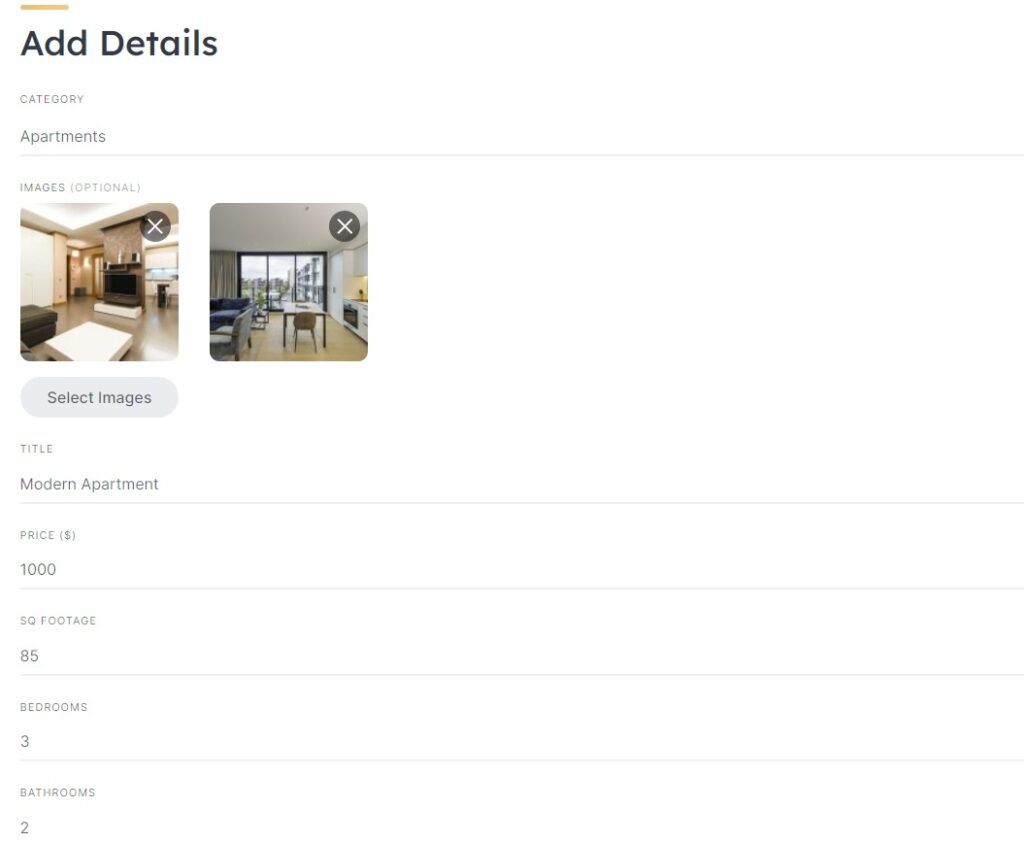
Now it’s time to test how adding a listing on your website works. In RentalHive, you can add listings both via the backend and front end. For the sake of this tutorial, let’s check how it works via the front end. To do that, go to your website’s homepage, and click “List a Property”. Here, fill in the fields, including the ones you created, then click “Submit Listing”.
If you have moderation enabled, any new listing undergoes a review process. The website admin receives the listing for approval and can either accept or reject it in the Dashboard > Listings section. You can disable manual moderation in Dashboard > HivePress > Settings > Listings. After the approval, the listing will be visible on the front end, and users will be able to book it, as shown in the image below.
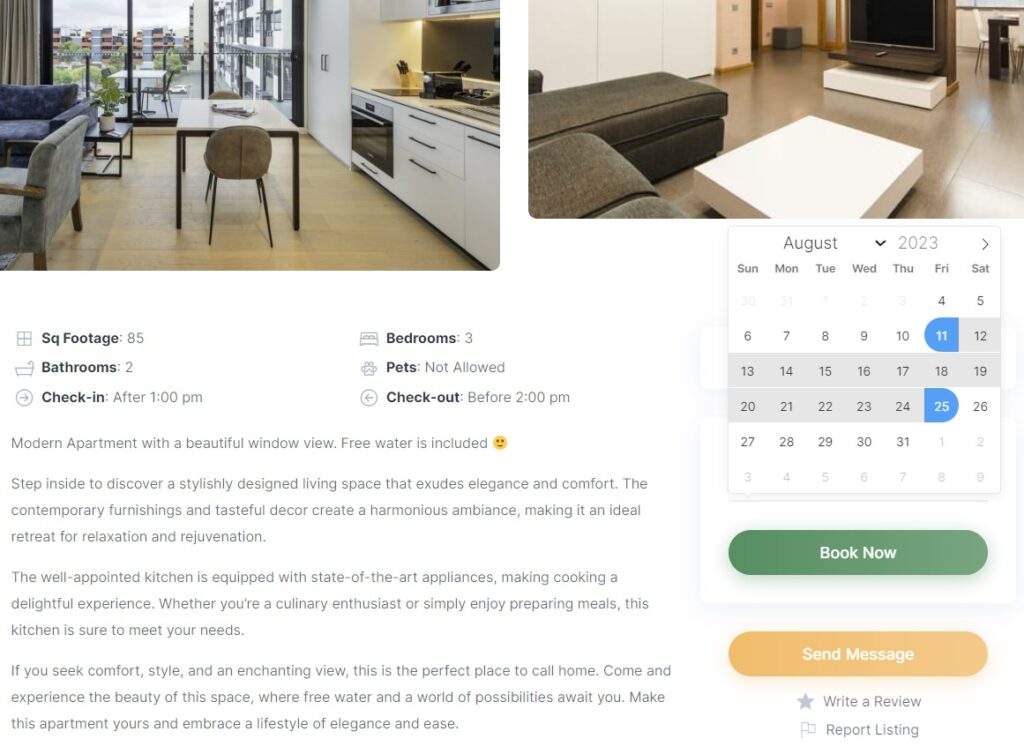
Let’s try to book this listing. After selecting the desired dates and pressing the “Book Now” button, we will be redirected to the confirmation page, where all the details can be verified and some notes added.
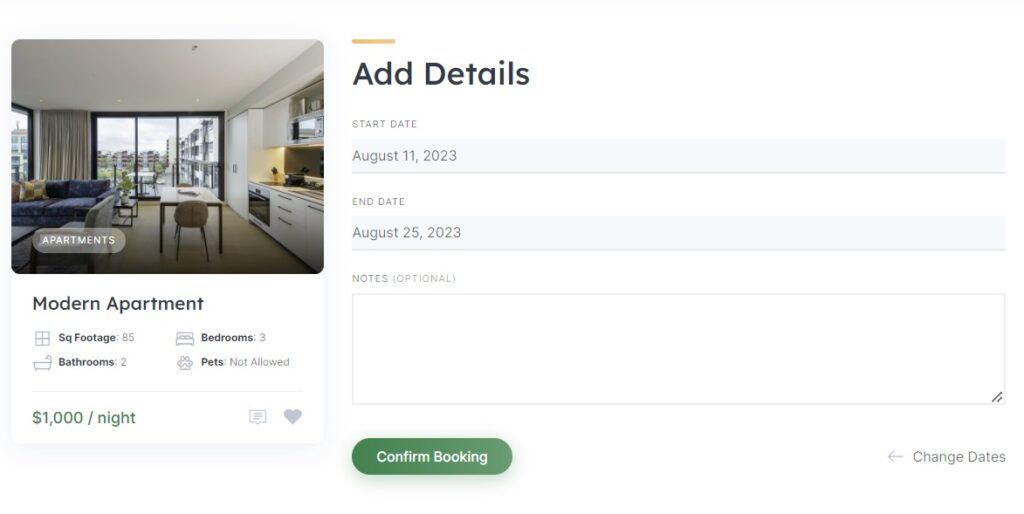
Depending on how the settings on your website are configured, users will be able to either pay for booking right away or confirm it and pay with the cache.
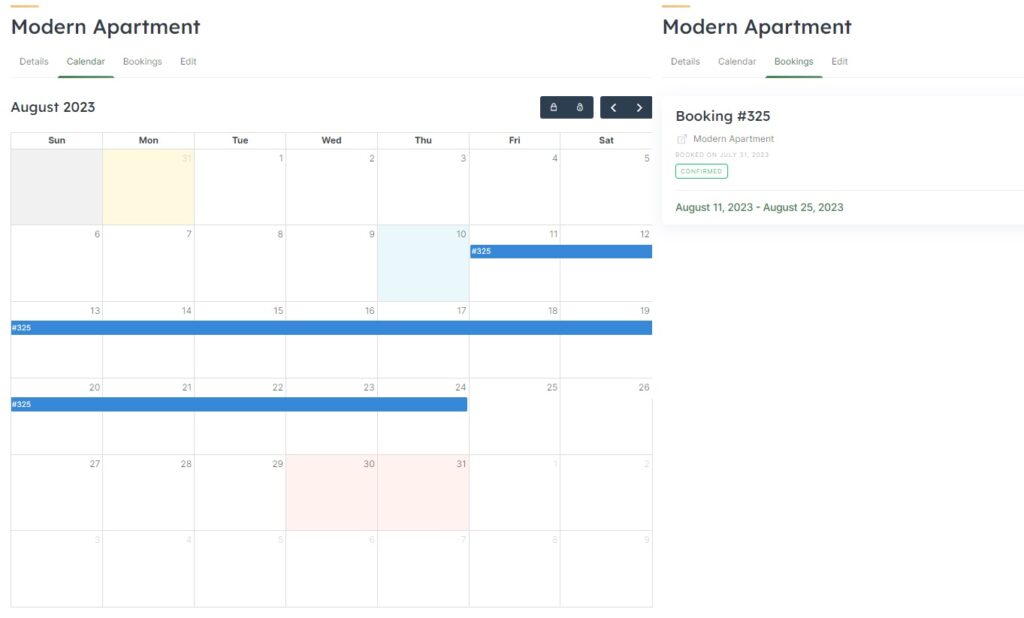
There’s also a convenient calendar feature that empowers hosts to manage their availability. They can easily block or unblock specific dates, making them either available or unavailable for new bookings. This feature ensures hosts have a clear and organized overview, making it easier to efficiently manage their rental schedule and provide an exceptional booking experience.
Monetizing Your Rental Marketplace
Finally, let’s talk about monetization of your rental marketplace, as it is a critical aspect of turning your platform into a successful and profitable business. Here are three main monetization options:
- Commissions
It’s possible to take a commission on every successful booking from vendors, customers, or even both parties. You can set a commission rate or fee: in the first case, a commission percentage will be charged on every purchase (e.g., 10% on each sale), whereas in the second one, there’ll be a fixed commission fee (e.g., 10$ on each sale). - Paid Listings
You can charge users for adding new listings. For example, you can create two packages: a free and a premium one. The free package will allow users to post up to only five listings, but if they want to extend this number – the premium one comes in. The one that will enable them to post, let’s say, 50 listings. - Featured Listings
You can also charge users for promoting their listings. Featured listings appear at the top of the search results, attracting more visibility and potential customers. By offering this premium feature, hosts can enhance their listing’s exposure and increase the chances of securing bookings.
Conclusion
Congratulations! You now have a clear roadmap to create your very own rental marketplace using WordPress in no time. Our aim was to keep this tutorial straightforward, enabling you to launch your website effortlessly, even without any coding expertise.
If you’re still in doubt about what tools to use for your rental marketplace venture, consider the powerful combination of the HivePress plugin and the RentalHive theme. They provide a comprehensive set of features, ensuring all the essential elements are at your disposal to kickstart your website successfully.


")
")
")