
Last updated - November 8, 2023
It is indeed highly convenient to create and run a WordPress-powered website for your business. As convenient and quick as it may be to create and run WordPress-based websites if you are unable to edit footer, it may be a deal-breaker (at least for some).
One of the aspects that may seem to be an intrusion is the copy that reads “Powered by WordPress” at the footer of your web pages. Having invested large amounts of money, time, and effort into building a proficient website, it doesn’t look good to have this kind of copy.
For this reason, we bring insights into how you can edit the footer of your WordPress website in this article.
What is a WordPress Footer?
A website’s footer is a section that follows the main body of the content at the bottom of the page. The footer of a website typically shows on every page, much like the header does.
Similarly, your WordPress website’s footer is the part that normally follows the main content at the bottom of each page. ‘Proudly powered by WordPress’ is the trademark that is present by default in the footer section. In the footer.php template file, the WordPress footer is often specified.
Every time a page of your website loads in WordPress, this separate file footer text file called footer.php will load as well. Therefore, your entire website will be affected by any modifications you make to footer.php.
Why is it Important to Edit Footer in WordPress Website?
To Provide Informative Links
On each and every page of your WordPress website, the footer will be visible. You can’t just fill up this space with irrelevant links or message templates from your default WordPress theme. You should take full advantage of your website’s footer by emphasizing important links that you can’t include in the header.
To Emphasize Brand-building
Additionally, the footer provides you with a fantastic opportunity to enhance your brand’s reputation and leave a lasting impression on your users. You can include your logo here along with a succinct description of your brand or a joke that sums up your company instead of leaving this place blank or filling it with meaningless material.
To Improve SEO Optimization
From an SEO standpoint, the footer of the website is equally essential. Any links in the footer will be regarded as site-wide links since they can be found on every page of your website. Never pack keywords or internal links into this area to increase page authority. Include links only if they are relevant to your readership or required by law.
Ways to Edit Footer in WordPress Website
Using WordPress Theme Customizer
You may adjust your site’s header and footer, alter the titles, and access many other global options by using the WordPress Theme Customizer, an option built into your WordPress website’s dashboard. This is an extremely user-friendly and secure option that lets you edit your WordPress website’s footer in simple steps.
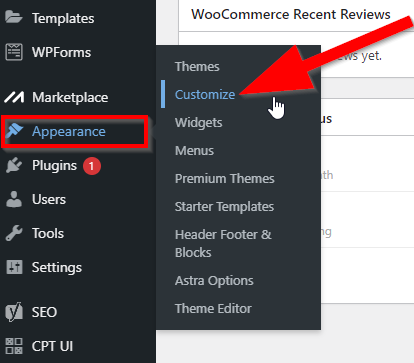
Go to your WordPress Dashboard > Appearance > Customize
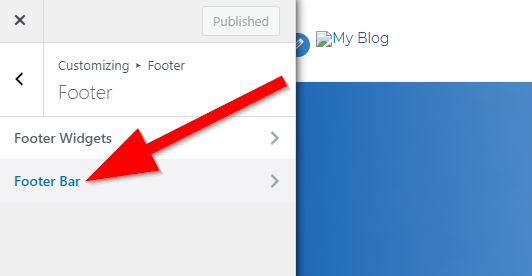
Then go to Footer and from the next window click on Footer Bar
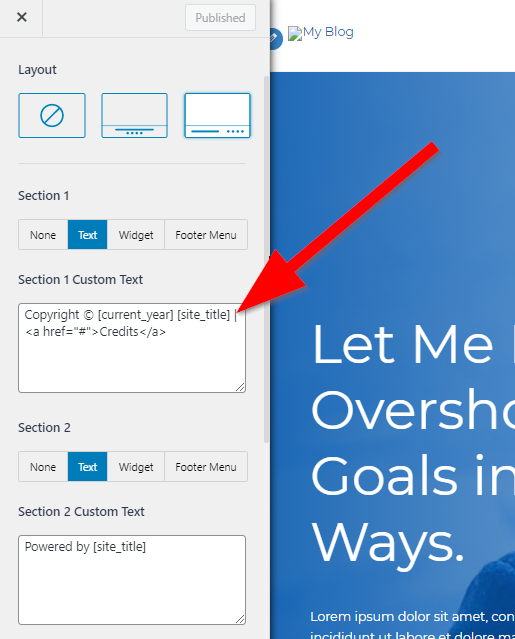
Here you can start editing the layout, text, and other aspects of the footer.
You can scroll down the edit window to customize the styling options as shown in the image below.
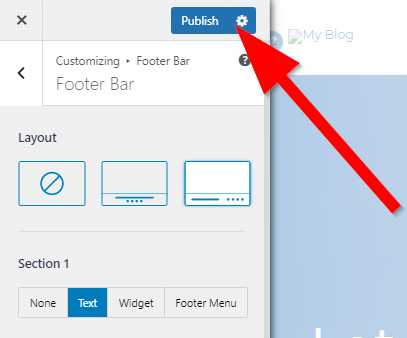
Once you are happy with the changes you’ve made to the footer you can click on Publish to save the changes.
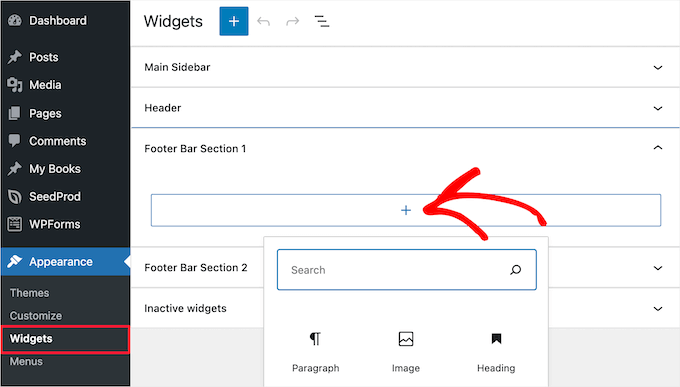
Adding Widgets
Several reliable WordPress themes often contain widget spaces in the footer. You can add text, photos, or links using the widget sections to your privacy notice documentation, copyright disclaimers, and other crucial pages using widgets. You can follow the step-by-step instructions given below.
Go to your WordPress Dashboard > Appearance > Widgets
Then click the + button in the Footer Sidebar section
In order for you to add links in the widget area of the footer
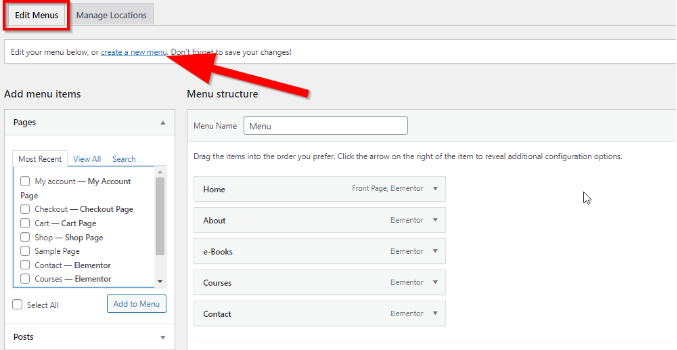
Go to your WordPress Dashboard > Appearance > Menus. Under the Edit Menu page click on the ‘Create a new menu’ link.
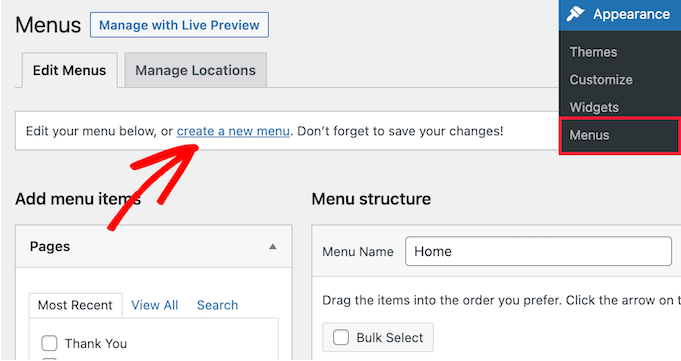
WordPress will then prompt you to provide a name for the new menu.
Choose the appropriate footer area, provide a menu name that is easy to recognize, and then click the Create Menu button.

Your new menu is now ready and you can start adding appropriate links to it. And for that
Check the desired posts, pages, and categories from the column on the left side and click the Save Menu button.
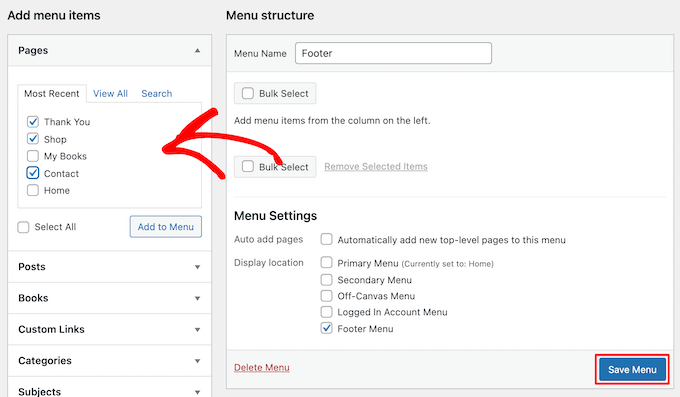
Now, the new menu you created is ready to be added to the footer widget area.
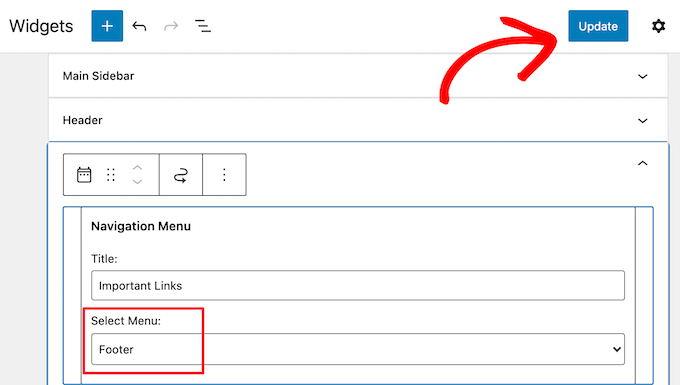
Go to your WordPress Dashboard > Appearance > Widgets
Then click on the + icon, search for Menu and click on Navigation Menu
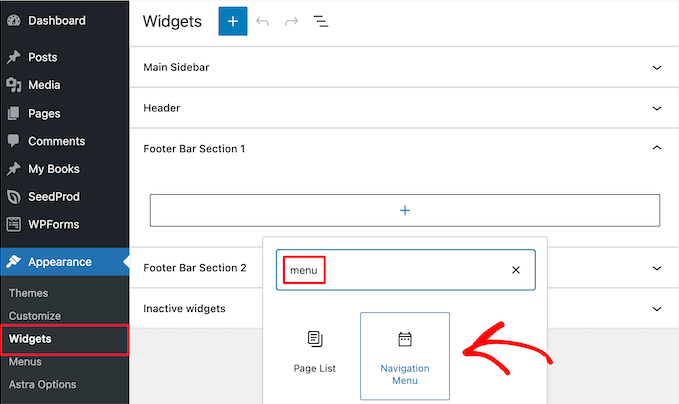
Finally, choose your footer navigation menu from the Select Menu drop-down and give your widget a title. In your footer, the title will be shown above the menu.
And then click the Update icon to save the changes.
Adding New Menu
The majority of website owners include one or more navigation menus in their footer. These are frequently supplemental menus made up of links that may not be significant enough to appear in your header but are very relevant to your users. Here is a detailed look into how you can add a new menu.
Go to your WordPress Dashboard > Appearance > Menus
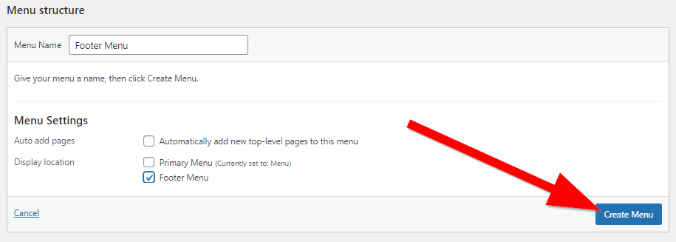
And then click on then click on Create New Menu link provided below the Edit Menu section.
Provide your new footer menu an easy-to-remember name and check the box against Footer Menu provided under the Menu Settings section.
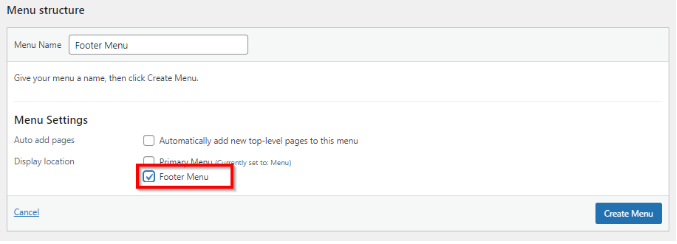
And then click on Create Menu icon
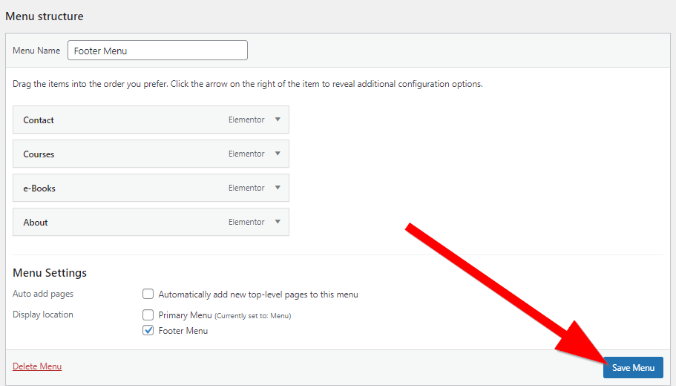
Once the new menu is created you need to add links that should appear in it. To add links
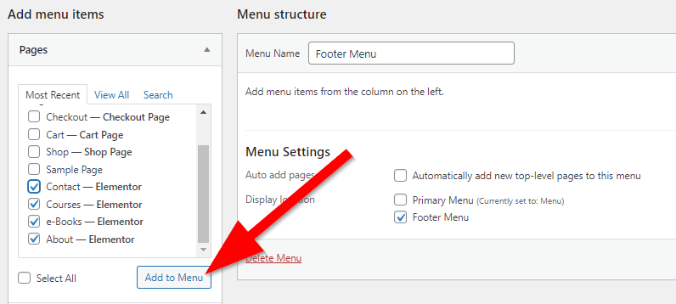
Go to Add Menu Items page and select the relevant page as shown in the image
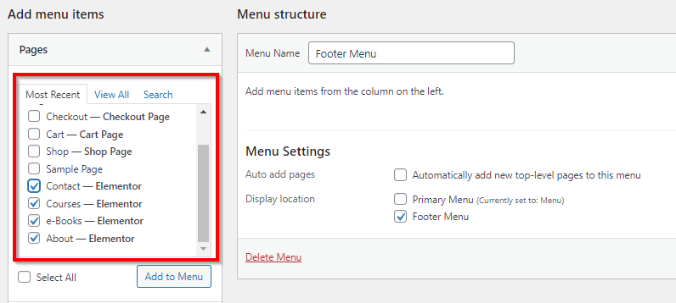
Next click the Add to Menu icon.
The “add menu items” feature also allows you to include any articles, unique links, and categories in your menu.
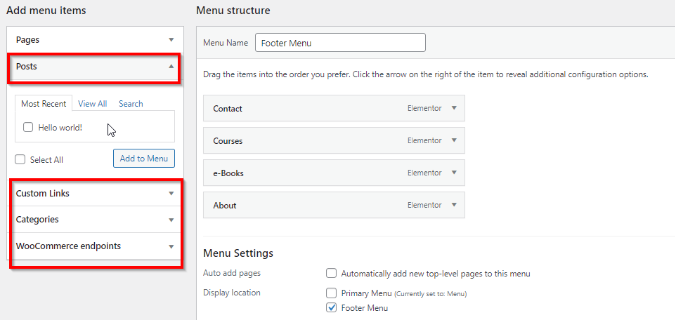
Once all of the pages have been added to your menu, you can move them to arrange them in any order you like.
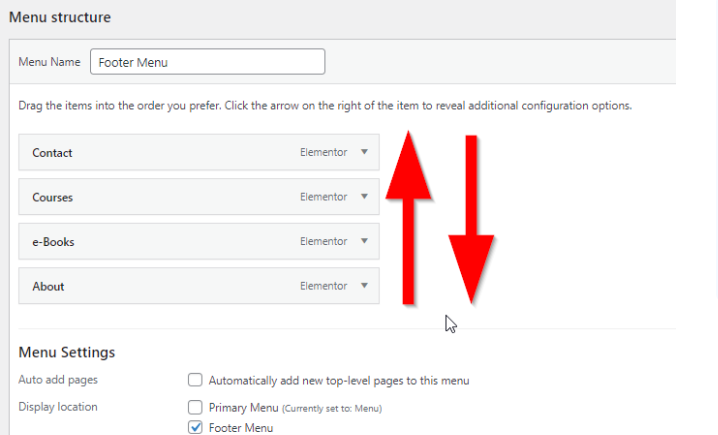
Finally, you can click the Save Menu buton to save and publish it in your WordPress website’s footer.
Adding Script/HTML Code
Commonly, the footer of many websites contains several scripts and tracking codes from programs like Google Analytics and others. However, to do this you need to install a plugin. Here’s the procedure to follow if you want to add any type of code or replicate this on your website’s footer.
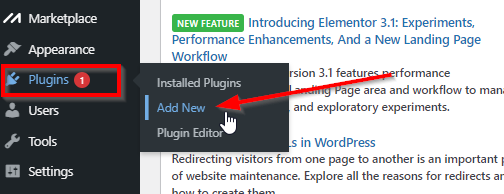
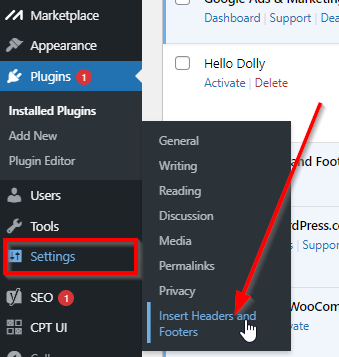
Go to your WordPress Dashboard > Plugins > Add New
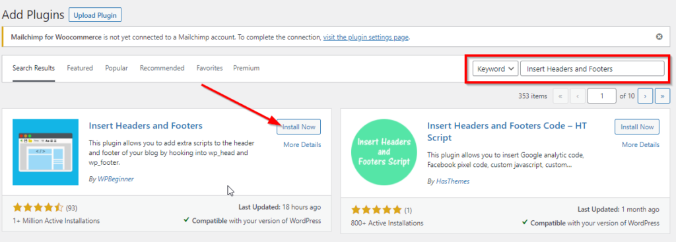
Search for the plugin you want in the search bar and click on Install Now icon. In this case, we’ve used ‘Insert Headers and Footers Plugin’
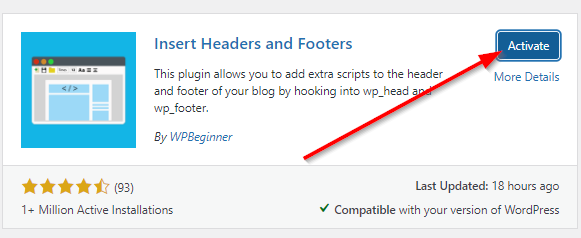
Next click on the Activate button
Once the plugin is installed and activated go to your WordPress Dashboard > Settings > Insert Headers and Footers
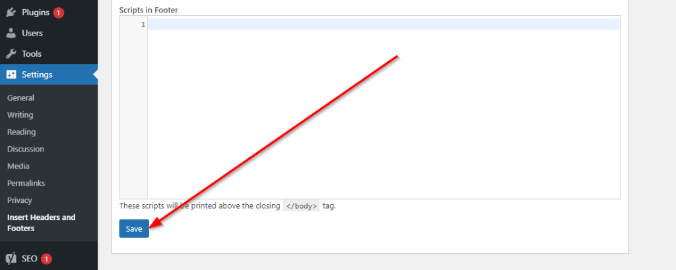
Scroll down to Scripts and Footers on the plugin’s page, and copy your script/code in the text box.
And then, click on the Save button to publish the changes.
Removing “Powered by WordPress” Text
Many WordPress themes use “Powered by WordPress” as their standard footer text. This doesn’t look great on your website, especially after you have invested huge amounts of money, manpower, and time in developing your website.
This is why most business owners choose to remove the default footer text. You can remove the footer text by editing the footer and we have explained how to do it.
Some WordPress themes provide an option to edit the footer. For that simply navigate to Appearance > Customizer and remove the footer text from there.
However, if your WordPress theme does not allow you to customize the footer text then you can remove it by editing the code in the footer.php file. Here is how you can do it.
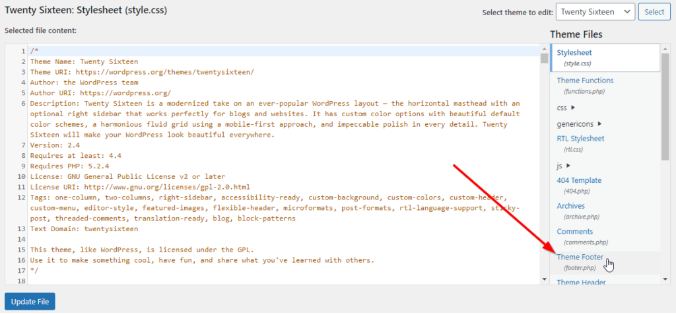
Go to your WordPress Dashboard > Appearance > Theme Editor

Find and select footer.php from the Theme Files list on the right-hand side of your screen.
Now, before you could edit the code you need to create a backup of the existing code in case anything goes wrong.
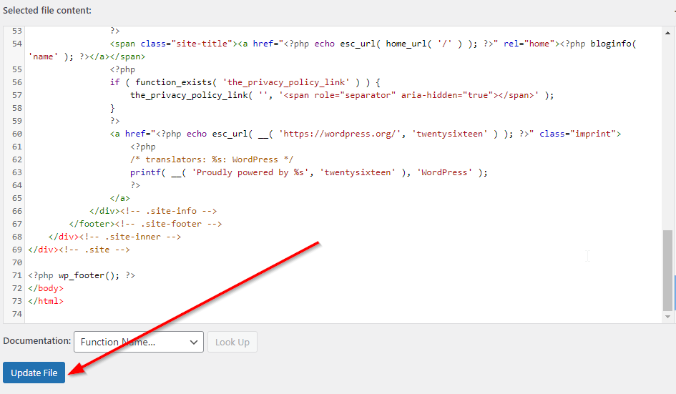
On the footer.php window open the Search Text box by pressing CTRL+F and search for the text ‘powered by’.
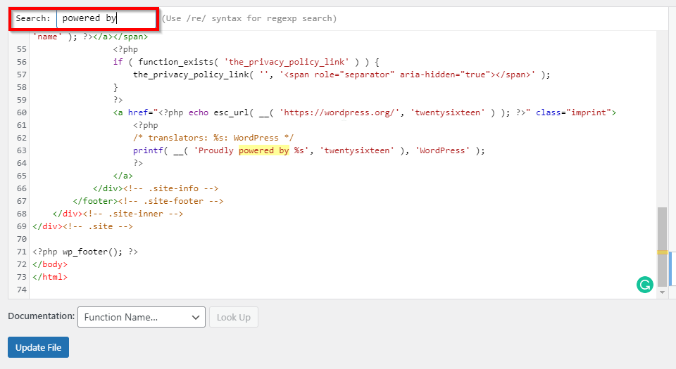
Once you find the line of code, remove it

Finally, click on the Update File button to save the changes.
A Few Popular Plugins to Edit Footer in WordPress Website
Insert Headers and Footers
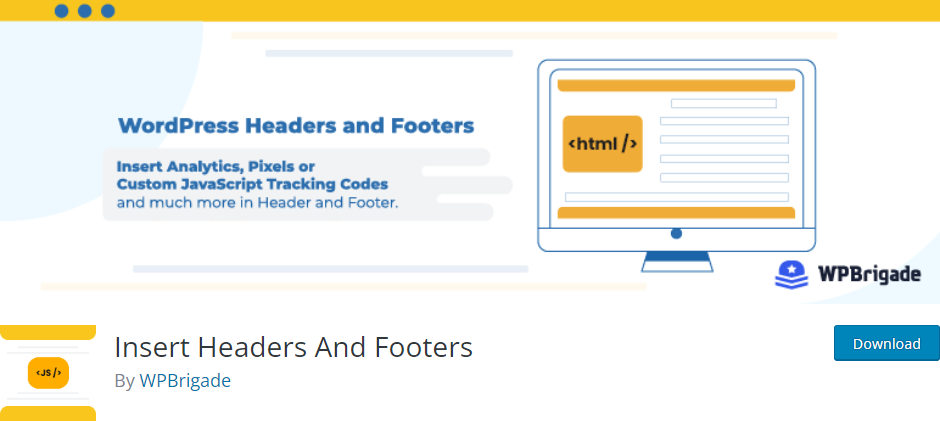
You can start with the well-liked and cost-free Insert Headers and Footers plugin from WPBeginner if you want to add customized code to your footer. With the help of this plugin, you may add your own HTML, JavaScript, and CSS code to the standard WordPress bottom section along with Google Analytics and Facebook pixel code.
It is simple to install, configure, and insert code with the Insert Headers and Footers plugin, and it integrates flawlessly with other plugins and active themes as well.
In actuality, you don’t even need to make any changes to your theme files, and you won’t lose your unique footer code if you decide to switch themes. Compared to personalizing your footer using the theme, this offers a benefit.
Monarch

Elegant Themes created the WordPress social sharing plugin called Monarch. With its capabilities, you can create and set up requests for people to share your content on more than 20 social media sites, including Facebook, Twitter, Reddit, and Pinterest.
The footer area is a great spot to utilize simple but effective social network buttons to direct more traffic to your social media profiles. With Monarch, you can post customizable social media sharing buttons and CTAs just about everywhere on your site.
Header Footer Code Manager
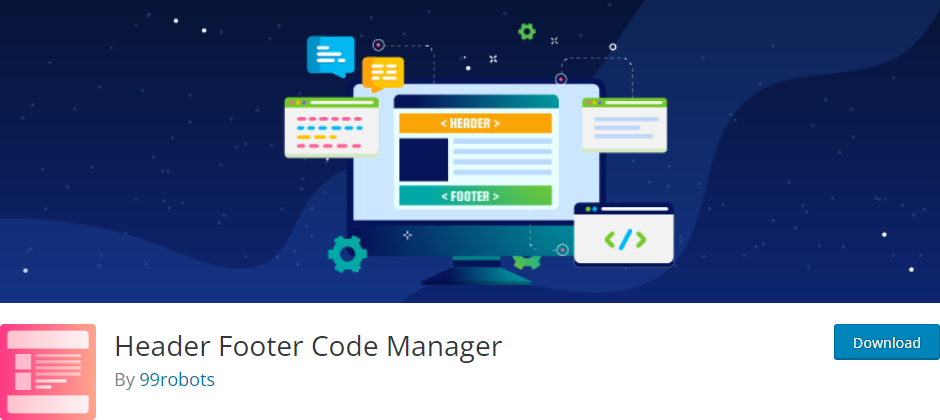
Another free and practical tool for inserting program code in the footer part of your website is the Header Footer Code Manager plugin. Simply install and activate the plugin, create a “Snippet,” then paste the shortcode into the code field to complete the procedure.
With this plugin, you are not limited to the footer area; instead, you may add code to any other area of a page or post using a shortcode that the plugin generates. Code may be inserted in the header, sidebar, or text.
Conclusion
Customizing the footer of your WordPress website is very simple, as we’ve shown you in detail in this article. There are several methods you may use to change your footer, and none of them will take more than a few minutes.
You can follow the step-by-step guide provided in this article and watch the video below and start editing the footer of your WordPress website and shift the tangent of your business altogether.


")
")
")