
Last updated - July 8, 2021
Do you want to migrate posts in WordPress along with the featured image and do not know how? In this tutorial we will explain it in a few simple steps. Read on!
On certain occasions we may need to migrate only the posts from one web page to another, for example because it has been redesigned and the entries are the only thing to recover from the old web. If you are in this situation, it is possible that you have tried to do the migration and that you have encountered problems such as the images have not been migrated or they have not moved from server. Don’t worry! It is simpler than it seems if you know what steps to take, and I will explain them to you in this tutorial Let’s get started!
How to Migrate WordPress Entries with the Featured Image?
To carry out the process we will use the tools to export / import provided by WordPress and that are installed by default, along with 2 plugins:
These plugins are in the WordPress repository so you can download them directly from there. This tutorial has been tested up to WordPress version 4.9.8 and the plugins have worked correctly and without problem.
Preparing to Migrate Posts in WordPress
In order to start with the migration, we have to have our old web page with the entries we want to export, and obviously, the new page where we want to import them. It would also be convenient to avoid surprises and possible errors, create on the new page the same users who have written entries on the old page. As a general rule, there will not be many, so it is not a complicated task. We will go into detail at this point later.
Step 1: Install “Export Media with selected Content” plugin
On the old page, where we have the entries we want to export, we must install the “Export Media with selected Content” plugin. We just have to install it; you don’t need to configure any settings. This plugin is required because the WordPress exporter does not export the highlighted image if we do not select the option to “export all content” (which is used to migrate all the files on a web page) and in our case we do not want to export all the content but Simply the tickets. Thanks to this plugin, when we do the export, the featured image will be included.
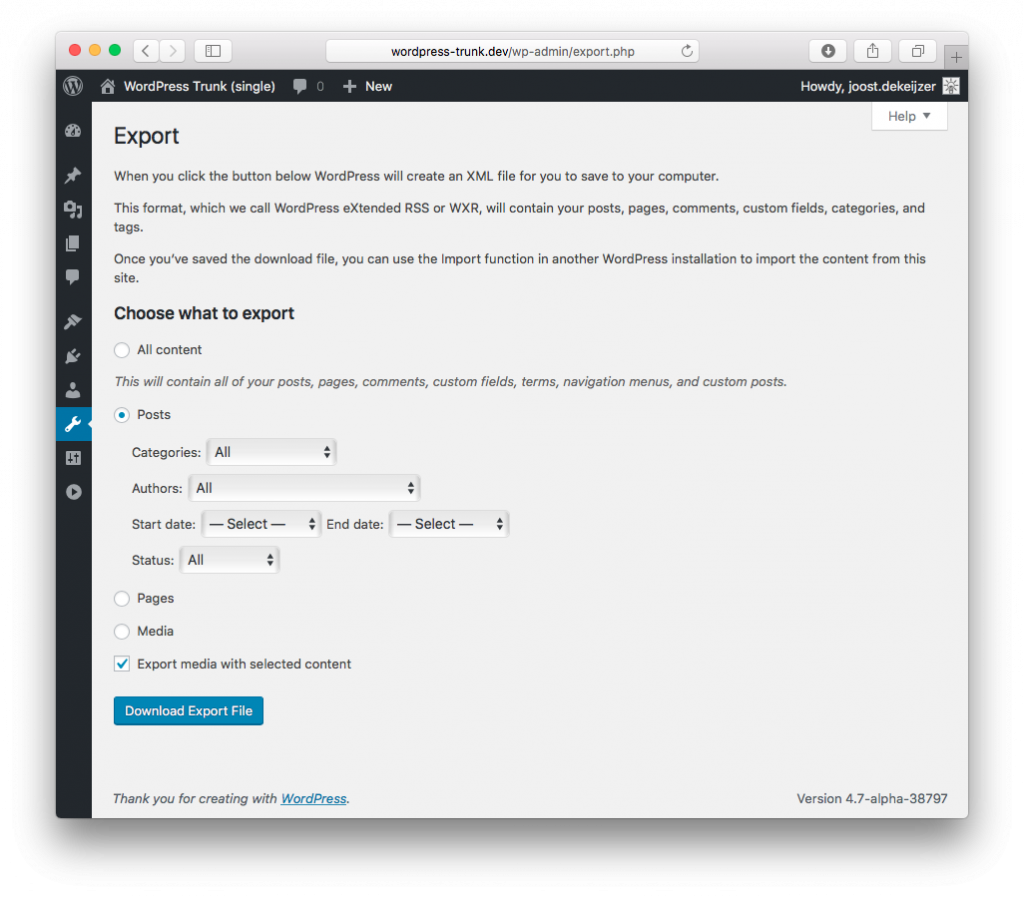
Step 2: Export entries with WordPress
Once we have the plugin installed, with 4 simple clicks we can export the file that will contain our entries and all its information:
- Inside the WordPress back office, access Tools -> Export
- In the “Choose what to export” options we will select “Tickets”. If we want to export a specific author or a specific period of time, we must specify it in the options that are displayed when selecting entries. If we want to export them all, we don’t need to touch these settings.
- Check the “Export media with selected content” box.
- Click on the “Download the export file” button.
Step 3: Import entries with WordPress
Once we have the exported .xml file, we can go to our new website where we want to import the posts. There, we perform the following steps:
- In the WordPress back office, we access Tools -> Import.
- Of the options offered, the last one is the WordPress importer, being the first time it is most likely that you do not have it installed, you just have to click to install it and then another click on “Run importer”.
- On the next screen you ask for the import file, and we will upload the .xml file that we have exported from our old WordPress. Once selected, we click on “Upload file and import”.
- In the next step we must manage the authors of the entries. WordPress by default would create a duplicate of the users we had on our previous website and assign them the posts they wrote., But according to the tests we have done there are times that things can be lost and we have found that some post was not assigned to the correct author. Therefore, I recommend you that you create the users on the new page, and in this step, relate them manually. As I said, we already have to have created the same users, and in each drop-down we will assign the posts to the same author. Once done, we just have to check the box “Download and import attachments” and then click on the “Send” button. Depending on the volume of entries it will take more or less.
- Once finished, we will have our imported tickets with the highlighted image, although we still have one last step.
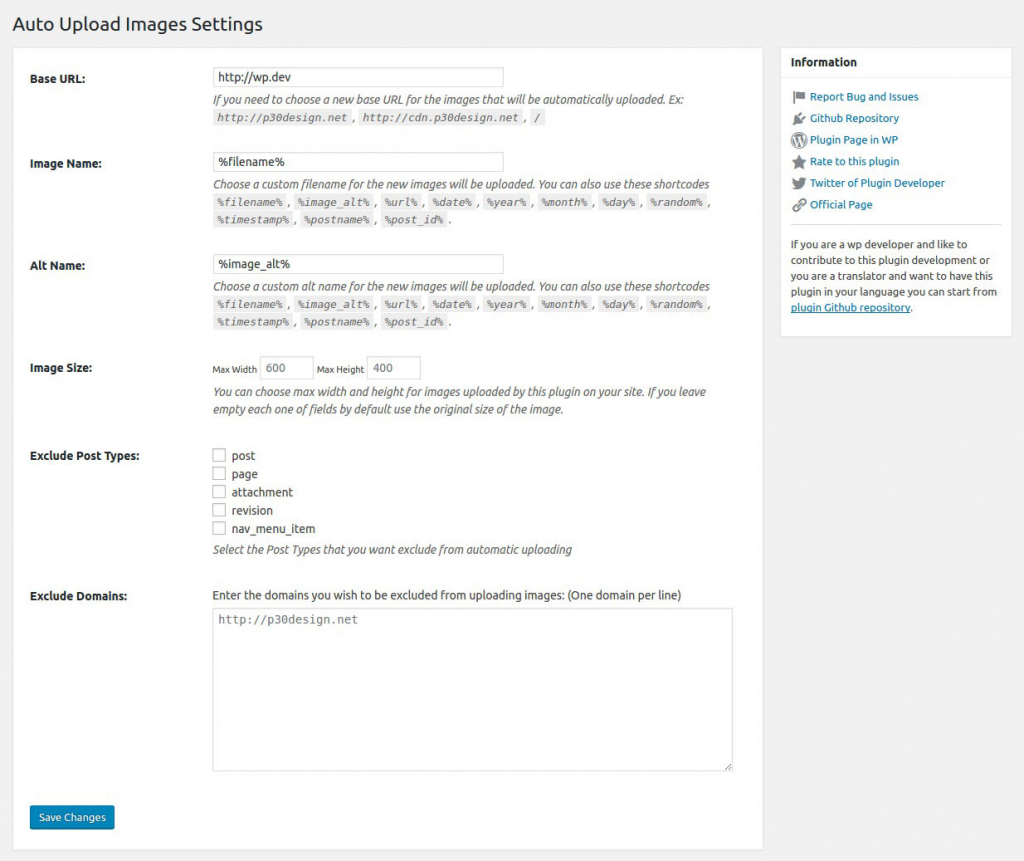
Step 4: Import images of the entries to the new website
We already have our imported tickets with their images, but if you look at the url it still points to the old url. To solve it we will use the “Auto Upload Images” plugin. We install it on our new page and as it happened with the previous plugin, we do not need to touch any settings, install it and go.
To do its function and transfer the images, all we have to do is edit the posts and save them again without making any changes. We need this step for the plugin to “react” and update the related information. To simplify, we can do it in batches of 50 posts approximately every time. In the WordPress back office, we go to “Entries” and from there we use the tools to make mass changes, selecting “Edit”. Then we click on the box to select all the posts shown in the view and we click on the “apply” button. Then we save without making any changes. We repeat the process until all the entries have been updated and voila! You should already have all the images transferred correctly.
Conclusion
Migrating only posts from one web page to another can be a complicated task since there is no single and simple process, but we have seen that with the help of 2 plugins we have achieved the goal in a simple way. If you have any questions or problems when making the migration, remember that you can leave us a comment below this entry. And if you don’t have the time to carry out this process or any other migration process. Good luck with your new website!


")
")
")