
Last updated - July 8, 2021
This article is part of Order Management Guide:
- Basics of order management (current article)
- Dealing with refunds
- The role of plugins in order management
- Ensuring prompt email notifications
Once you set up your store, orders will start coming. WooCommerce has convenient settings to help you manage your orders. Let’s look into these settings in more detail.
Firstly, to access orders on the admin panel, go to WooCommerce → Orders. Alternatively, you can just click WooCommerce; it’ll also take you to the Orders page.
The Orders page has a display of all your orders, their status, and other details. There is a column on the left side with different icons to denote the status of the orders.
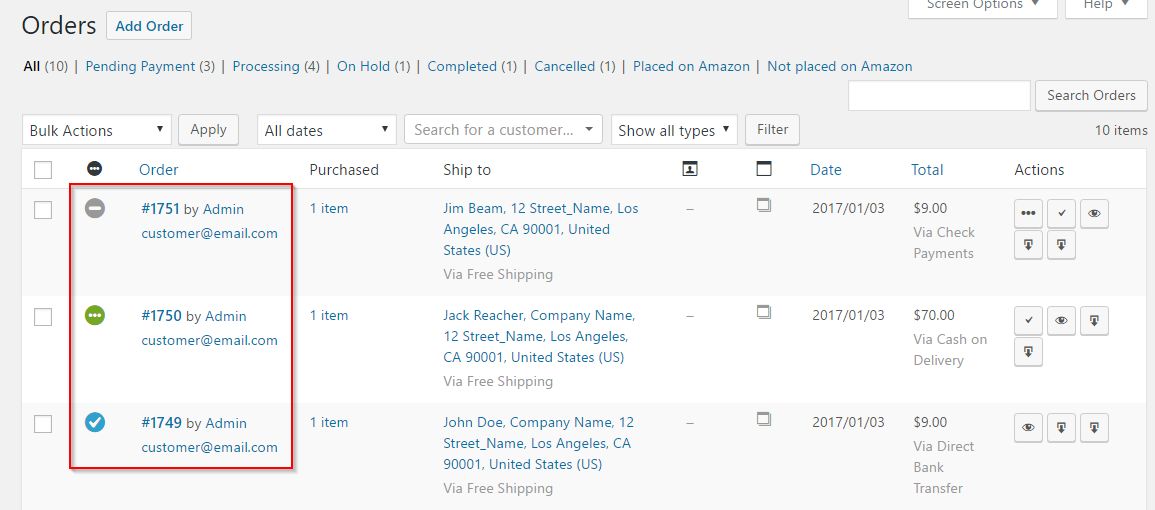
Before getting into the details of individual orders, let’s look into some of the features on the top of the page.
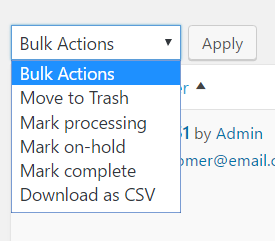
Bulk Actions and Filters
You can select a number of orders to perform a bulk action. These are:
- Mark Processing
- Move to Trash
- Mark on-hold
- Mark complete
- Download as CSV
You can filter the orders by month, customer name or email, and the order type (original or renewal). For this, you can select the criteria and click the filter button. This will display all the orders that meet the selected criteria.

Accessing the details of an order
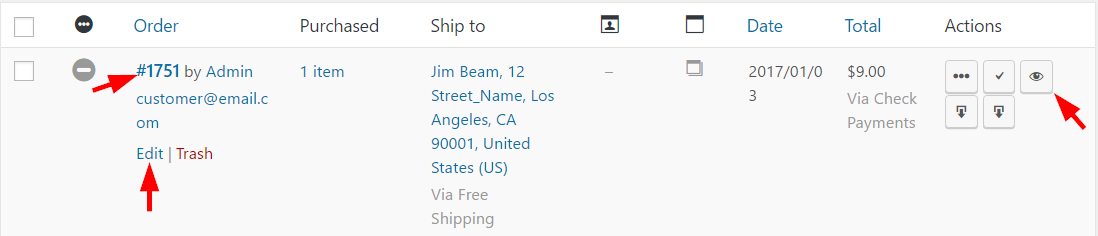
You can go to the details of an order by three ways:
- Click the order number
- Hover the cursor around the order and click ‘Edit’
- Click the view button under the Actions column at the extreme right.
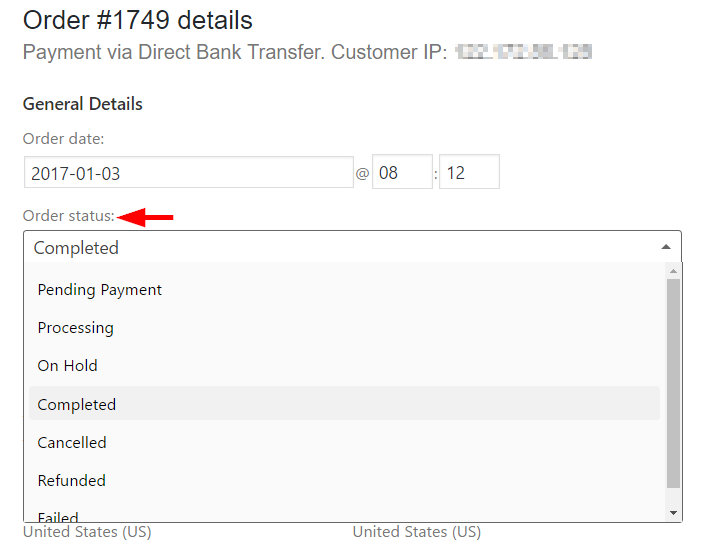
Editing order status
On the Order details page, you can see the general details of the order. You can change the order status here. For some of the payment options like BACS, you have to manually change the order status to process the order ahead.
The different options for order status are as follows:
- Pending payment – You have received the order, payment is pending
- Processing – Payment is done, the order is in process. The status will be ‘processing’ till the shipment reaches the customer. Downloadable products won’t have this status.
- Completed – Order is completed.
- On-Hold – Payment to be confirmed, but the stock is reduced.
- Cancelled – Order is canceled by the admin or customer.
- Refunded – Refund is completed.
- Failed – Payment is declined or failed. Until verified, this might still sow status as Pending.
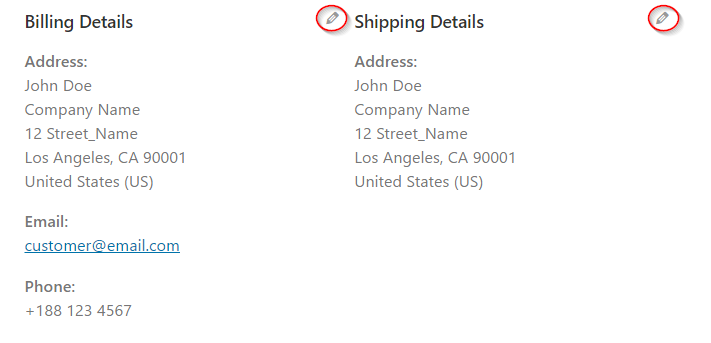
Billing and Shipping details
The customer’s address details will be displayed in this section. You can edit these details if required.
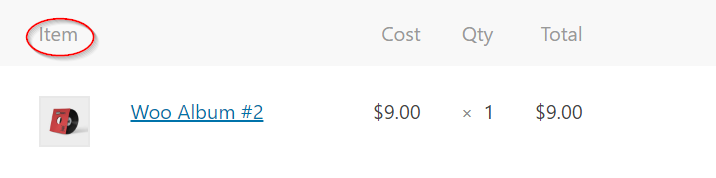
Item details
Next, you can see details of the ordered item(s). Individual cost, quantity and total cost are displayed.
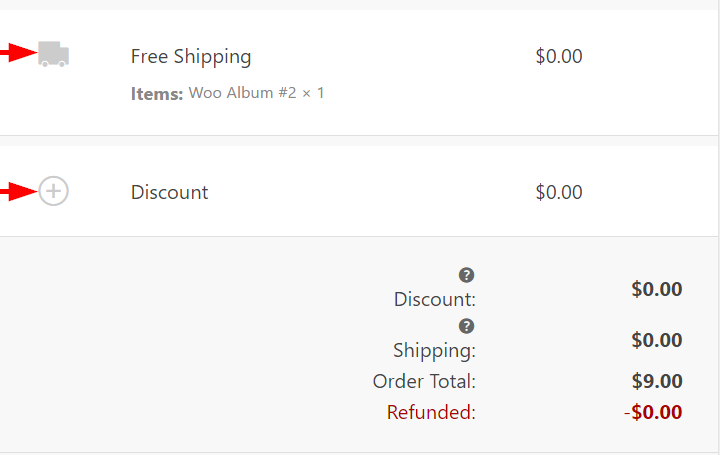
Under this section, you can also see other relevant information like Shipping and discount details, if any.
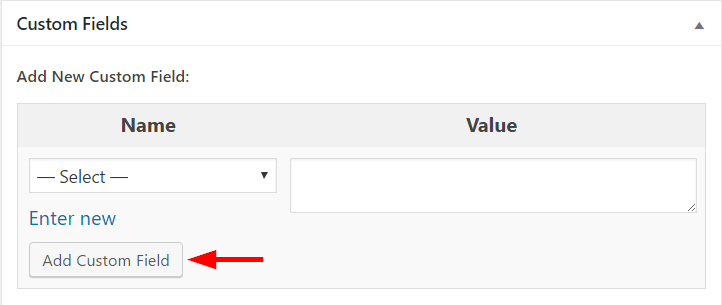
In addition, you can add custom meta-data fields in the Custom Fields section. Use the Add Custom Field button to create a new custom field.
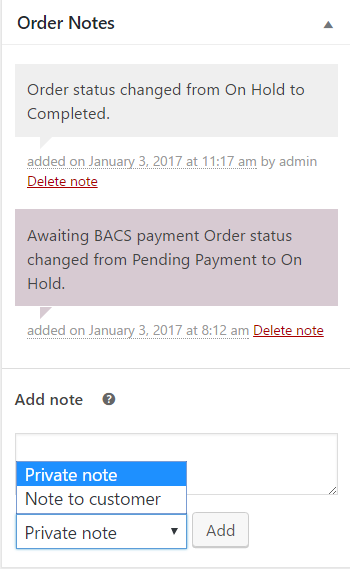
Order Notes
This section displays notes related to the order. It has internal notes regarding the change of order status and any other details. In the ‘Add note’ section, you can add notes to communicate to the customer as well.
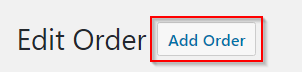
Creating an order manually
Click the Add Order button to manually create an order. Add the relevant information of the order, along with the order status.
Under ‘Order Actions’ section, you can select ‘Actions’ to give payment instructions to the customer.

Once you have updated the order, click the Save Order button.

You have now got a basic overview of order management in WooCommerce. More aspects will be discussed in later articles.


")
")
")