
Last updated - November 10, 2023
The best and most efficient way to communicate with your customers is through live chat. Unlike the majority of other support methods, such as email, you may provide your customers with speedier support and address their issues immediately to increase your conversion rates.
In addition, you can increase client involvement, collect data, offer 24/7 help if necessary, strengthen your brand’s trust, and outperform your rivals. In short, compared to most other mediums, live chat provides you with more advantages.
If you would like to integrate a live chat system into your WordPress website then you need a strong solution like 3CX Live Chat for WordPress, which is the focus of this blog. The features that make 3CX one of the top chat plugins for WordPress will be covered in greater detail in the following sections.
What is 3CX Live Chat?
Let’s begin by defining the 3CX Live Chat plugin. 3CX is a free live chat plugin for WordPress if that wasn’t previously clear enough. The firm that created the plugin acquired the old WP Live Chat Support plugin and improved it to become the 3CX Live Chat you see today by adding many fantastic new features that put 3CX far ahead of many competing products.
Install a robust communications system and you can save up to 80% on your phone expenses. These systems often include features like live chat, audio/video conferences, web conferencing, various messaging channels, easy management, and much more. Aside from offering a forever-free plan, 3CX Live Chat provides affordable pricing and top-notch customer service.
Features of 3CX Live Chat
Firstly, it is necessary to know that you are in good hands because there have been over 2.5 million downloads overall and more than 600,000 businesses trust the plugin. The plugin also received a commendable 4.6 out of 5 stars on WordPress.org. Let’s talk about the characteristics to expect now that we are aware of what we are dealing with.
- The StartUp plan of the 3CX Live Chat plugin is completely free and supports up to 10 agents, which makes it ideal for small business enterprises and startups.
- The capacity to offer many forms of support is one of its most impressive qualities. Right in the chat window, you can choose between different help channels.
- Another useful capability is taking calls via a web browser or mobile apps for desktop, iOS, and Android.
- Personalize the conversation by including your company logo and your agents’ pictures in the live chat window.
- Since the live chat box is operated by Ajax, it is interoperable with all caching plugins.
The best thing is that the StartUp Plan makes the majority of these capabilities available for free, allowing you to use the plugin without incurring any further costs. You can always upgrade to a premium plan if you require additional features.
Setting Up 3CX Live Chat for Your WordPress Website
Download the Plugin from WordPress
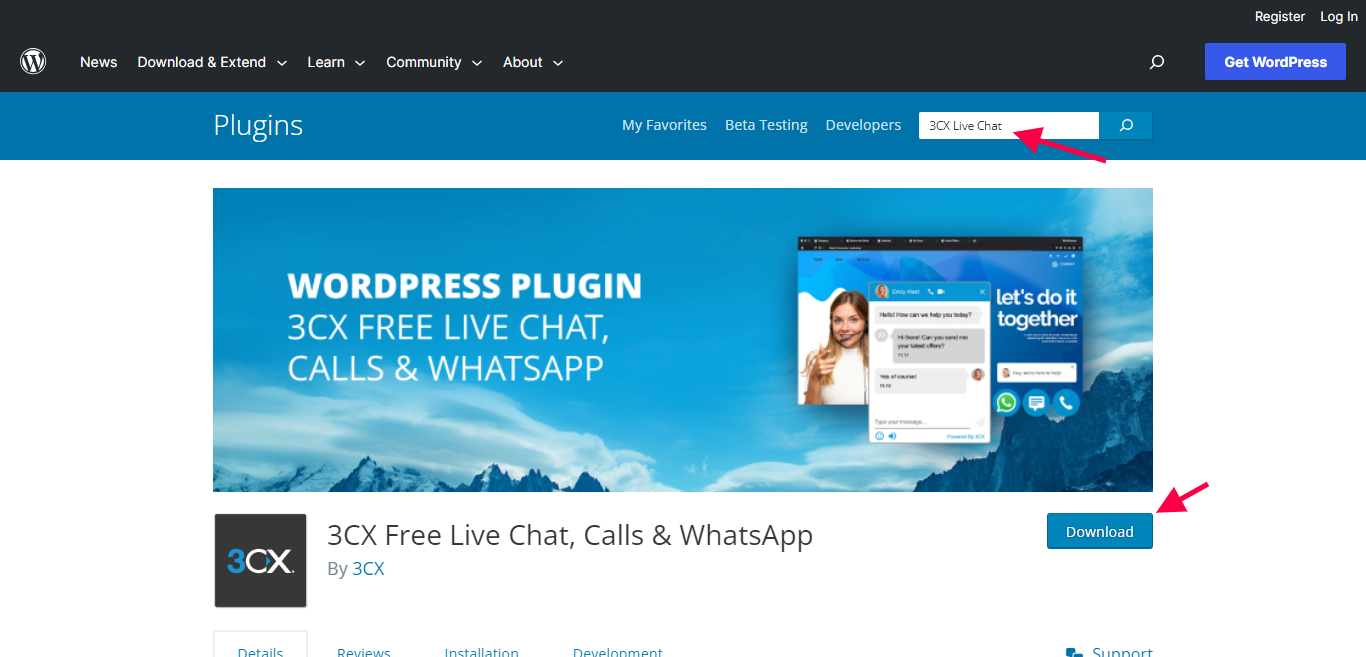
First things first, go to WordPress and search for 3CX Live Chat, once it appears as shown below, click the download icon. The plugin will be downloaded to your local drive.
Note: The installation of the 3CX plugin is relatively easy and it will take about 20 minutes if done right and as per the instructions.
Sign Up With Google
Once you run the setup of the downloaded plugin, you need to sign up with your existing Google account or an official email ID to begin installing and using the plugin for your WordPress website.
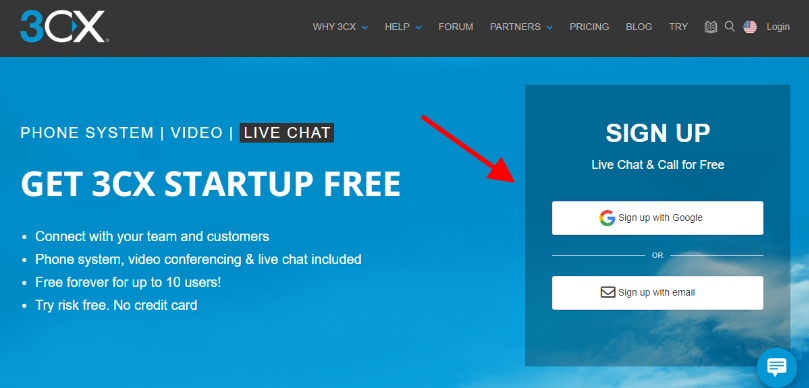
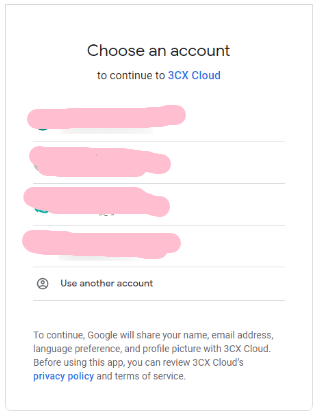
Click the “Sign up with Google” button and then choose your preferred Gmail account.
Complete Your Account Details
Next, you will need to fill in your details to finish setting up your account. The details will include your first and last name, company name, phone number, country, state/region, and your preferred language.
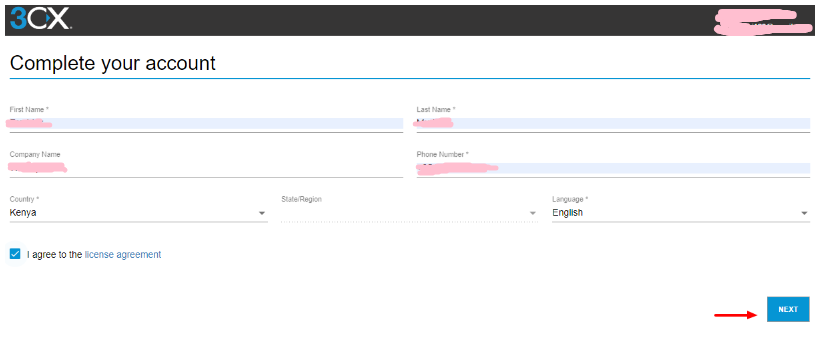
Once you fill in all the details, check the “I agree to the license agreement” option and click the “Next” button.
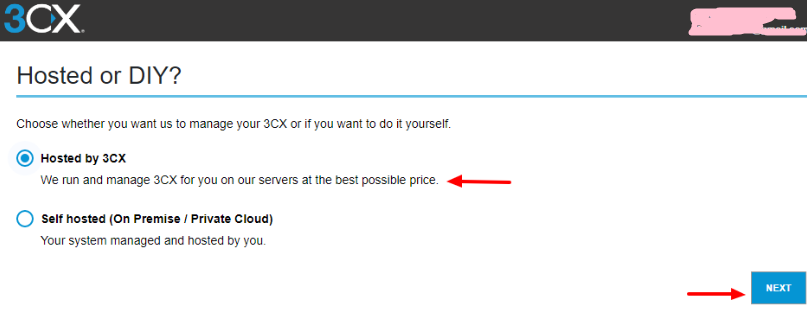
Choose the Hosting Option
In the next window, the 3CX Live Chat plugin will display the hosting options. Here, it is recommended that you choose the “Hosted by 3CX” option for ease of operation and effortless workflow. If you have a dedicated team working on the hosting aspects of your WordPress website, then you choose the second option, which is “Self-hosted”. However, it is ideal to go with 3CX-managed hosting!
Next, choose the number of users you want to host.
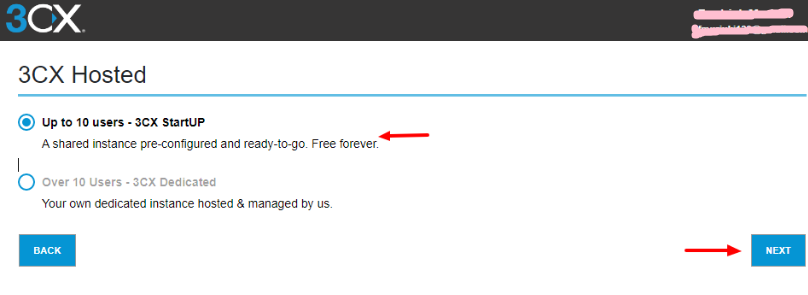
In this instance, I have opted for the “Up to 10 user – 3CX StartUP” option. However, based on your requirements and the magnitude of your business, you can select the “Over 10 Users – 3CX Dedicated” option. Click “Next”, once you’ve selected your desired option, and your plugin will almost be ready to use.
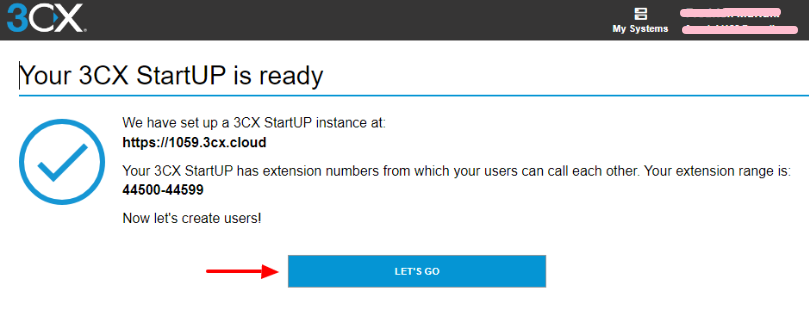
Create Users
In this step, you will need to add the details of each user. Based on the option you have chosen, you will need to add those many user details. These are the basic details, along with information about the “Role” of each user in the company.
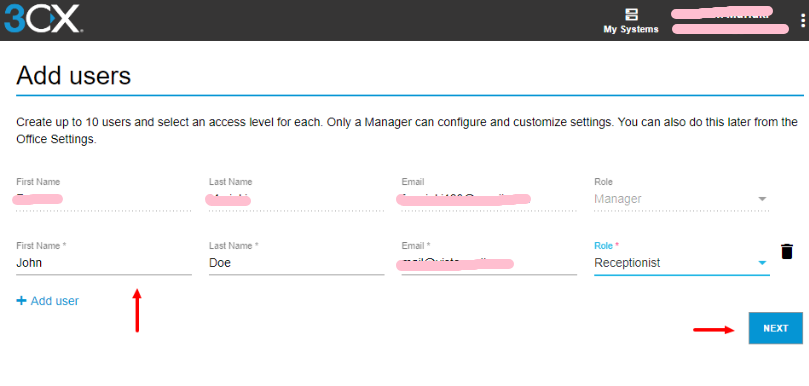
Note: Only the users whose role is set as “Manager” can manage the plugin and customize it as and when required.
Setup Live Chat
In this window, you will be setting up the Live Chat option. In order to set up the live chat of the 3CX plugin, click “Yes” for both the options presented, i.e., “Would you like to set up Live Chat for your business?” and “Do you have a WordPress website?”. Next, enter your website URL in the provided space, and then click “Set”
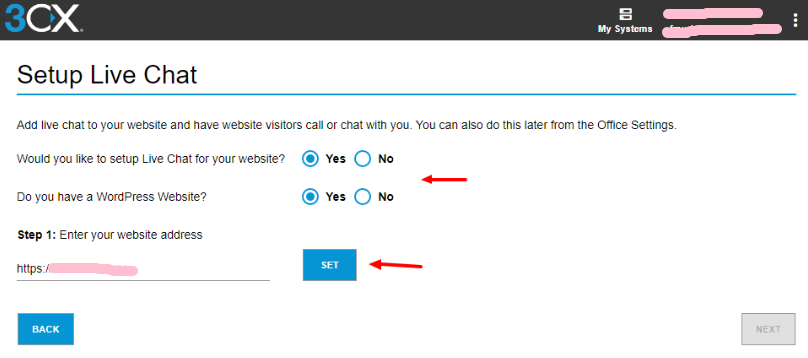
Upon clicking “Set” you will see a few options, including a unique link that must be added to your WordPress website.
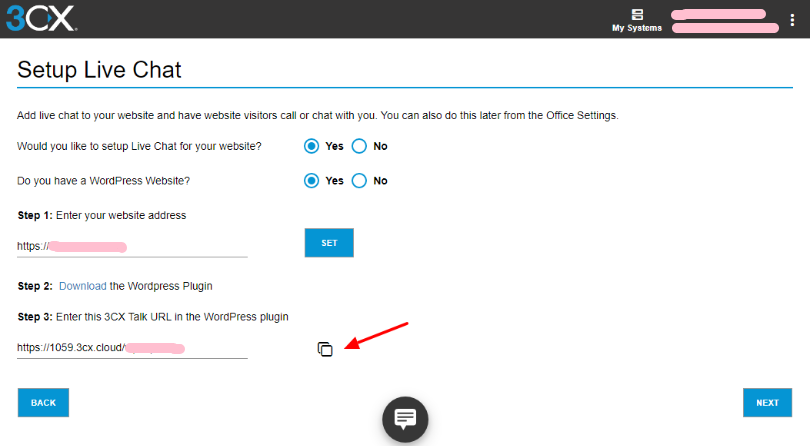
But before that, let us see how to install the 3CX Live Chat plugin on your WordPress website.
Installing 3CX Live Chat Plugin
Step 1
Login to your WordPress account > Dashboard >Plugins > Add New
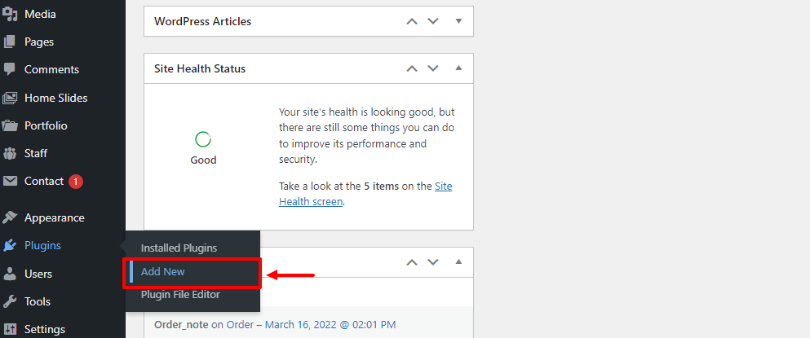
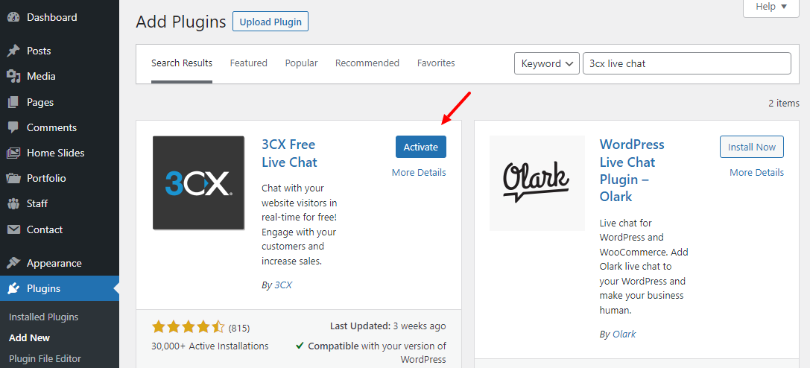
Step 2
Search for 3CX Live Chat in the search bar. Click “Install” and then “Activate”
Step 3
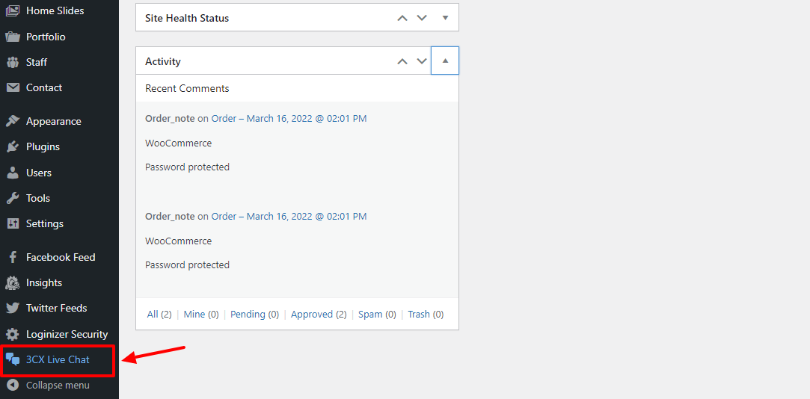
Once the plugin is activated, it will appear in the taskbar on the left side. Click “3CX Live Chat” as shown below.
Step 4
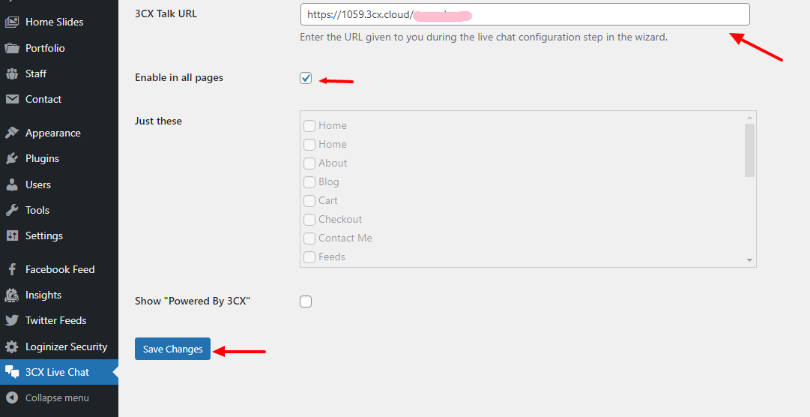
Once the plugin window opens up, paste the unique URL that was generated while setting up 3CX Live Chat in the space provided against “3CX Talk URL”, check the “Enable in all pages” box as illustrated, and then click “Save Changes”.
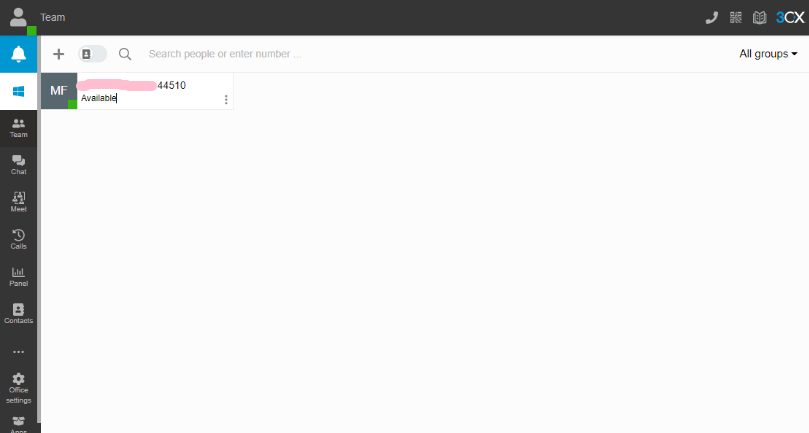
After you click “Save Changes” you will be redirected to the 3CX web client page with a successful setup message and asked to log in to the client page with your Google account, which you had initially selected to set up the plugin.

Step 6
Log in to your 3CX Live Chat web client page, and it will look like this.
Now, that’s how you can add the 3CX Live Chat to your WordPress website. If you are someone who prefers a tutorial video more than reading through an article, then don’t worry, I’ve got you covered. Here is a detailed video that explains the step-by-step procedure of the same.
Also, here is a manual exclusively for the purpose of setting up and customizing the 3CX Live Chat plugin.
Conclusion
Adding the 3CX Live Chat plugin is not as complicated as it may seem. Although there are plenty of live chat plugins available for WordPress websites, 3CX Live Chat is quite simple and easy to set up. Add live chat to your WordPress website and take your eCommerce business to the next level.


")
")
")