Last updated - November 10, 2023
The goal of business is to make, buy, and sell products. Products include both tangible objects and software. Having said that, a product needs to be effectively handled regardless of its type. Inventory management control enters the picture here. Additionally, an inventory manager for WordPress may be more efficient.
No time is better than now to launch or expand an online store, and WordPress makes it simple. With the help of plugins, any WordPress site can be transformed into an online storefront, regardless of your level of expertise in eCommerce.
In this article, we will take you through the step-by-step process of how you can set up an inventory management tool on your WordPress website to manage your inventory better and keep track of it.
Why Use WordPress for your Website?
About 34.5 percent of websites on the internet run on WordPress. Your website may expand and adapt in step with your company because of its free, open-source, and constant scalability. Although WordPress is the industry standard for blogging, it also rules in other sectors like eCommerce.
WordPress’s ability to let users of various skill levels create fully-functional online stores is what makes it so enticing. All of this is made possible through plugins, or little programs that can be uploaded to enhance and increase the functionality of any WordPress website.
There are a ton of WordPress plugins that can be downloaded for free. Others are available as paid (or premium) plugins, which come with more functionality, faster support, documentation, and updates. And there are plenty of plugins for inventory management as well and we will take a closer look at it.
Use Cases of WordPress Inventory Management Tools
With a product in stock, several different things can occur. It might become harmed, run out of date, or simply be out of season. Any of these scenarios may result in losses. The products’ locations must therefore be monitored at all times. You must be able to use WordPress Inventory Manager to its maximum potential in order to accomplish that. Here are a few of them:
Add Stock and Keep Track of Inventories
Knowing what products you have in stock and how many of each is crucial. That is simple to accomplish with the aid of a WordPress inventory management system. The system will contain all of the information about your products. Because of this, you can check your stock without taking a lot of time after a while. Inventories can also be expanded using stock.
Manage Everyday Transactions
You should record all of your daily transactions if you own a business. So, why not carry out that task using the inventory management system? Your daily transactions’ full details will be kept in the system. The inventory management plugin makes it simple to keep tabs on daily activities.
Categorize the Inventory and Add Products Accordingly
Numerous products are available for sale. As a result, you must monitor every product. With the aid of an inventory management system, you can make goods as well as categories for them. As a result, it will be simpler to keep track of every item.
Use Inventory Reports and Create Appropriate Plans
You will receive a complete report on your inventory, sales, and product purchases. In order to decide which things to buy and which to sell, you can use those reports. As a result, there will be fewer opportunities for the product to become faulty or outdated, and you will have gained ground.
How to Set Up an Inventory Management Tool?
In order to explain the process of setting up an inventory management tool we will use WP ERP Inventory Manager as an example.
Given the fact that installing WP ERP Inventory Manager is as easy and simple as installing any other WordPress plugin, let’s assume that you’ve already installed the plugin.
To use it after installation, go to WP Admin Dashboard > WP ERP > Accounting Inventory
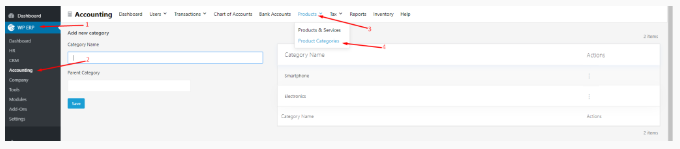
Create Product Categories
Go to WP Dashboard > WP ERP > Accounting > Product > Product Categories
You need to input both the name of the parent category and the name of the category you want to establish, or “Product Category,” before you can proceed. After providing all of the necessary information, select ‘Add New Category’ to establish the product category.
Add Products
Go to WP Dashboard > WP ERP > Accounting Products > Products & Services to add a product.
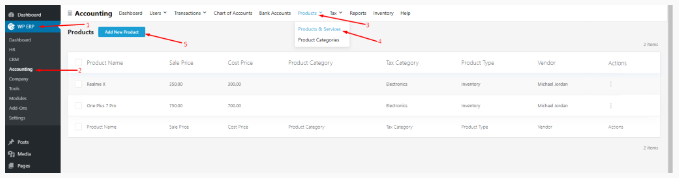
Click on Add New Product and you will get a pop-up page.
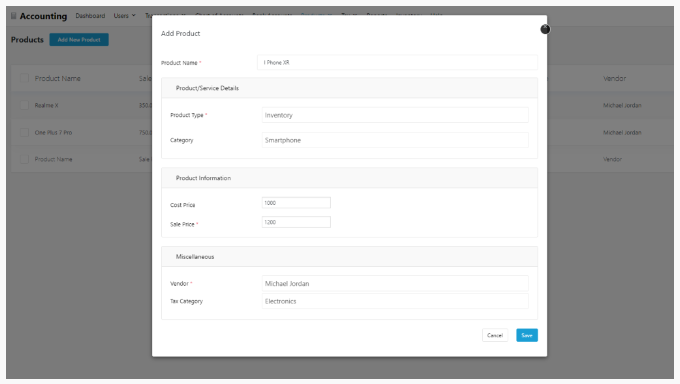
Next, include information about your product, such as its name, type, category, cost and sale prices, vendor, and tax classification.
And then click the Save Button to save the added product.
Add Stock to Inventories
Navigate to WP Dashboard > WP ERP > Accounting > Transactions > Purchases > New Transactions > Click on Create Purchase.
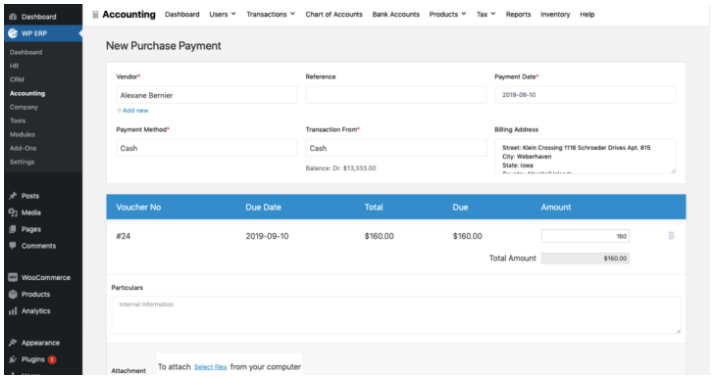
The billing address will be inserted automatically following the selection of a vendor. A reference number may be included if you so choose.
You must enter the number of goods you intend to stock in the Quantity area.
To make the payment for the purchase, go to WP Admin Dashboard > WP ERP > Accounting > Transactions > Purchase > New Transactions > Pay Purchase. Choose the supplier for whom the invoice was made and proceed with the payment.
To confirm that the items you bought have been added to stock go to WP Dashboard > WP ERP > Accounting > Inventory and simply check if your products have been added.
Get Transaction Reports
WP ERP inventory management reports allow you to access all transaction reports in one location. These reports will give you the proper information about your inventory, allowing you to make future plans.
In order to view reports navigate to WP Dashboard > WP ERP > Accounting > Reports, there you will get all the necessary reports on your inventory.
From the list, you can choose which reports to view.
Top WordPress Inventory Management Plugins
Z Inventory Manager
One-third of businesses, according to research, sold an item that wasn’t in stock. This problem is brought on by a lack of visibility in their workflow for inventory management. Customers must wait longer for products as a result, which can cost firms sales. The good news is that there is a way to stop these operating difficulties. You may better manage your business with the use of Z Inventory Manager. It streamlines the workflow between your accounting system, internet retail, and warehouse.
Rating: 5 ⭐
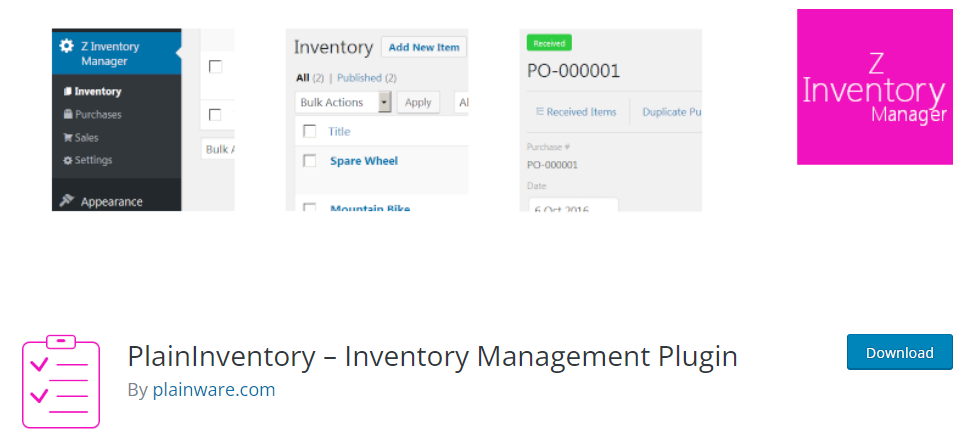
WP Inventory Manager
eCommerce retailers using a WordPress site may show inventory precisely how you want it with a simple drag-and-drop interface and completely customizable labeling. Regardless of whether you’re showing 5 or 5,000 items, the free edition gives you the essential tools you need. However, there are no restrictions on how many items you can store and organize.
Rating: 4.5 ⭐
WordPress ERP Inventory Module
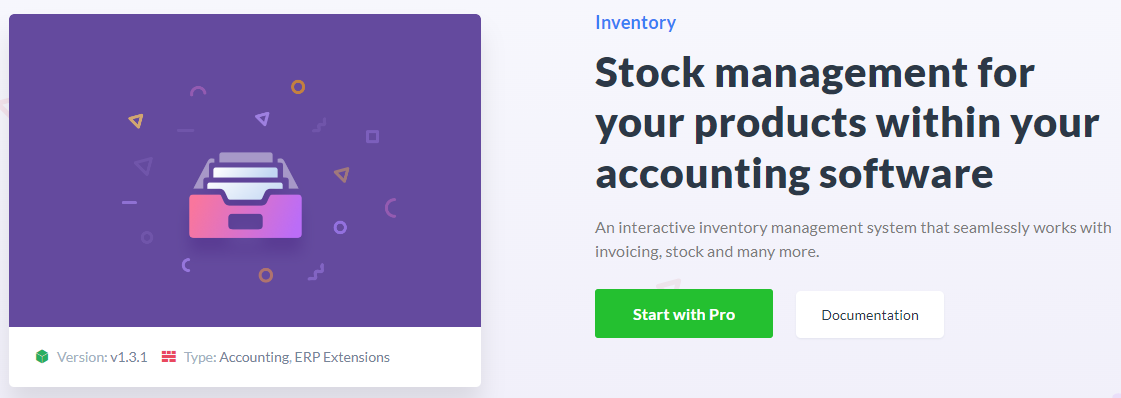
Your small business can save money by managing its inventory. It enables you to prevent unwanted food spoiling and other products with an expiration date. When you have an excess of a product on hand, you can also avoid paying exorbitant storage fees.
Your accounting software incorporates stock management using the WP ERP Inventory Module. You may see a summary of the item code, cost price, sale price, and the amount of stock left in one place where all of your products are kept. A built-in search function makes it simpler to sort through your products.
Rating: NA
Conclusion
Businesses must take all of their alternatives into account when managing their inventory. It is simple to stay on top of everything thanks to automated and real-time monitoring features. With this detailed tutorial on how to set up an inventory management tool on your WordPress website along with some of the best plugins, I am sure you can expedite the whole process of your business management.


")
")
")