")
Last updated - December 4, 2023
In today’s digital era, UPI payments have become an integral part of our daily lives. The convenience they offer is unmatched, making them a popular choice for both consumers and businesses alike. If you’re a WooCommerce store owner, integrating UPI payment gateways can significantly enhance the user experience and boost sales.
In this comprehensive guide, I’ll guide you through the simplest way to add a UPI Payment Gateway to your WooCommerce website. Let’s dive in!
What is a UPI Payment Gateway?
Unified Payments Interface (UPI) is a real-time payment system developed by the National Payments Corporation of India (NPCI) to facilitate instant money transfers between bank accounts through mobile devices. UPI has transformed the way people conduct digital transactions in India, providing a seamless and interoperable platform for sending and receiving money.
Key features and aspects of a UPI Payment Gateway include:
- Mobile-Centric Approach: UPI operates predominantly through mobile devices, allowing users to link multiple bank accounts to a single mobile application. This enhances the convenience and accessibility of digital transactions.
- Real-Time Transactions: One of the significant advantages of UPI is its ability to facilitate real-time transactions. Users can instantly transfer funds from their bank accounts 24/7, including weekends and holidays.
- Interoperability: UPI promotes interoperability, meaning users can send and receive money between different banks seamlessly. This interoperability has contributed to the widespread adoption of UPI across various financial institutions.
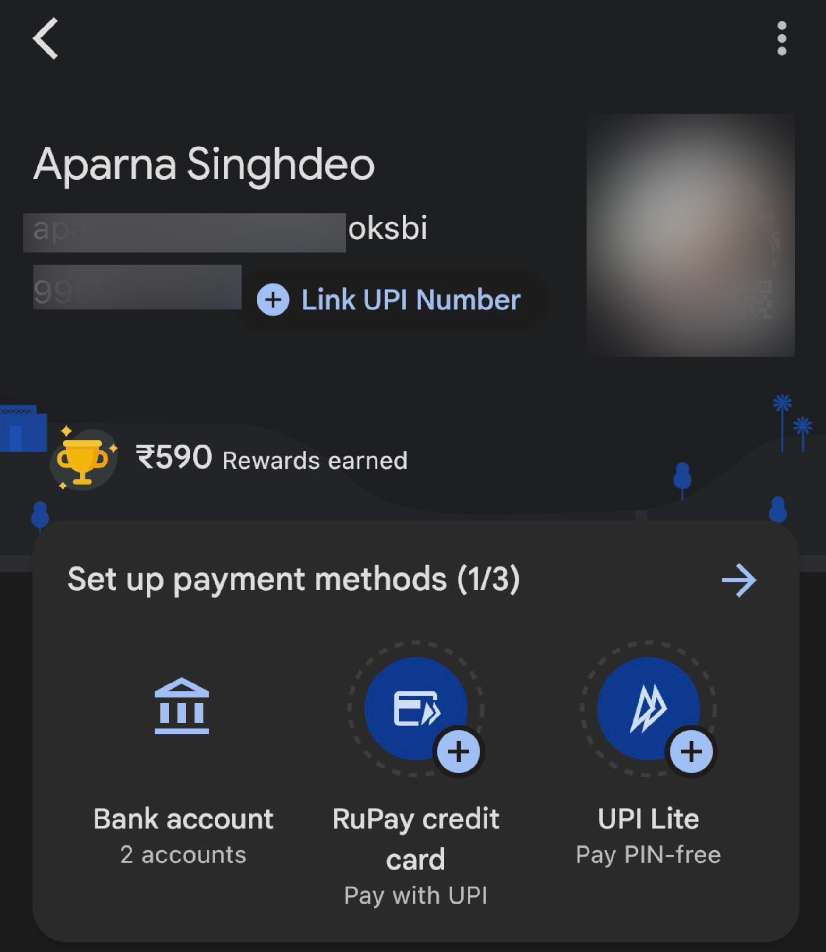
- Virtual Payment Address (VPA): Each UPI user is assigned a Virtual Payment Address (VPA), which acts as a unique identifier linked to their bank account. This VPA simplifies the process of sending and receiving money as users don’t need to remember complex bank details.
- Secure Authentication: UPI transactions are secured through two-factor authentication, ensuring the safety of financial information. Typically, this involves a combination of a unique Mobile Personal Identification Number (MPIN) and a one-time password (OTP).
- Bill Payments and Merchant Transactions: In addition to person-to-person transactions, UPI facilitates bill payments and merchant transactions. Users can make payments for utility bills, online purchases, and various services directly through the UPI platform.
- QR Code Payments: UPI transactions can be initiated by scanning QR codes. Merchants often display QR codes at their point of sale, allowing customers to make payments by scanning the code with their UPI-enabled mobile apps.
- Government-Backed Initiative: UPI is a government-backed initiative, with the NPCI playing a crucial role in its development and implementation. This lends credibility and trust to the platform, encouraging widespread adoption.
Popular Payment Gateways:
Payment gateways have gained popularity in India due to their user-friendly interfaces, widespread acceptance, and additional features. Here are some of the popular UPI payment gateways in India:
- Google Pay: Known for its simplicity and integration with various banks, Google Pay is widely used for UPI transactions. It offers a straightforward interface, and users can link multiple bank accounts to the app.
- PhonePe: PhonePe has gained popularity for its quick and hassle-free transactions. It offers a range of services beyond peer-to-peer payments, including bill payments, mobile recharges, and online shopping.
- Paytm: Paytm, initially known for mobile recharges, has expanded its services to include a comprehensive UPI payment gateway. Users can make payments, transfer money, and also utilize the platform for various other financial transactions.
- BHIM (Bharat Interface for Money): BHIM is the official UPI app developed by the National Payments Corporation of India (NPCI). It is designed to simplify UPI transactions and is known for its security features.
- Amazon Pay: Amazon Pay, integrated into the Amazon platform, allows users to make payments for their orders using UPI. It also supports a variety of other payment methods, providing a seamless checkout experience.
- PayUmoney: PayUmoney is a popular payment gateway that supports UPI transactions. It is widely used by merchants for online payments and has gained recognition for its reliability.
- Axis Pay: Axis Pay is the UPI app from Axis Bank, offering users the ability to send and receive money seamlessly. It also provides additional features such as bill payments and mobile recharges.
- ICICI Pockets: ICICI Pockets is the UPI app by ICICI Bank. It allows users to link their accounts and perform various UPI transactions along with other banking services.
Installing the ‘UPI QR Code Payment Gateway for WooCommerce’ Plugin
Assuming you already have WooCommerce installed and configured, let’s move on to the main steps. We’ll be using a user-friendly WordPress plugin called “UPI QR Code Payment Gateway for WooCommerce.” This plugin requires minimal settings and seamlessly integrates with your website.
Navigate to your WordPress Dashboard.
Go to Plugins → Add New → In the search bar, type ‘UPI,’ and you’ll find the “UPI QR Code Payment Gateway for WooCommerce” plugin.

Click ‘Install’ and then ‘Activate’ the plugin.
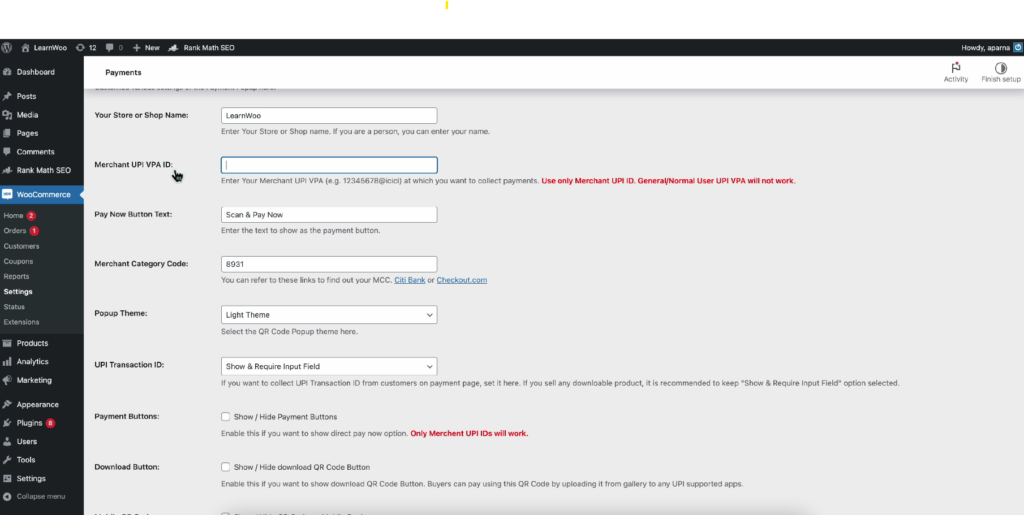
Configuring the Plugin Settings
Now that the plugin is installed, let’s configure the settings.
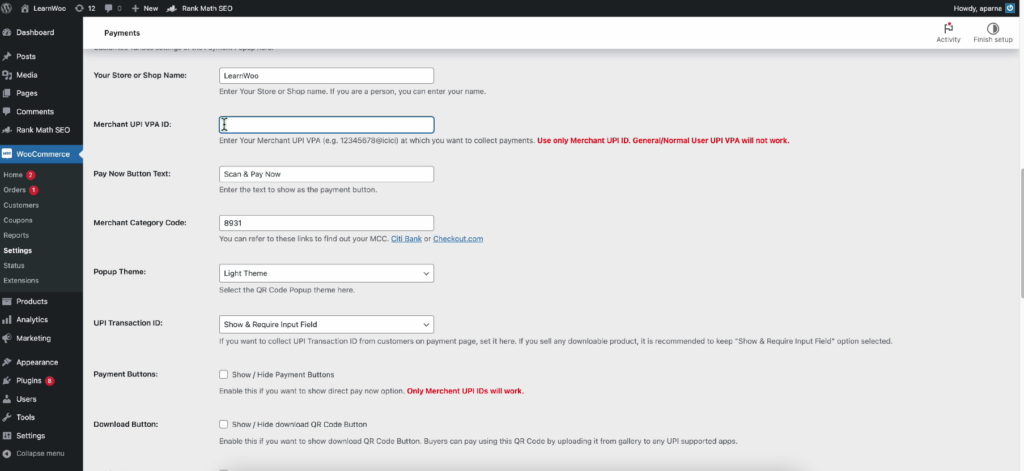
In the WordPress Dashboard, go to Plugins → Installed Plugins.
Find the newly installed UPI Payment Gateway plugin and click on ‘Settings.’

Scroll down to the ‘UPI VPA ID’ option and enter your UPI ID (PhonePe, Google Pay, etc.).
Getting Your UPI IDs
For the convenience of your customers, let’s explore how to obtain UPI IDs from popular payment gateways
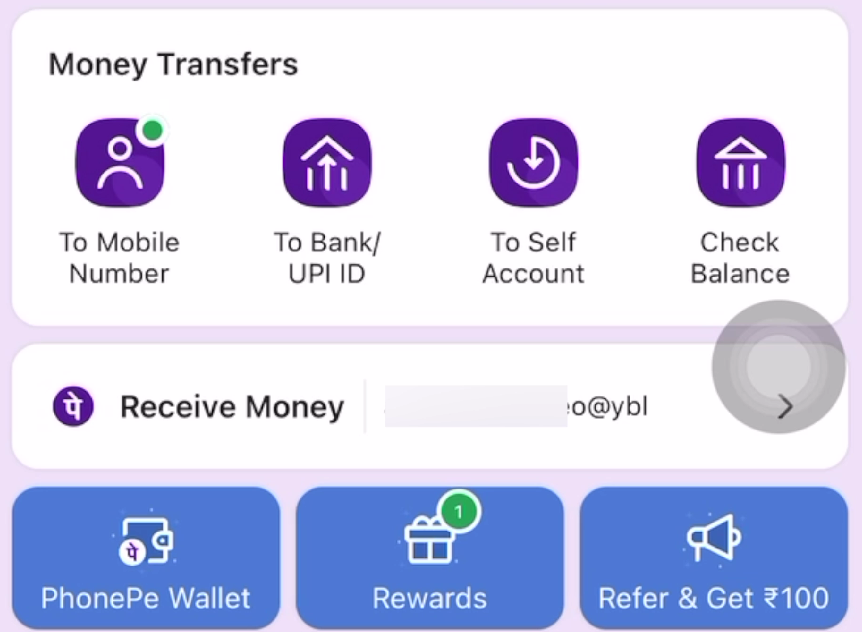
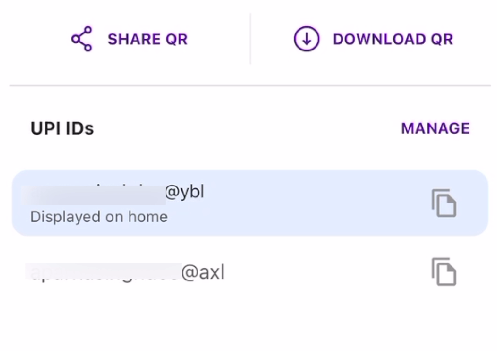
For PhonePe
Open your PhonePe app.
Your UPI ID will be displayed on the homepage or under your Profile.
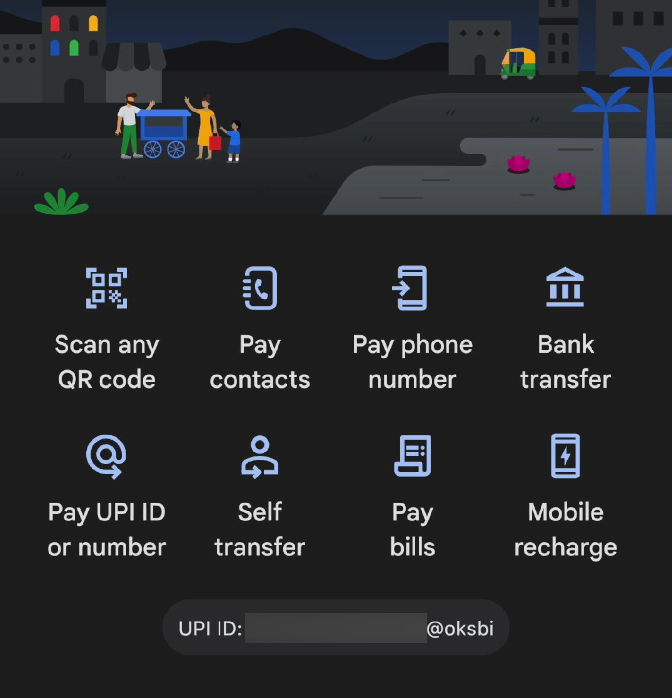
For Google Pay
Open your Google Pay account.
Find your UPI ID either on the main page or in your profile settings.
Copy the UPI ID and paste it in the respective field on the plugin’s settings page.
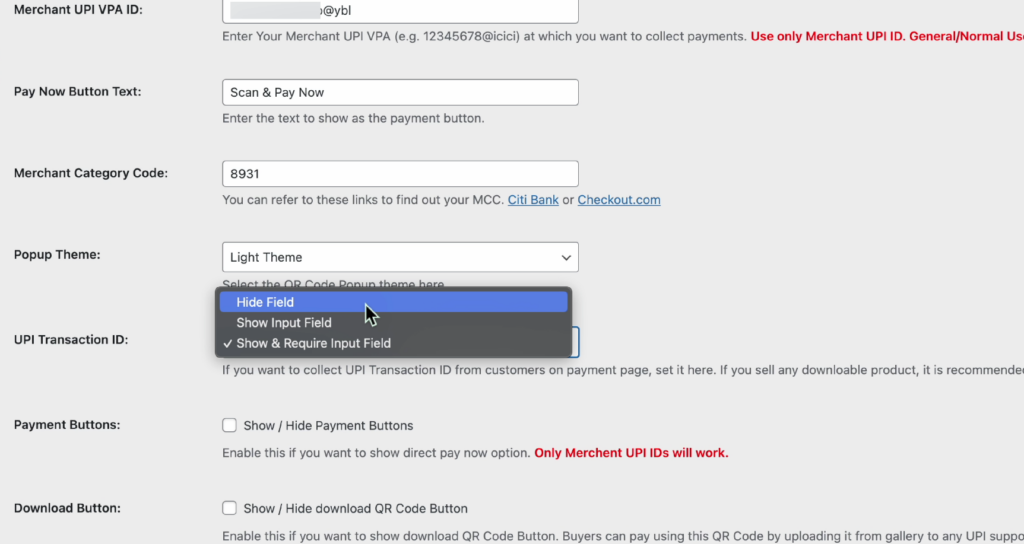
Additionally, choose ‘Hide it’ from the dropdown menu for the UPI Address option.
Once done, click ‘Save Changes.’
Testing UPI Payments on Your WooCommerce Site
Now that your plugin is configured, let’s ensure that the UPI payment option is successfully added to your WooCommerce site.
To check that, visit your shop page, now add products to the cart, and proceed to the checkout page.
On the checkout page, you’ll see the newly added UPI Payments option.
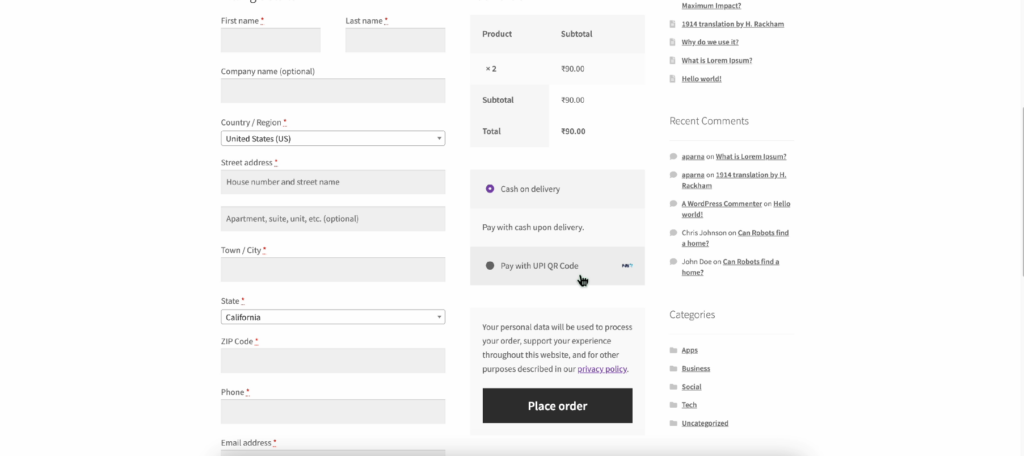
To complete the process, simply click on ‘UPI’ and proceed with the payment.
Conclusion
Congratulations! You’ve successfully integrated a UPI Payment Gateway into your WooCommerce store. By providing your customers with the flexibility to make UPI payments through popular platforms like PhonePe and Google Pay, you’ve not only enhanced the user experience but also potentially expanded your customer base.
Keeping in mind the dynamic nature of e-commerce, you must be up-to-date with payment trends for a sustaining and growing business. UPI payments, with their speed and ease, are a pivotal part of this evolution.
If you are someone who is more comfortable with video content, then here is a detailed video describing the simplest way to add a UPI Payment Gateway to your WooCommerce website.


")
")
")