
Last updated - January 11, 2024
If your WooCommerce store is based in the US and you are selling in USD, you can use the simple payment option called ‘WooCommerce Payments’. With this payment option, you will be able to securely accept payments through major credit cards. You can install the plugin for free, and there are no charges or setup fees. However, there will be a transaction fee applicable. This payment option is powered by Stripe, and it offers hassle-free subscription payments as well. In this article, we will describe how you can set up WooCommerce payments.
Please note: You will require an SSL certificate to be able to use this payment option.
Installing and getting started
You will find this plugin in the WooCommerce marketplace or the WordPress plugin repository. Install and activate the plugin just like you would for any other WordPress plugin.
If you need some help please check out our article on installing and setting up a WordPress WooCommerce plugin.
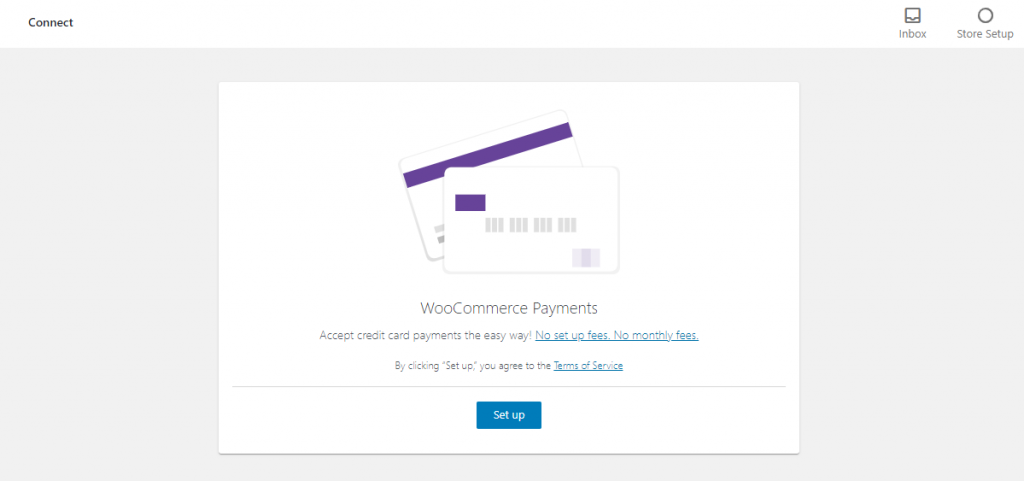
Once the plugin is activated, you can start with the setup of WooCommerce Payments. The plugin will add a section on the WordPress admin panel by the name ‘Payments’. The below screenshot displays the first window that you will encounter during the setting up process. Click the Set up button to get started.
Next, it will link with your WordPress.com account. You can also enter the username, email id and password to create a new account.

In the next step, you can verify your details with Stripe. You have to specify what type of entity your business is, and also a phone number and email id for verification.

Settings Page
Once the verification is complete, you will be able to access the plugin settings page. We will give a brief overview of the configuration here.

Enabling the payment mode and updating account details
Here you can enable and disable the payment mode as per your requirements.
Your account details will be stored in the Stripe database. You can easily access the account details through the link provided, and update them if required. Here you can update your company information, address, phone number, website, industry, ownership information, etc.
Account Status
In the next field, you can see the Account Status. This will be one of the following:
- Complete
- Enabled
- Restricted
- Rejected
If the account status is not ‘Complete’, there will be instructions on the next steps in order to complete it.
Here you will also see an option for ‘Payment’, which when enabled lets you accept payments on the Checkout page.
The ‘Deposits’ field indicates the schedule with which your account balance will be credited to your bank account.
Customer bank statement
The next field determines how your store name will be displayed in the customer’s credit card or debit card statement. By default, it used the url that you have specified while signing up for the account. However, you can add one here by following the requirements for statement descriptor.
Manual Capture
There is an option to enable manual capture of the payment while using this payment gateway. By default, this option will be disabled and you can charge the payment at checkout. However, if you enable this option, you will get an option to authorize the payment at checkout and capture it within 7 days. If the funds are not captured within 7 days, the order and the authorization will be cancelled.
Test mode and debug log
You can enable Test Mode for testing payments, disputes, or to check out any previous test transactions. Here, you need to use test credit card numbers, which will help you simulate transactions without a real order.
Debug log will help you gather information about any issues you may be facing while processing payments or managing the payment option itself. You can access the logs from WooCommerce > Status > Logs.
There are some basic aspects that you need to understand while setting up WooCommerce Payments. In the next section, we will look into these.
Different types of transactions
The following are some of the terms you will encounter while using this payment option.
- Deposit – This refers to the transfer of your account balance completely or partially to a bank account or debit card.
- Charge – When customers place orders, the payment will be charged against their credit or debit card.
- Refund – Refund indicates the return of charges against a customer’s card.
- Dispute – A payment dispute happens when a customer lodges a chargeback or inquiry with their credit card provider.
- Dispute Reversal – This refers to the return of fees and payment after a customer opens a dispute.
How to access deposits?
You an access deposits through Payments > Deposits. Here, you can view list of previous deposits, estimated deposit details and transactions associated with given deposits.

How to view information on transactions?
Information on all your transactions can be accessed from Payments > Transactions.
On this page, you can see the following details:
- A list of previous transactions.
- An option to sort the list by date, amount, fees and revenue.
- You can also filter the list based on date and type.
- Details of a specific transaction.
How to view and respond to disputes?
You can access the disputes section through Payments > Disputes.
Here you can:
- View list of disputes made on this payment option.
- View details and status of a specific dispute.
- Respond to a dispute when the status is ‘Needs response’ by choosing either ‘Accept the dispute’ or ‘Challenge the dispute’. For the latter, you will have to provide evidence as well.
How to refund a payment?
You can refund a payment by going to the specific order, and by clicking the Refund via WooCommerce payments button.
If you need more details on how to initiate a refund on your WooCommerce store, please check out the article – How to manage WooCommerce refunds.
How to manually capture charges?
In order to manually capture charges for an order, you need to visit the specific order details page, and click the Capture charge option from the ‘Order actions’ section.
Complete support for Subscriptions
WooCommerce Payments extension offers full support for subscriptions. It offers the following features that are relevant to subscriptions:
- Suspension, cancellation and reactivation of subscriptions.
- Multiple subscriptions
- Recurring total changes.
- Payment date changes
- Payment method changes for customer and store manager.
Transaction fees
The transaction fees for using this payment method starts from 2.9% + $0.30 for US-issued cards. But if you are looking for more reasonable rates – try accepting payments using Fondy. Here you will find a tariff of 1.3% + £0.20 for UK based and 1.3% + €0.25 for EU based.
Hopefully this article has provided you with a good understanding on WooCommerce payments and its setup process. Feel free to leave us a comment if you have a query.


")
")
")