")
Last updated - February 7, 2023
The most utilized eCommerce plugin for WordPress is WooCommerce. Although it functions effectively in its basic settings, modifying it will help your shop reach new heights. Making the purchasing process easier and more user-friendly is one of the most effective strategies to attract new clients.
It’s critical to consider customizations that will assist in differentiating your online store from competitors if you already operate one or are considering opening one. The little details are what will draw attention to your shop. So let’s look at a straightforward customization method for WooCommerce that will set you apart from other online stores.
WooCommerce is an excellent WordPress store builder, and adjustments are not too difficult. Customizing the WooCommerce button text is an easy tweak that will improve your shop’s performance.
This will offer your shop a more distinctive appearance and feel, and it will enable you to modify the wording for a more recognizable and personable appearance. This is but one kind of plugin that may contribute to increased sales.
ELEX WooCommerce Catalog Mode, Wholesale & Role Based Pricing
The ELEX WooCommerce Catalog Mode, Wholesale & Role Based Pricing by ELEXtensions is a profound plugin that can be used to easily and quickly customize the WooCommerce buttons.
The plugin provides three options to customize the WooCommerce buttons and below is the step-by-step procedure using each option.
Catalog Mode
To edit the WooCommerce buttons using the Catalog Mode.
Go to WooCommerce Dashboard > ELEX WooCommerce Catalog Mode, Wholesale & Role Based Pricing > Settings > Catalog Mode
On the Catalog Mode page, you can choose to remove the Add to Cart button by checking the Enable box adjacent to the Remove Add to Cart option and selecting the respective page [Shop Page / Product Page] on which you want the changes to appear.

On removing the Add to Cart button you can add your custom text in the place of the Add to Cart button.
You can do this by adding the custom text, in this case, ‘Enquire’, in the text box next to the Placeholder Text option as shown below.
Again this change will appear for the entire page you have selected.
After removing the Add to Cart button and replacing it with custom text, you can enable the custom text to redirect to a website of your choice.
Go to the Catalog Mode page and copy paste the website URL in the text box provided against the Change Button URL option and save the changes.

As with other customization options, this change will also reflect on all the products of the entire Product or Shop page based on your choice.
Role-based Settings
Unlike the Catalog Mode, in the Role-based Settings, you can choose to customize the Add to Cart button based on the specific user roles.
Go to WooCommerce Dashboard > ELEX WooCommerce Catalog Mode, Wholesale & Role Based Pricing > Settings > Role-based Pricing
You can choose to remove the Add to Cart button for a specific kind of user by choosing the designated user role from the dropdown list adjacent to the Remove Add to Cart option.
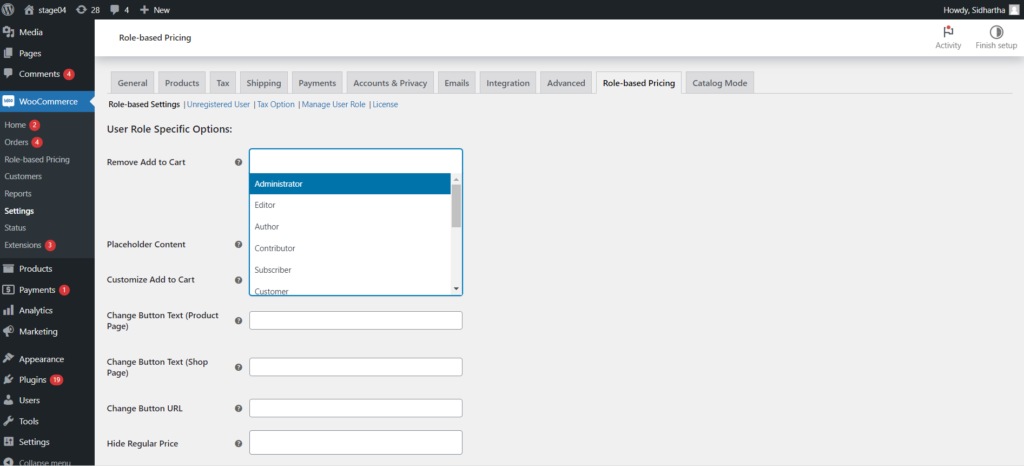
Just as with Catalog Mode, you can choose the page on which you do not want the Add to Cart button to appear for specific users. You can select either Shop Page or Product Page or you can choose both as shown below.

Once you’ve removed the Add to Cart button for specific users based on their user roles, you can replace it with custom text as in Catalog Mode by typing the content in the text box provided for the Placeholder Content option.

Next, you can also customize the Add to Cart button based on user roles and for a specific page of choice. You can customize the text of the Add to Cart button and not the font, color, font size, etc.

Redirecting users based on their roles to your or a third-party website is made easy with this plugin. First, choose the user role in the Customize Add to Cart option and then paste the URL in the text box provided in the Change Button URL option and save the changes.

Product-based Settings
In this setting, you can remove and customize the Add to Cart button based on the products. For instance, if a particular product is unavailable, only a few stocks are available, or if a product’s price is under revision then you can customize the Add to Cart button of that product alone.
Go to WooCommerce Dashboard > ELEX WooCommerce Catalog Mode, Wholesale & Role Based Pricing > Products
On this page, you can customize the Add to Cart button as with the other two options described above, but by selecting the product from the list.
Once you save the changes the customization carried out will appear only for that specific product.

The WooCommerce Customizer plugin is perfect for this situation, as it offers a ton of features and flexibility. You can quickly modify the WooCommerce button wording with this WordPress plugin without having to update any layouts or create any code.

You may also make more adjustments to your shop with the WooCommerce Customizer plugin if that’s something you’re interested in. However, the focus of this guide will be on how to easily alter the WooCommerce button wording in various locations around your store.
There is a ton of capability in the customizer for changing button wording. A few of these are:
- Text on Cart Button.
- Text on a sales button.
- Items Displayed on Page.
- Text on the checkout page.
- Button Text on the Login and Coupon Pages.
- Text on Tax Labels.
- Text on the image placeholder.
Now let’s move on to understanding the installation and setting up WooCommerce Customizer
Installing and Activating the Plugin
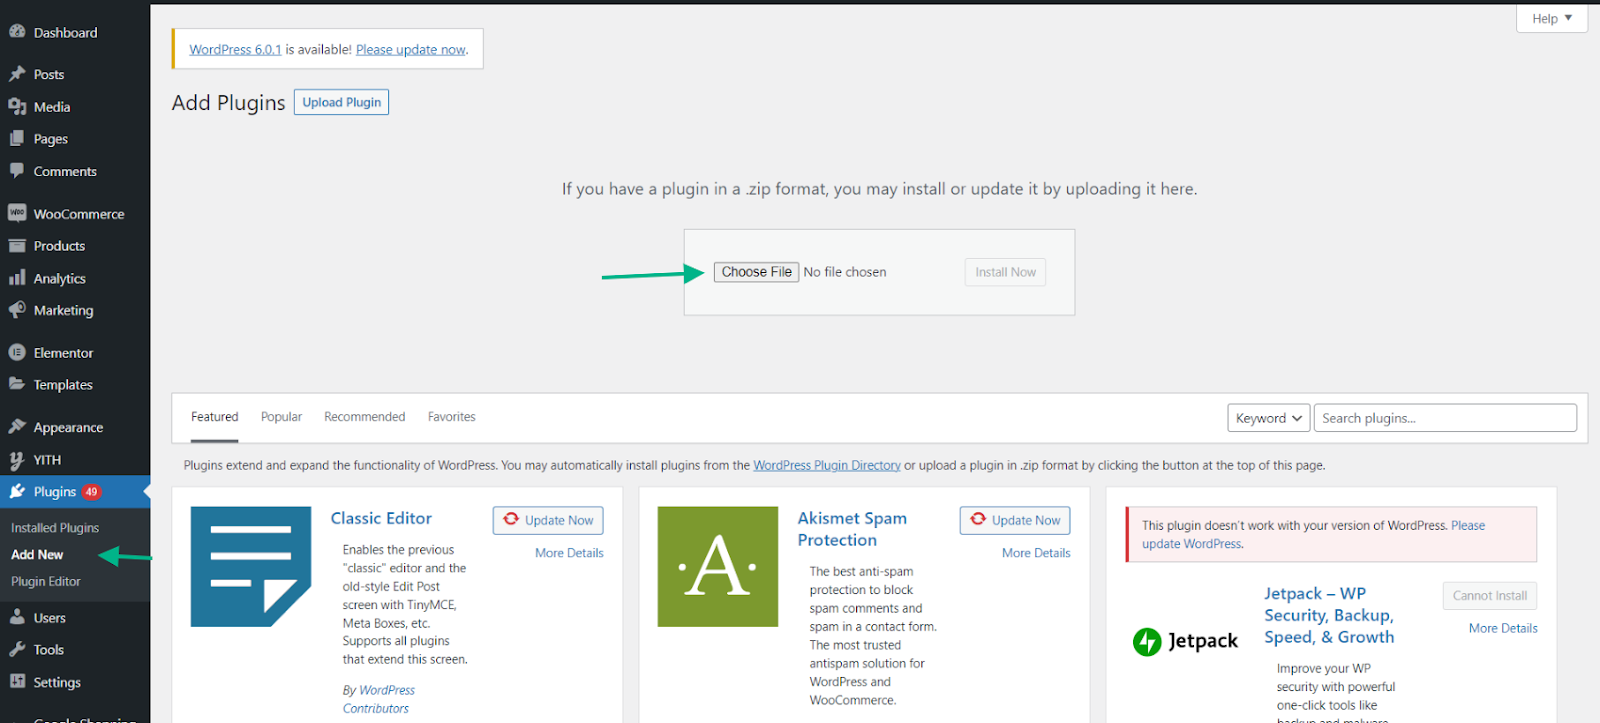
The first step to customizing the WooCommerce button text is installing and activating the customizer plugin, which can be easily done from the plugins page on the WordPress admin dashboard.
In order to do so, go to Dashboard > Plugins > Add New > Upload plugin. Once the plugin is installed, click Activate Plugin.
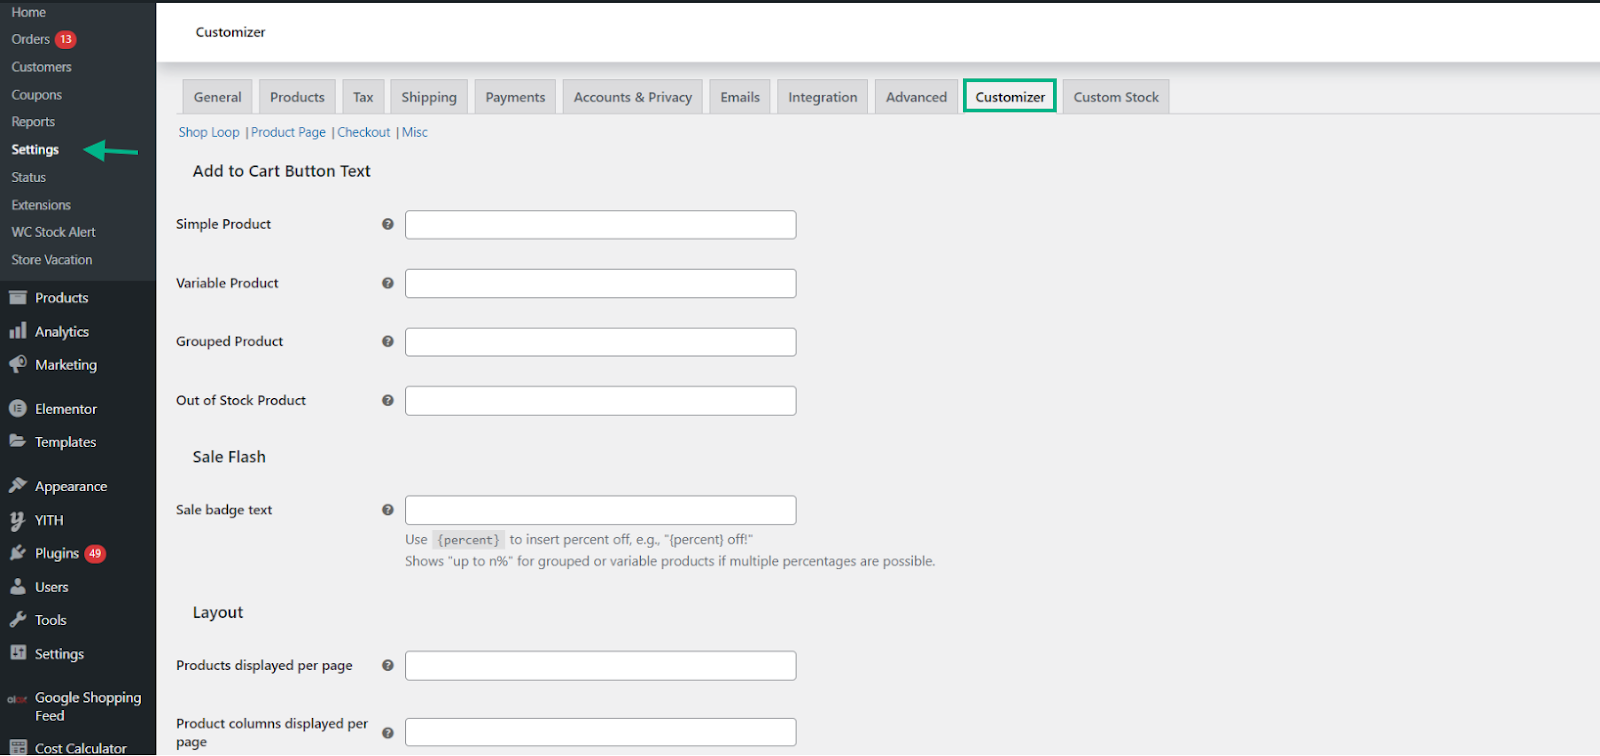
In order to access the plugin, go to Dashboard > WooCommerce > Settings. This is where the “Customizer” tab would be visible, which is auto-added to the page.
The next step is to customize your button by tweaking the plugin functions.
Customizing WooCommerce Button Text
The “Button Text” can be customized the way you want it by clicking on any of the four sub-links available under the Customizer tab. These four sub-links include:
- Shop Loop
- Product Page
- Checkout
- Misc

Let’s explain here how these sub-links work.
- Shop Loop
Adding text and configuring buttons for all the “Add to Cart” button text becomes easy with the “Shop Loop” link. These include:
- Simple Product
- Variable Product
- Grouped Product
- Out of-Stock Product
Details can be filled out under these buttons based on the label text you would like displayed in these areas.
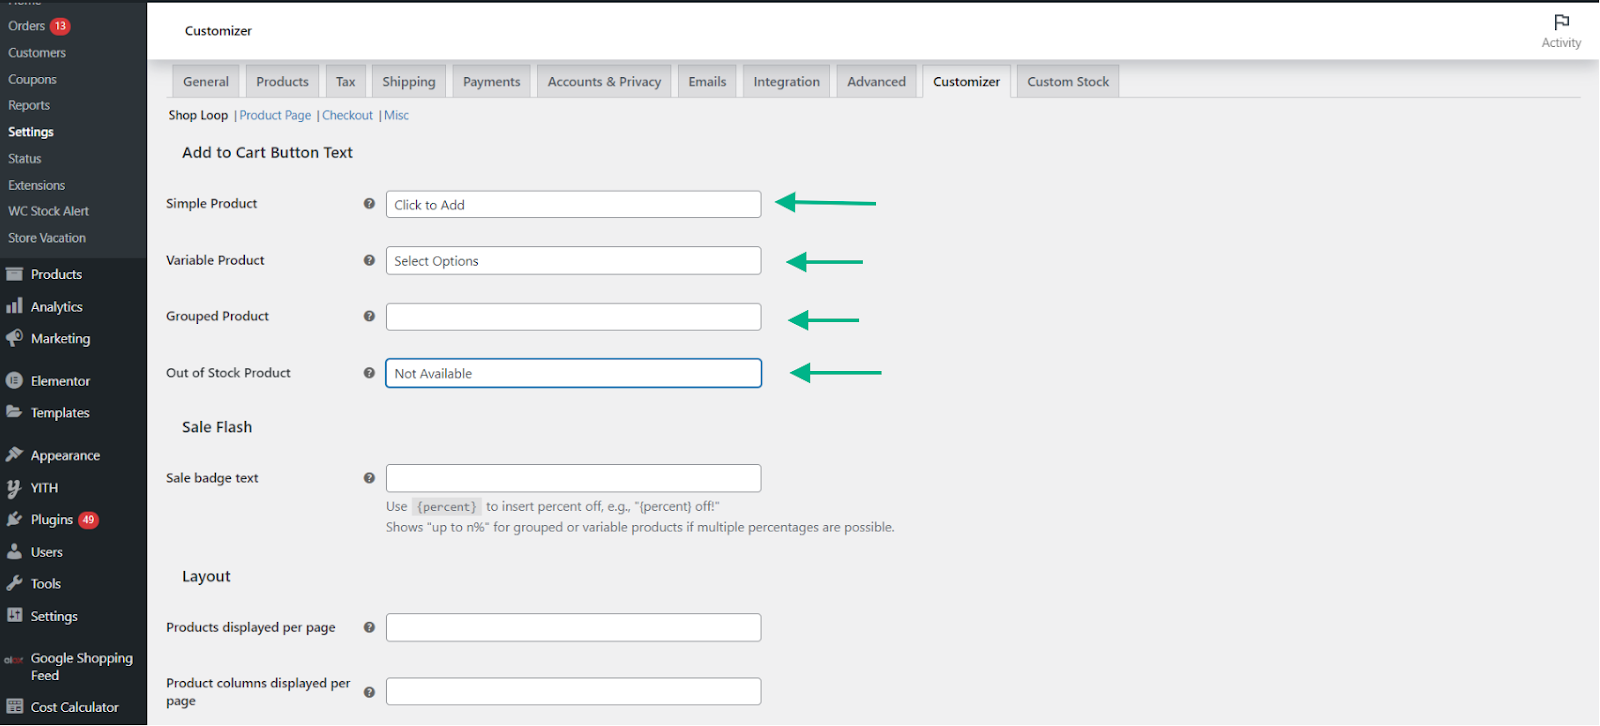
Once you are done making changes, click Save Changes.
PS: The remaining functions such as sale flash and layout are not necessary to customize button text and will be covered in another post.
Next, you have the option of checking out some product page layout options.
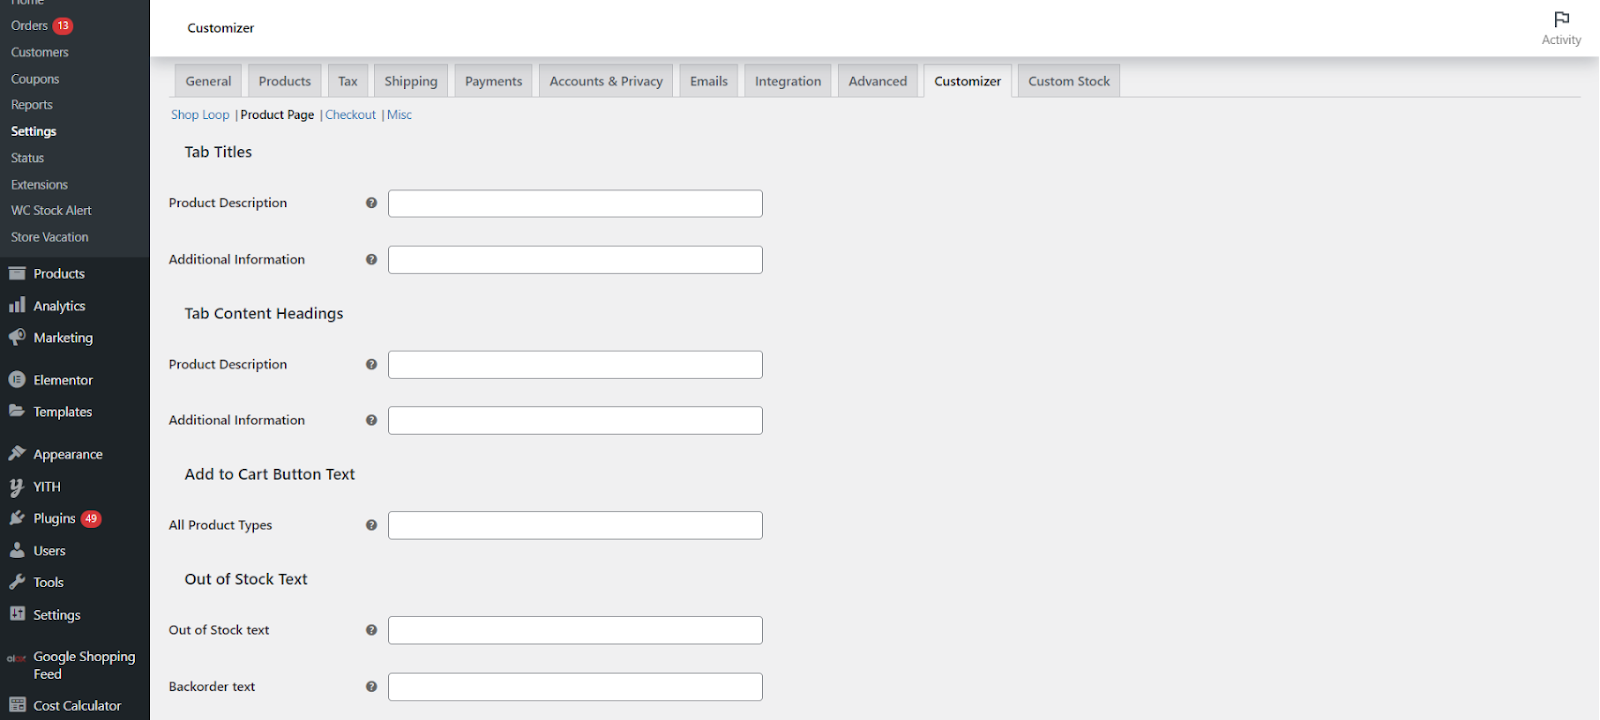
- Product Page
The “Product Page” link is where, as the name states, product page button texts can be configured. These include:
- Tab Titles
- Tab Content Headings
- Add to Cart Text
- Out of Stock Text
- Sales Flash Text
Details under these custom buttons can be filled out as per what suits you.
- Checkout
Next in the sub-links in the “Checkout” link. Login and coupon text, along with other buttons and labels, can be easily changed under this link. Fill in with details that you would want to.

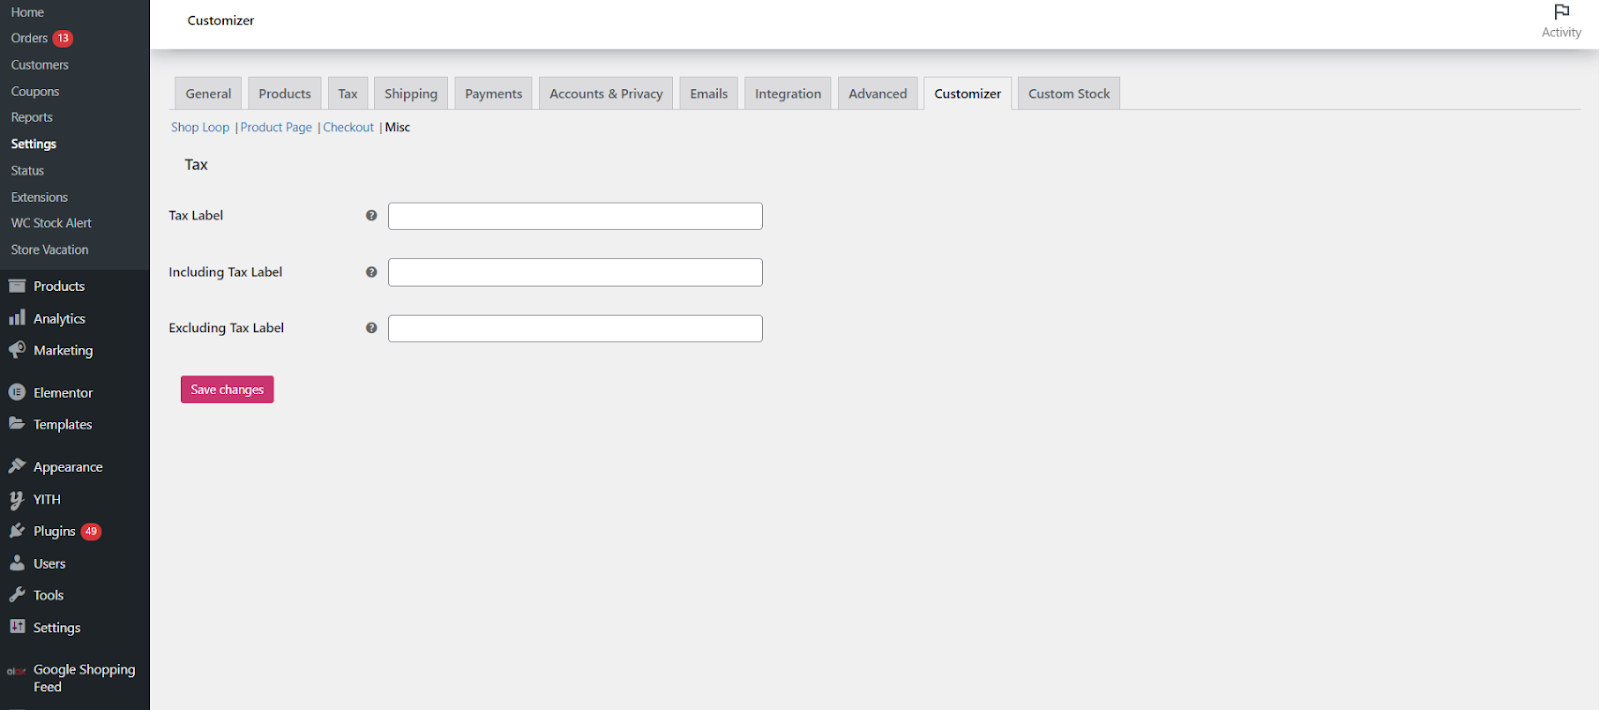
- Misc
The last sub-link is the “Misc” link, where text labels for sales tax can be customized and configured to suit your requirement; you can also customize text labels for product images. Do not forget to save changes once the text labels are customized.
You are now all set and on the way to having a live store running on the front-end of your website, with all the customized buttons live.
Since, we have gone through the process of customizing buttons using a plugin. Let us go through customizing the buttons using the in-built WordPress Block editor.
WordPress Buttons Block
Navigate to the post or page where you want to place the button before adding it to your WordPress content. Next, pick the Buttons option by clicking on the Add block icon (+), then typing “buttons” into the text field.
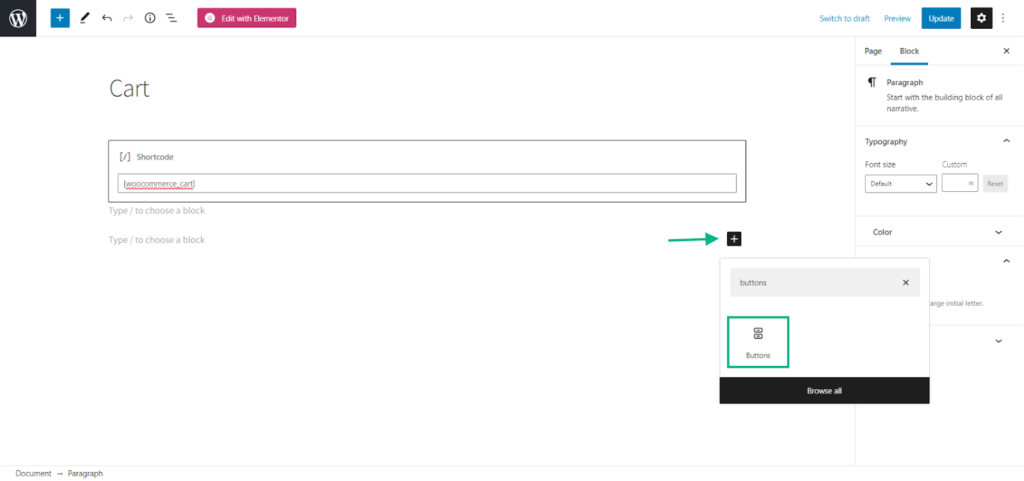
By entering “/buttons” into the text editor and pressing the Enter key on your keyboard, you can also add the Buttons block. After placing the block, a new toolbar menu will become available.
Every WordPress block comes with a unique collection of settings and controls. There are several choices for connecting, aligning, and decorating buttons when they are added.
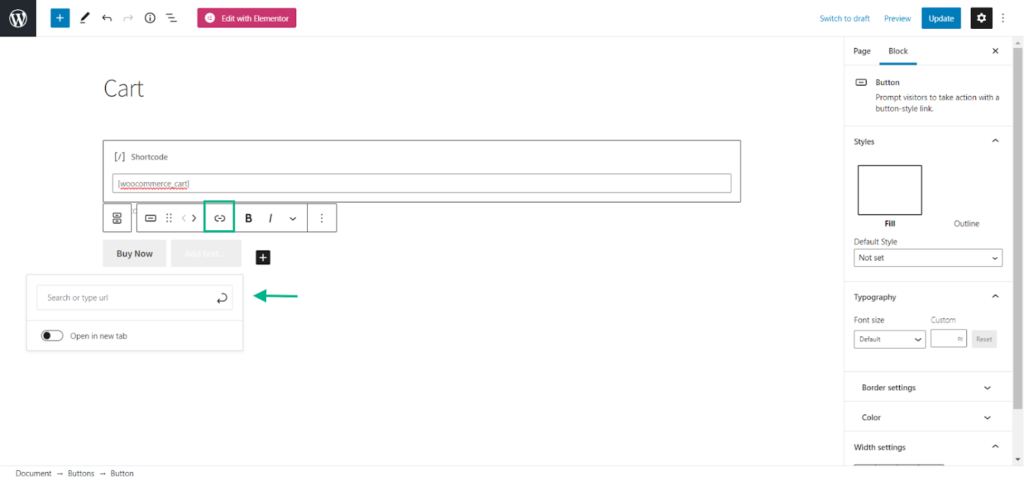
Button Text and Links
Create a button, then click on it to enter some text. You may utilize the pop-up toolbar in Gutenberg’s text-based blocks to bold, italicize, highlight, and use other formatting choices. Additionally, you may adjust the justification and orientation of your button inside the layout.
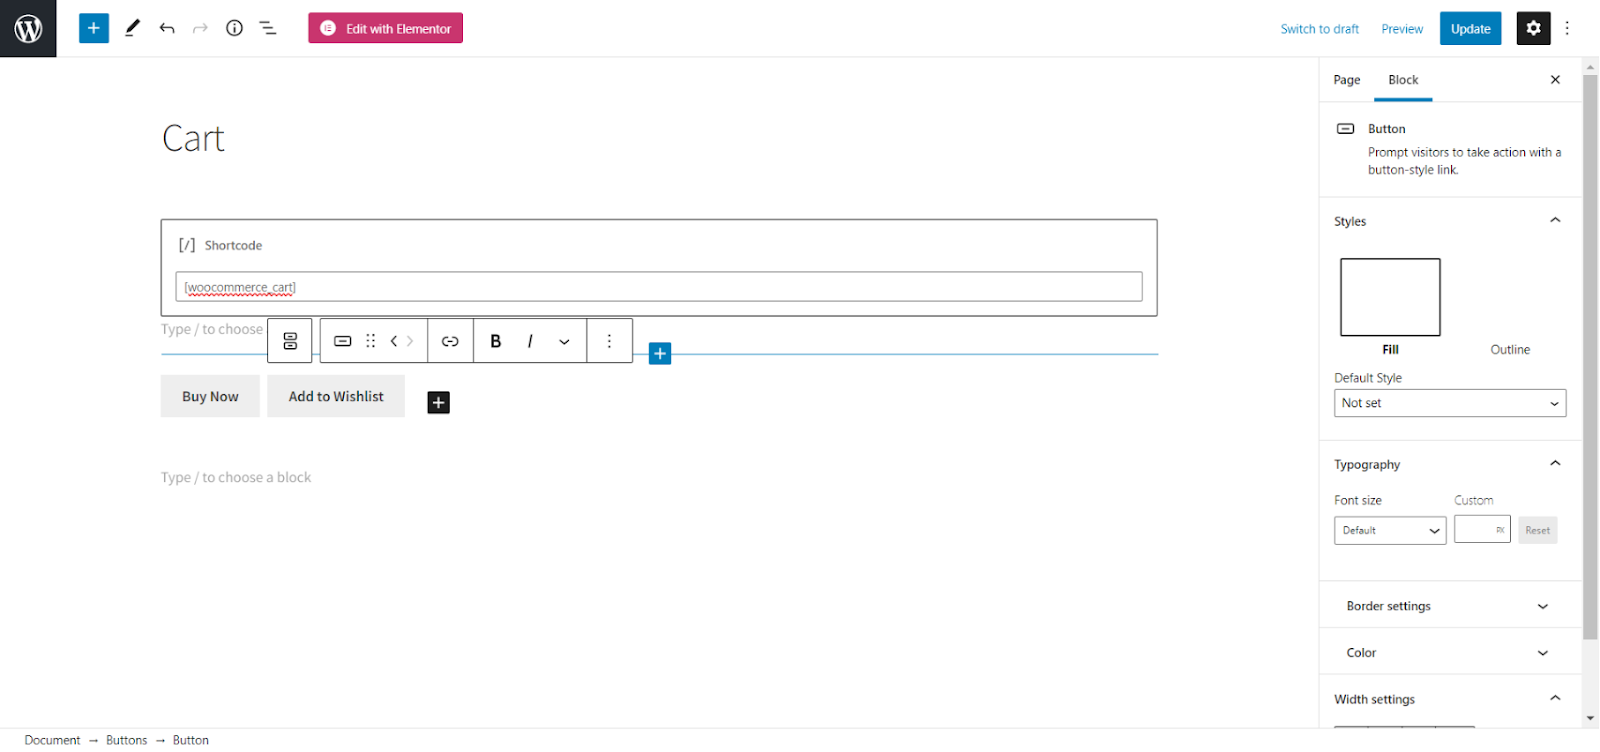
Click on the chain symbol in the toolbar to link the button to a specific URL.
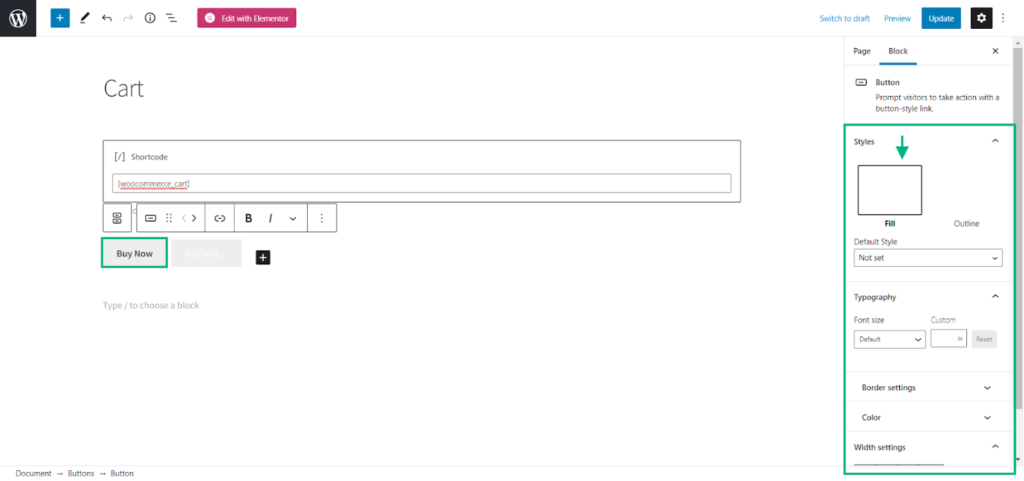
Button Style and Color
The style, typeface, and color choices for your button come next in the customization process. Use the controls in the sidebar menu of the block to complete all of these tasks.
You may choose between the two styles, Fill and Outline. In contrast to Outline, which offers a transparent button with an optional colored border, Fill turns the button into a solid color. Select your preferred appearance from the Default Style drop-down menu or by clicking the icon with the preview.
The font size for the text on your button may then be selected under the Typography section.
Extra small to Gigantic are two extreme end choices. Another option is to enter a custom size.
Changes to text and button colors are available under the Color panel. You have the opportunity to select a custom hue for either or pick from the list of offered possibilities.
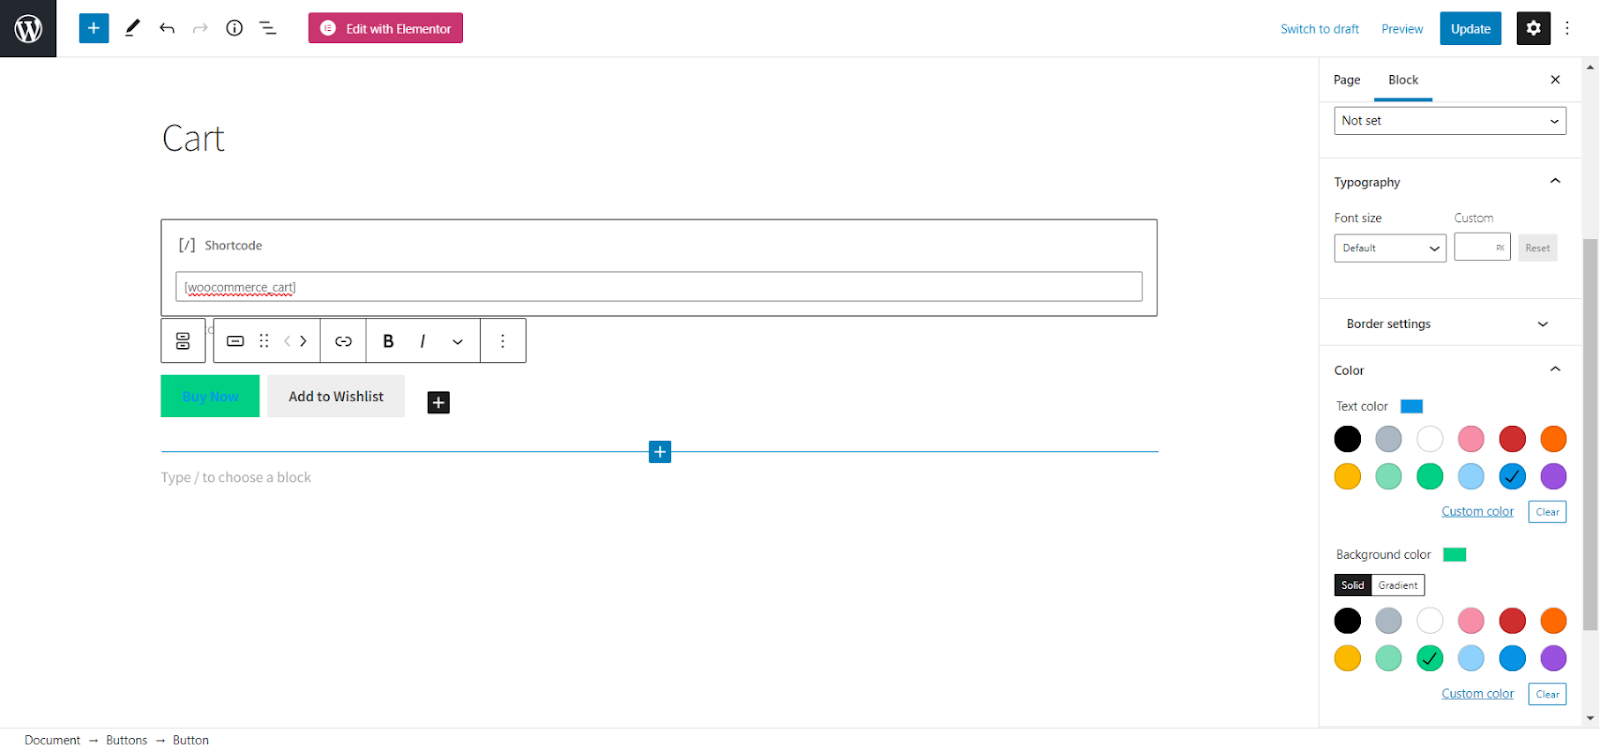
Keep in mind that you have the option of choosing a Solid or Gradient background color.
Once you are done customizing the block to your preference, click Save Draft to make future changes, and then click Publish or Update.
Additional Plugins for Button Customization on WooCommerce
Here are some examples of some popular custom button plugins for WooCommerce.
Button Customizer for WooCommerce
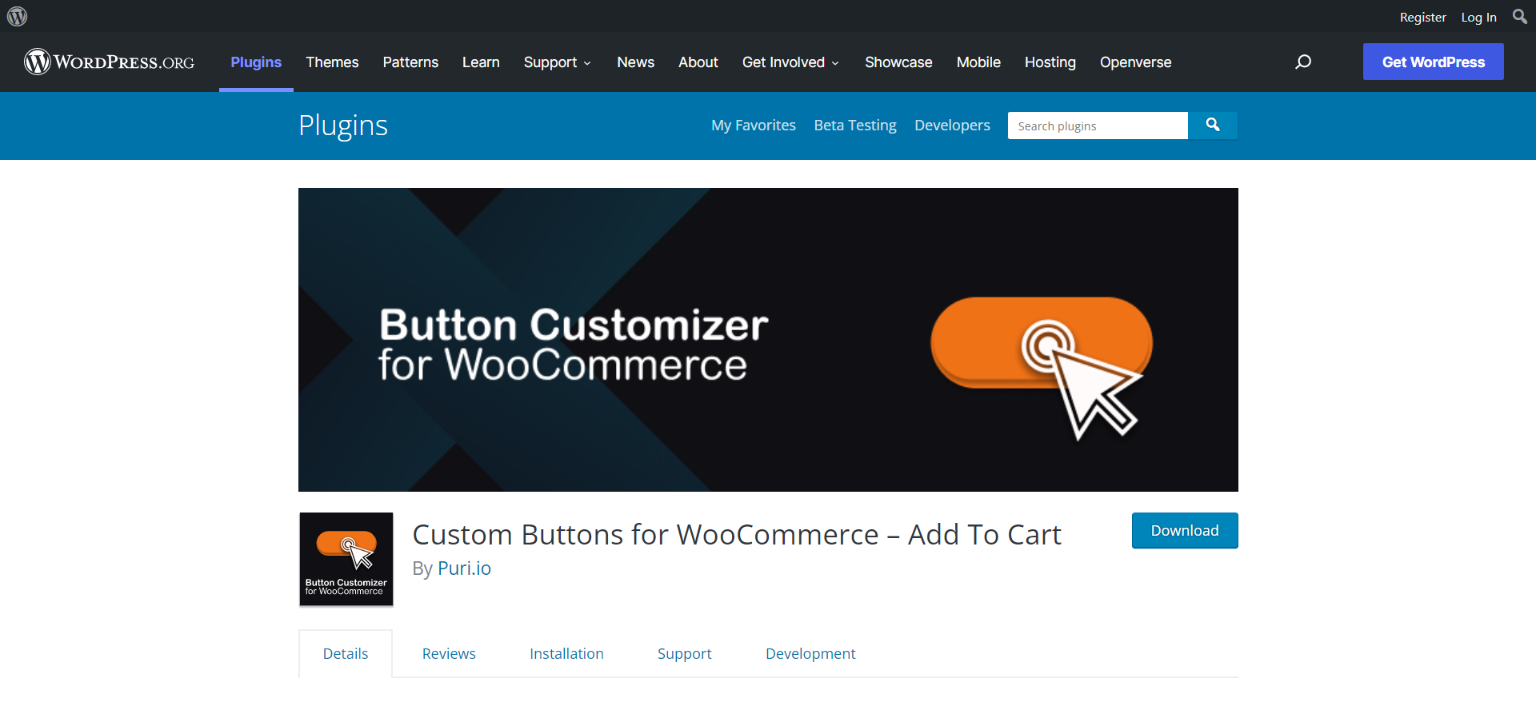
Button Customizer for WooCommerce enables the easy creation of custom buttons for every product type. The button text on WooCommerce product loops can be changed easily for both shop and archive pages and single product pages.
Key Features:
- WooCommerce version 6.6+ and WordPress 6.0 ready.
- It is ideal for custom adding to cart buttons for all WooCommerce product types.
- It is easy to customize WooCommerce “Add to Cart” button text.
- It is suitable for shop pages, archives, and even single product pages.
- It enables fallback text for custom or unspecified product types.
- It is just about 13Kb when zipped, making it a lightweight plugin.
Site Origin CSS

If you are looking for a powerful CSS editor for your WordPress, then SiteOrigin CSS is the one for you. This simple editor gives you the visual control to edit the look and feel of your site in real-time. It is a great tool that can be used by both beginners and advanced users, with the same ease, wherein beginners get to control and preview the site in real-time and advanced users get to write CSS faster with the help of the code auto-completion feature.
Key Features:
- SiteOrigin CSS’s inspector helps find the correct selector easily and just gives you a comfortable editing experience, for both a novice and an advanced user. All you need to do is click on the element that can identify the best selector.
- The Visual Editor of SiteOrigin CSS enables easy selection of colors, styles, and measurements. Making changes is just a few clicks away with the help of this feature coupled with the inspector.
- The powerful CSS editor of SiteOrigin CSS enables autocompletion for both CSS selectors and attributes, along with a CSS linting that helps identify issues in the code.
- This editor is free and does not require licensing, thus making it possible to be installed on as many sites as you like. In fact, all and any future updates would be free, making it one of the most opted editors.
- It comes with free customer support on its support forums.
- It works with all WordPress themes.
- The editor is constantly developed.
Ultimate Custom Add to Cart Button for WooCommerce
The Ultimate Custom Add to Cart Button for WooCommerce enables you to easily customize the Add to Cart button on your WooCommerce store, thus propelling your sales.
The reason this customizer is useful for your store is that a wee bit of customization of the Add to Cart button can take your sales to the next level.
Key Features:
- It enables customization of the button text on simple, variable, and grouped products.
- You can easily change the button’s background color.
- The button’s border-radius can be easily customized
- The style of the quantity box can be completely changed, while the arrows on the number input can be removed, and the plus and minus buttons to the left and right of the quantity input box can be easily added.
- Can change the hover background color of the button.
- Can customize the button’s width, height, etc.
- Cart icons can be added to your Add to Cart button.
- It works with all themes.
- It comes with a pre-built Add to Cart button from Lazada, Amazon, and Shopee.
Conclusion
There are several ways to stand out when you modify WooCommerce. One of those simple adjustments that will assist distinguish your shop from the competition is customizing the button. There is no necessity for writing code, and it is simple to complete. Additionally, these plugins are compatible with almost any theme.


")
")
")