")
Last updated - November 9, 2022
The primary objective of any online store should be to provide a satisfying shopping experience. The customer’s shopping experience does not, however, end when they add an item to their shopping cart and proceed to pay for it. On the contrary, the user will begin to feel vulnerable and wonder whether your shop is reputable and if the item will actually be shipped, with which carrier, when it will be delivered, and what steps to take in the event of a late delivery or no delivery at all.
According to a usability report, 97% of consumers would prefer to be able to track the progress of the delivery of the products they have ordered online.
Giving clients a feature that allows them to track the whole delivery of the goods with a single click can streamline the sale process, help you gain their trust, and lighten the pressure on your customer care staff.
This guide is for you if you’re still unsure how to manage WooCommerce order tracking. In this lesson, we’ll go over why setting up order tracking is important, how to do it in WooCommerce, and which plugins are the best for doing it.
The advantages of integrating WooCommerce order tracking
When a consumer puts an order, order tracking starts, and it stops when the ordered item or service is delivered. Order monitoring directly affects how customers see a business or brand. Always seeking a consistent experience are customers. Customers, for instance, anticipate getting information similar to emails while they’re on the road.
You should set up order tracking for your WooCommerce business for the following reasons:
- Confirm if the purchased order has been received.
- Track the order at all times.
- Organize various delivery dates.
- Ensuring prompt delivery of the order.
- Get streamlined reports regarding completed orders.
How to configure WooCommerce order tracking
It’s essential to remember that every step of the order tracking process offers the possibility to give an exceptional customer experience while boosting retention and profitability. This process is straightforward and easy to carry out.
We will be using the ELEX WooCommerce Shipping Calculator, Purchase Shipping Label & Tracking for Customers plugin.
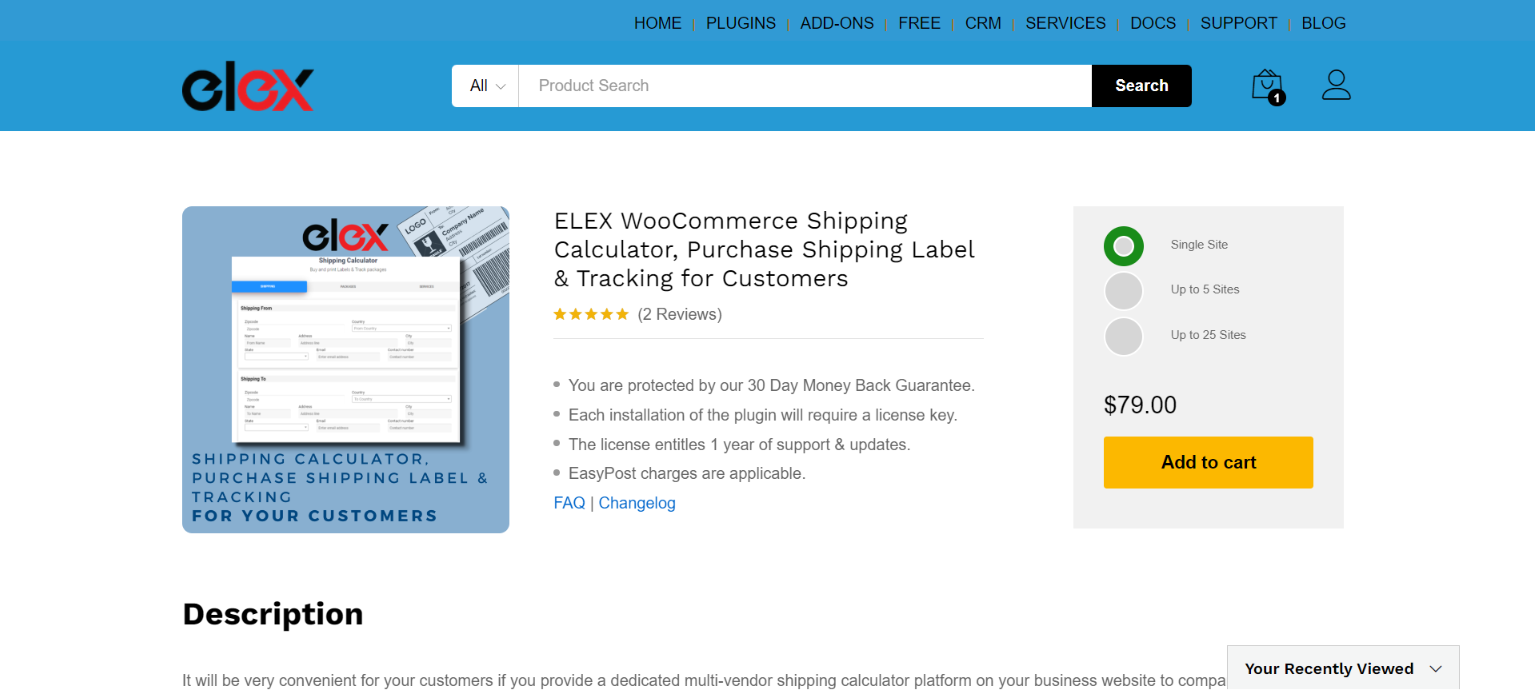
The plugin is very versatile and offers a lot of features. Below we have listed a few of the plugins features:
- Create a shipping rate calculation in only two clicks.
- Select a shipping company.
- Make your own packages.
- Create several packages at once.
- Get the tracking link and shipping label.
- Give the shipping calculator its own page.
- Custom Email with Label and Tracking Information is triggered.
- With a ton more.
Access the plugin
Start by purchasing the plugin by clicking on the link above. Once the plugin is downloaded, you may go ahead and install it like you would with any other plugin. Go to WordPress Dashboard > Plugins > Add New and click Upload Now.
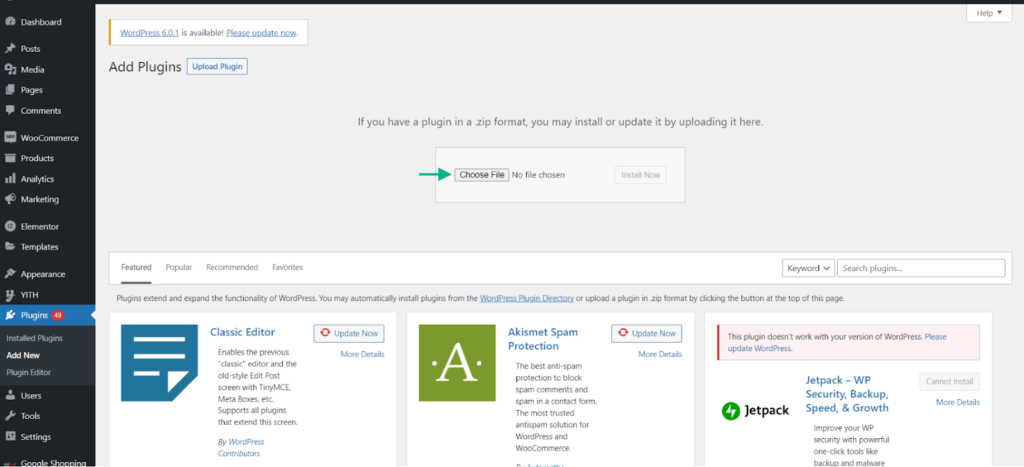
Once the plugin is installed, go ahead and click Activate Plugin.
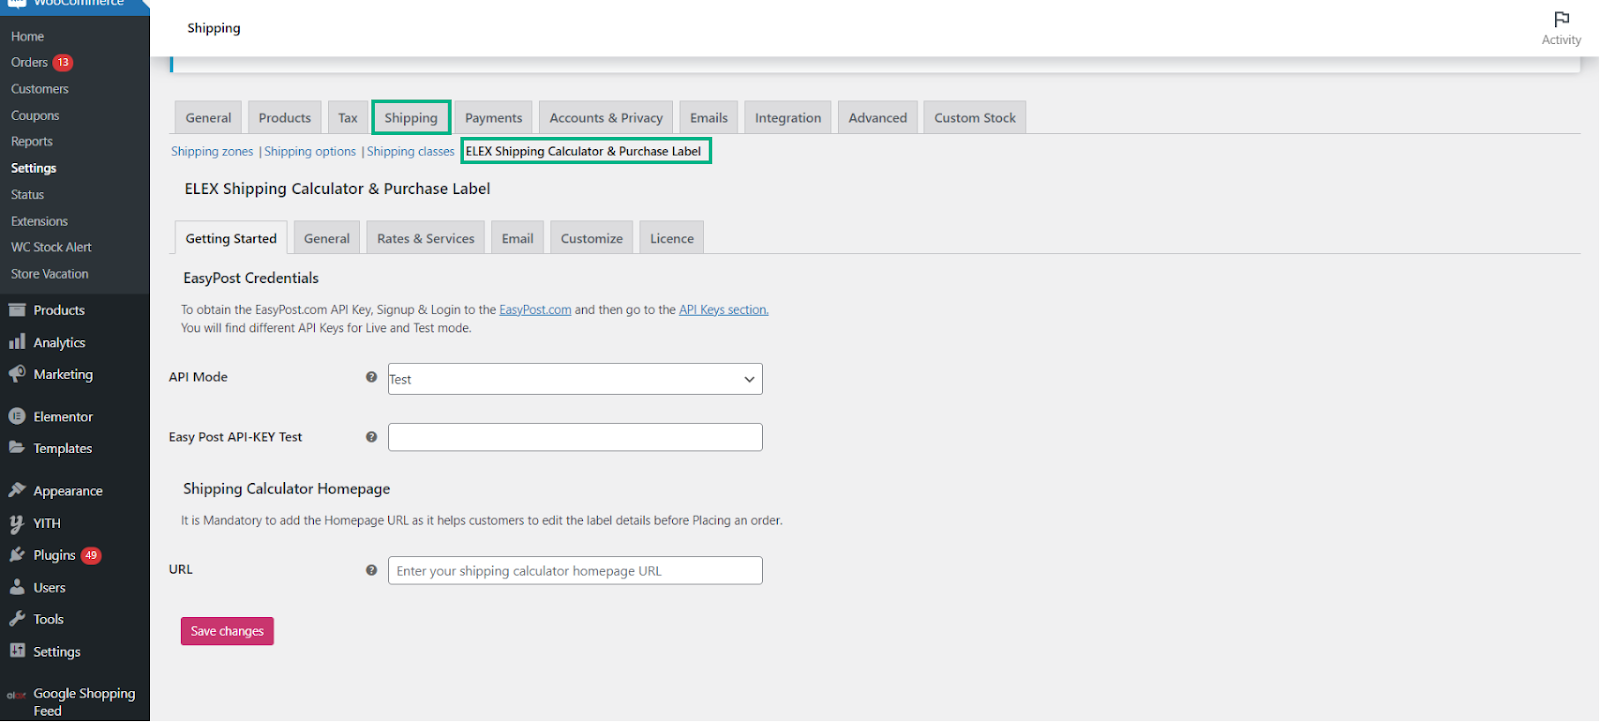
Now that the plugin is active, you may access the plugin dashboard by going to WordPress Dashboard > WooCommerce > Settings > Shipping > ELEX Shipping Calculator and Purchase Label.
Plugin dashboard
The plugin dashboard offers a plethora of tabs and functions. We will go through a few of them:
- Getting Started
You must provide your EasyPost API-Key and set the API Mode to Live or Test in this field. It currently works with FedEx, UPS, USPS, and Canada Post through EasyPost.
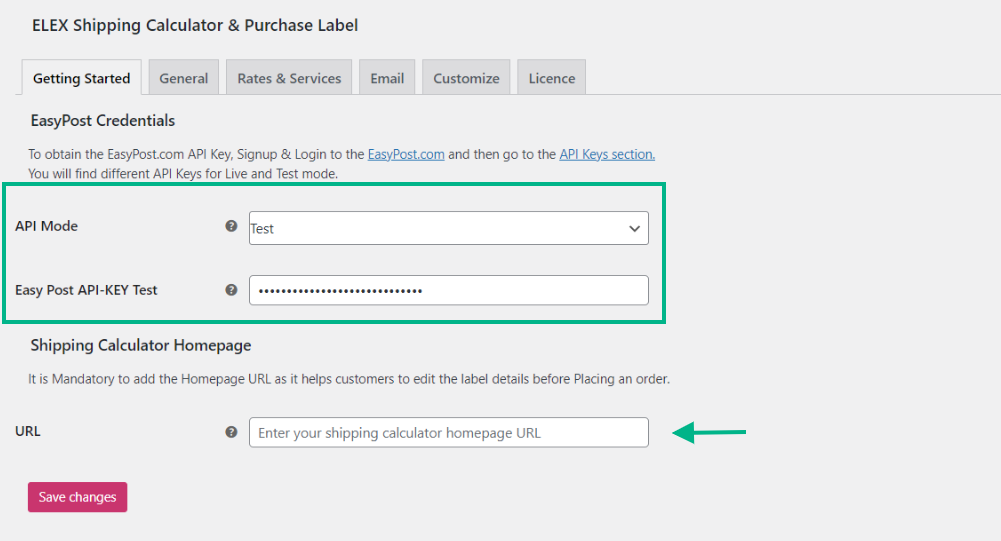
API Mode: Live mode is the preferred API mode for when your store is active. For testing and development reasons, you can go to the Test mode.
EasyPost API-KEY: Enter your EasyPost API-Key in the box provided. You must register with EasyPost in order to use the EasyPost APIs. You’ll get a test key and a real key after registering successfully. Input the API key you just received in this area.
URL: Provide the URL for the shipping calculator’s home page so that consumers can be sent there and change their shipping information before proceeding to the Checkout page to place their transactions.
- General
Shipping From: You have the option of selecting Shipping from all countries or Shipping from a specified list of countries. If you select option one, consumers can create shipping labels from any nation on the globe. If you select the latter option, you may select the nations from which consumers can produce labels when they enter the source address (also known as the “from” address).
Shipping To: Similarly, you have the option of shipping to all nations or just a select few. If you select the latter option, you may select the nations from which clients can create labels when they enter the destination address (the “to” address”).
Access to shipping calculator: You may decide which user roles need to have access to the shipping calculator. The user roles are selectable from the drop-down menu. It will be accessible to all user roles if you do not choose any user roles.
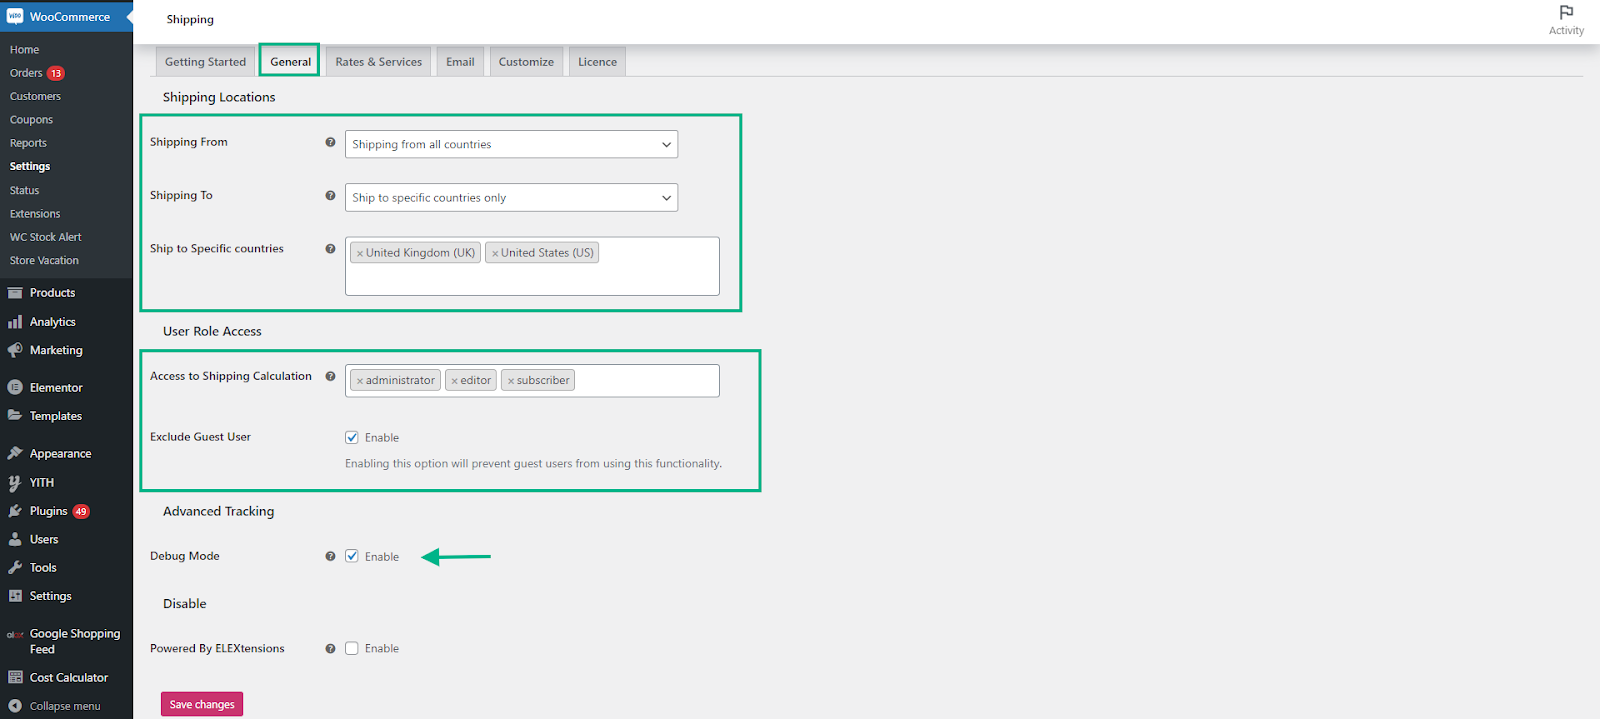
Exclude Guest User: You can turn on this option if you do not want unregistered users or guests to have access to the shipping calculator.
Display Rate Option: Enable the display rate option on your shipping calculator’s home page to provide clients the option of selecting between Retail and Commercial prices. If it is not enabled, the commercial rate will be shown as the default choice.
Debug Mode: To locate the error(s) in WooCommerce logs, use the Debug mode checkbox.
Use this address as: Using this drop-down option, you may choose whether the default address is a “To” or “From” address. If None is selected, no default address will be displayed, and the client may input any address in accordance with their needs. The consumer won’t be able to change or amend the From or To address if you’ve set it as the default.
Default Address Details: Provide the default “To” or “From” address’s name, nation, state, postcode, city, address, email, and phone number.
- Rates & Services
Print Label Type: You may choose the preferred file type for printing the shipping labels by using the Print Label Type option.
Handling Fee (USD): You can enter a handling fee here to be added to the subtotal. On the Checkout page’s subtotal, which you can see, the sum will be immediately added.
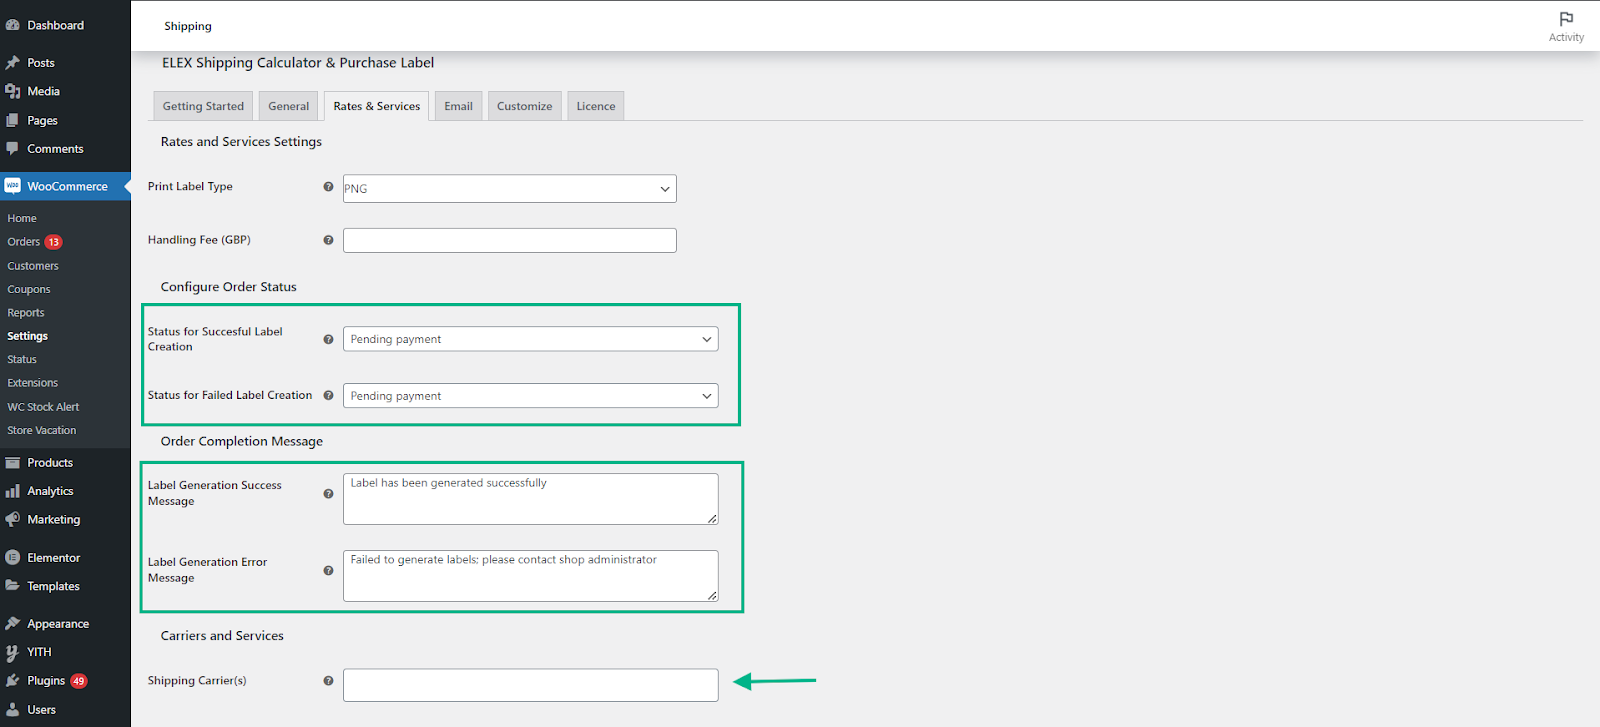
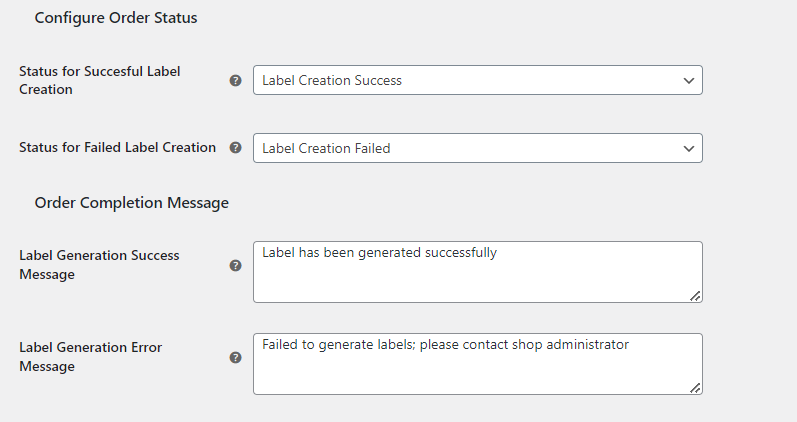
Status for Successful Label Creation: From the drop-down list, choose a WooCommerce order status. The order status will be changed to this entered state after the label has been successfully produced.
Status for Failed Label Creation: If the label generation failed, you may choose a WooCommerce order status from the drop-down list to define the order’s status.
Label Generation Success Message: Enter a customized message to be shown on the Order completion page if the label was successfully produced.
Label Generation Error Message: If label generation is unsuccessful, provide a custom message to be shown on the Order completion page.
Services and Carriers
You may choose which shipping services to include on the shipping calculator’s list of shipping carriers.
In the screenshot below, I’ve selected USPS. Therefore, fixed pricing or percentage adjustment option will be available for all of USPS’s services when they are listed.
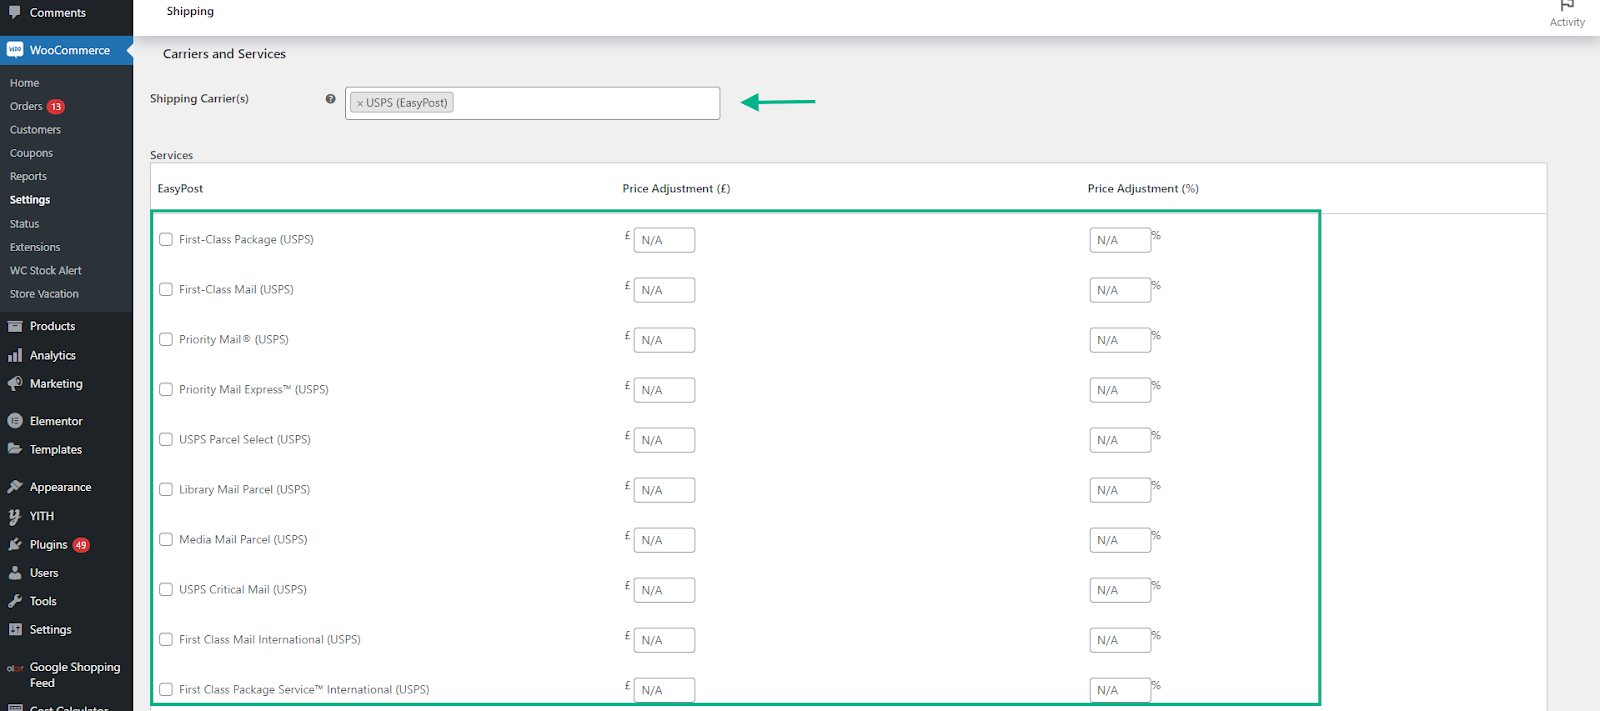
Similarly, if you select a shipping carrier, a list of all of its services will appear. From there, you can check the boxes next to the services you want to be included in the Shipping Calculator.
Once you are done customizing the above aspects to your satisfaction, you may move ahead to the email customization section. This section allows you to tweak the email that will be sent to the customer along with the tracking link.
When a label is created in the Shipping Calculator, you can use this option to automatically send a custom email with the shipping label and tracking link to the supplied shipping and billing email addresses.
Email Subject: Type a personalized email subject here.
Email Recipients: Choose the people or organizations to whom you should send emails.
Here, you have three choices:
- Both: To email both the sender’s and the recipient’s email addresses.
- Shipping from Email: To send an email to the email ID of the sender, choose this option.
- Shipping to Email ID: Sending an email to a recipient’s email address.
Custom email content can be written in text (using HTML tags) or in a visual format.
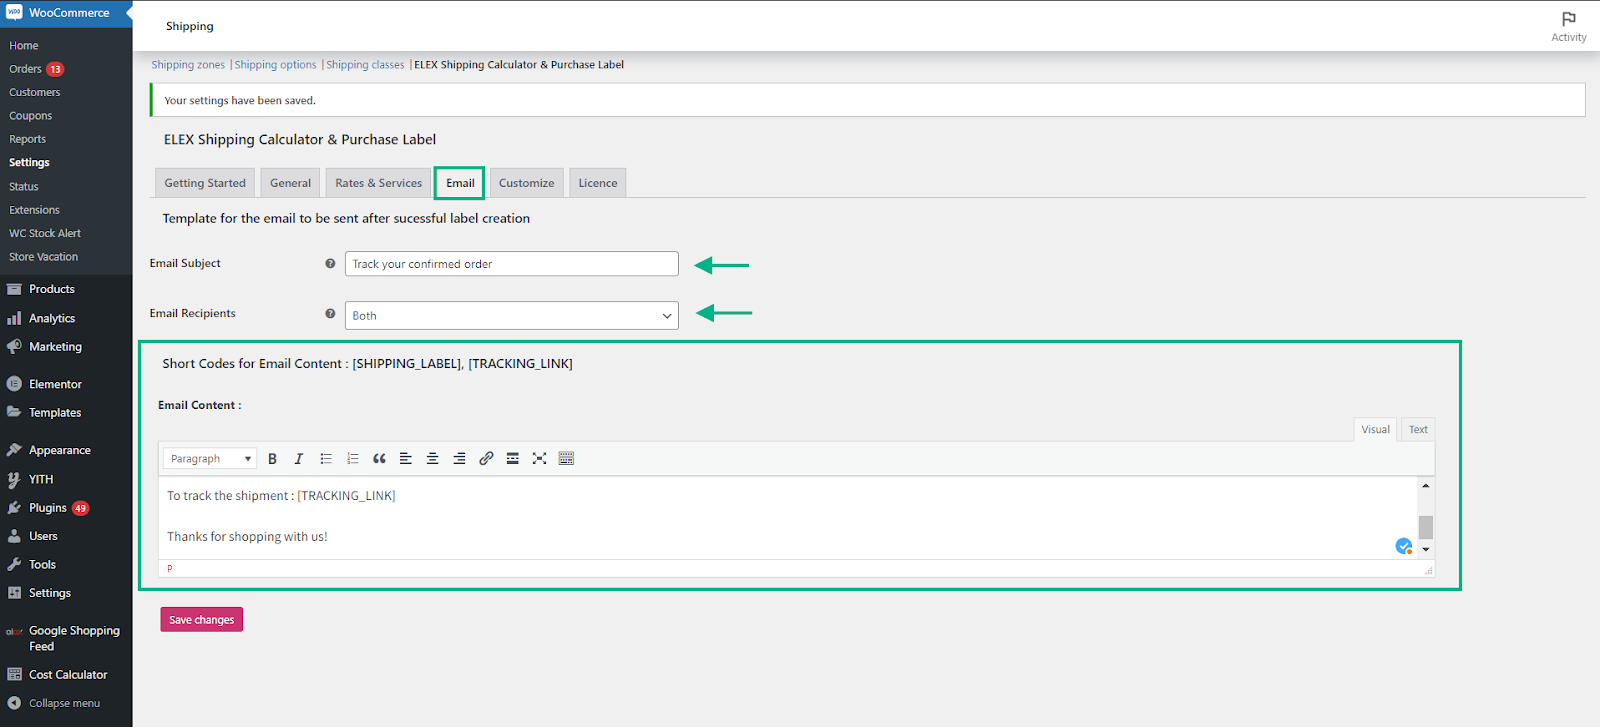
You have the option to add the shipping label and tracking link for the sake of easy tracking for the customer by copying and pasting the respective shortcodes in the email body.
The shortcode for the components are as follows:
- Shipping label – [SHIPPING_LABEL]
- Tracking link – [TRACKING_LINK]
Once you are done tweaking the plugin settings to your satisfaction, you may go ahead with business as usual. Whenever a customer places an order, they will receive an email with a tracking link similar to the one below.
Additional Plugins for Order Tracking
YITH WooCommerce Order Tracking
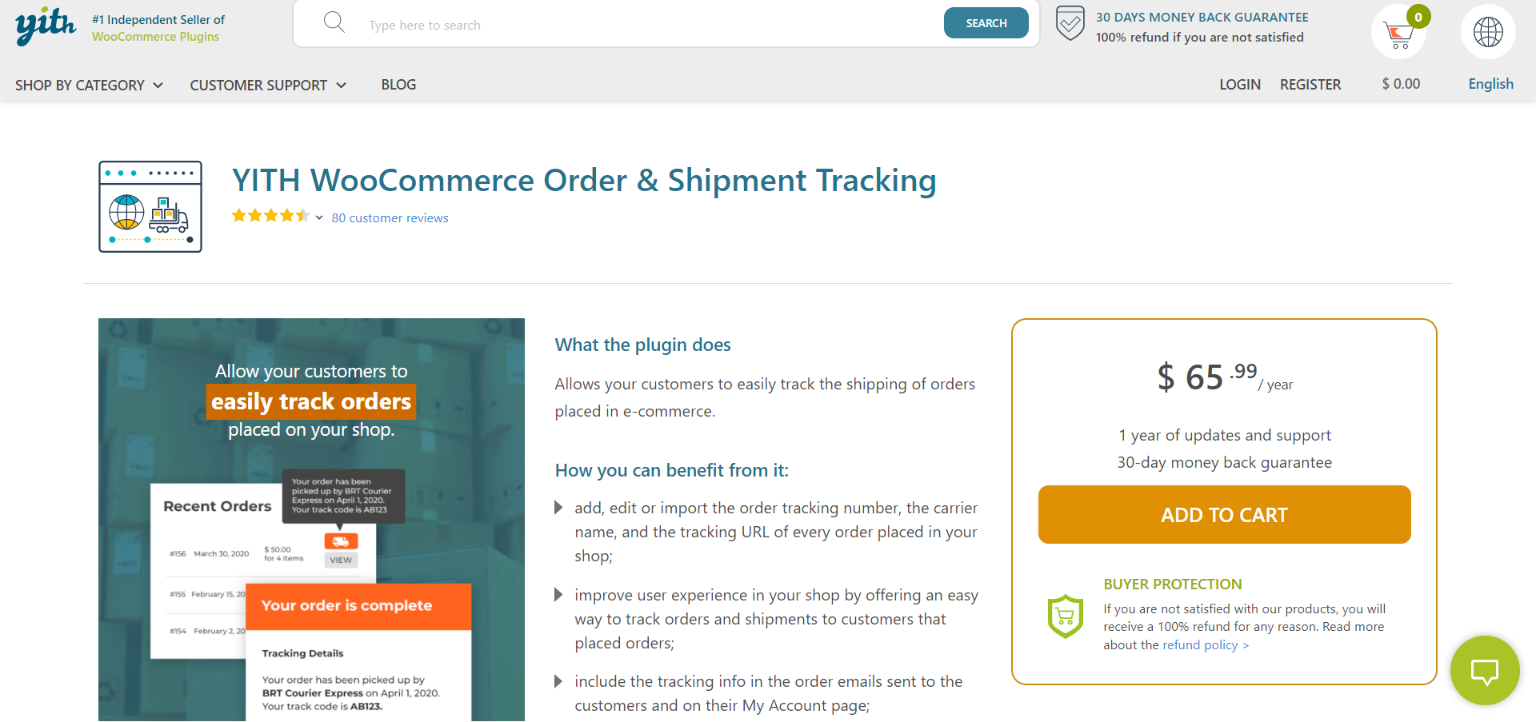
A WordPress plugin called YITH WooCommerce Order Tracking enables you to easily handle shipping information for your orders and tells your customers when their products ship. Over 90 shipping companies are integrated with this order tracking plugin. You will also receive a tracking ID from the shipping company, which you can add to the order in the WooCommerce menu.
Highlights include:
- Automatically select the default delivery carrier for each order.
- Customize the message that appears to users in the WooCommerce order details.
- Use placeholders to fill in the carrier’s details, the tracking number, and the delivery date.
- From the relevant page in the WooCommerce back end, you can easily manage delivery tracking information.
- Choose where the tracking message will appear to the WooCommerce users on the order detail page.
Plugin Price: $59.99
WooCommerce Shipment Tracking Pro
WooCommerce Shipment Tracking Pro plugin lets you integrate Order Tracking functionalities into your WooCommerce store. By using this plugin, you provide your customers with an easy way to track their order delivery from top shipping carriers like UPS, USPS, FedEx, DHL Express, and 80+ other carriers.
The plugin allows you to send shipment tracking notifications via a WooCommerce order completion email. It adds tracking information to WooCommerce orders instantly and automatically marks the order as completed.
With this WooCommerce order tracking plugin merchants can customize their own order tracking messages. Import WooCommerce tracking details using CSV, FTP & SFTP upload in bulk.
This plugin is compatible with WPML, ShipStation, Shippo, ShippingEasy, and PayPal. The plugin pricing starts at $89 for a single license and goes up to $219 for 25 sites license. If you are looking for a handy WooCommerce Order Tracking plugin, just go for it.
WooCommerce Shipping Tracking

The Order details page and the WooCommerce notification emails will both display tracking information thanks to the WooCommerce Shipping Tracking plugin. The progress of a shipment’s chronology can optionally be shown. With the help of this plugin, you can select your carriers, estimate shipping prices, and determine delivery times. Additionally, when a customer completes their transaction, it shows the dates on when the item left, arrived, and was processed at each site.
Highlights include:
- Permit numerous tracking codes and shipping firms to be associated with each order.
- Enabling template personalization from the admin menu.
- Tracking information on the Order details page and any incoming WooCommerce emails.
- Give a time frame for expected delivery for every shipping option.
- Enabling the importation of order tracking data from a.csv file.
Plugin Price: $24
WooCommerce Orders Tracking
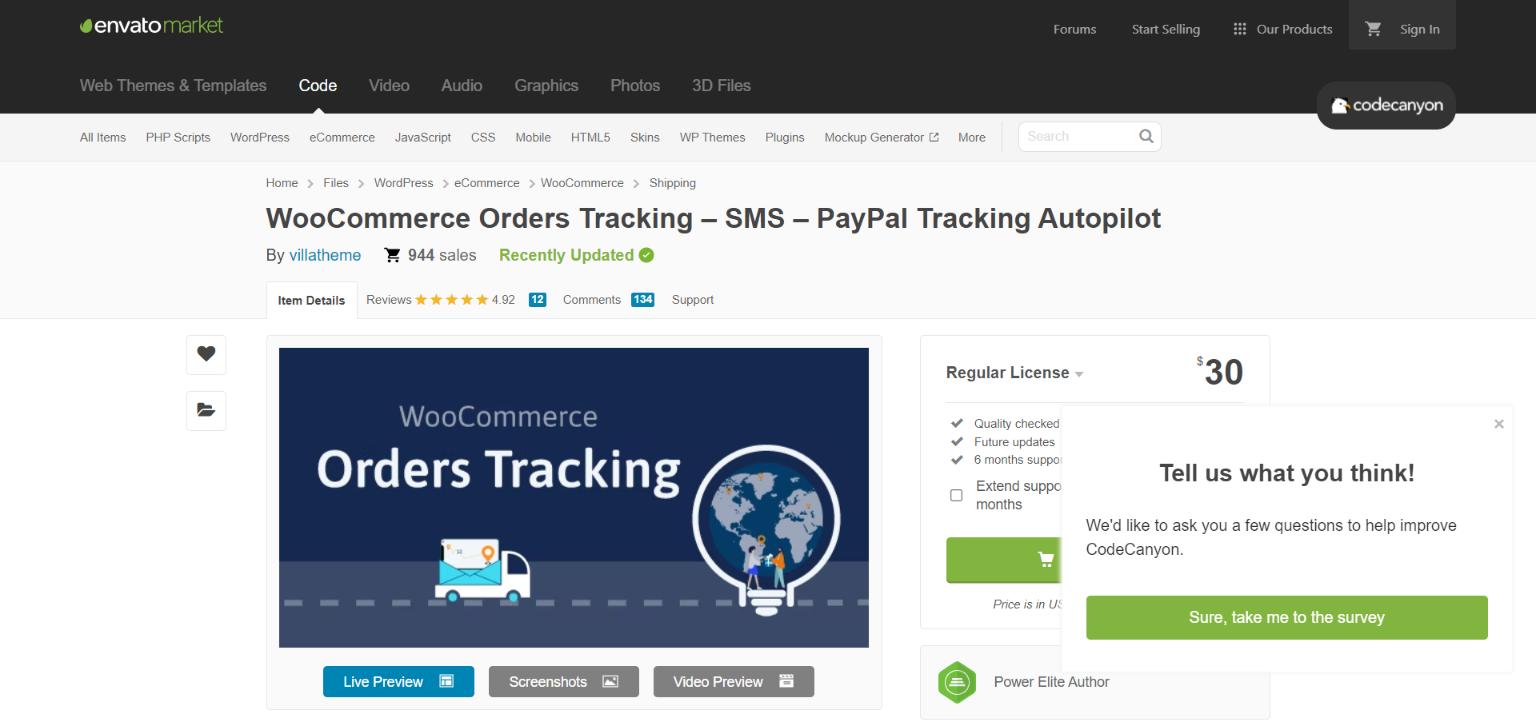
You may produce tracking links and distribute them with customers instantly thanks to WooCommerce Orders Tracking’s connections with several shipping firms. Shop owners may add, amend, import, and export tracking numbers and URLs for each item and order with this plugin. Additionally, this plugin may add order tracking information and tracking URLs to PayPal transactions in addition to sending order tracking emails and SMS messages.
Highlights include:
- Enables inputting the carrier’s name and tracking URL to create customized cargo carriers.
- Including shortcodes in emails to show the recipient’s name, order number, and delivery information.
- Permit sending an SMS to customers with a tracking URL.
- Add carrier names and tracking numbers automatically to your Paypal account.
- Permit choosing orders, exporting them as a CSV file, and add tracking codes to the exported file.
Plugin Price: $30
Conclusion
In conclusion, order tracking is regarded as a crucial element in online company since it increases accuracy and brand trust, which in turn promotes customer satisfaction. Consider employing technology solutions in order tracking, such as creating an order tracking system, if you don’t want to lose your competitive edge.
As you can see from this post, using the plugins we’ve suggested makes the process simple to do. We hope that after reading our essay, you have a good understanding of how to configure order tracking in WooCommerce.


")
")
")