
If you are running a wholesale business or managing B2B sales on an online store, a feature to let customers request a quote will be important for you. WooCommerce does not provide this option by default, and hence you will have to rely on a plugin to configure it. In this article, we will discuss how you can add Add Request a Quote Button to WooCommerce Store in a few easy steps.
What is the relevance of the Request a Quote button?
For B2B transactions, it is a good-to-have feature to let customers ask for price quotes for their specific requirement. Then store owners will be able to analyze and take a better pricing decision based on the requested quantity or the different products for which customers have shown an interest. More than a simple conversion, a chance to request a quote will help to get customers in touch with you, and you can offer them a better deal in a lot of cases.
What features do you need along with a Request a Quote button?
There are a few specific aspects that could be relevant for such stores. These may include:
- Display the products customers are interested and their quantity in a list format.
- Provide an option to request a quote for specific products.
- Offer products with quote request option along with products that can be added to cart like regular store.
- Hide the price for products that needs to be made available only through quotes.
- Notifications when a quote is requested for, and responded to.
- Easy payment and checkout process once a quote is accepted.
How to set up a WooCommerce Request a Quote plugin?
We will demonstrate how you can incorporate this feature on your WooCommerce store in simple steps. For this demonstration, we are using the ELEX WooCommerce Request a Quote Plugin.
Step 1 – Install and activate the plugin
You can purchase the plugin from the ELEXtensions website, and install it like any other WordPress plugin. If you need help to install and set up a plugin, please check our article, How to install and set up a WordPress WooCommerce plugin.
Once you install and activate the plugin, you can access the plugin settings from WooCommerce > Settings > Request a Quote.
Step 2 – Configure the request a quote button and page
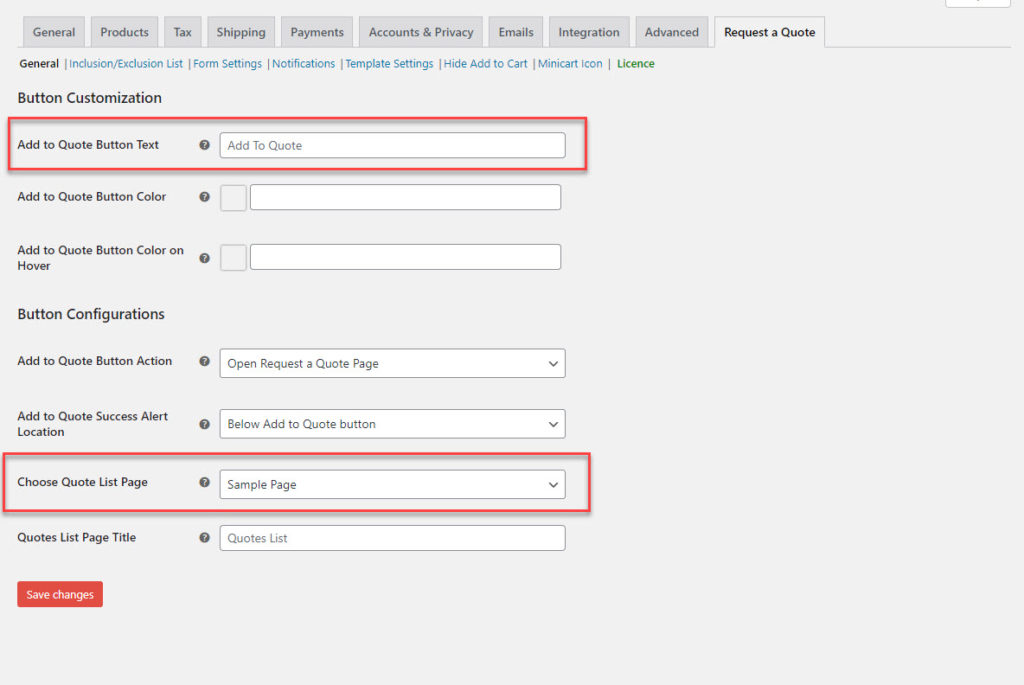
At the start itself, you can configure how the buttons will be displayed on the page, and also specify a page to display the list of products that the customers would choose for a pricing quote.
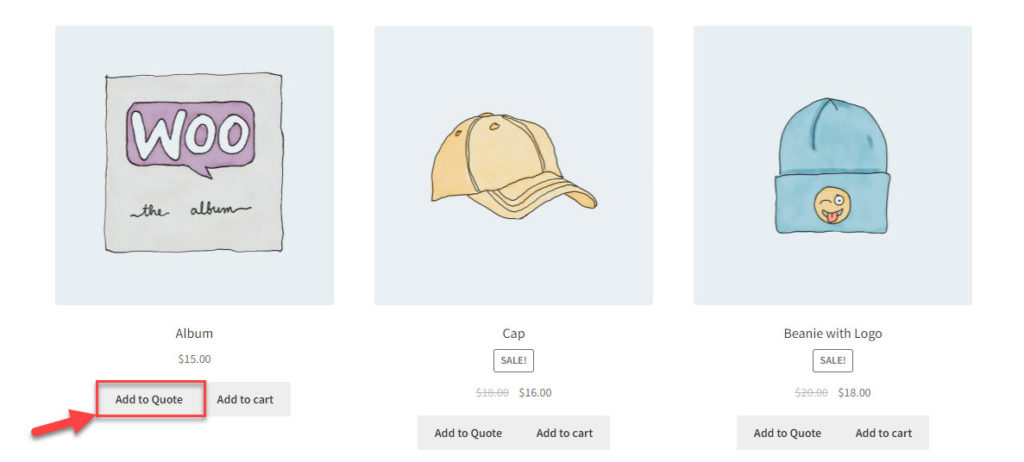
First of all, you can add a custom text for the Add to Quote button, and also choose an appropriate color for the button.
You can also specify the button action, whether the quote list page will be opened upon clicking the button, or the quote list will be displayed in a lightbox.
The plugin also offers an option to customize the location to display the alert when a product is successfully added to the quote list. You can display this alert either below the Add to Quote button, or at the top of the page.
And you can choose a page for the quote list, and specify a header for that page.
Step 3 – Customize the Quote list form
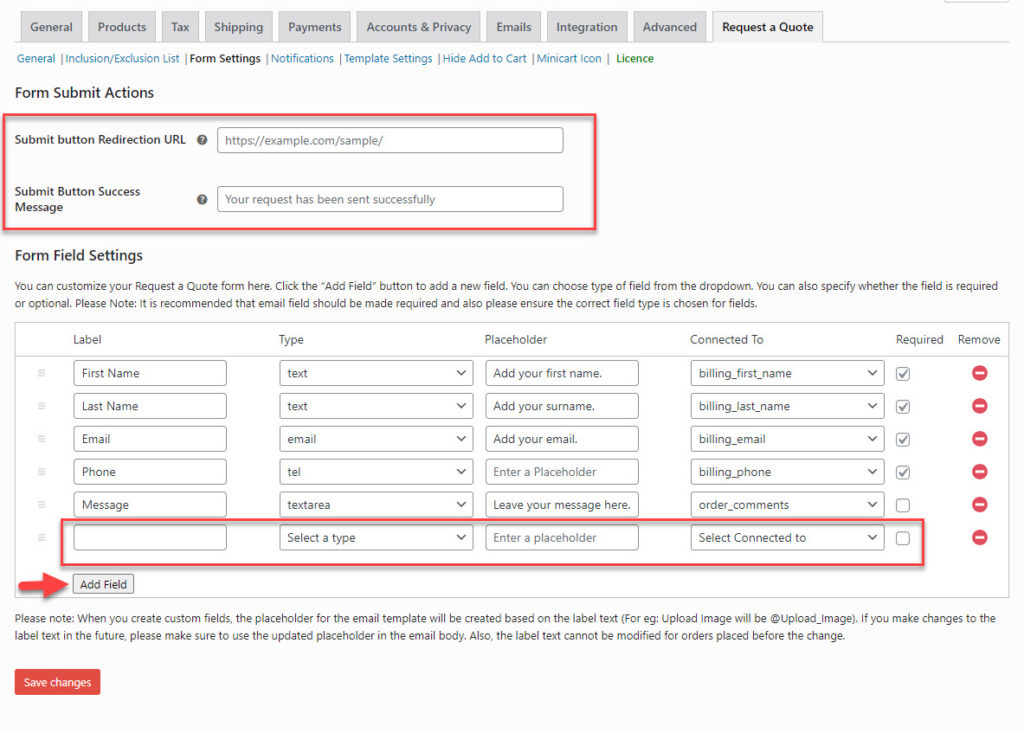
In the previous step, you have specified a page to display the products that your customers will add to the quote list. Along with the list of products, you can gather required information from customers with the help of different fields like name, address, etc. By default, the quote list form has fields for first name, last name, email id, phone and a message field.
You can customize this page by adding or removing fields as per your store strategy.
To add a new field on the quote list form, you can click the Add button, and then specify the type of the field, the label text, and also the placeholder text. Here you also need to connect the field to one of core checkout fields of WooCommerce if applicable, or can choose custom field. Finally, you can specify whether the field should be Required or optional.
Along with that, you can also specify the url to redirect customers after they place a request, and the message to display.
Step 4 – Set restrictions for the add to quote option
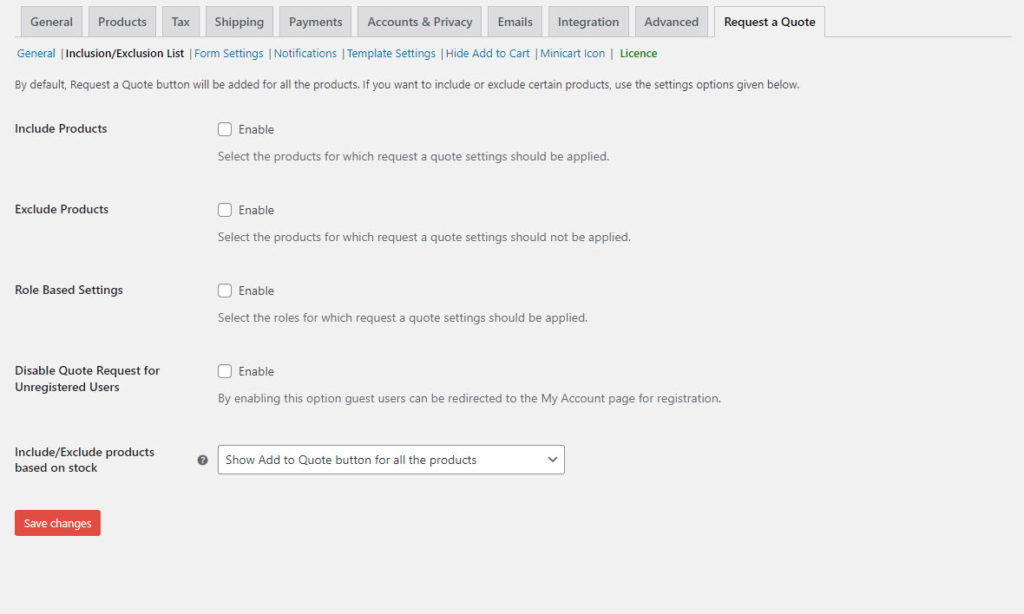
The plugin offers options to help you restrict the feature so that it is applicable only to specific products or users. You can include or exclude products by specifying their name, category or tags. You can also include or exclude specific user roles to have this option.
The plugin also has an option to prevent unregistered users from creating quote lists. Instead, you can redirect those users to the registration page.
Another interesting option is to display or hide the add to quote button based on the stock status of a product.
If you have not selected any products or user roles, the plugin will apply the add to quote option to all products in your store.
Step 5 – Set up notifications
For a store that offers an option to request for quotes will need an efficient mechanism for notifications. When a new quote is placed, the store owner needs to be notified, and when an action is taken on a quote, the customer too needs to know.
With the plugin, you will be able to set email notifications for customers and store owners. You can customize notifications for different scenarios – when a customer request a quote, when it is approved or rejected. In the notification that is sent after a request is approved, you can even include a payment link. In addition, you can also set SMS and Google Chat notifications for store owners.
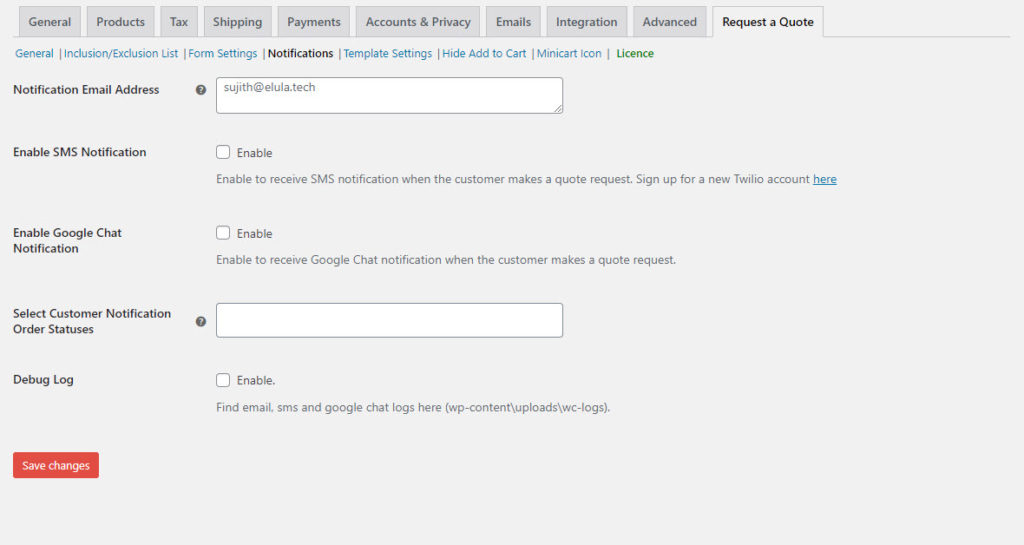
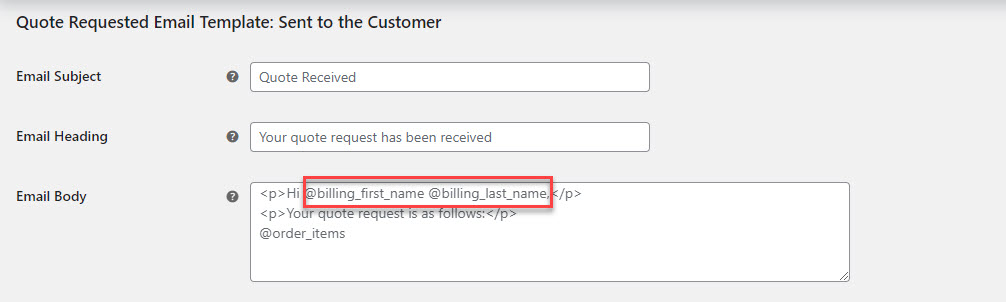
In the template settings, you can customize each notification template using the dynamic placeholder in the body.
You can get the plugin from the ELEXtensions website for $59 for a single site subscription. If you want to try it out, there is a free option with basic features. Download the ELEX WooCommerce Request a Quote Plugin (Free) plugin.
We hope this article has offered an easy way to Add Request a Quote Button to WooCommerce Store. Leave us a comment if you have a query or concern regarding this topic.


")
")
")