
Last updated - October 13, 2021
Registering and logging to a website should be a breeze. And though the default WordPress login and registration page is minimal, it very likely doesn’t match your website’s aesthetic. Nor does it welcome users with confidence.

So if you want the default login page of your website to look more professional, here’s our guide to customizing your login and registration page.
Installing and Setting Up User Registration Plugin
Plugins like Profile Builder, Ultimate Member, and User Registration are great for customizing the WordPress login and registration page. We’ll use the User Registration plugin by WP Everest.
Before we begin, make sure the registration function is enabled for your WordPress website. Head to Settings > General Settings. Here, enable the “Anyone can register” option. Also, choose a default role for new users. Preferably, you should set it as Subscriber. Save the changes when you’re done.

Next, install the User Registration plugin from the WordPress repository. Upon activating it, you’ll see a prompt to automatically add new user registration pages like Register and My Account. Click “Install User Registration Pages”.
Two new pages have been added to our website and will be automatically added in the menu. However, our new login and registration pages follow a simple and straightforward approach, but we can easily change the fields and other settings.

Head to User Registration > Settings. Here, we can choose what happens after a visitor has registered; you can have visitors manually log in after registering, you can have them confirm their email before logging in, you can give them instant access to their account after registering, or you can require an approval by you or a fellow admin before visitors are able to log in. Choose an option that makes sense for your website.

Below, you can prevent WordPress dashboard access for certain user roles on your website. With the next option, you can enable the hide and show password button. By default, visitors can’t see the password for security purposes. However, you can add a button to let them see the password while typing.
Further below, you can manage other settings for the My account section. Click Save changes when you’re done.
Then, switch to Login options.

In the first setting, you can choose from various looks for the login form. Below, you can enable or disable the remember me and lost password options, hide field labels, and enable Google reCaptcha.
You can also redirect new users to the registration page from the login page. Head over to the registration page and copy its URL. Then paste it in the Registration URL field.
The settings page also lets you customize the labels, placeholders, and messages for the login page.
In the Frontend messages section, you can choose the text for the various success and error messages visitors see while registering and logging in.

When you change the successful registration message here, anyone who signs up will see the new message.
In the Integration tab, you can enter the Google reCaptcha details to enable reCaptcha on your login and registration pages to reduce spam accounts. You can read our article to learn about the process of enabling reCaptcha on your website.
In the email section, you’ll see that the plugin has created email notifications that users will receive. You can either disable these emails, or you can edit their email subject and body according to your preferences.
In the Import/Export section, you can import and export users and forms for your WordPress website.
Customizing the Registration Page
It’s possible to edit the existing form to make it more visually pleasing. However, let’s start from scratch. Head to User Registration > Add new.
Give a title to the form here to distinguish it from the others. Next, you’ll see that the layout looks similar to a typical page builder with blocks on the left and a live preview area in the center. You can add a long list of fields like email, first name, website, secondary email, dropdown, checkbox, privacy policy, section title, profile picture, and even some WooCommerce billing address fields.

Let’s start by adding a username field. Drag the Username element and drop it wherever you need it. You can rearrange the position of the fields by dragging it within the row block.
Then, click on the field to edit its field options. We can add a label, description, and set a placeholder. Also, we can make the field mandatory by selecting “Yes” from the Required dropdown. We can also hide the label and add custom classes for further customization.
You can similarly add other blocks like first name, last name, and confirm password. If too many fields make the form look very long, you can condense it by splitting it into two columns.
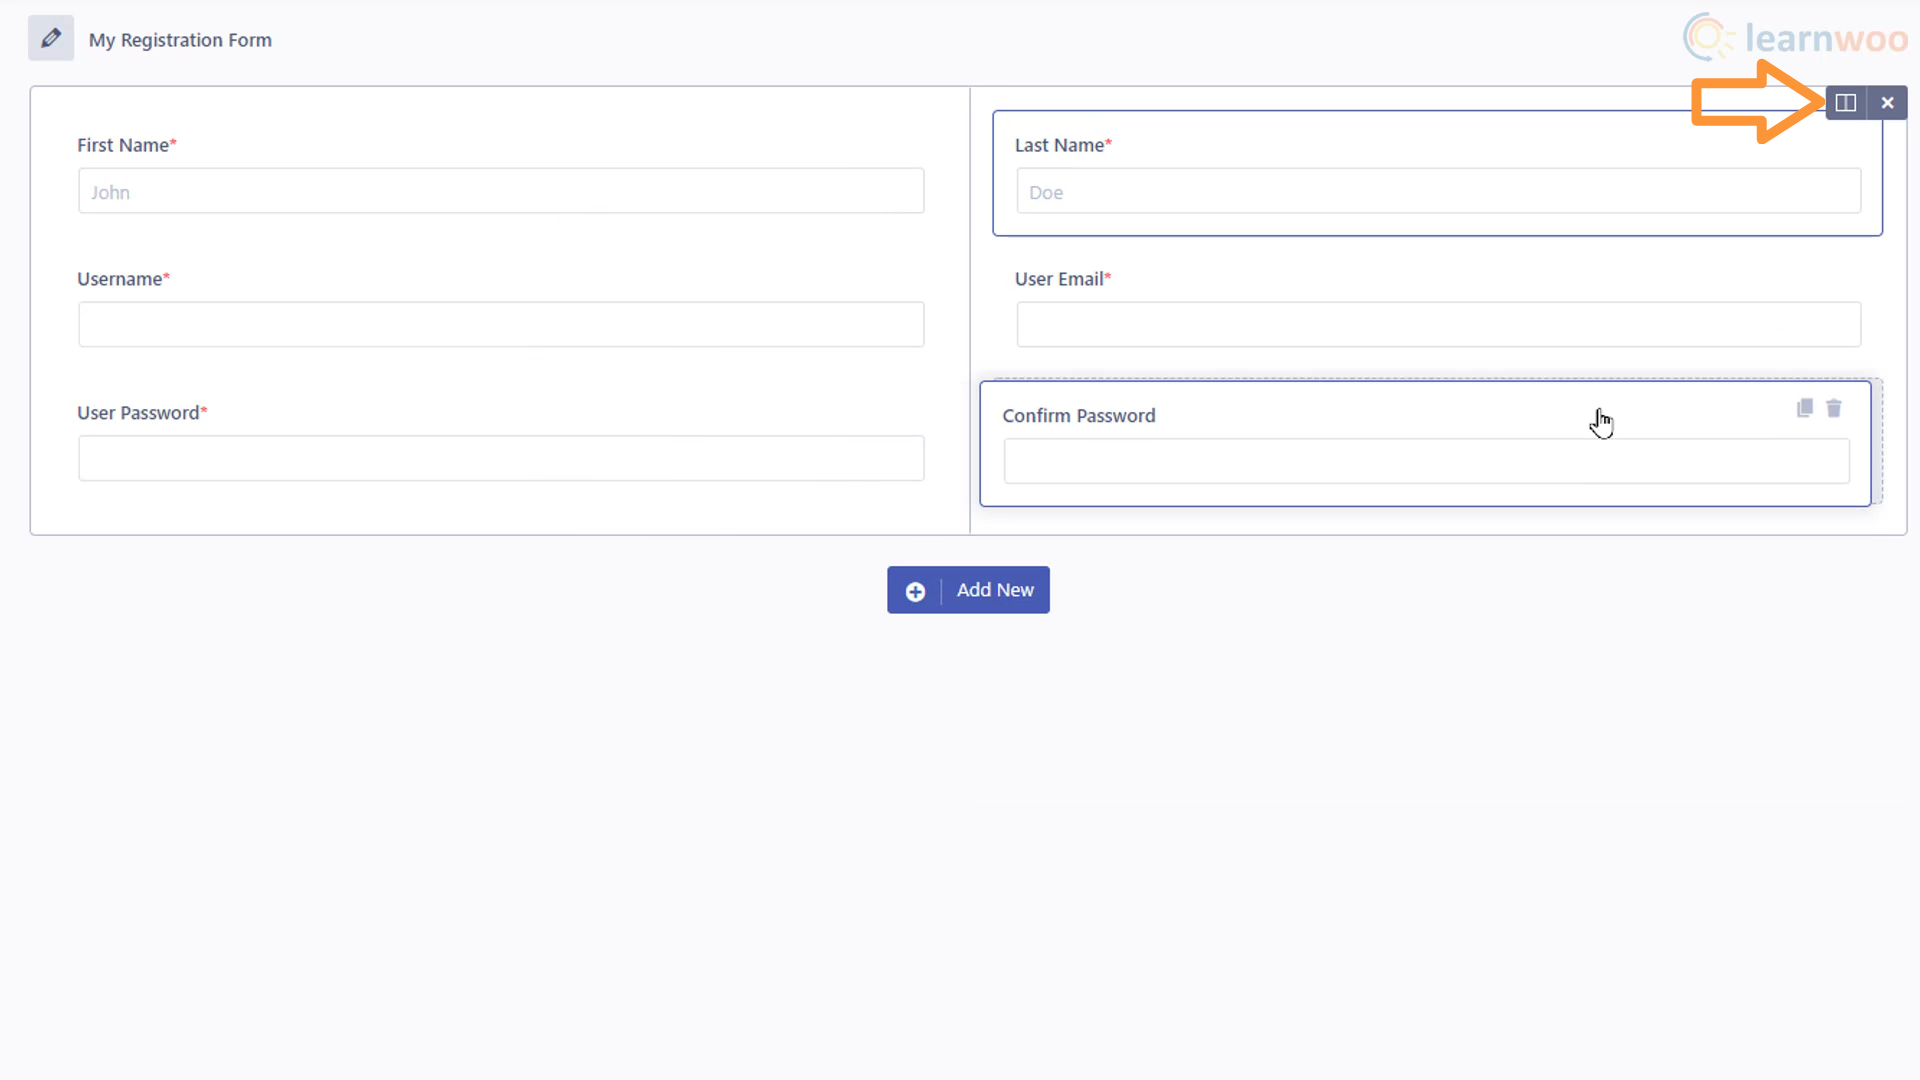
You can add as many rows as you want to the form. And add fields like dropdown questionnaires to make the form work for your website’s needs.
When you’re done, click “Create Form”. The form has been added to the user registration tab. Now, you just need to activate it. So copy its shortcode.
Then, head over to the Pages tab and click edit under the Registration page. Here, delete the old shortcode and paste the new one. Then, click Update.
Our website’s registration page has been updated to the one we just created. You can further customize and stylize the page by clicking Edit with Elementor.
Here, you can customize the page with Elementor just like any other page by using the Shortcode element. You can add spacers, use backgrounds, add graphics, and make a whole lot of other customizations. Also, you can check out our Elementor tutorial video to learn more.

Apart from this, the User Registration plugin offers paid extensions to add more fields, enable social login, use style customizer, and many other features. You can try them according to your website’s needs and your preferences.
If you have any questions regarding customizing the login and registration form, feel free to reach out to us in the comments below.
If you prefer a video version, please check out the video below:


")
")
")
It is actually a nice and useful piece of information. I’m happy that you just shared this helpful information with
us. Please stay us informed like this. Thank you for sharing.
Hi Ingeborg, Glad that you found it useful and informative. Stay tuned for more such guides and tutorials.
Hello! I’ve been reading your website for some time now
and finally got the bravery to go ahead and give you a shout out from
New Caney Texas! Just wanted to say keep up the fantastic work!
Glad you loved it and our content was informative to you.