
It’s not difficult to get a WooCommerce store up and running. In this WooCommerce tutorial, we’ll show you how. The plugin guides you through the majority of the procedure. Even so, if this is your first time dealing with payment processors, shipping options, and other issues, you’ll need some assistance.
Installing and setting WooCommerce correctly the first time will save you a lot of time and headaches afterwards. The earlier you have all of your store’s settings in order, the faster you can market your items and make sales.
Overview
- Introduction to WordPress
- Build the base with WooCommerce
- Creating pages
- Payment Settings
- Account Settings
- Setting up Emails
- Tax Settings
- Shipping Settings
- Adding Products
Introduction to WordPress
If you’ve ever been involved in the building of a website, or if you already have one, you’ve undoubtedly heard of WordPress. It is also the most popular platform due to its versatility and ease of use. Its popularity in website creation has skyrocketed. It has progressed from assisting with the development of blogs and websites to content management systems (CMS), eCommerce websites, and membership sites, to mention a few.
WordPress is available in two forms: WordPress.org and WordPress.com. The former is a free, open-source downloadable program that operates in a self-hosted environment and is installed and administered on your computer, whilst the latter is a blogging hosting platform that works like a wizard and does not require installation.
In order to continue with the integration of WooCommerce, you need to have WordPress installed and ready to go. There are many ways to go about it, in order to get an in-depth understanding of how to install WordPress, check out How to Install WordPress?
Build the base with WooCommerce
When it comes to setting up an online store, you’ll naturally opt for convenience at first and scalability later on, depending on your company’s development pace. WooCommerce is great in this situation since it can help you scale your website’s functionalities over time. You have the ability to scale your business as it expands. It’s open source and free to download. As a result, using it throughout the early and later phases of your business is a sound financial move.
Now that we have a basic understanding of WooCommerce, let us integrate it into our WordPress…
If you currently have WordPress hosting, installing WooCommerce is a breeze. To ensure that the plugin runs well, make sure that the server requirements are satisfied. Start by logging into your WordPress dashboard.
Once you have logged in, on the left side of the WordPress admin panel, there are various options. You may get to the plugin installation page by following the steps below:
- Click ‘Plugins’ on the dashboard.
- Click ‘Add new’ on the top of the page.
- In the search area, type ‘WooCommerce’ and press Enter.
- WooCommerce comes out on top in the search results.
- Click the ‘Install Now’ button.
After the installation is complete, we need to activate the plugin. To do so, click the Activate button (The ‘Install Now’ button automatically changes to Activate). You will get a notification stating that the plugin has been activated. You can access WooCommerce from your WordPress dashboard.
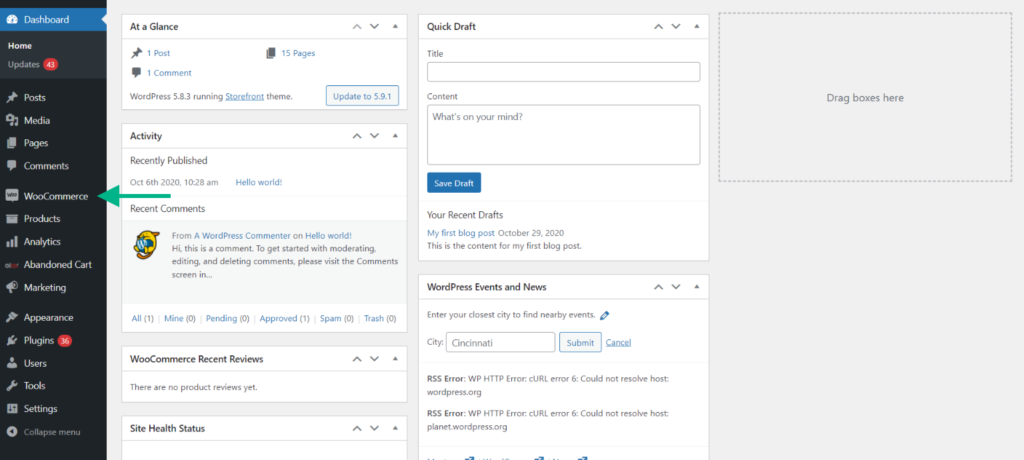
We have set up WooCommerce on our WordPress website. Now we can start by creating pages for our website.
Creating pages
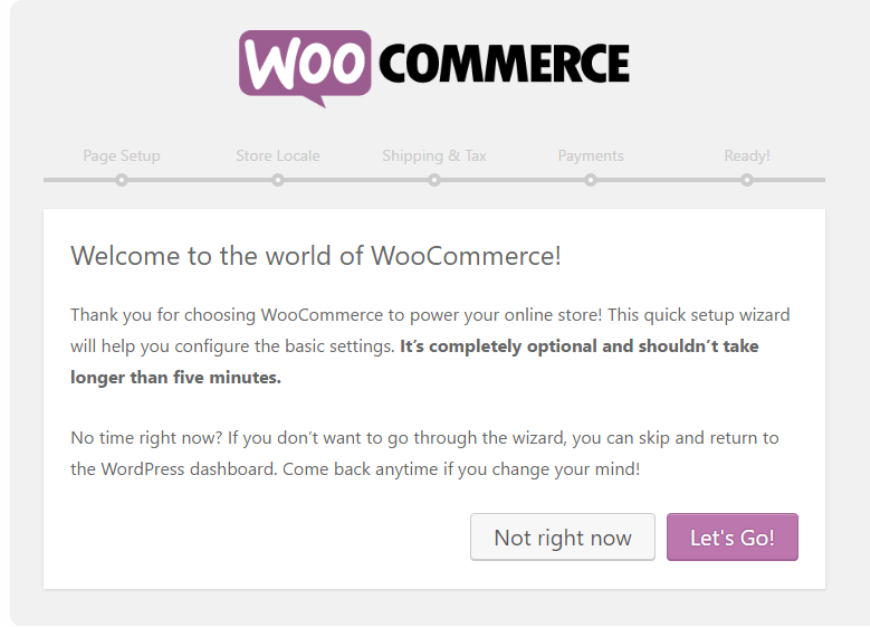
WooCommerce offers a Setup Wizard to assist you acquaint yourself with the process and make it easier. After the activation procedure, the Setup Wizard is normally presented automatically. You may always run this from the ‘Help’ section if it isn’t displayed immediately. The below steps are not necessary and can be done manually, but the setup wizard makes it easier.
- Go to WooCommerce Help first.
- To launch a menu tray, click Help and then Setup Wizard.
- Click the blue Setup Wizard icon to start the wizard.
The following is a screenshot of the welcome screen.
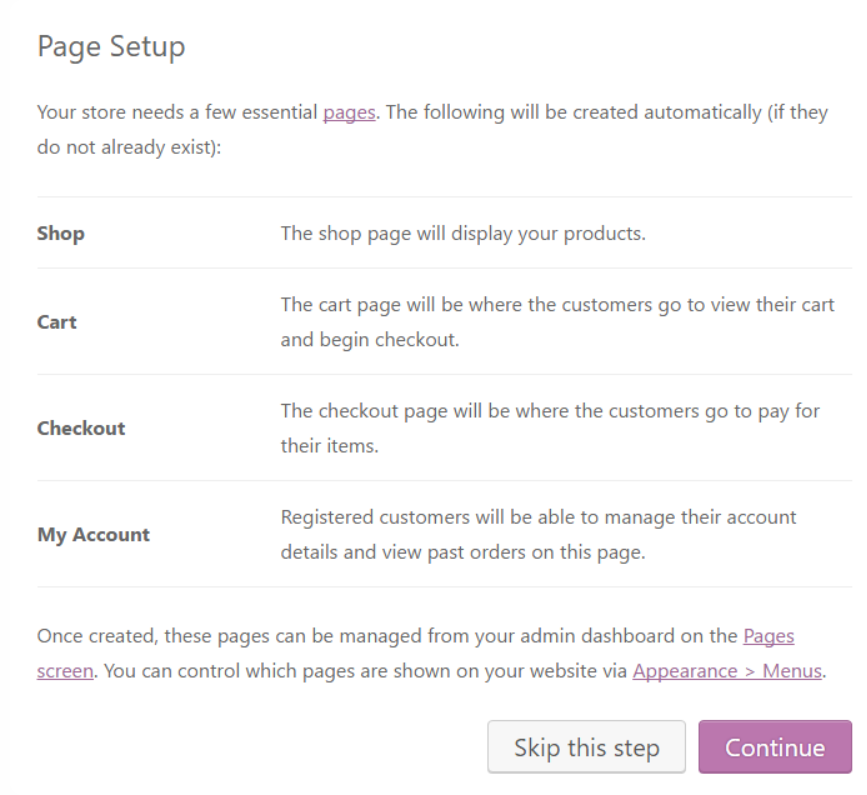
In order for WooCommerce to work effectively, it needs to set up a few default pages. These are the following:
- Shop
- Cart
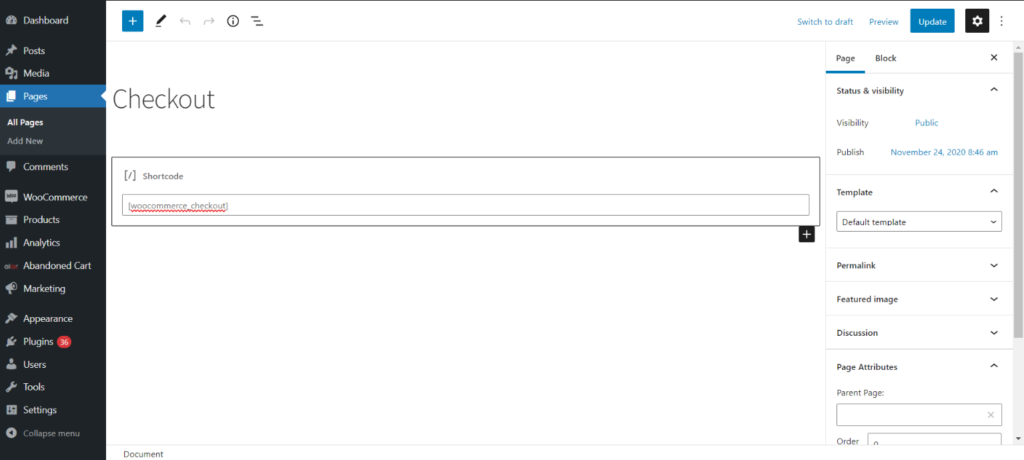
- Checkout
- My Profile
Let’s look at how to use the Setup Wizard to make these pages. To proceed to the Page Setup, click the ‘Continue’ button.
You can skip through the remaining settings or go through each one in detail. Do not worry if you skip, as you can set these up later, and we will discuss how to go about it later in the article.
You will see a shortcode in the content area that aids WooCommerce in determining the page’s special purpose. This is what distinguishes the page from non-default pages.
To manually create the default WooCommerce pages without the help of the setup wizard, follow these steps:
- On the dashboard, go to WooCommerce > System Status
- Open the Tools tab on the System Status page and choose Install pages.
You don’t have to worry about producing duplicate pages this way, since WooCommerce only creates pages if one of the required ones is missing. This step will have no effect on pages that have already been built and configured. A notice appears at the top of the screen after the pages have been successfully created.
You may also confirm this by heading to Pages in the admin panel.
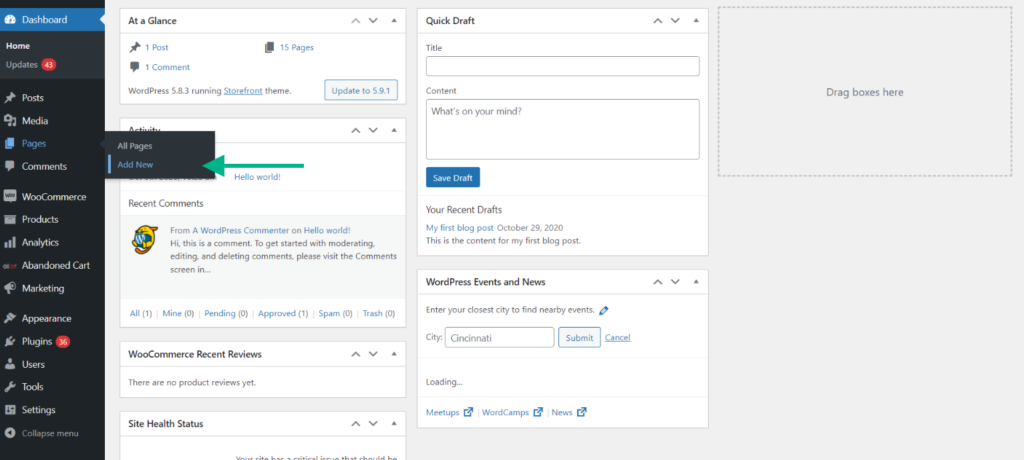
If you want to create additional pages, you can follow the same steps by going to the dashboard > pages and click ‘Add New’. An empty page will appear. You can add a title and all the required information and click ‘Publish’.
Let’s take a look at the settings for your website.
Payment Settings
When you set up an online business, one of the most critical components of consumer contact is setting up payment choices. These characteristics may be defined during the first phases of setting up your store using WooCommerce.
You’ll be able to activate numerous online and offline payment methods when you initially install WooCommerce. We will show you how to go about it manually.
WooCommerce > Settings > Payments will give you access to the payment options.
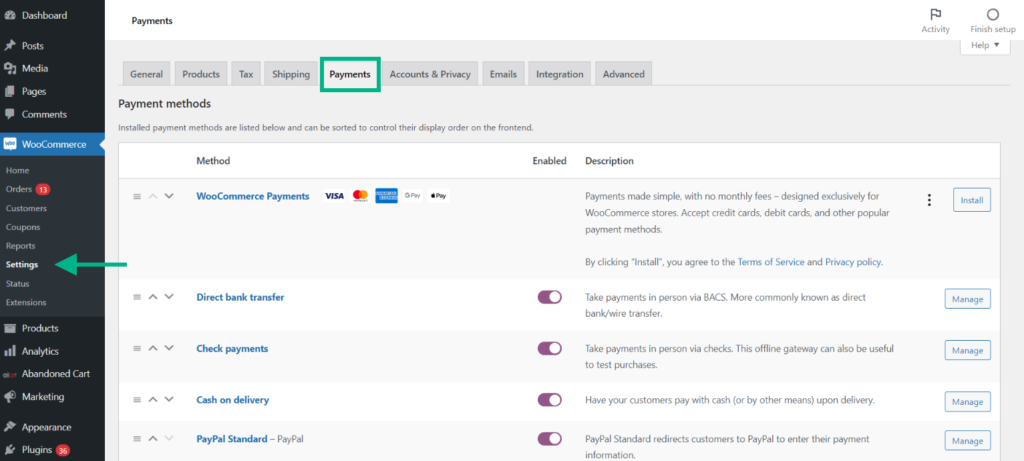
In this area, you’ll get a list of all the payment gateways you’ve set up. The enable/disable button next to each payment method may be used to enable or disable payment gateways. You may also rearrange the display order by dragging and dropping to your liking.
Every time you make a change to these settings, remember to click the Save changes option.
In the ‘payments’ section, you will find four options for setting up payment gateways.
- Direct bank transfer
- Check payments
- Cash on delivery
- PayPal
Each of the above mentioned gateways can be set up in detail by clicking ‘setup’ next to each of the payment options. To thoroughly understand each of the payment options, check out WooCommerce – How to Set Up Payment Options.
Moving on to the account settings…
Account Settings
This is where you configure account management and privacy settings for your WooCommerce store. Go to WooCommerce > Settings > Accounts & Privacy to get started.
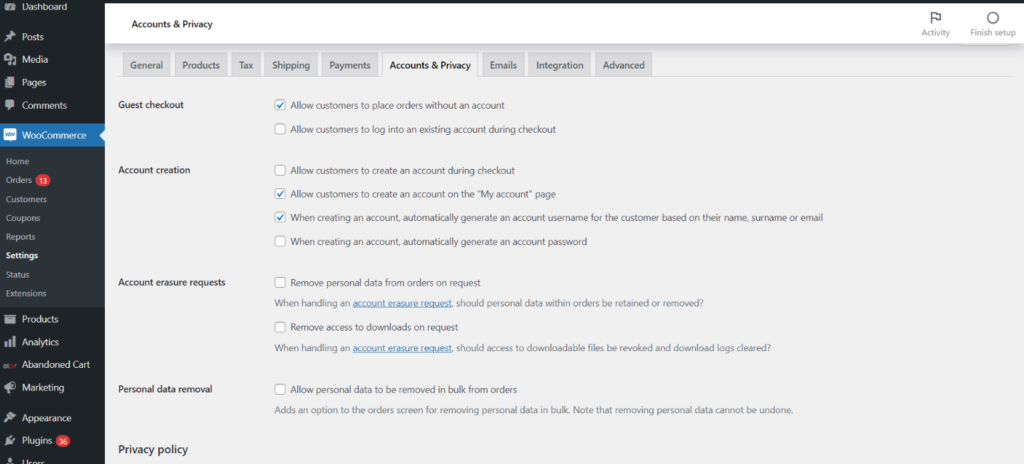
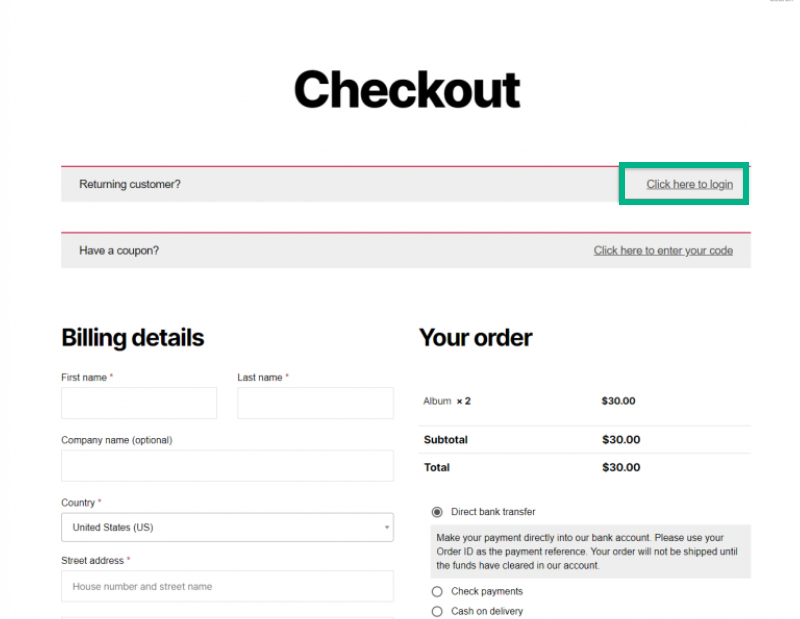
Guest Checkout
Guest checkout is one of the first things you’ll want to set up on this page. It basically regulates whether or not clients may make purchases on your site without having to sign in. You may customize this option based on customer engagement on your site. There will be two alternatives available to you. The first is to allow clients to purchase items without having to create an account. Customers can connect into an existing account at checkout with the second option.

A guest user will view the Checkout page as seen in the picture below if both options are enabled.
Account Creation
You may also restrict how customers create accounts on your business from this page. Customers may register for an account on the Checkout or My Account pages. To make these choices available, simply tick the box.
You may also allow the option to generate a username for consumers based on their first name, last name, or email address to make things easier for them. Similarly, during the account creation process, you may establish a secure password automatically.
To activate any of these features, simply click the appropriate checkbox.

Customers may just enter their email address and a password will be provided to that email once the feature is activated. During account creation, you may assist clients by suggesting usernames and setting up passwords.
If you disable these options, clients will be presented with fields where they may construct their own username and password.
Account Erasure Requests
There are two options here that govern how your shop handles account erasure requests. You can choose whether or not to erase personal data linked with orders when you receive a request to remove personal data. When a client requests that their personal data be erased, you may decide whether or not you wish to deny them access to downloaded files.

Privacy Policy
This section assists you in creating a privacy policy. You may customize wording that summarizes your privacy policy on the checkout and account signup pages, in addition to designating the page that specifies your privacy policy. Please note that in order to display the language on the registration and checkout pages, you must first build a privacy policy page.
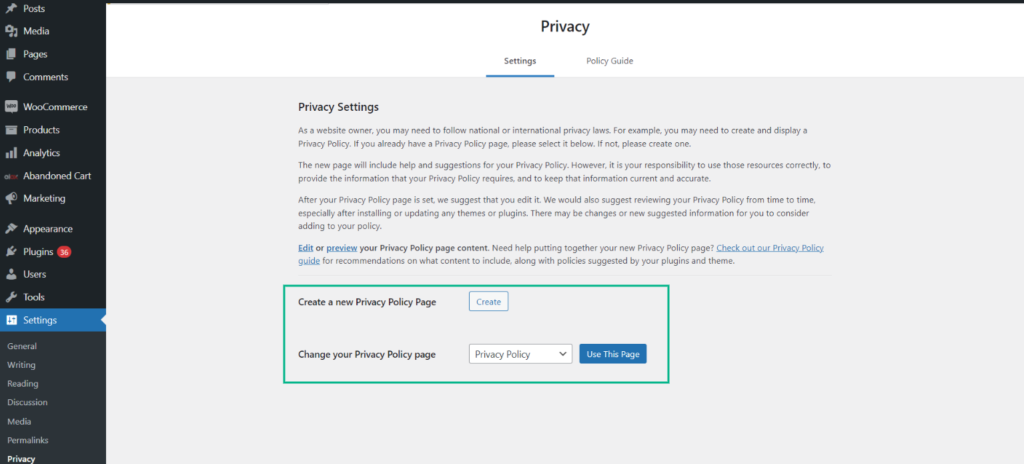
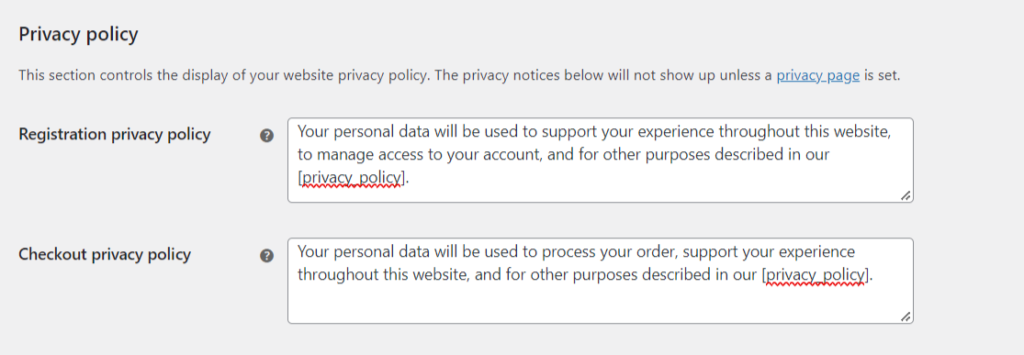
To begin, select your privacy policy page from the dropdown menu. Then, on the Registration page, add an optional text to be shown. Finally, include a phrase that will appear on the checkout page. WooCommerce adds some example text to both of these fields by default, which you can keep or edit.
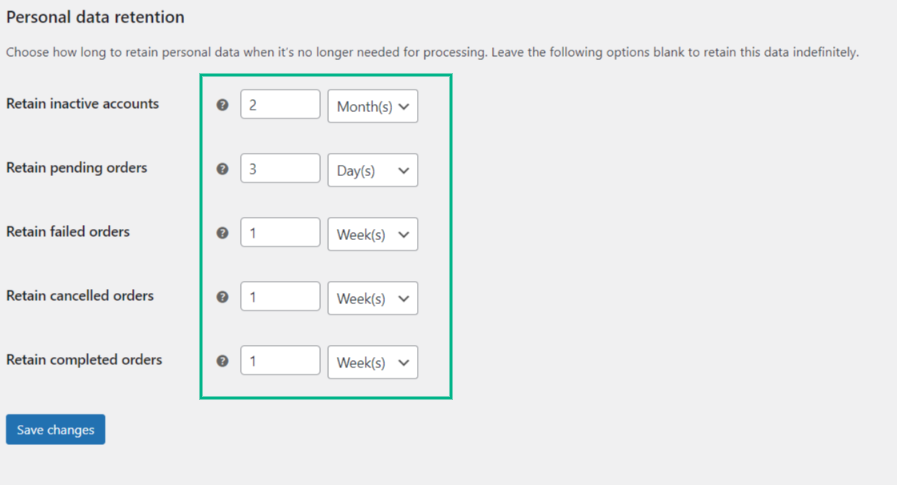
Personal Data Retention
You may also define the length of time you wish to keep personal data about clients on this page. There are five distinct options to choose from, each with fields to assist you define the time. You can input a value in the numeric data box after selecting a time period from day, week, month, or years.
Inactive accounts, pending orders, unsuccessful orders, cancelled orders, and completed orders all have choices for retaining personal data.
Setting up Emails
When you own an eCommerce business, it’s critical to keep your consumers informed at all times during the order process. With WooCommerce’s Email Settings, you can create an effective communication channel with your customers. You may access WooCommerce email settings by going to WooCommerce > Settings > Emails.
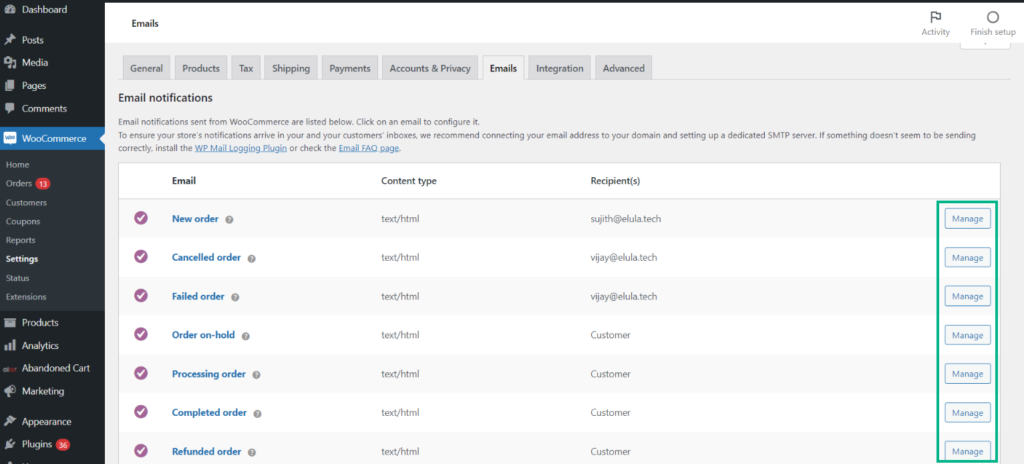
When you first access the Email Options screen, you’ll see a variety of different email notifications, each with its own set of settings. Each email has a title, as well as the type of content and recipients. To get a detailed understanding of each setting, check out WooCommerce – How to Set up Emails.
We will cover the general email settings in this article…
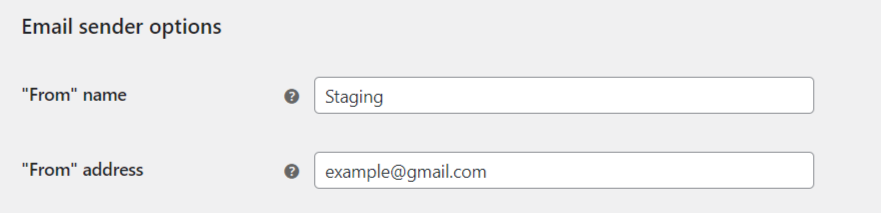
Email Sender Options
The “From” Name and “From” Address are found in the Email Sender Options section. When you send a message to your customers, this is what they will see in their inbox.
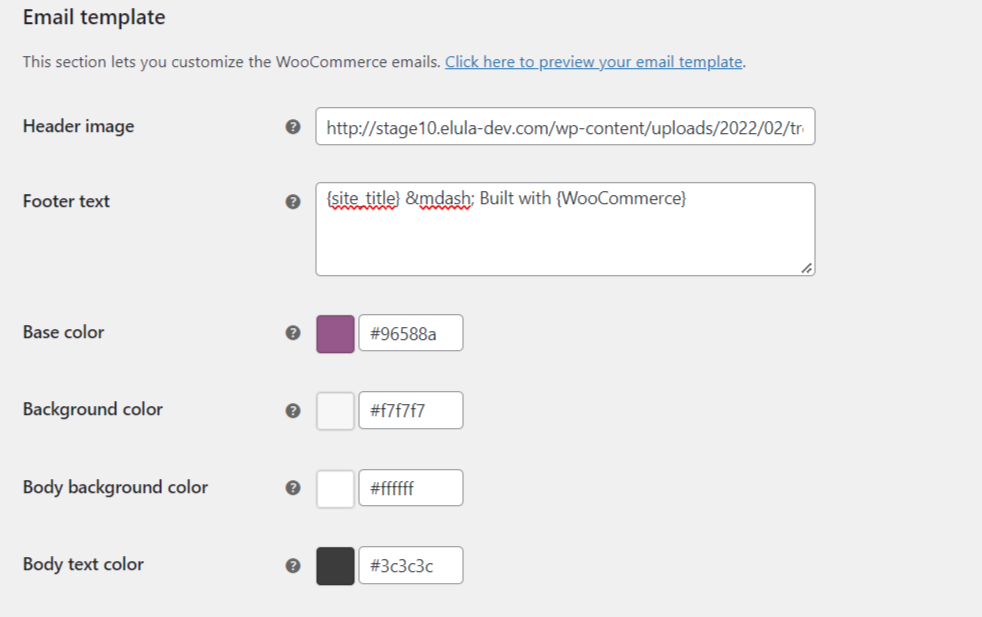
Email Template
In the Email Template area, you may change the look of the email you send to your consumers. You can put an image link in the Header Image section. To change the image, simply navigate to the Media Library by going to the Dashboard > Media > Library.

Scroll down and copy the link of the image you wish to use as the header image.
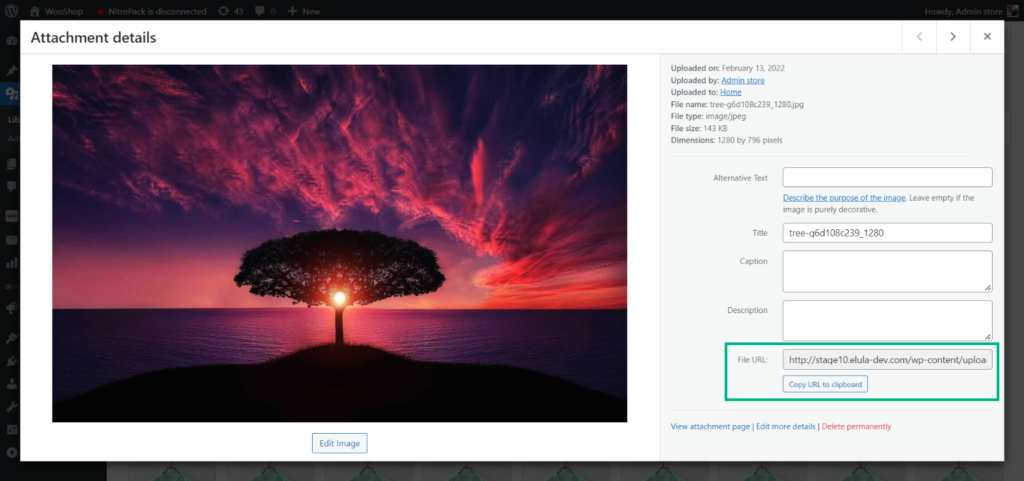
Copy the image link and paste it into the Header image area. You may also add your own text to display at the bottom by adding text to the ‘Footer Text’ field. If you scroll further down you may change the base color, background color, body background color, and body text color.
Once you have made all the required changes, click ‘Save Changes’ on the bottom of the page.
Tax Settings
Having the taxes worked out properly is one of the key steps to be considered while setting up an eCommerce store. It is essential to calculate the taxes accurately in compliance with the local legal laws of the region. However, it is not as easy as it sounds. It requires professional assistance, and that is where WooCommerce comes into the picture. Tax settings become quite easy with WooCommerce, wherein the settings make the process quite easy. In this section, we give you a peek into how tax settings can be configured in your online store.
- The first step is to enable ‘taxes’ under the General settings tab.
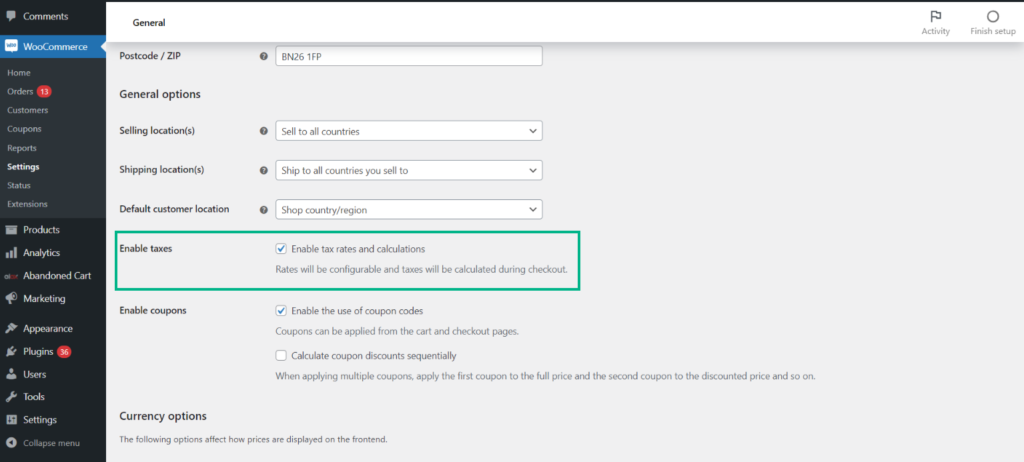
- A separate tab for Tax is created in the WooCommerce settings.
Here is the path to reach the ‘Tax’ tab – WooCommerce > Settings > Tax
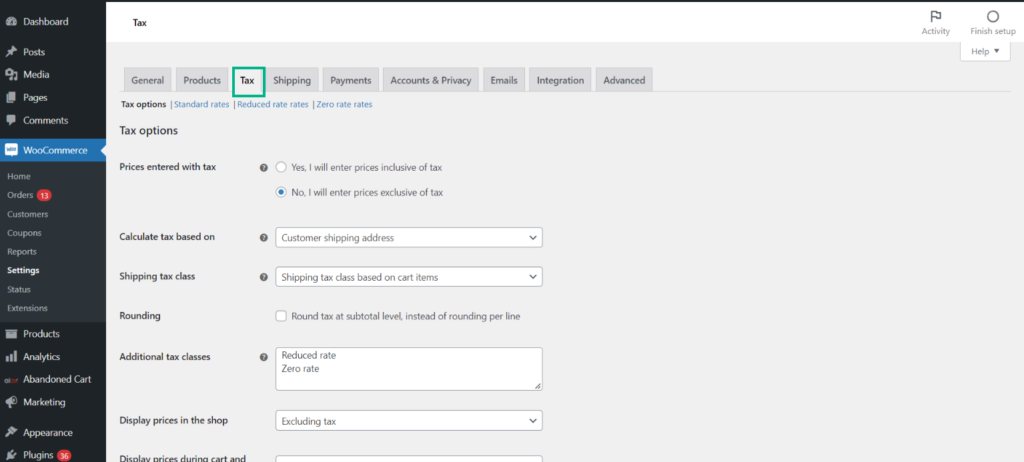
The tax settings tend to get very strenuous and complicated. In order to get a simple and in-depth guide about the various tax options available, check out ‘How to Configure WooCommerce Tax Settings’ for a detailed understanding of the same.
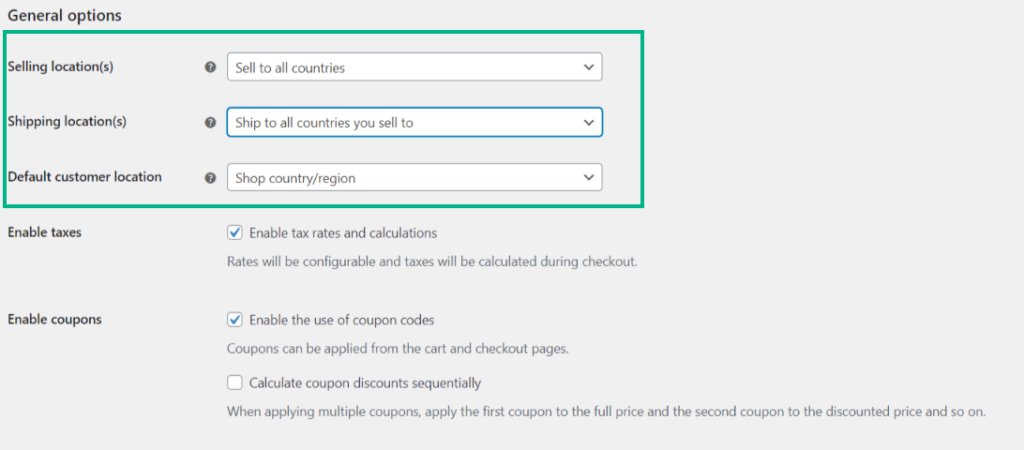
Shipping Settings
Shipping is an essential part of any online store that sells physical products. However, given the vast world of shipping, it is important to understand it properly to ensure timely, cost-effective delivery of products to their destinations. It is imperative for any business to have a good selling strategy in place and have shipping rates that are attractive. WooCommerce takes care of this aspect by setting up workable shipping options for products to be delivered across the world at good shipping rates.
To do this, the first step is to set up the shipping location under the General settings tab.
The next step is to go to the Shipping tab. Here is how the Shipping tab can be reached – WooCommerce > Settings > Shipping
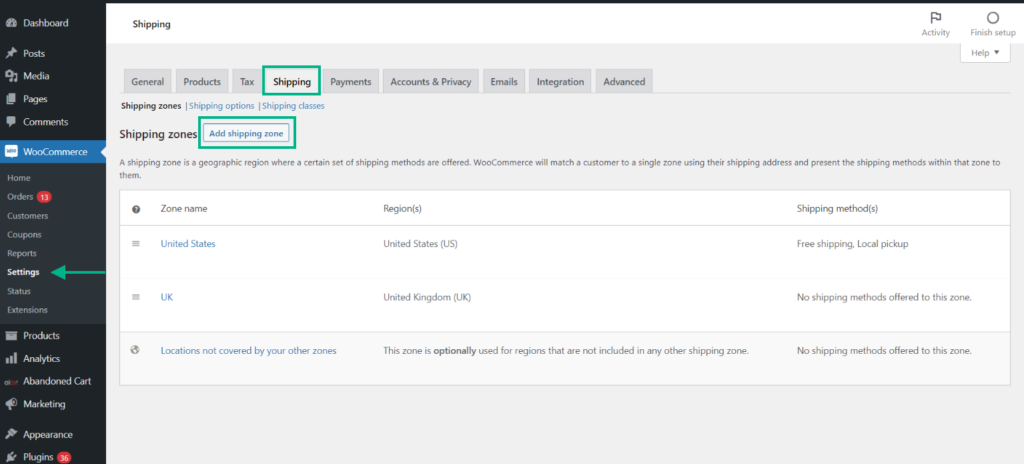
To know in detail about Shipping Zones, Shipping Options, and Shipping Classes, check out ‘How to Set Up WooCommerce Shipping’.
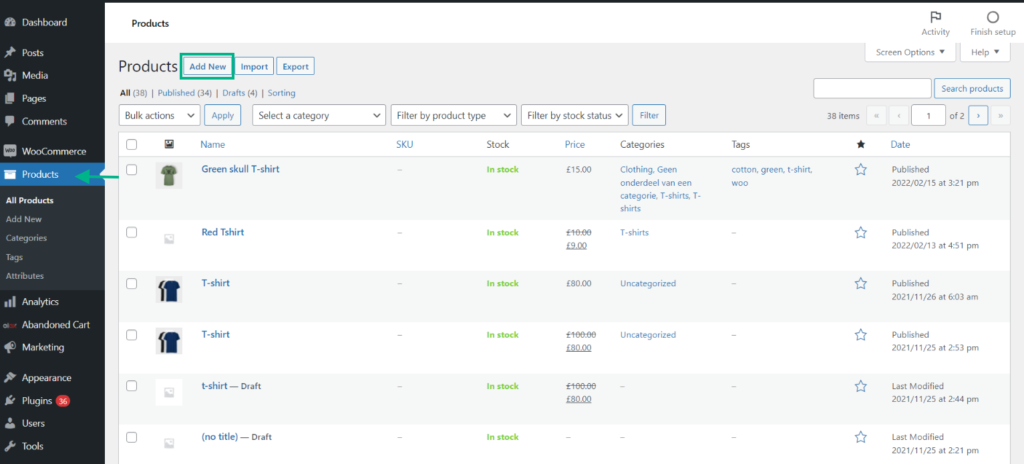
Adding Products
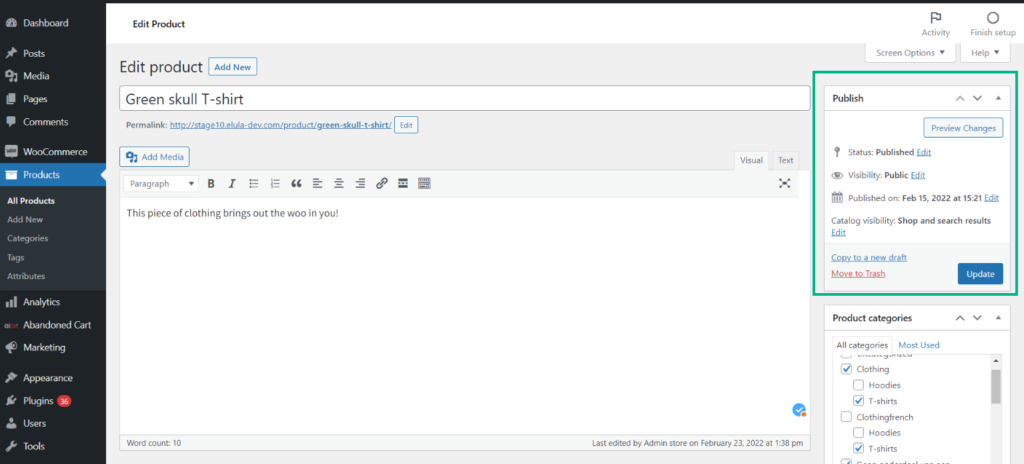
WooCommerce categorizes products into Simple, Grouped, External/Affiliate, and Variable categories to make the process of adding and managing products in your shop more organized. Virtual and Downloadable items are also available. This post will focus on adding a ‘simple product’. Let’s get started in the admin panel by going to the Dashboard > Products > Add New.
You may begin by giving your product a name and a description. A piece of advice, the product description should not be too long and should have appealing information about the product. Once you have filled in the required information, scroll down to the product data settings.
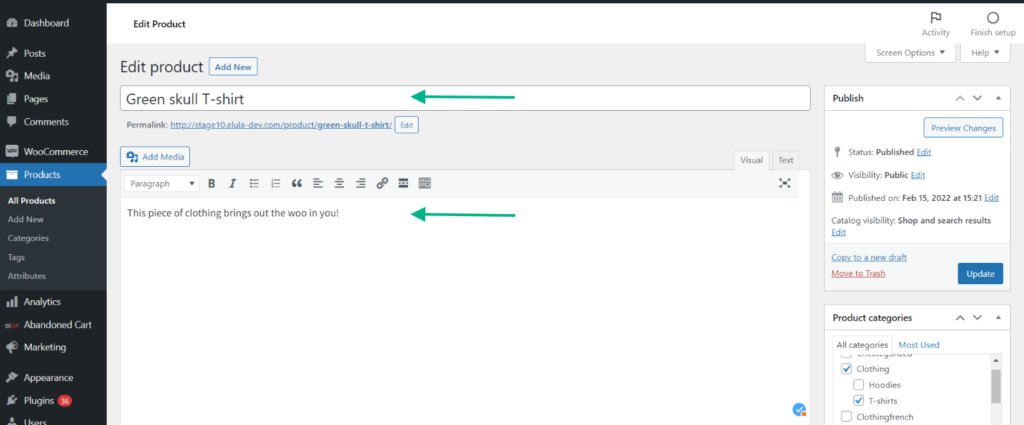
A Product Data meta box is located at the bottom of the page, where you may configure the fundamental elements of your product, such as product type, price, available stock, measurements, attributes, and stock management.
Let’s take a closer look at each of these options.
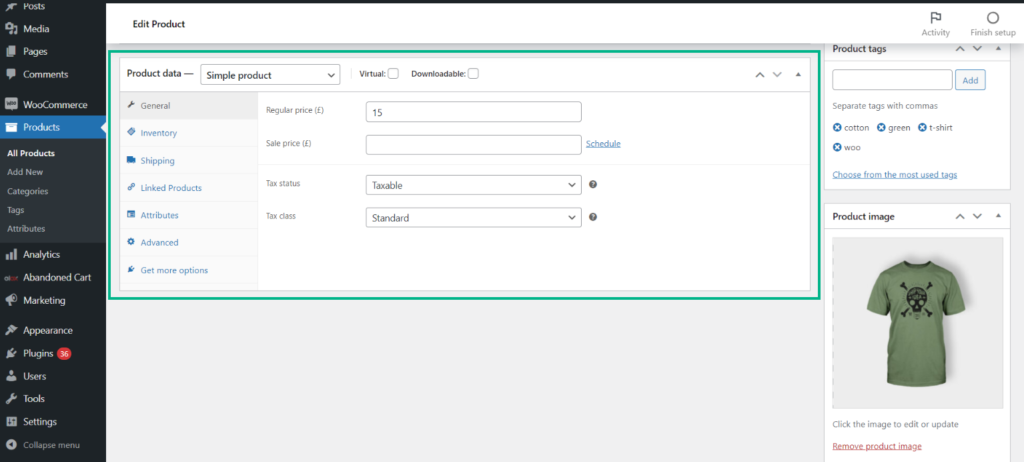
General Settings
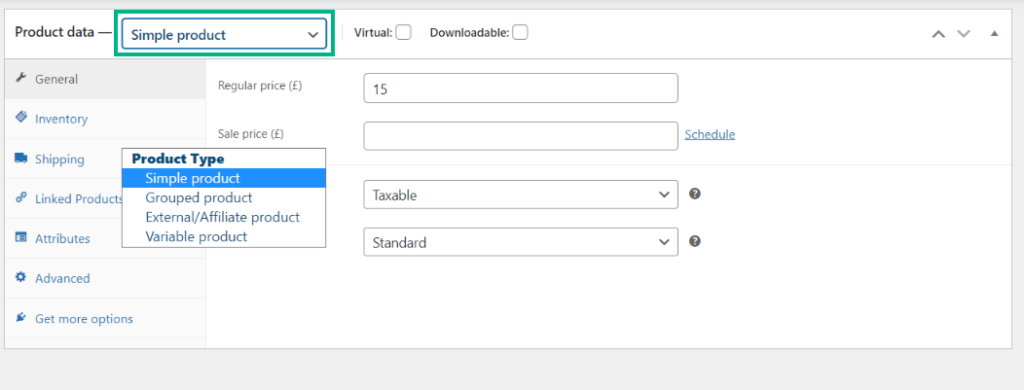
To begin, select the sort of product you wish to include. Simple, Grouped, External/Affiliate, and Variable are the options available to you. We will be selecting ‘Simple product’ for this demonstration.
There are four sections under the general sub tab. They are as follows:
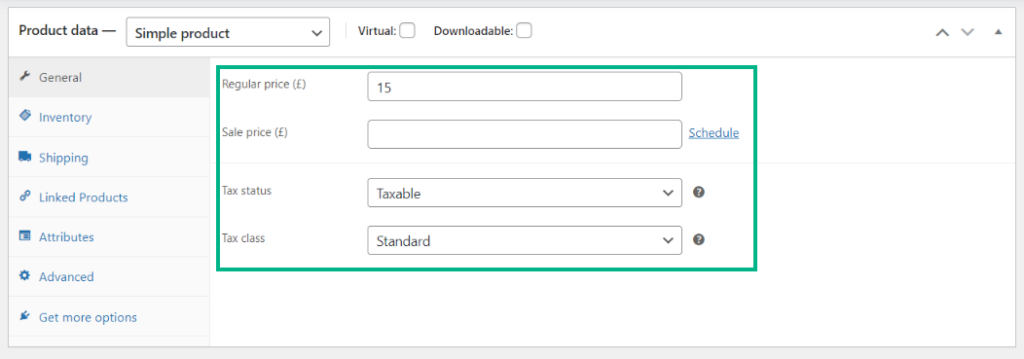
Regular Price: This is the default sales price of the product. You can set a price by entering the numeric value in the field provided.
Sales Price: This is the discounted price for that product. It has to be less than the regular price. You can schedule this price to appear on for your product on certain dates by clicking on schedule next to the field and entering a ‘From’ and ‘To’ date.
Tax Status: You have the option of making the entire product and shipping taxable, or simply the shipping fee for this specific goods taxable. You can also choose to not tax either.
Tax Class: You may select the tax classification for your product. You have the option of selecting all the default Standard Rates, one of the extra classes, or your own custom tax classes.
Inventory Settings
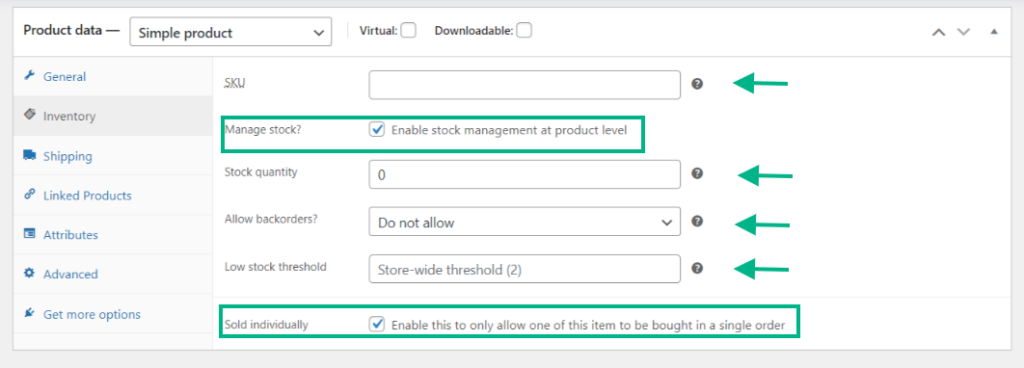
A few things can be set up in the Inventory settings. For your product, you may assign a SKU (Stock Keeping Unit). This is a unique identification number that you may associate to your product.
By checking the Manage stock option, you may enable stock management at the product level. You can also change the product’s stock status. In the front-end of your business, this will show if your product is in stock or not.
If you enable the ‘Sold Individually’ tick box, a customer cannot buy more than one of that product in a single order.
Shipping Settings
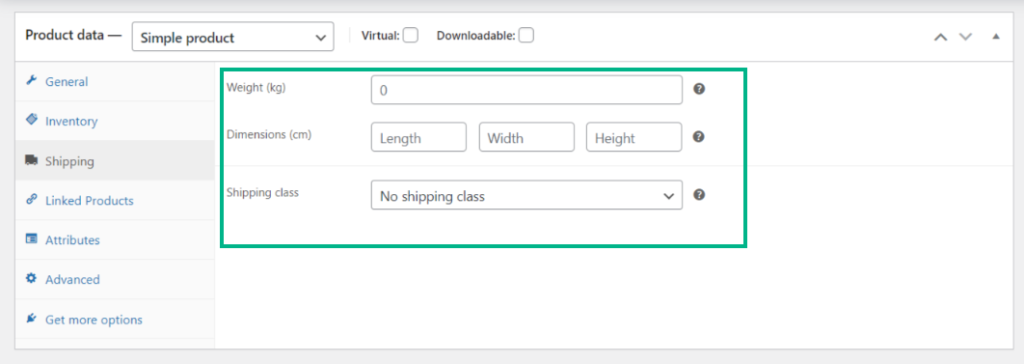
You may adjust the weight and dimensions of your goods under the shipping options. It’s important to enter these features carefully, as any errors might cause problems for your customer. You may also assign the goods to any of the shipping classes you’ve already established.
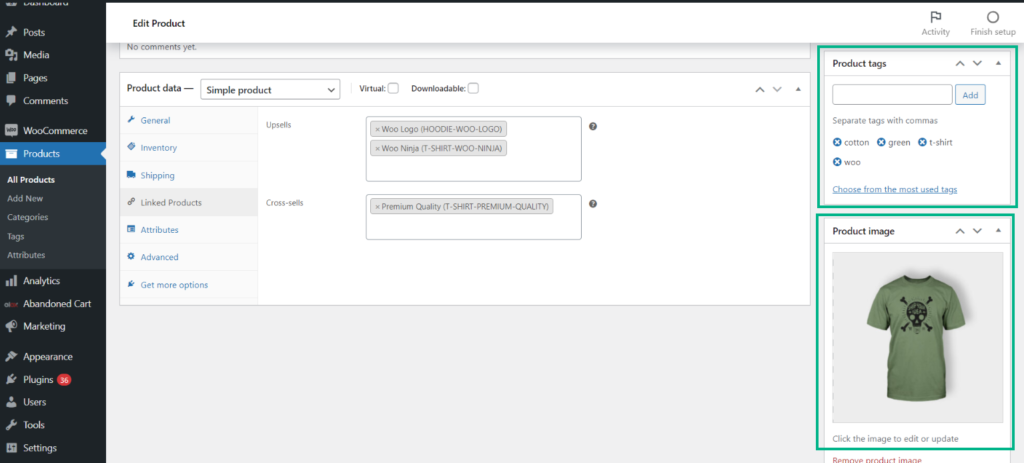
Linked Product Settings
WooCommerce allows you to link the current product to other goods in your inventory. For your store, this is an excellent marketing tactic. You have three options in the Linked Products settings. They are as follows:
Up-Sells: Up-sells are a means of proposing to your consumer a similar product that you think they’ll like. This will almost certainly be a more costly product. Hence, the term ‘up’ selling.
Cross-Sells: These are goods that are similar but not identical that you wish to recommend to the consumer.
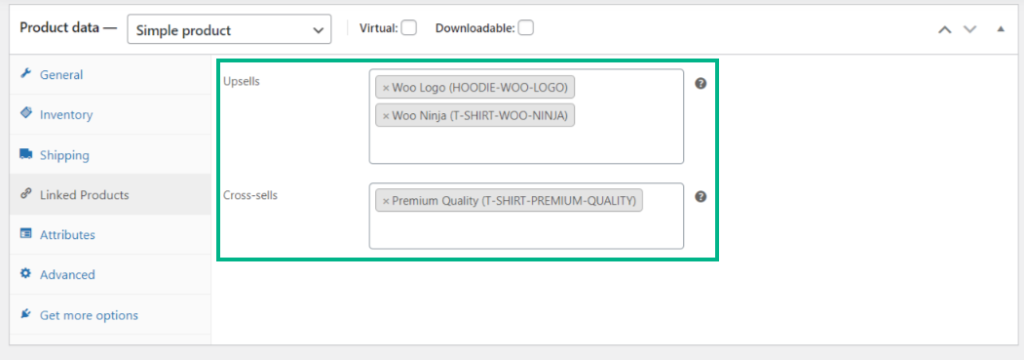
Grouped Products: The present product will be combined with other items to form a consolidated product.
Once you have completed tweaking all the settings for your product, you can add tags and product image to the right of the page. After completing all the required information, click ‘publish’. You will get a notification asking you to preview the product.
You can make changes to the product by following the above steps and clicking ‘update’ instead of ‘publish’.
To get an In-depth understanding of the additional product types, check out the following articles:
- How to Add a Grouped Product?
- How to Manage a Variable Product?
- How to Add Virtual, Downloadable and Affiliate Products?
Conclusion
Without a question, WooCommerce is the greatest free eCommerce solution for WordPress. On the surface, the plugin’s statistics seem incredible. However, the plugin’s actual potential is exposed only when you go further into its various settings. We hope this article has helped you grasp a better understanding of WooCommerce and its basics.


")
")
")