
Last updated - April 13, 2023
If your website serves its content to a multilingual audience that’s made up of people from several different countries, you might benefit from showing your content in more than one language. Not only can you display your website in a visitor’s native language, you can also provide localized content.
For example, if you have a sports blog, an American visitor will read sports stories related to the US in English, while a visitor from Germany can access stories related to their country in German. One way to do this is to create a WordPress multisite and set it up as a multilingual network of websites.
In this article, you’ll set up WordPress multisite for multilingual sites by learning about WordPress multisites and adding the multilingual capabilities to the subsites.
What is WordPress Multisite?
WordPress Multisite allows users to create multiple, related sites with a single WordPress installation. It lets you create a network admin under which you can create and manage as many subsites as you want.
These subsites share assets such as plugins and themes and thus, can be built and managed with ease. Moreover, you can structure subsites using subdomains, subdirectories, or even completely different top-level domains thanks to Domain Mapping.
Let’s take a look at the steps to set up WordPress multisite for multilingual sites.
Step 1: Creating a Multisite Network
First, you need to create a multisite network that will consist of the language-specific subsites. If you have a website already, you can convert it into a multisite by using some code.
Before you proceed though, make sure you have a backup of your website. You should also disable all your plugins until you’ve completed the first step.
Access your wp-config.php file using an FTP client like FileZilla. Open the file and add the code following code at the bottom of the file just above the line that says, “That’s all, stop editing! Happy publishing.”
/* Multisite */
define( 'WP_ALLOW_MULTISITE', true );
When you’re done, save the file. When you refresh your WordPress admin area, a new “Network Setup” option will appear under the “Tools” tab.
After clicking it, you’ll have to choose if you want to create your multisite using subdomains or subdirectories. If you’re starting a WordPress multisite for multilingual sites from scratch, you can go for either one depending on your preferences. But you must use subdomains for an established site to prevent clashes between subdirectory addresses.

Make your choice and provide the network title and admin email. Click “Install” when you’re done.
You’ll then get a set of instructions to follow, though they may slightly differ from site to site. You’ll most probably need to copy and paste some code in the wp-config.php and the .htaccess files using your FTP. After making the changes and saving both the files, click the “Log In” button under the instructions.
Provide your WordPress admin credentials and log back in to the admin area. You’ll now see a “My Sites” option in your sidebar and the toolbar which you can use to access the subsites in your network.

You can now enable the plugins that you had disabled before starting this process. However, if you’re installing WordPress on a brand new domain, you can similarly convert it into a multisite by editing the wp-config.php file.
Step 2: Configure Your Subsites
You’ve enabled WordPress multisite and created a network for the subsites. Now, you need to create and configure each of these subsites to match their purposes.
To start configuring, head to My Sites (Toolbar) > Network Admin > Sites. Here, you’ll see the main website that existed before creating the multisite. Click on “Add New” to create new subsites for various languages.

Provide the basic subsite details like its URL, title, default language, and an admin email. Then, click “Add site”. Your first subsite has been created. Head to it through My Sites (Toolbar) > Subsite Title > Dashboard > Settings > General.
Here, you need to localize the subsite to match its targeted demographic. Make sure to set the proper language, time zone, and the local time and date formats as well.

When you’re done, save the settings at the bottom. Then, repeat this process for all your subsites.
Step 3: Importing and Translating Your Content
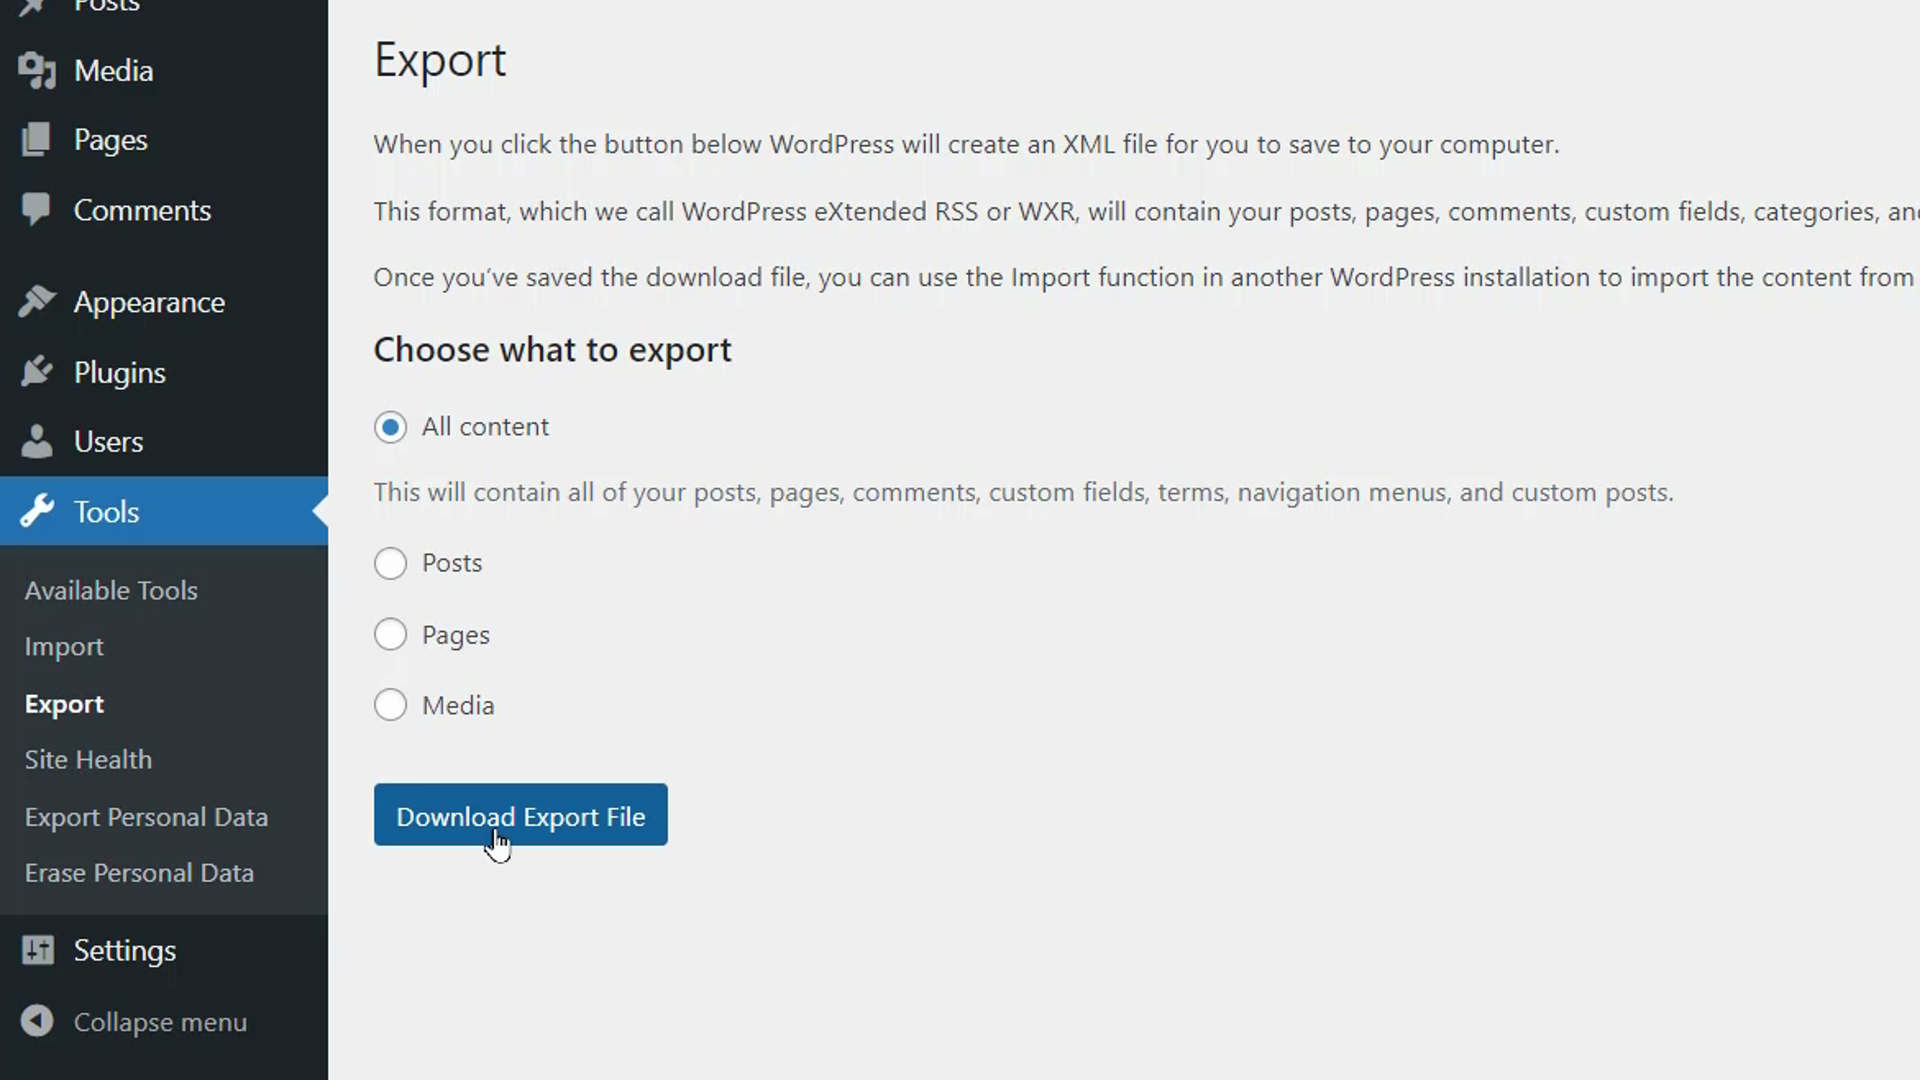
You now need to export content from your primary site to your subsites. The easiest way to do it is to head Tools > Export in your main website’s WordPress admin area. Here, make sure “All content” is selected and click “Download Export File” to download it to your computer.
Then, go to a subsite where you need to add content. Head to Tools > Import. Here, click the “Install now” button under WordPrest to download and activate the installer.. Then, run the importer and choose the exported zip file on your computer. All your content from the primary website will be available on your subsite as well.
You can also use plugins like WP All Import and WP Import Export Lite to easily transfer content from the main site to the subsites.
After transferring the content, you need to translate it into various languages. You can do it in three ways:
- You can either manually translate the content line-by-line from your own knowledge or you can use tools like Google Translate to translate and paste the content in chunks.
- You can hire third-party professional translation services or freelance translators from platforms like Upwork and Fiverr.
- You can use plugins like Translate WordPress with G-Translate and TranslatePress to automatically translate your pages using artificial intelligence.
Regardless of which method you use, don’t forget to translate the menus, footers, and widgets on your pages as well.
WIth that, your WordPress multisite has been set up for multilingual sites. Your users can now see your content in their language. You can either let them switch to content in their own language or automatically redirect users based on geolocation using plugins.
If you have any more questions, please feel free to reach out to use in the comments below.
If you prefer a video version, please check out the video below:


")
")
")